Add storage to Azure Backup Server
This article describes how to add storage to Azure Backup Server.
Azure Backup Server V2 and later supports Modern Backup Storage that offers storage savings of 50 percent, backups that are three times faster, and more efficient storage. It also offers workload-aware storage.
Note
To use Modern Backup Storage, you must run Backup Server V2 or later on Windows Server 2016 or later. If you run Backup Server V2 on an earlier version of Windows Server, Azure Backup Server can't take advantage of Modern Backup Storage. Instead, it protects workloads as it does with Backup Server V1. For more information, see the Backup Server version protection matrix.
To achieve enhanced backup performance we recommend deploying MABS v4 with tiered storage on Windows Server 2022. To configure tiered storage, see Set up MBS with Tiered Storage.
Volumes in Backup Server
Backup Server V2 or later accepts storage volumes. When you add a volume, Backup Server formats the volume to Resilient File System (ReFS), which Modern Backup Storage requires. To add a volume, and to expand it later if you need to, we suggest that you use this workflow:
- Set up Backup Server on a VM.
- Create a volume on a virtual disk in a storage pool:
- Add a disk to a storage pool and create a virtual disk with simple layout.
- Add any additional disks, and extend the virtual disk.
- Create volumes on the virtual disk.
- Add the volumes to Backup Server.
- Configure workload-aware storage.
Create a volume for Modern Backup Storage
Using Backup Server with volumes as disk storage can help you maintain control over storage. A volume can be a single disk. However, if you want to extend storage in the future, create a volume out of a disk created by using storage spaces. This can help if you want to expand the volume for backup storage. This section offers best practices for creating a volume with this setup.
To create a volume for Modern Backup Storage, follow these steps:
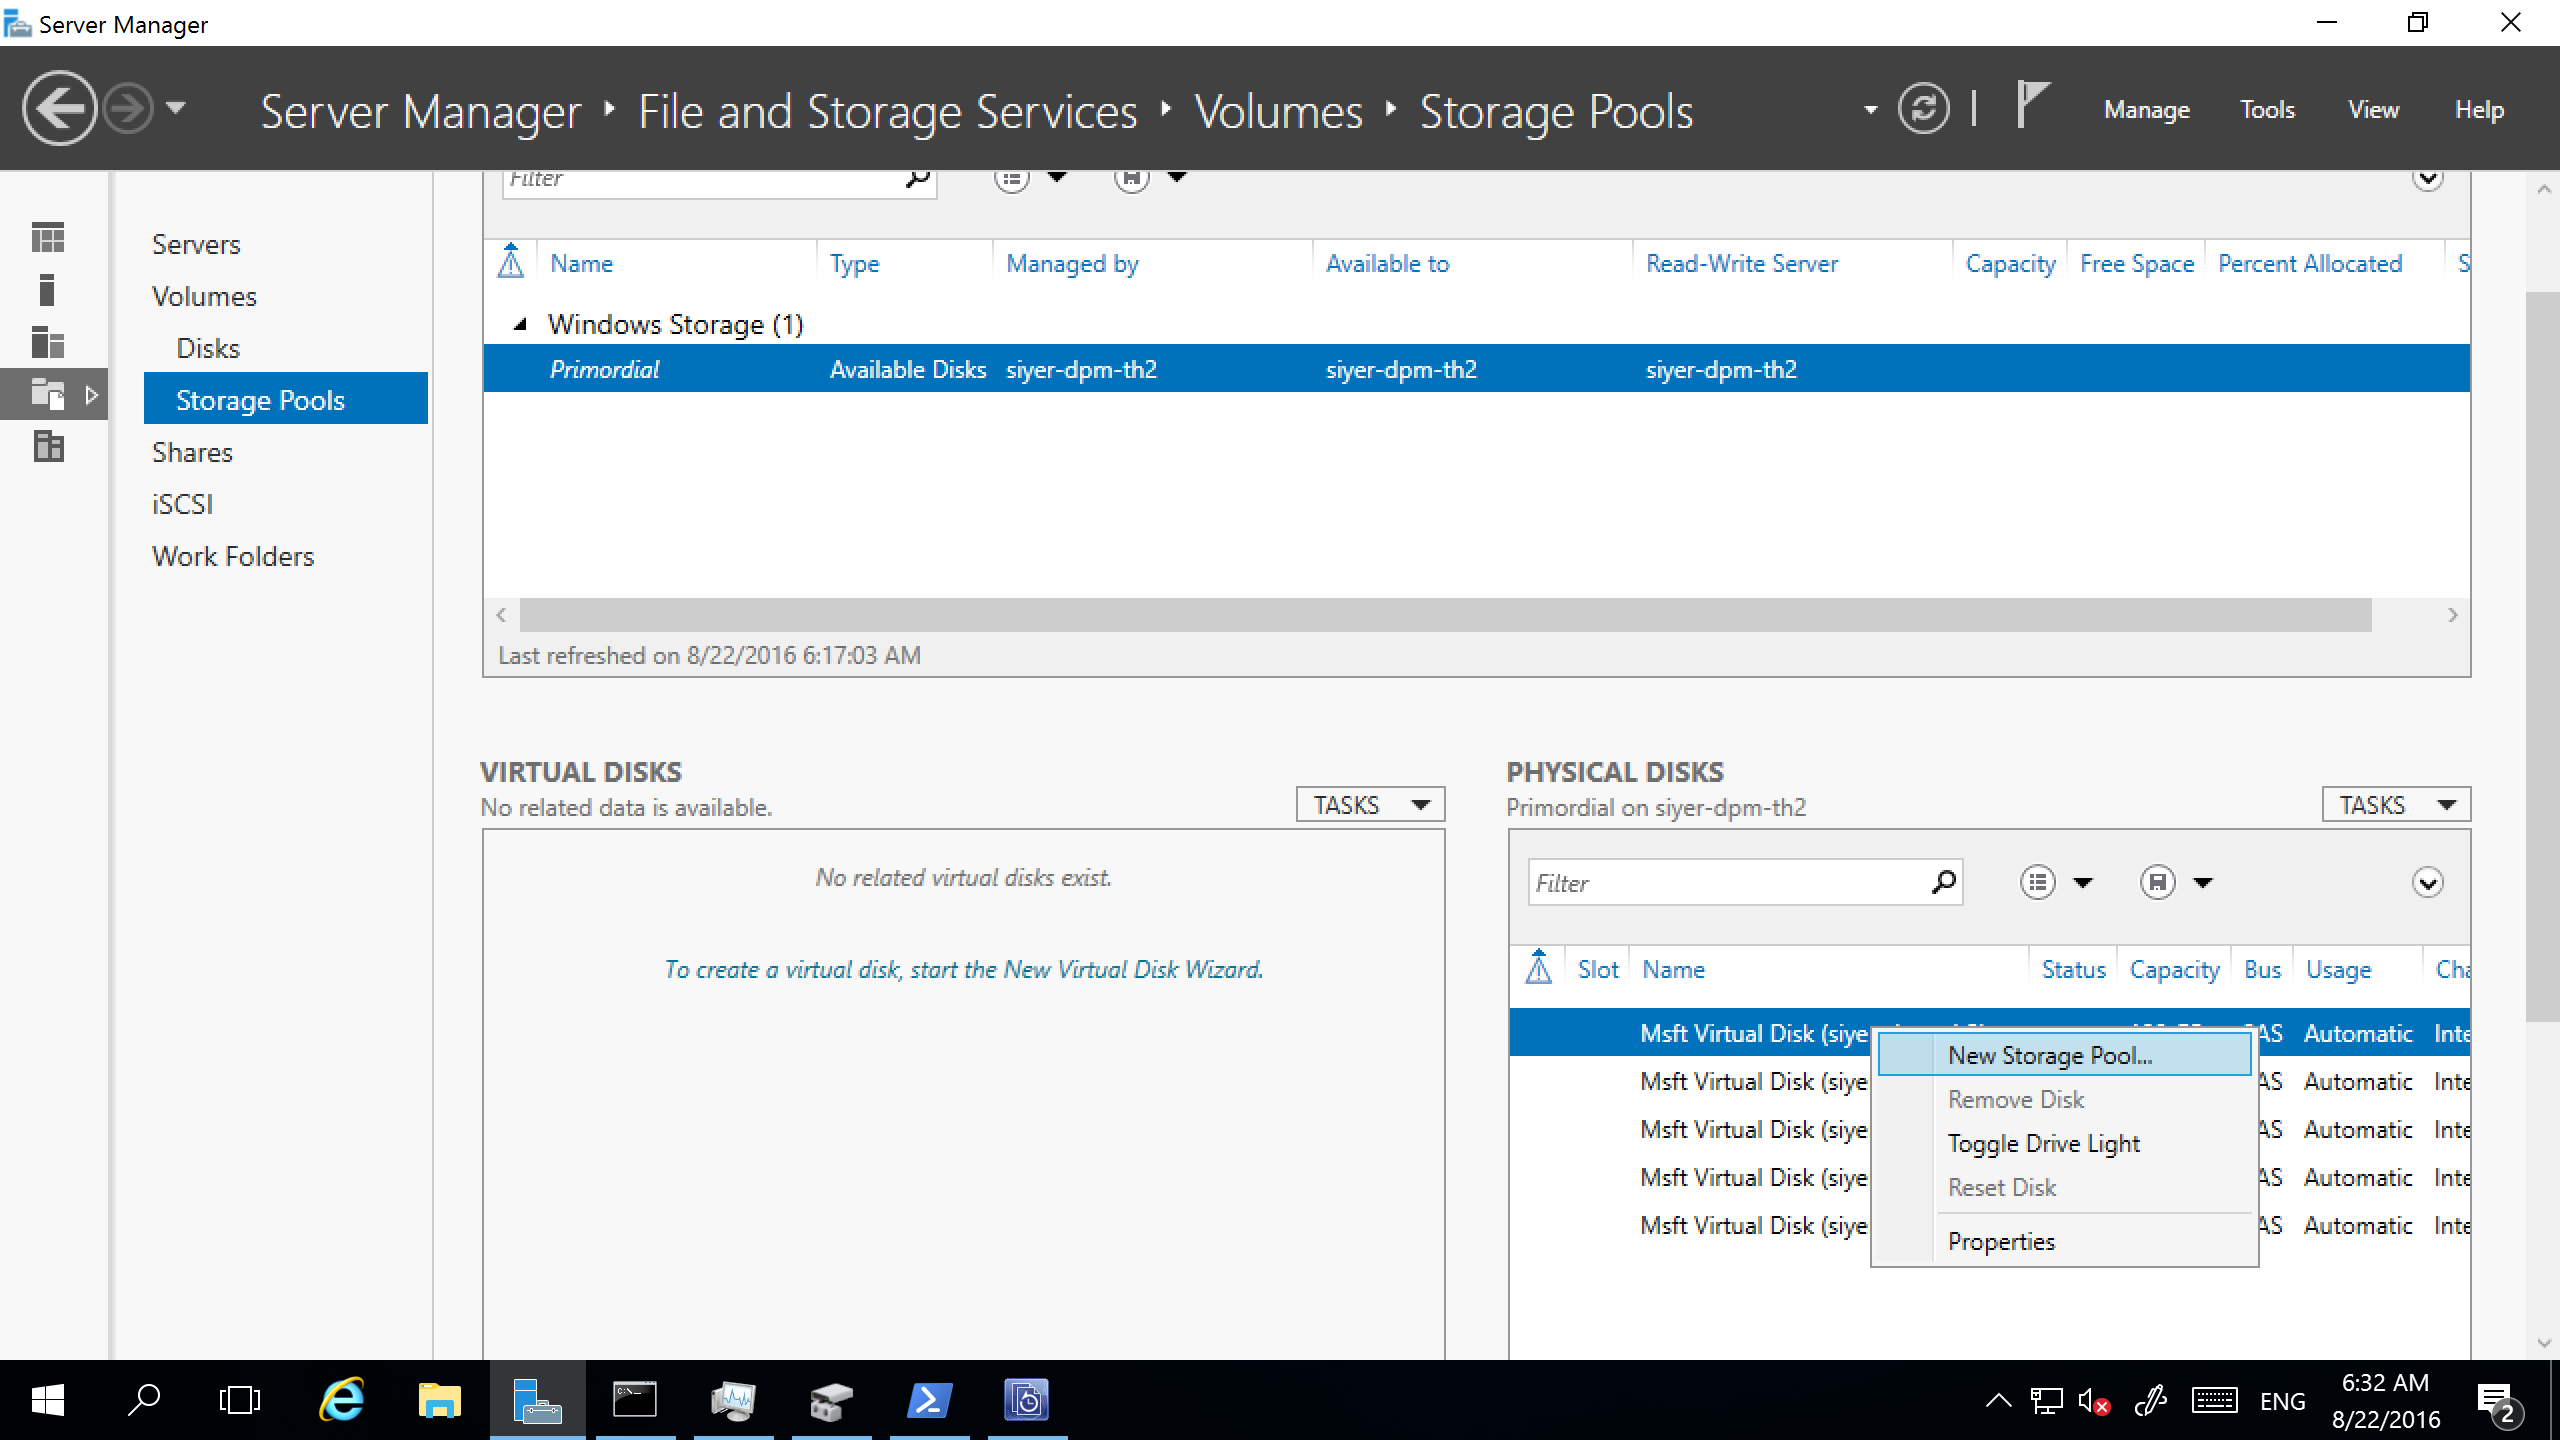
In Server Manager, select File and Storage Services > Volumes > Storage Pools. Under PHYSICAL DISKS, select New Storage Pool.
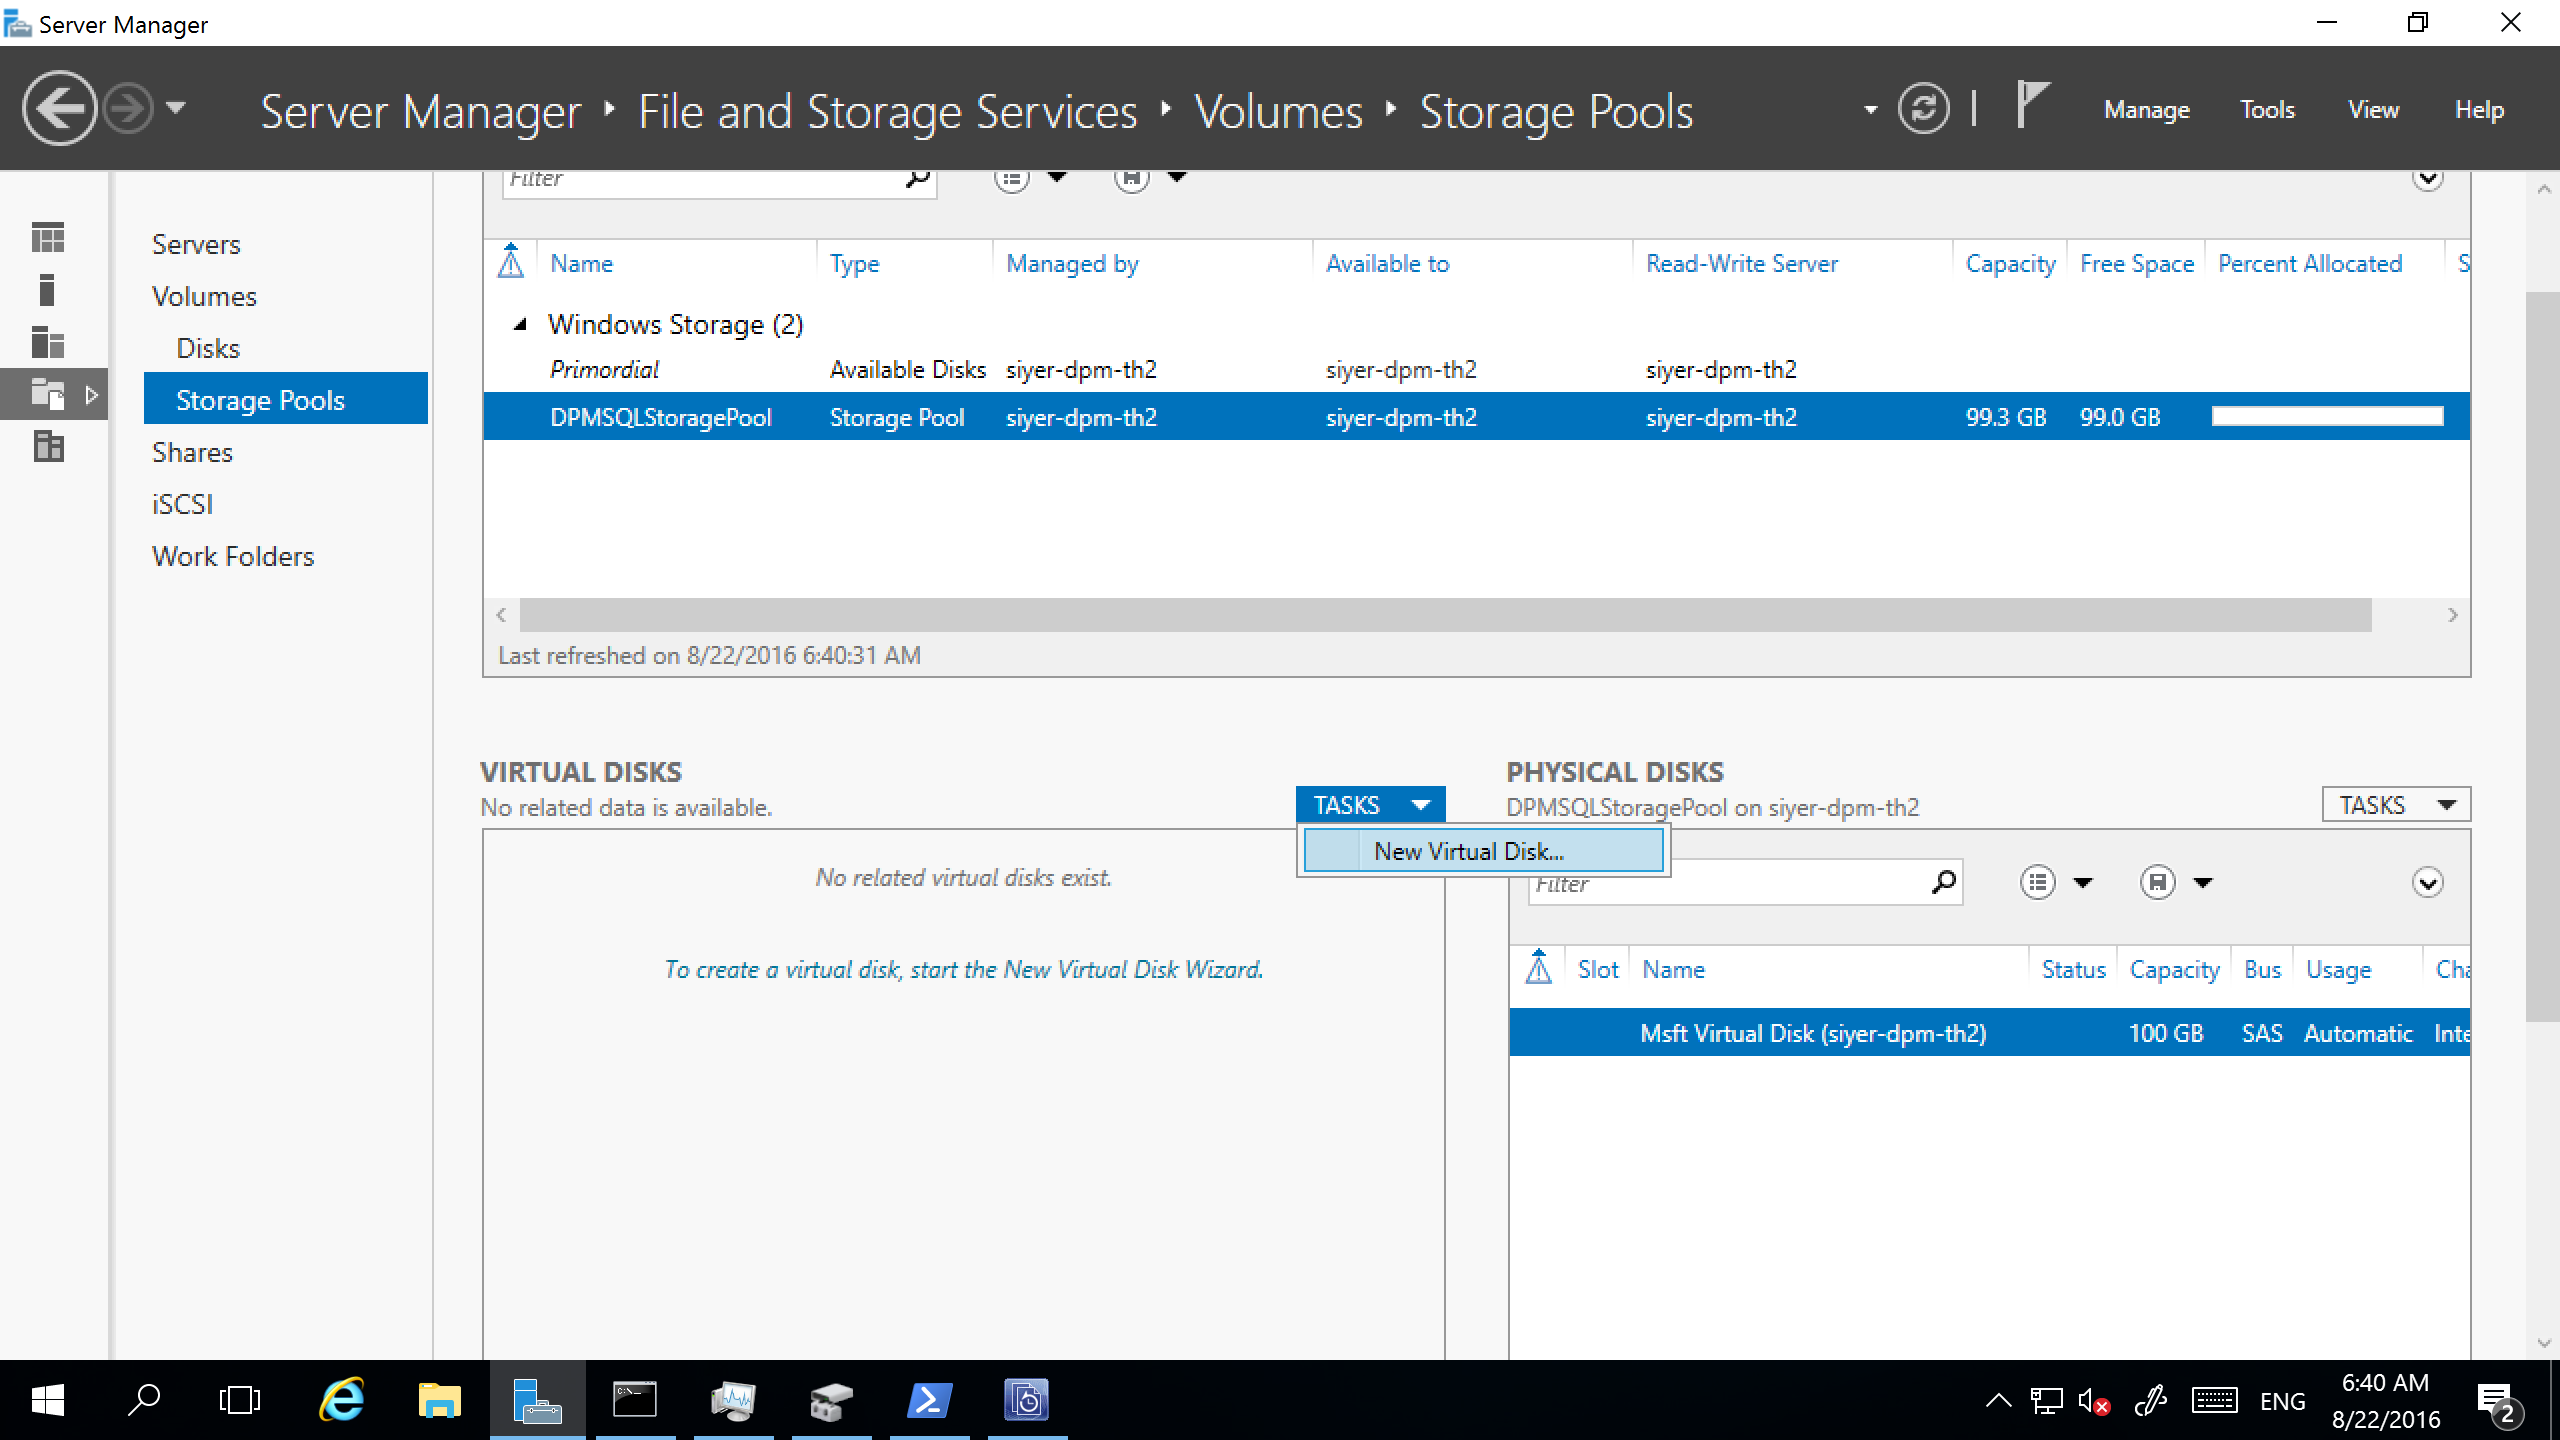
In the TASKS drop-down box, select New Virtual Disk.
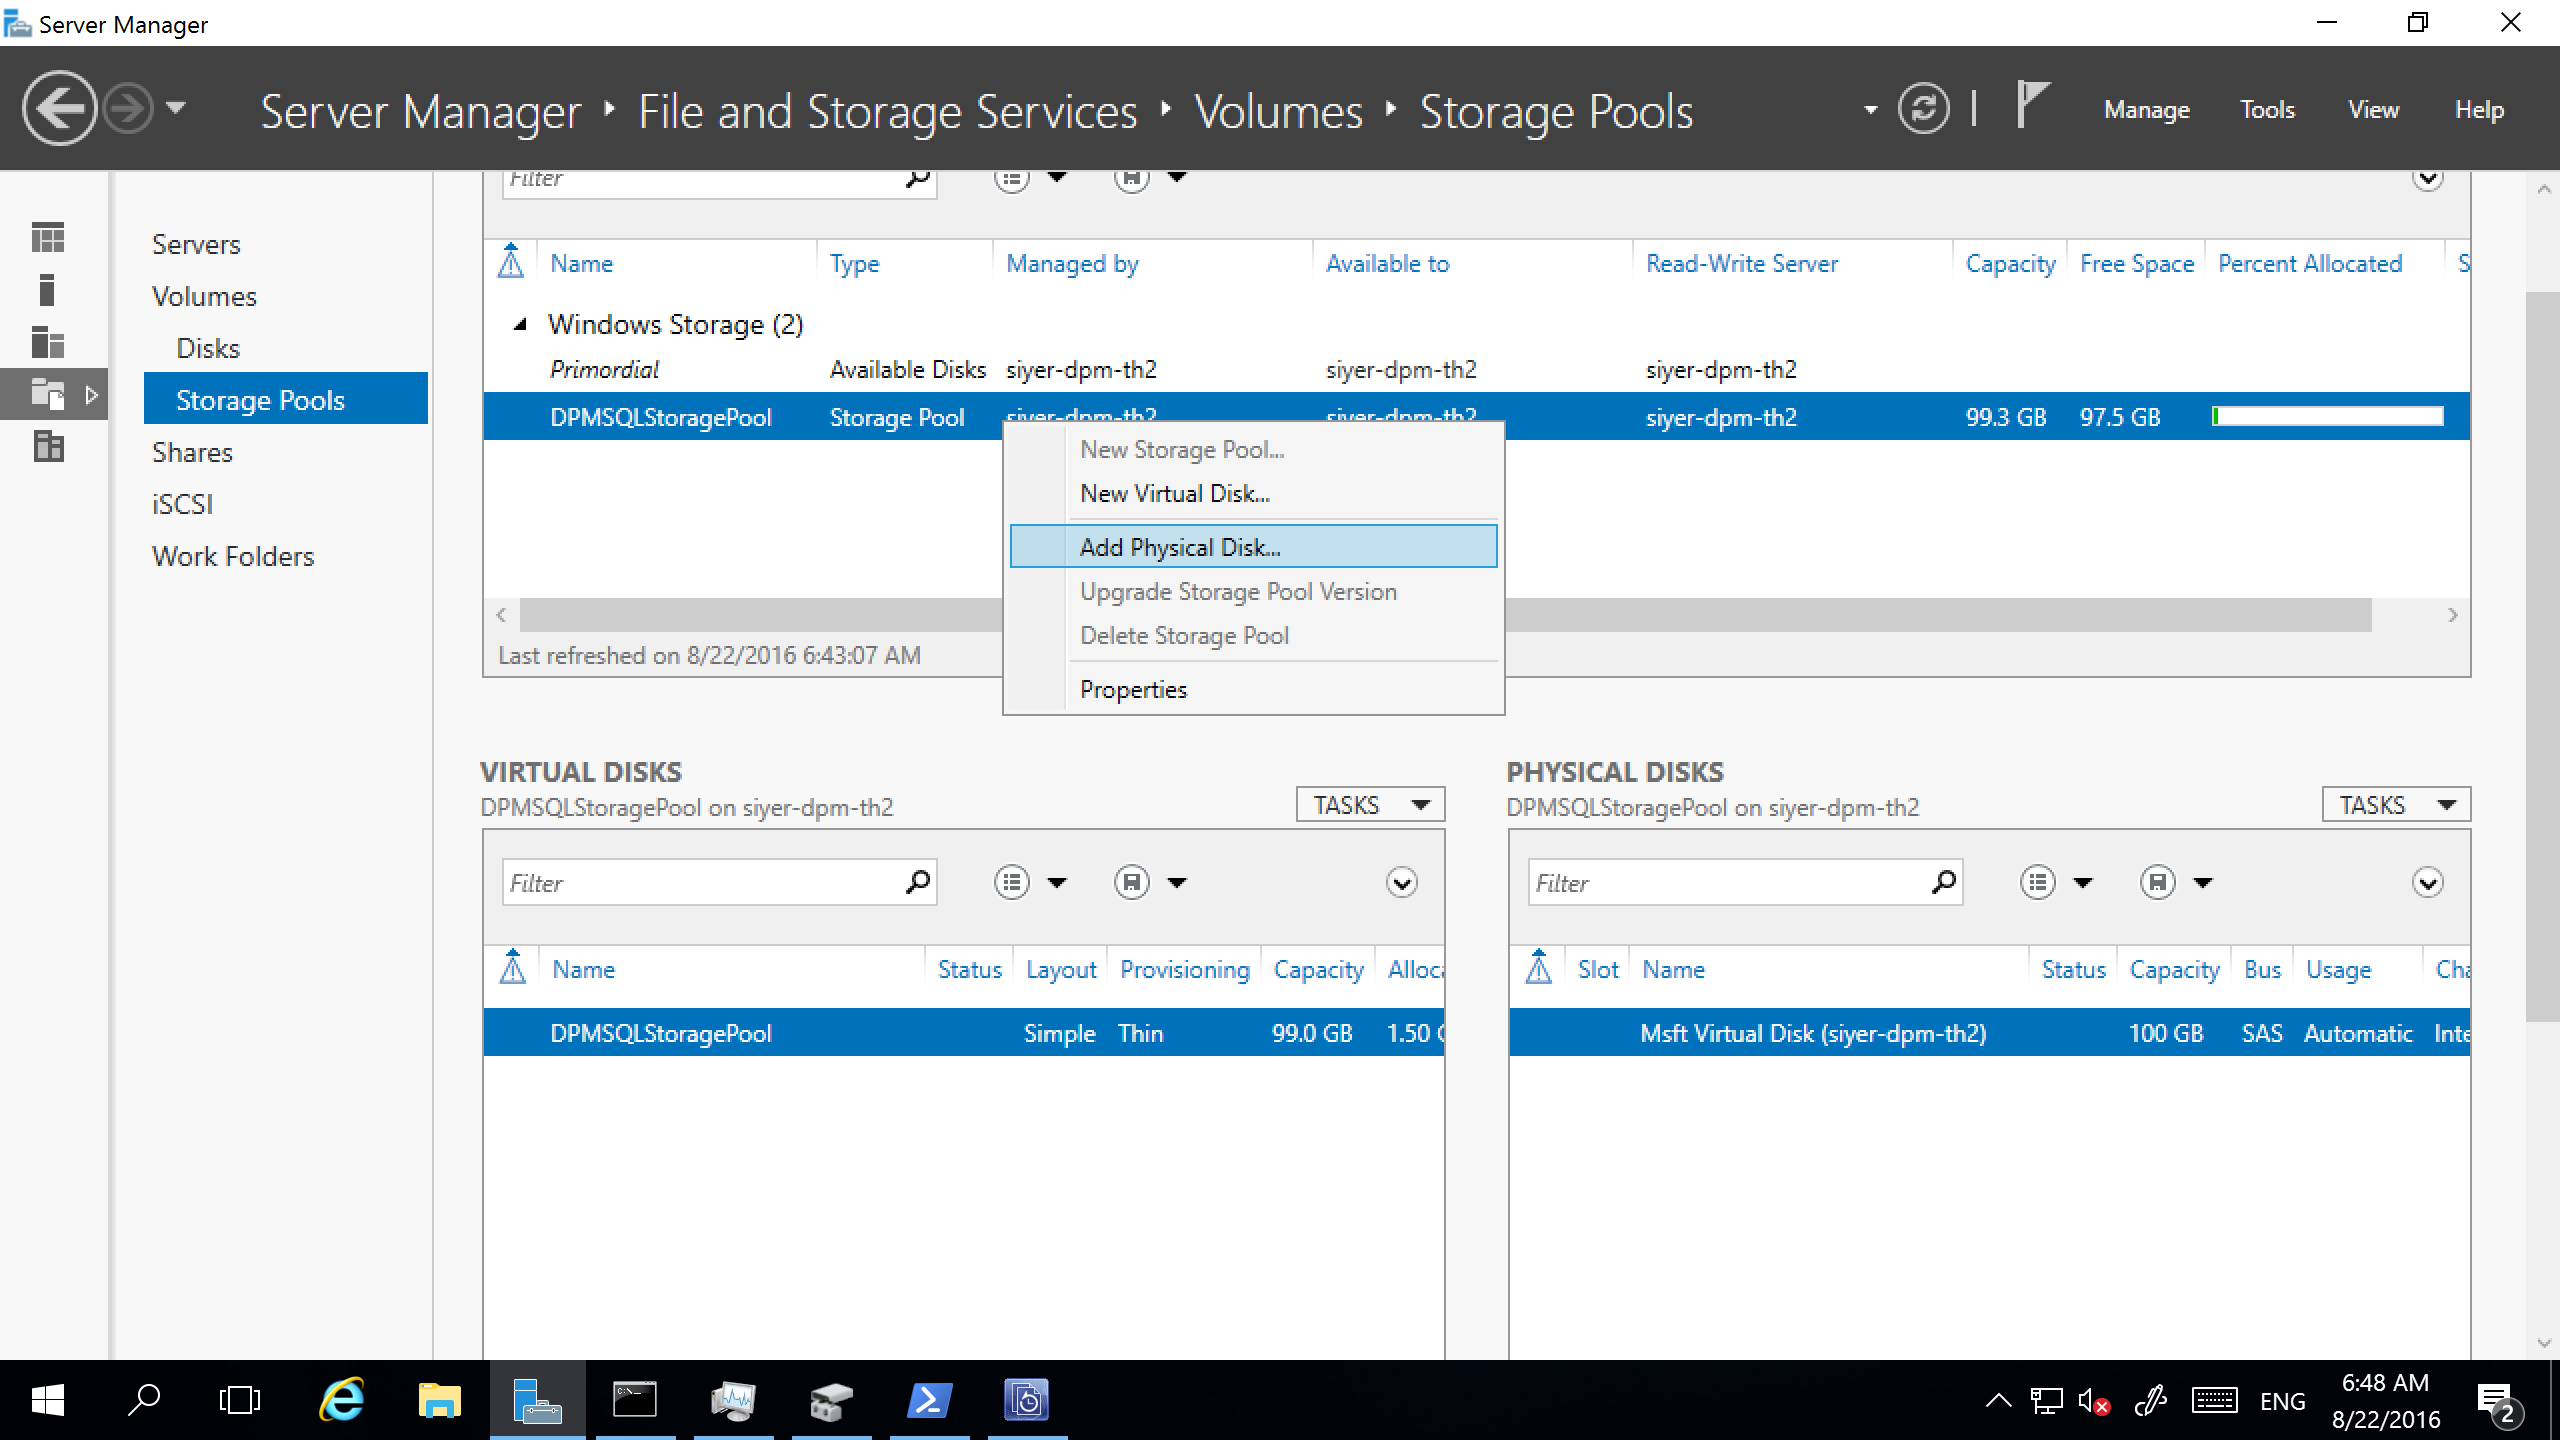
Select the storage pool, and then select Add Physical Disk.
Select the physical disk, and then select Extend Virtual Disk.
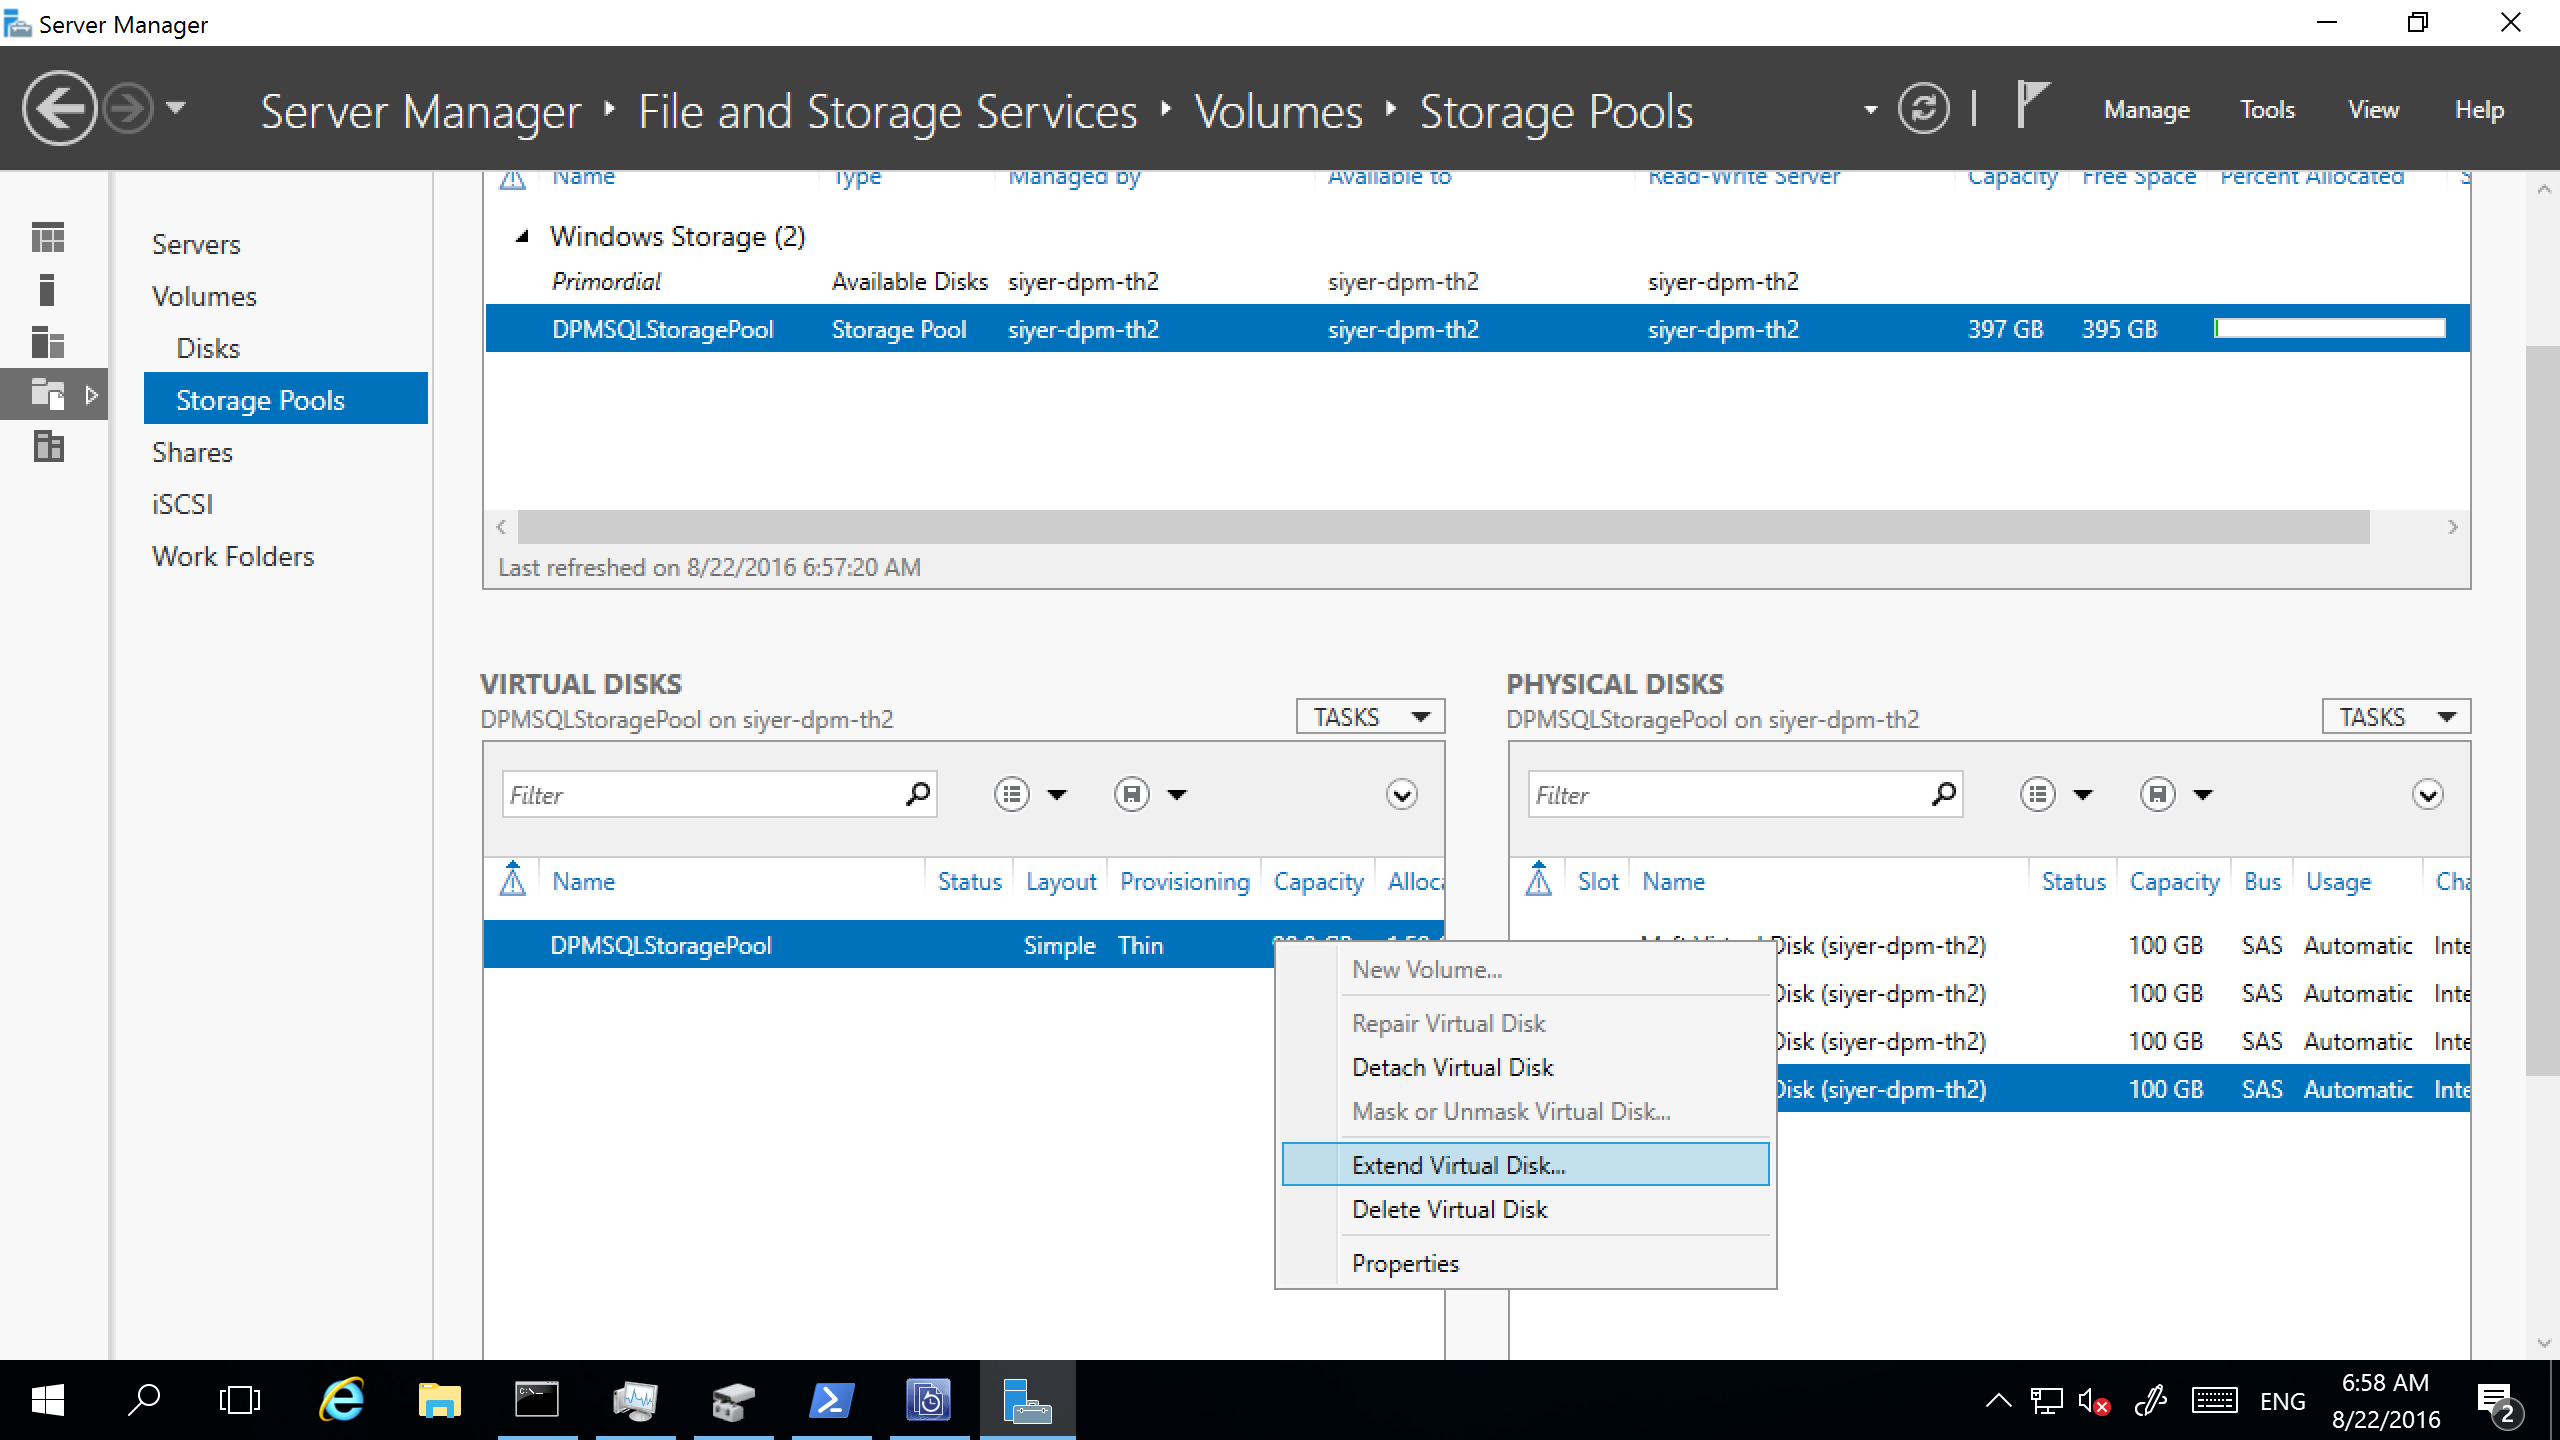
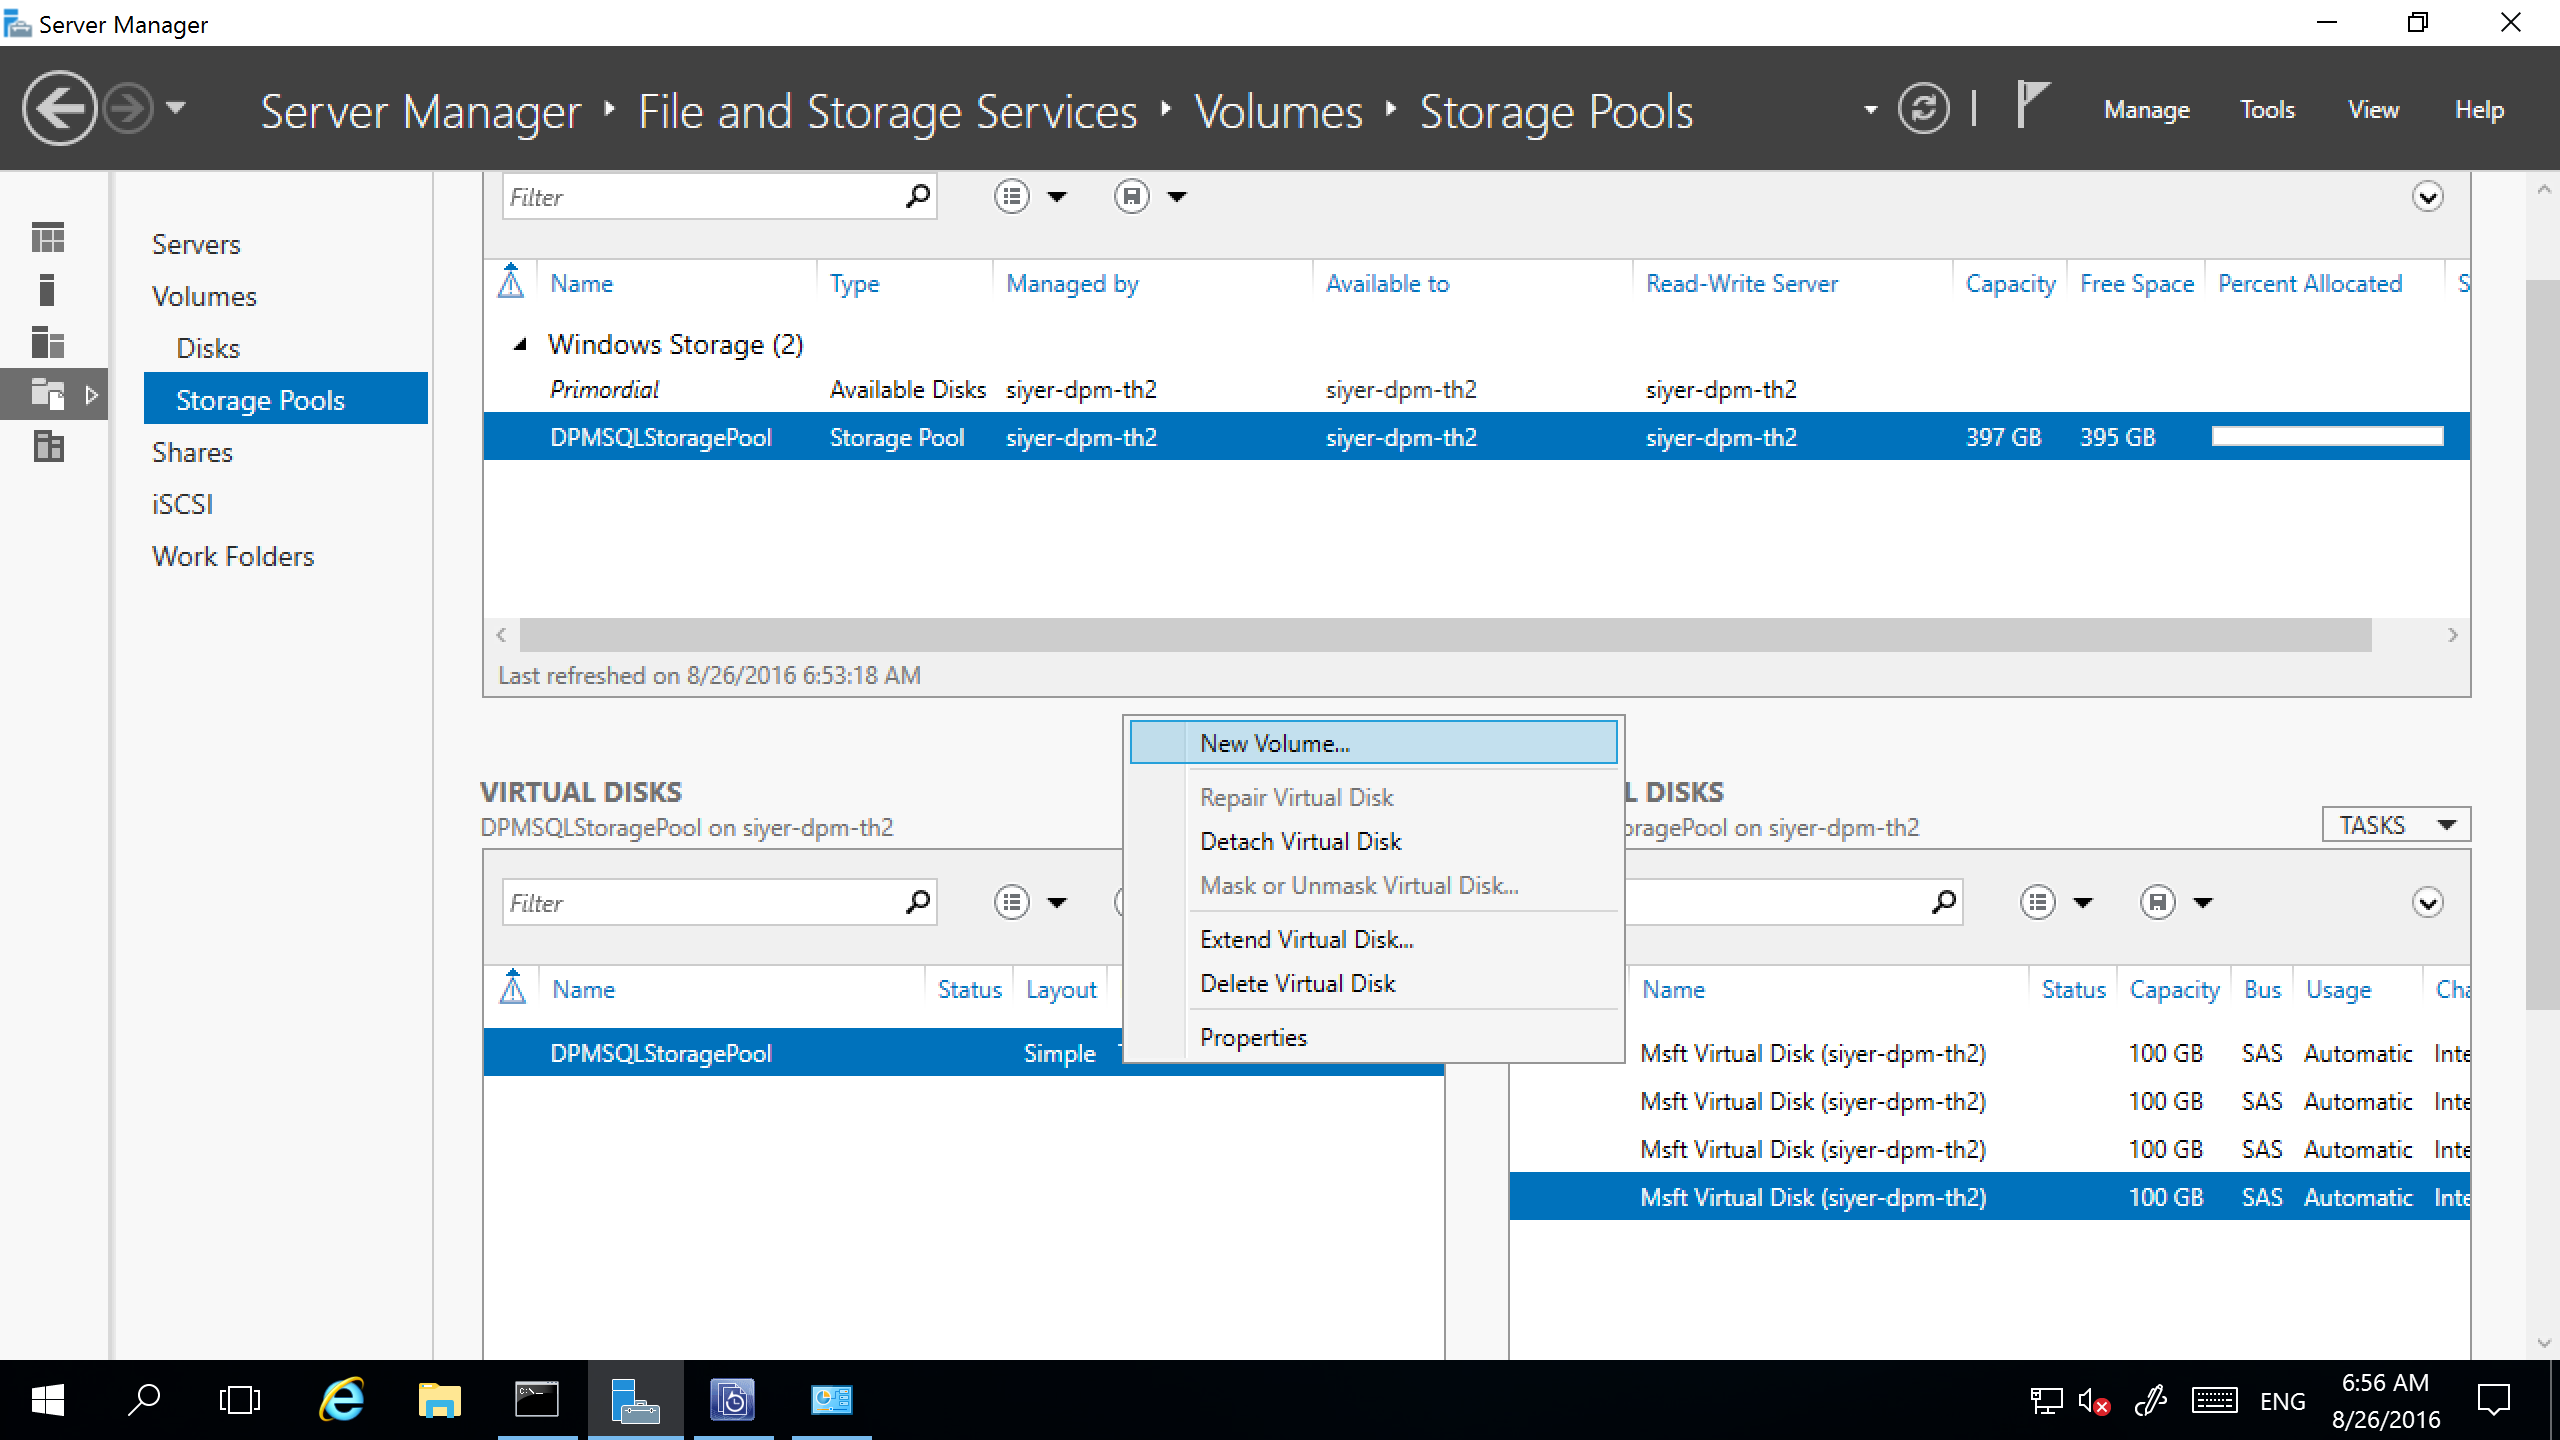
Select the virtual disk, and then select New Volume.
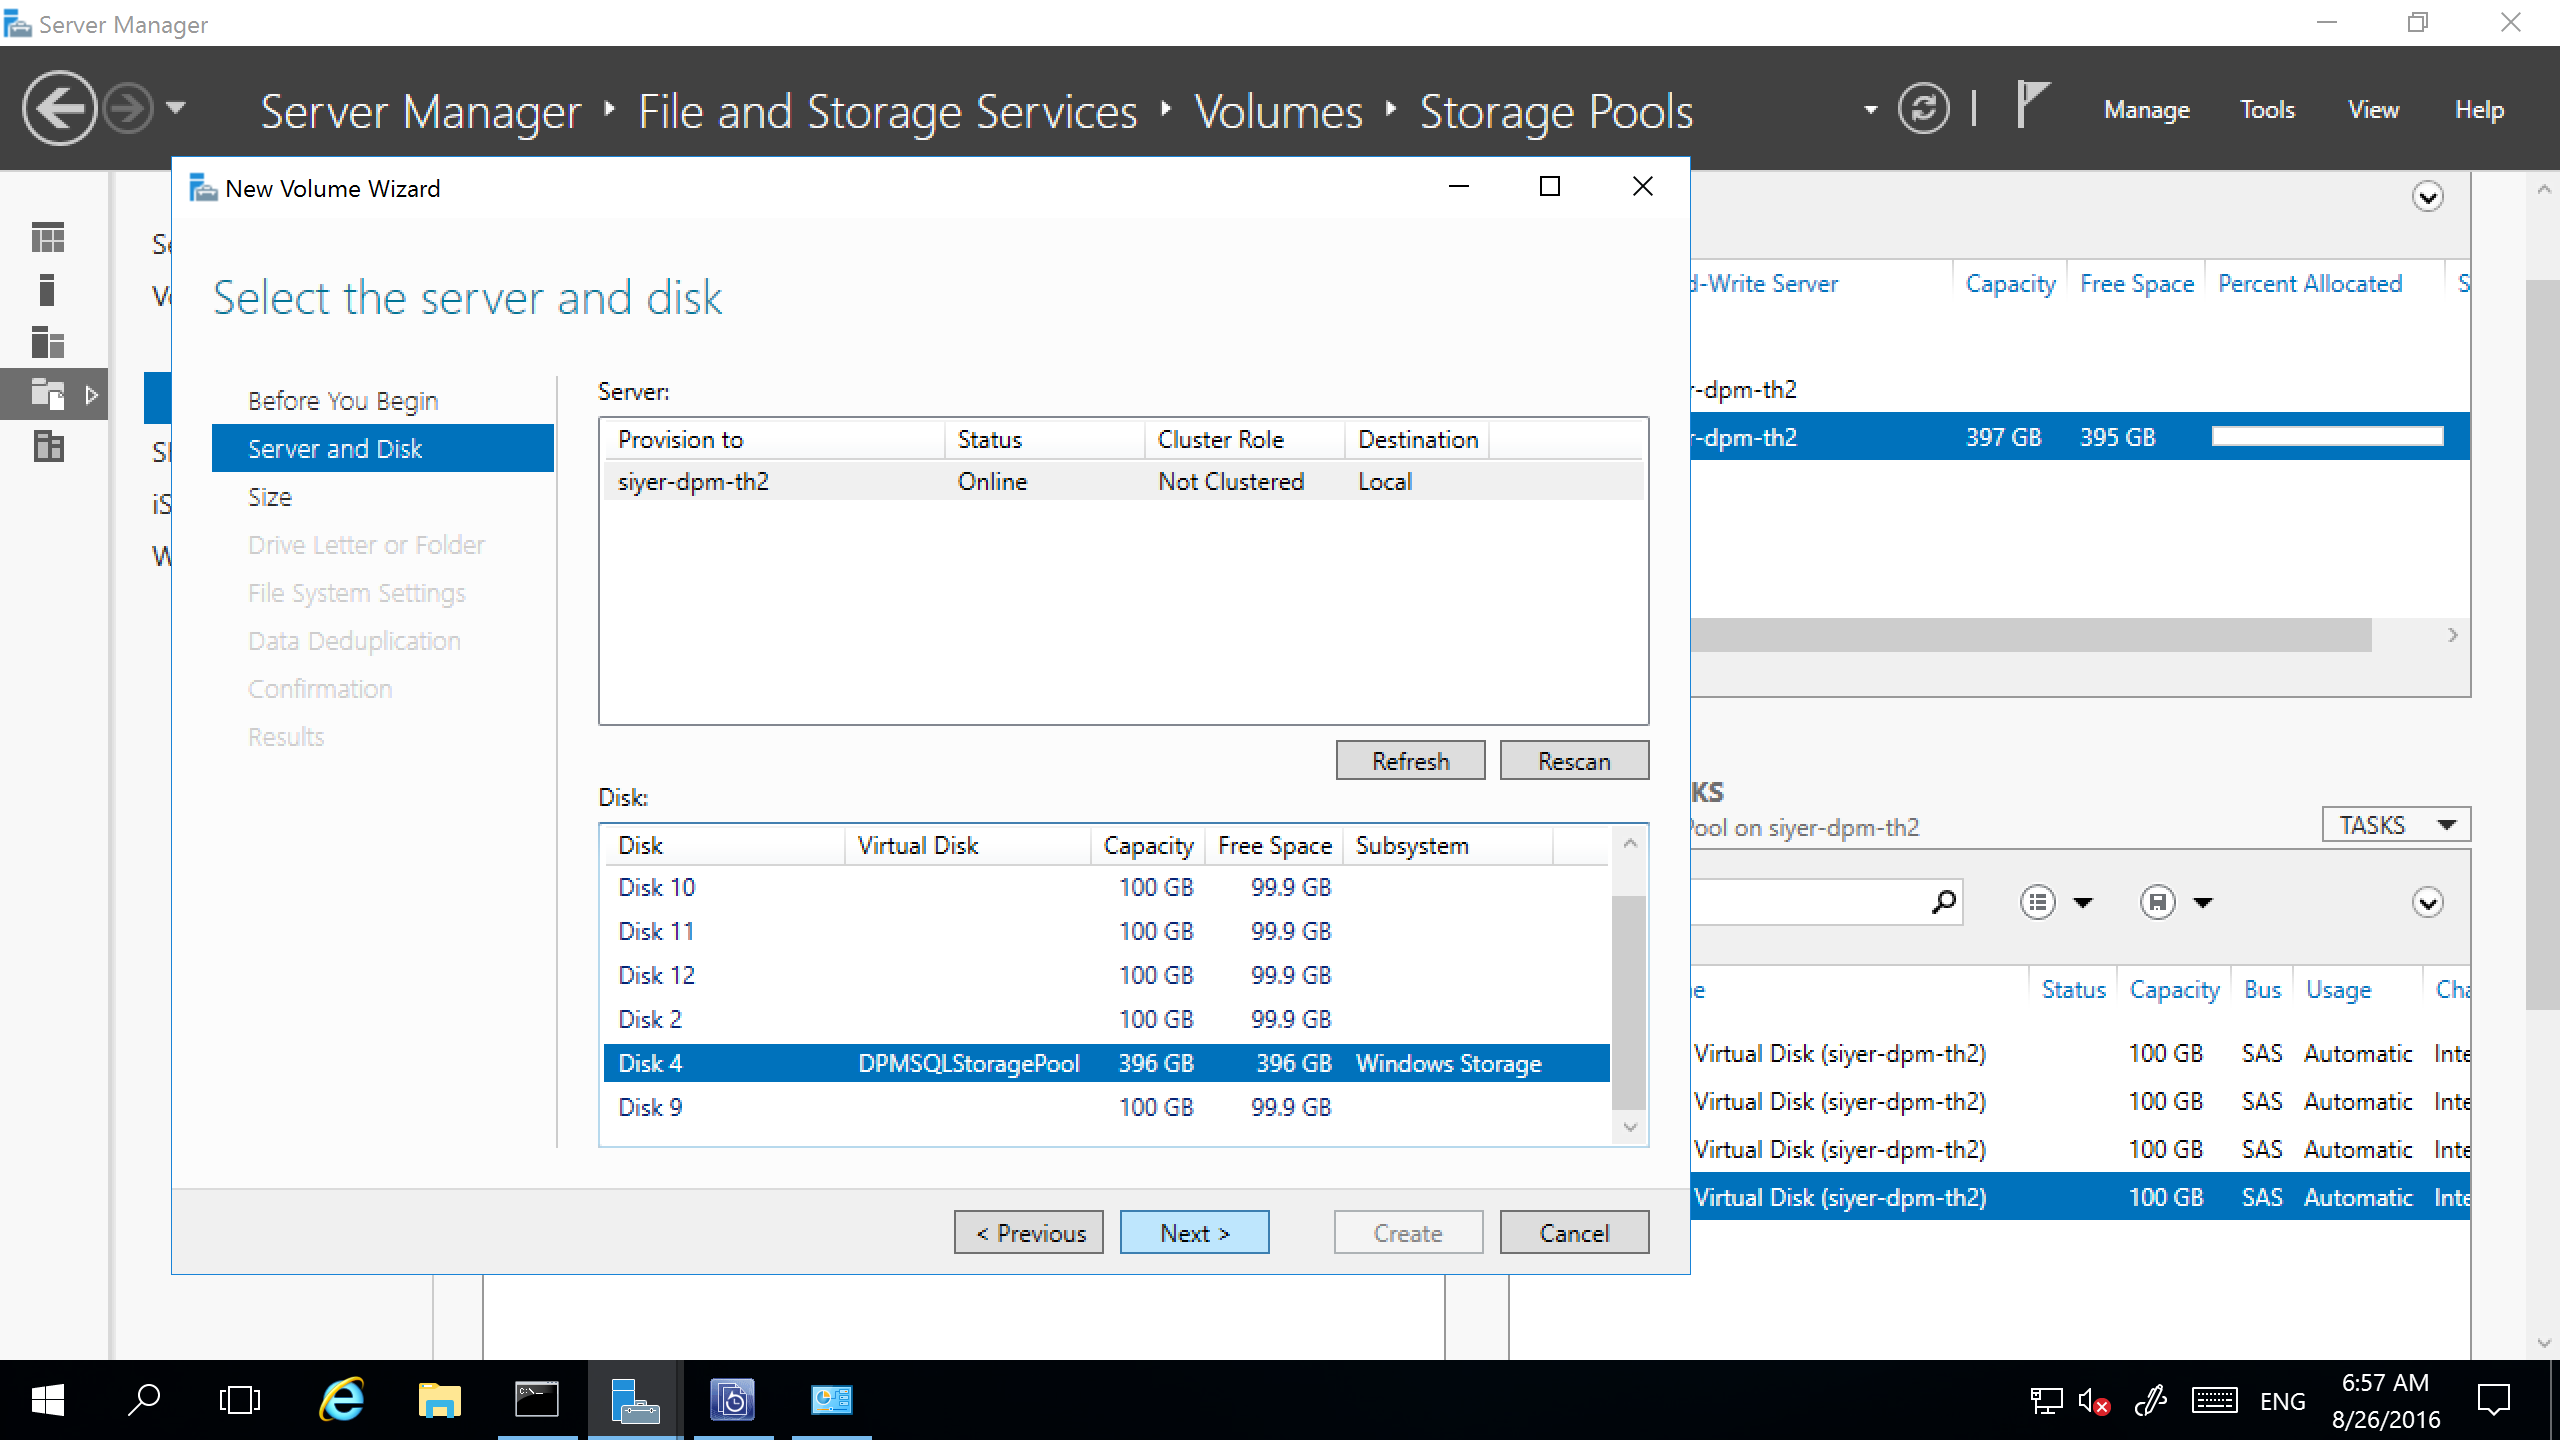
In the Select the server and disk dialog, select the server and the new disk. Then, select Next.
Add volumes to Backup Server disk storage
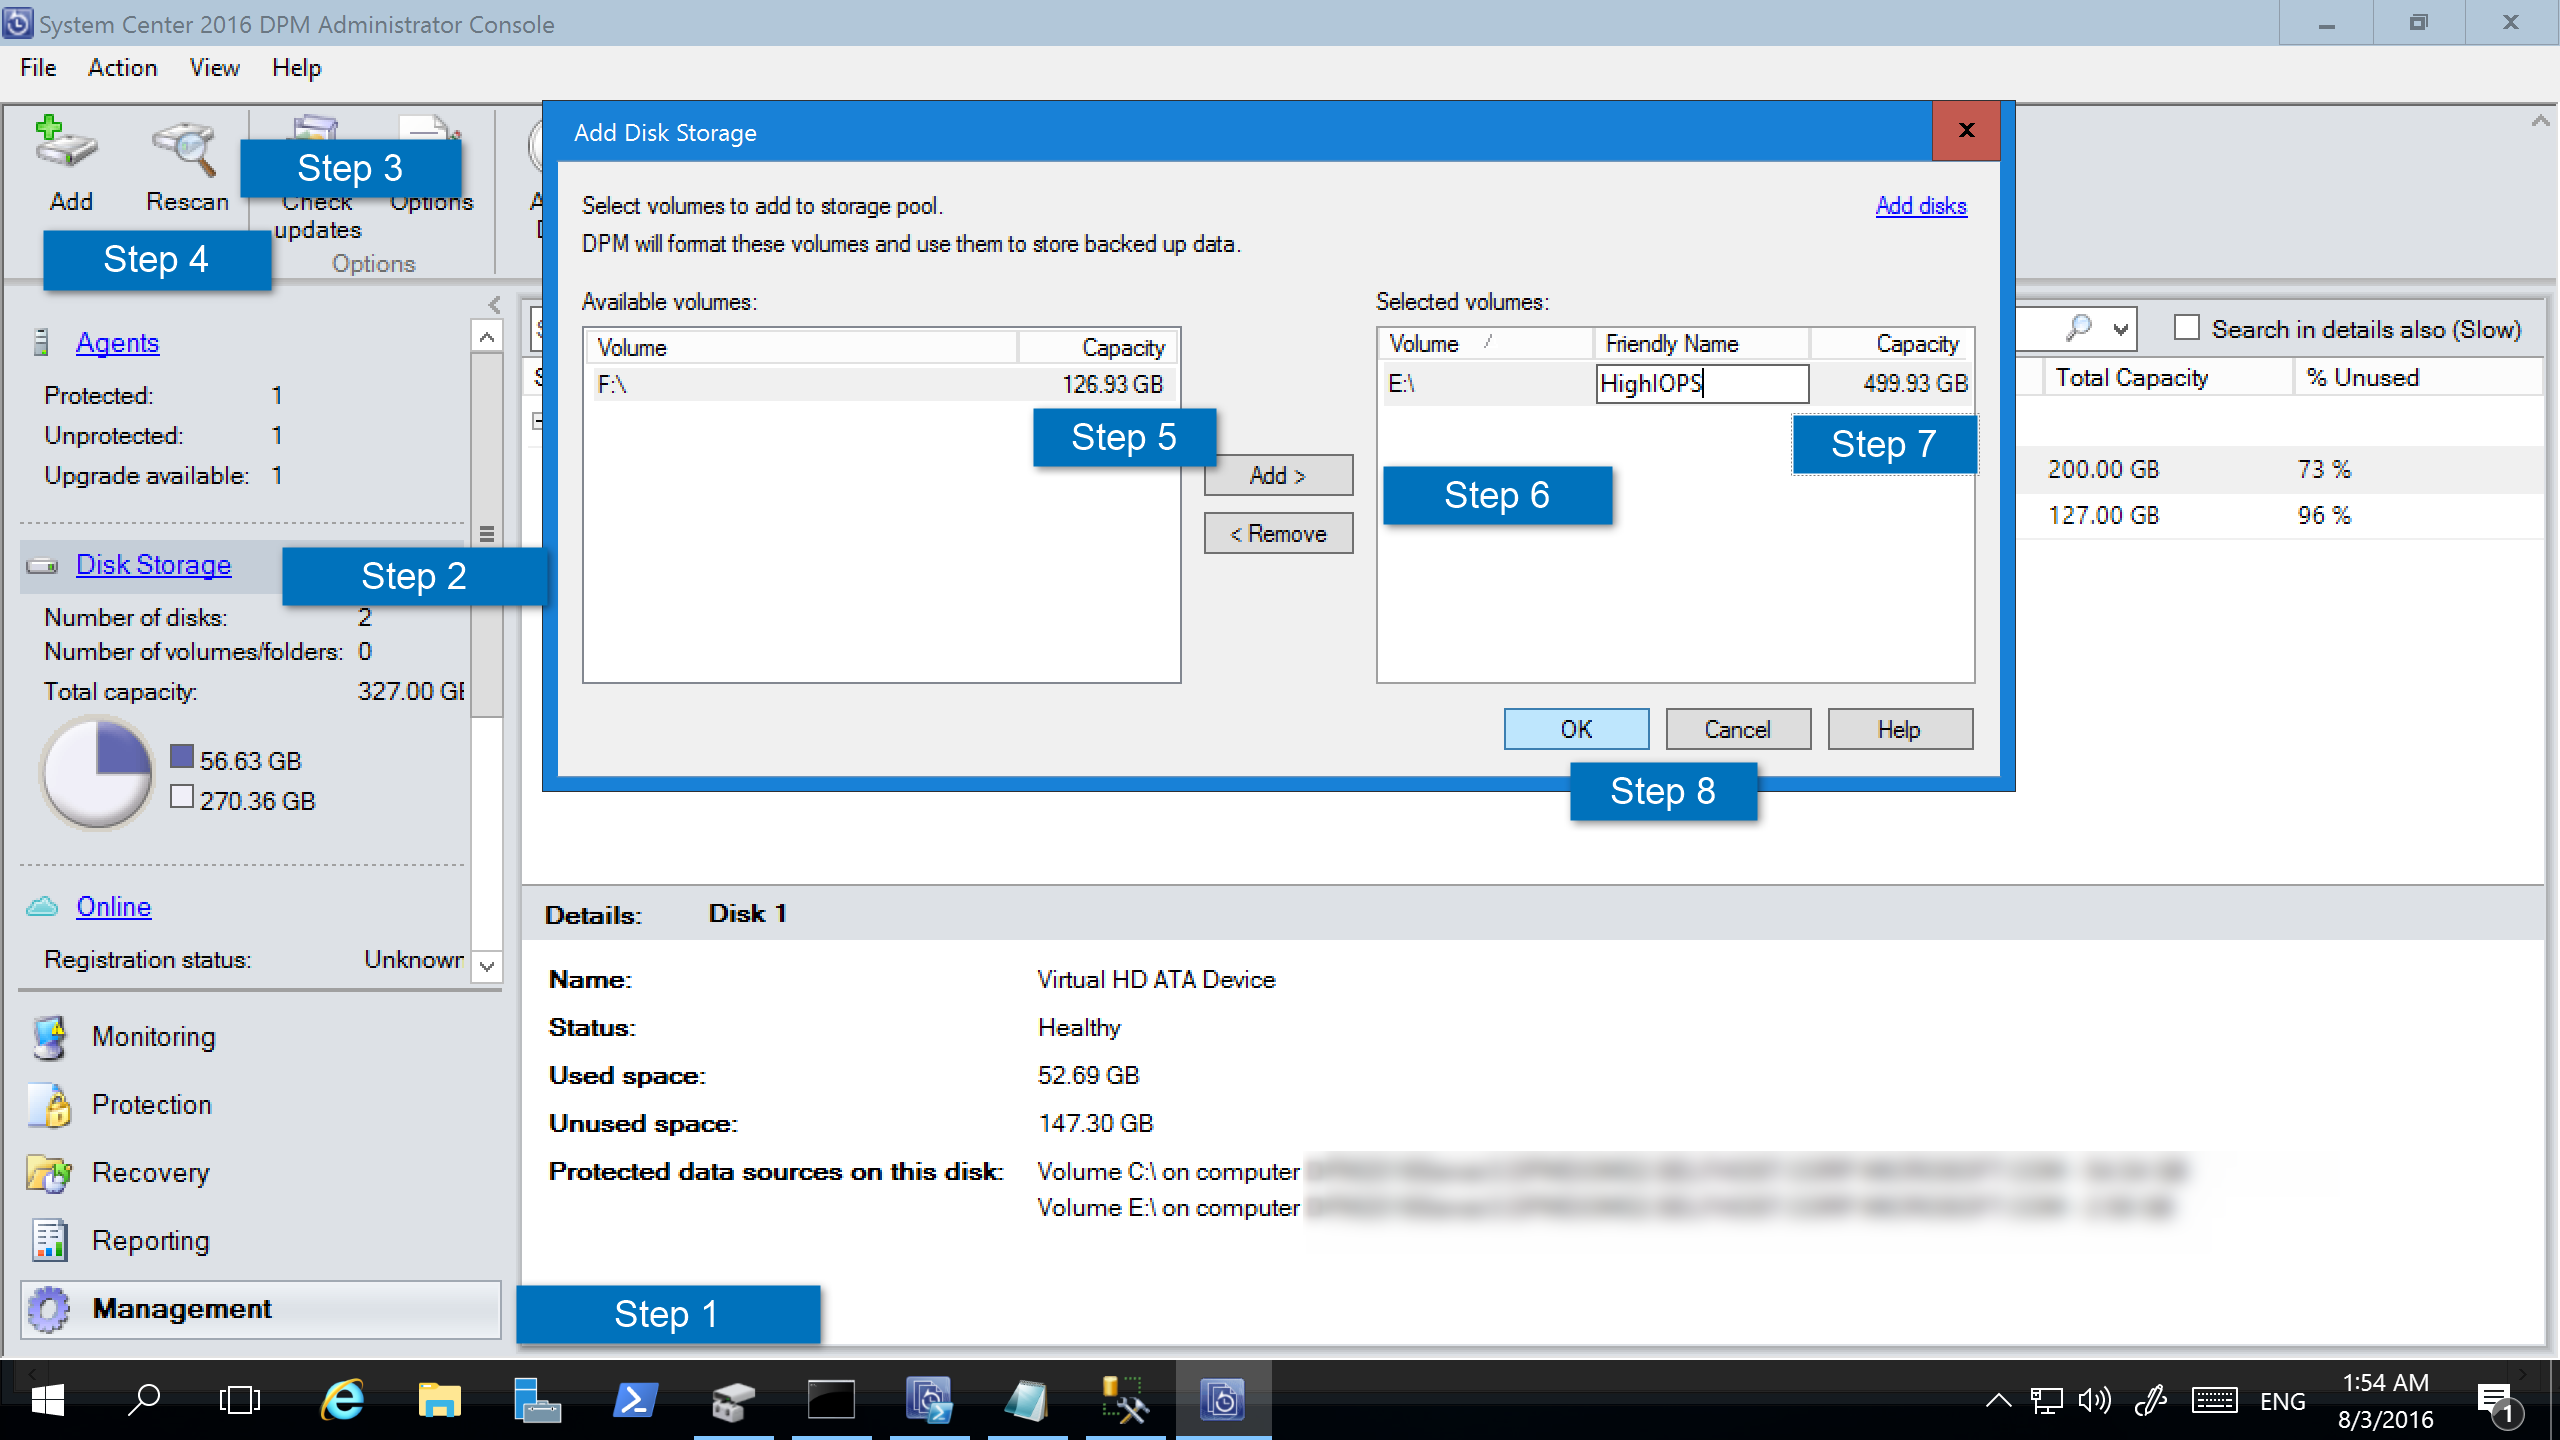
To add a volume to Backup Server, in the Management pane, rescan the storage, and then select Add. A list of all the volumes available to be added for Backup Server Storage appears. After available volumes are added to the list of selected volumes, you can give them a friendly name to help you manage them. To format these volumes to ReFS so Backup Server can use the benefits of Modern Backup Storage, select OK.
Note
- Add only one disk to the pool to keep the column count to 1. You can then add disks as needed afterwards.
- If you add multiple disks to the storage pool at a go, the number of disks is stored as the number of columns. When more disks are added, they can only be a multiple of the number of columns.
Set up workload-aware storage
With workload-aware storage, you can select the volumes that preferentially store certain kinds of workloads. For example, you can set expensive volumes that support a high number of input/output operations per second (IOPS) to store only the workloads that require frequent, high-volume backups. An example is SQL Server with transaction logs. Other workloads that are backed up less frequently, like VMs, can be backed up to low-cost volumes.
Update-DPMDiskStorage
You can set up workload-aware storage by using the PowerShell cmdlet Update-DPMDiskStorage, which updates the properties of a volume in the storage pool on an Azure Backup Server.
Syntax:
Parameter Set: Volume
Update-DPMDiskStorage [-Volume] <Volume> [[-FriendlyName] <String> ] [[-DatasourceType] <VolumeTag[]> ] [-Confirm] [-WhatIf] [ <CommonParameters>]
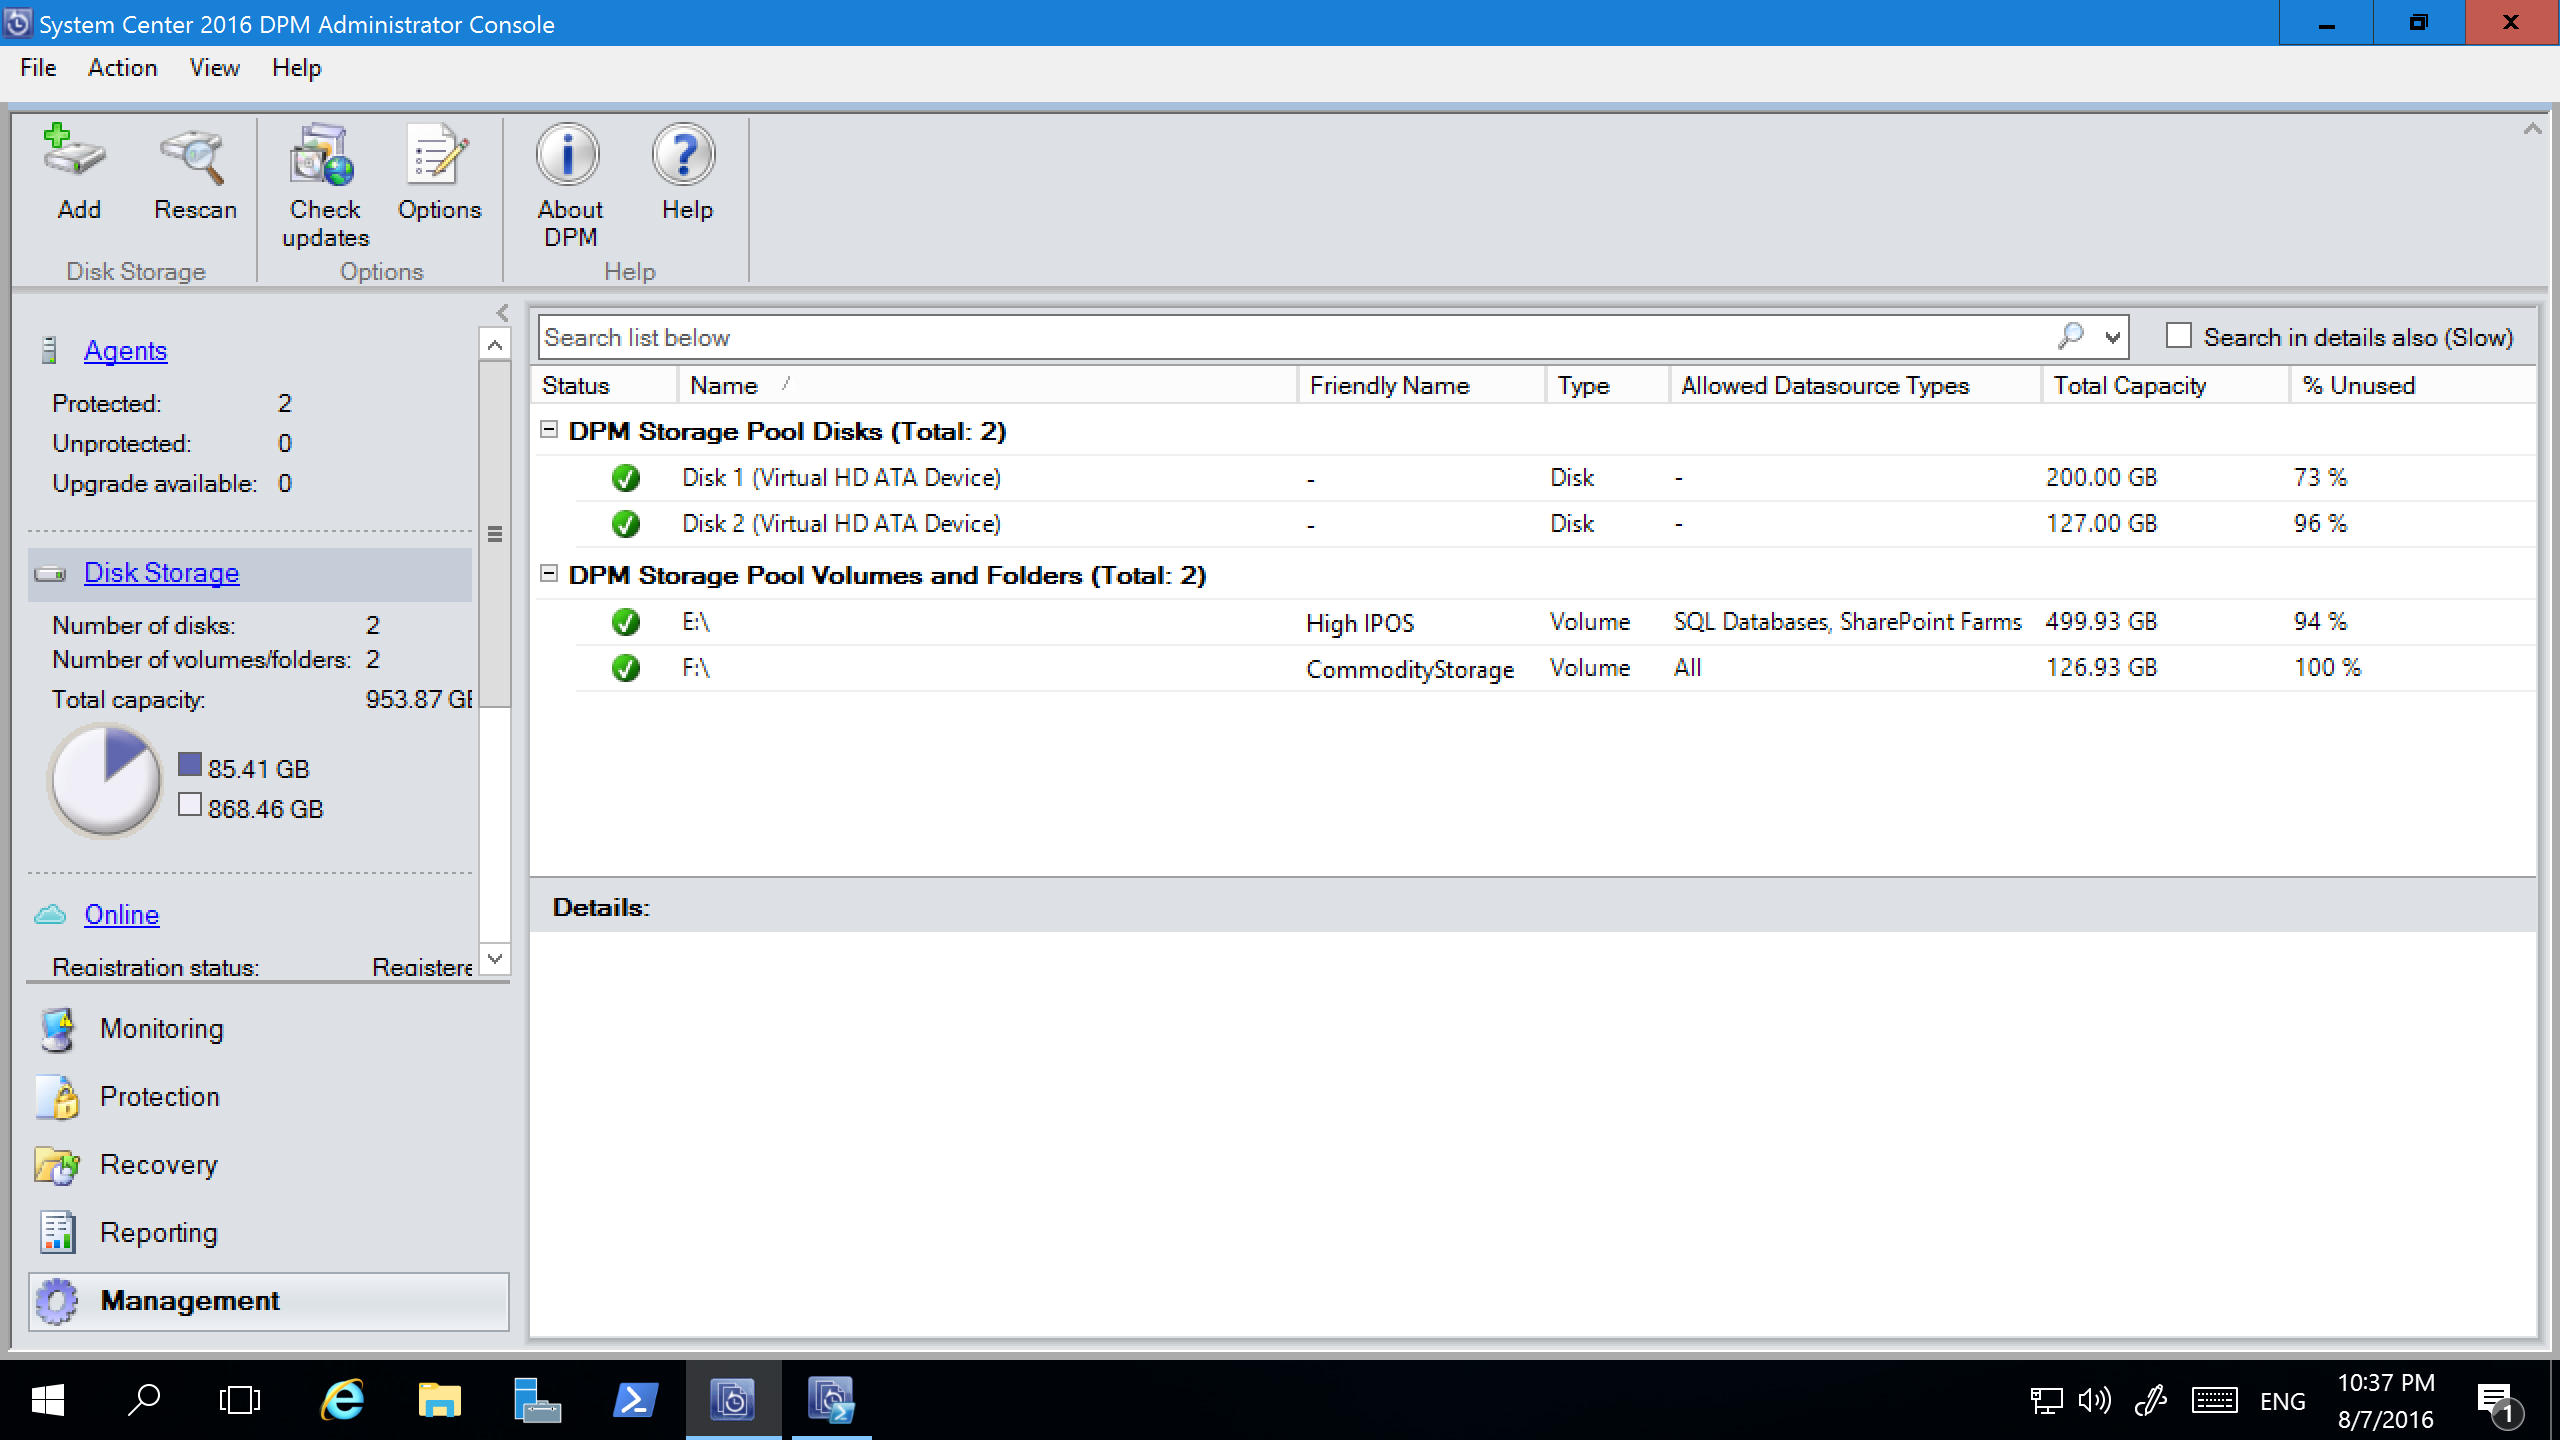
The following screenshot shows the Update-DPMDiskStorage cmdlet in the PowerShell window.
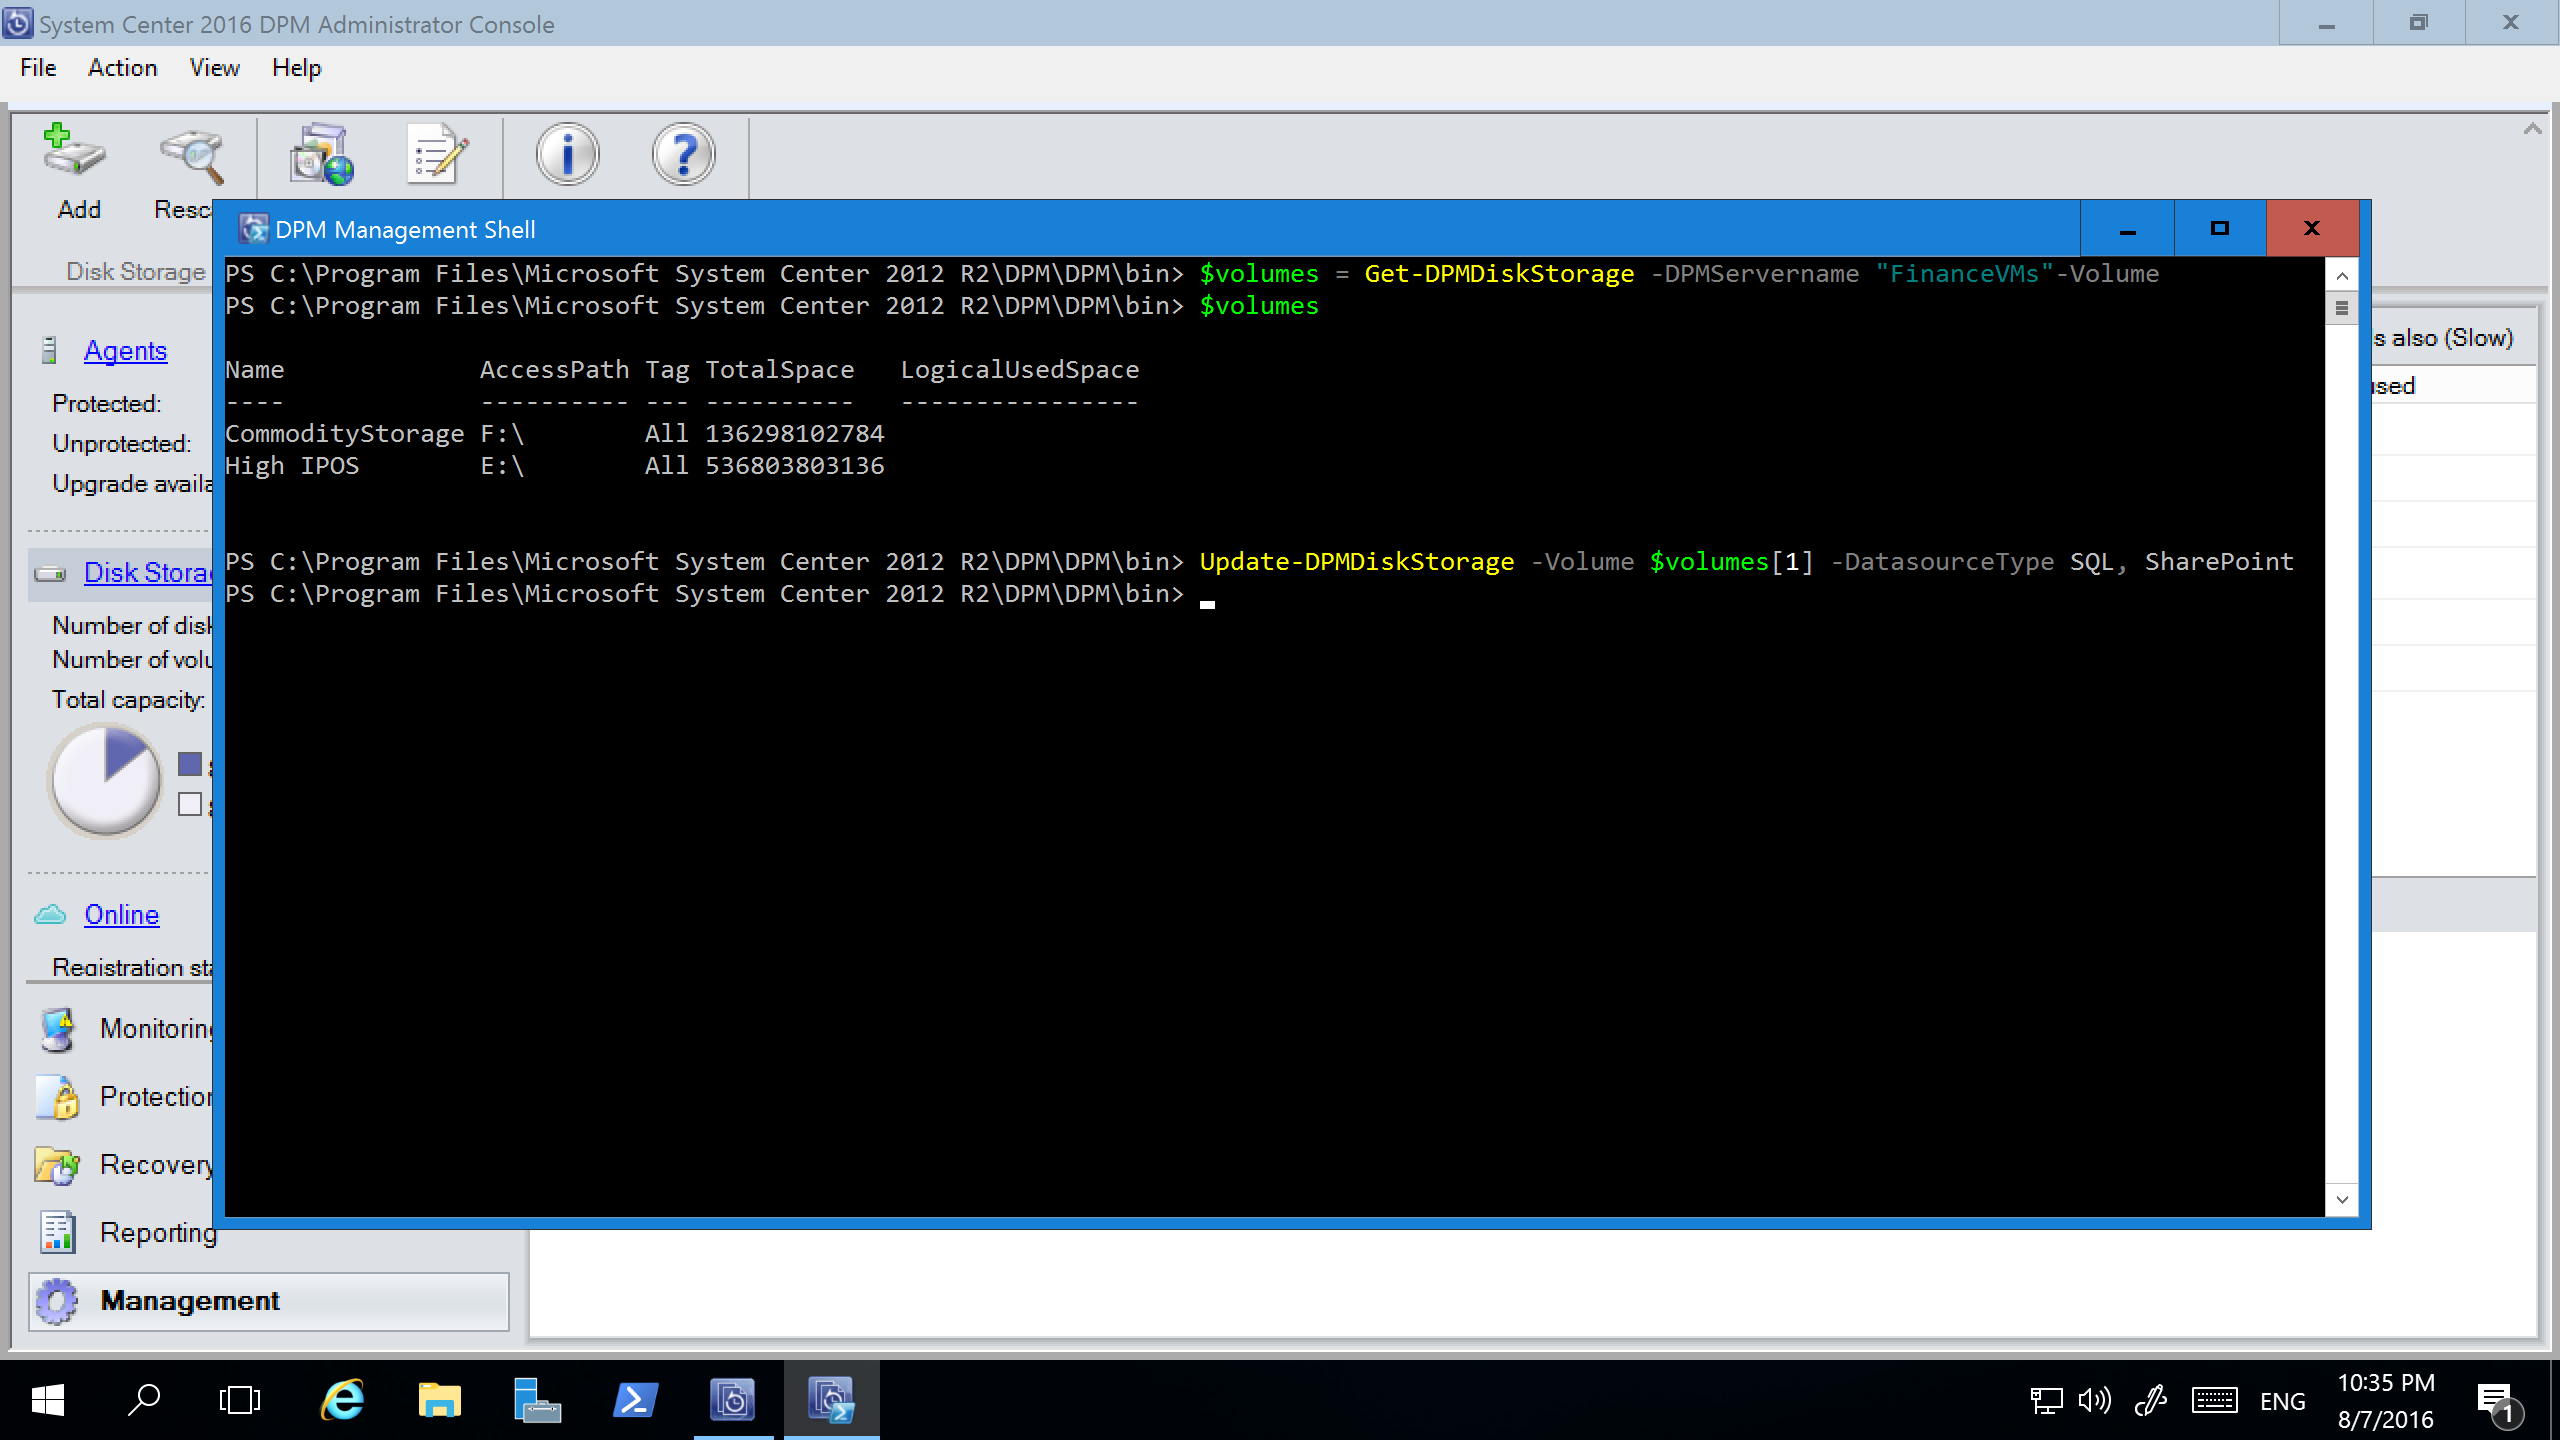
The changes you make by using PowerShell are reflected in the Backup Server Administrator Console.
Migrate legacy storage to Modern Backup Storage for MABS v2
After you upgrade to or install Backup Server V2 and upgrade the operating system to Windows Server 2016, update your protection groups to use Modern Backup Storage. By default, protection groups aren't changed. They continue to function as they were initially set up.
Updating protection groups to use Modern Backup Storage is optional. To update the protection group, stop protection of all data sources by using the retain data option. Then, add the data sources to a new protection group.
To migrate legacy storage to Modern Backup Storage for MABS v2, follow these steps:
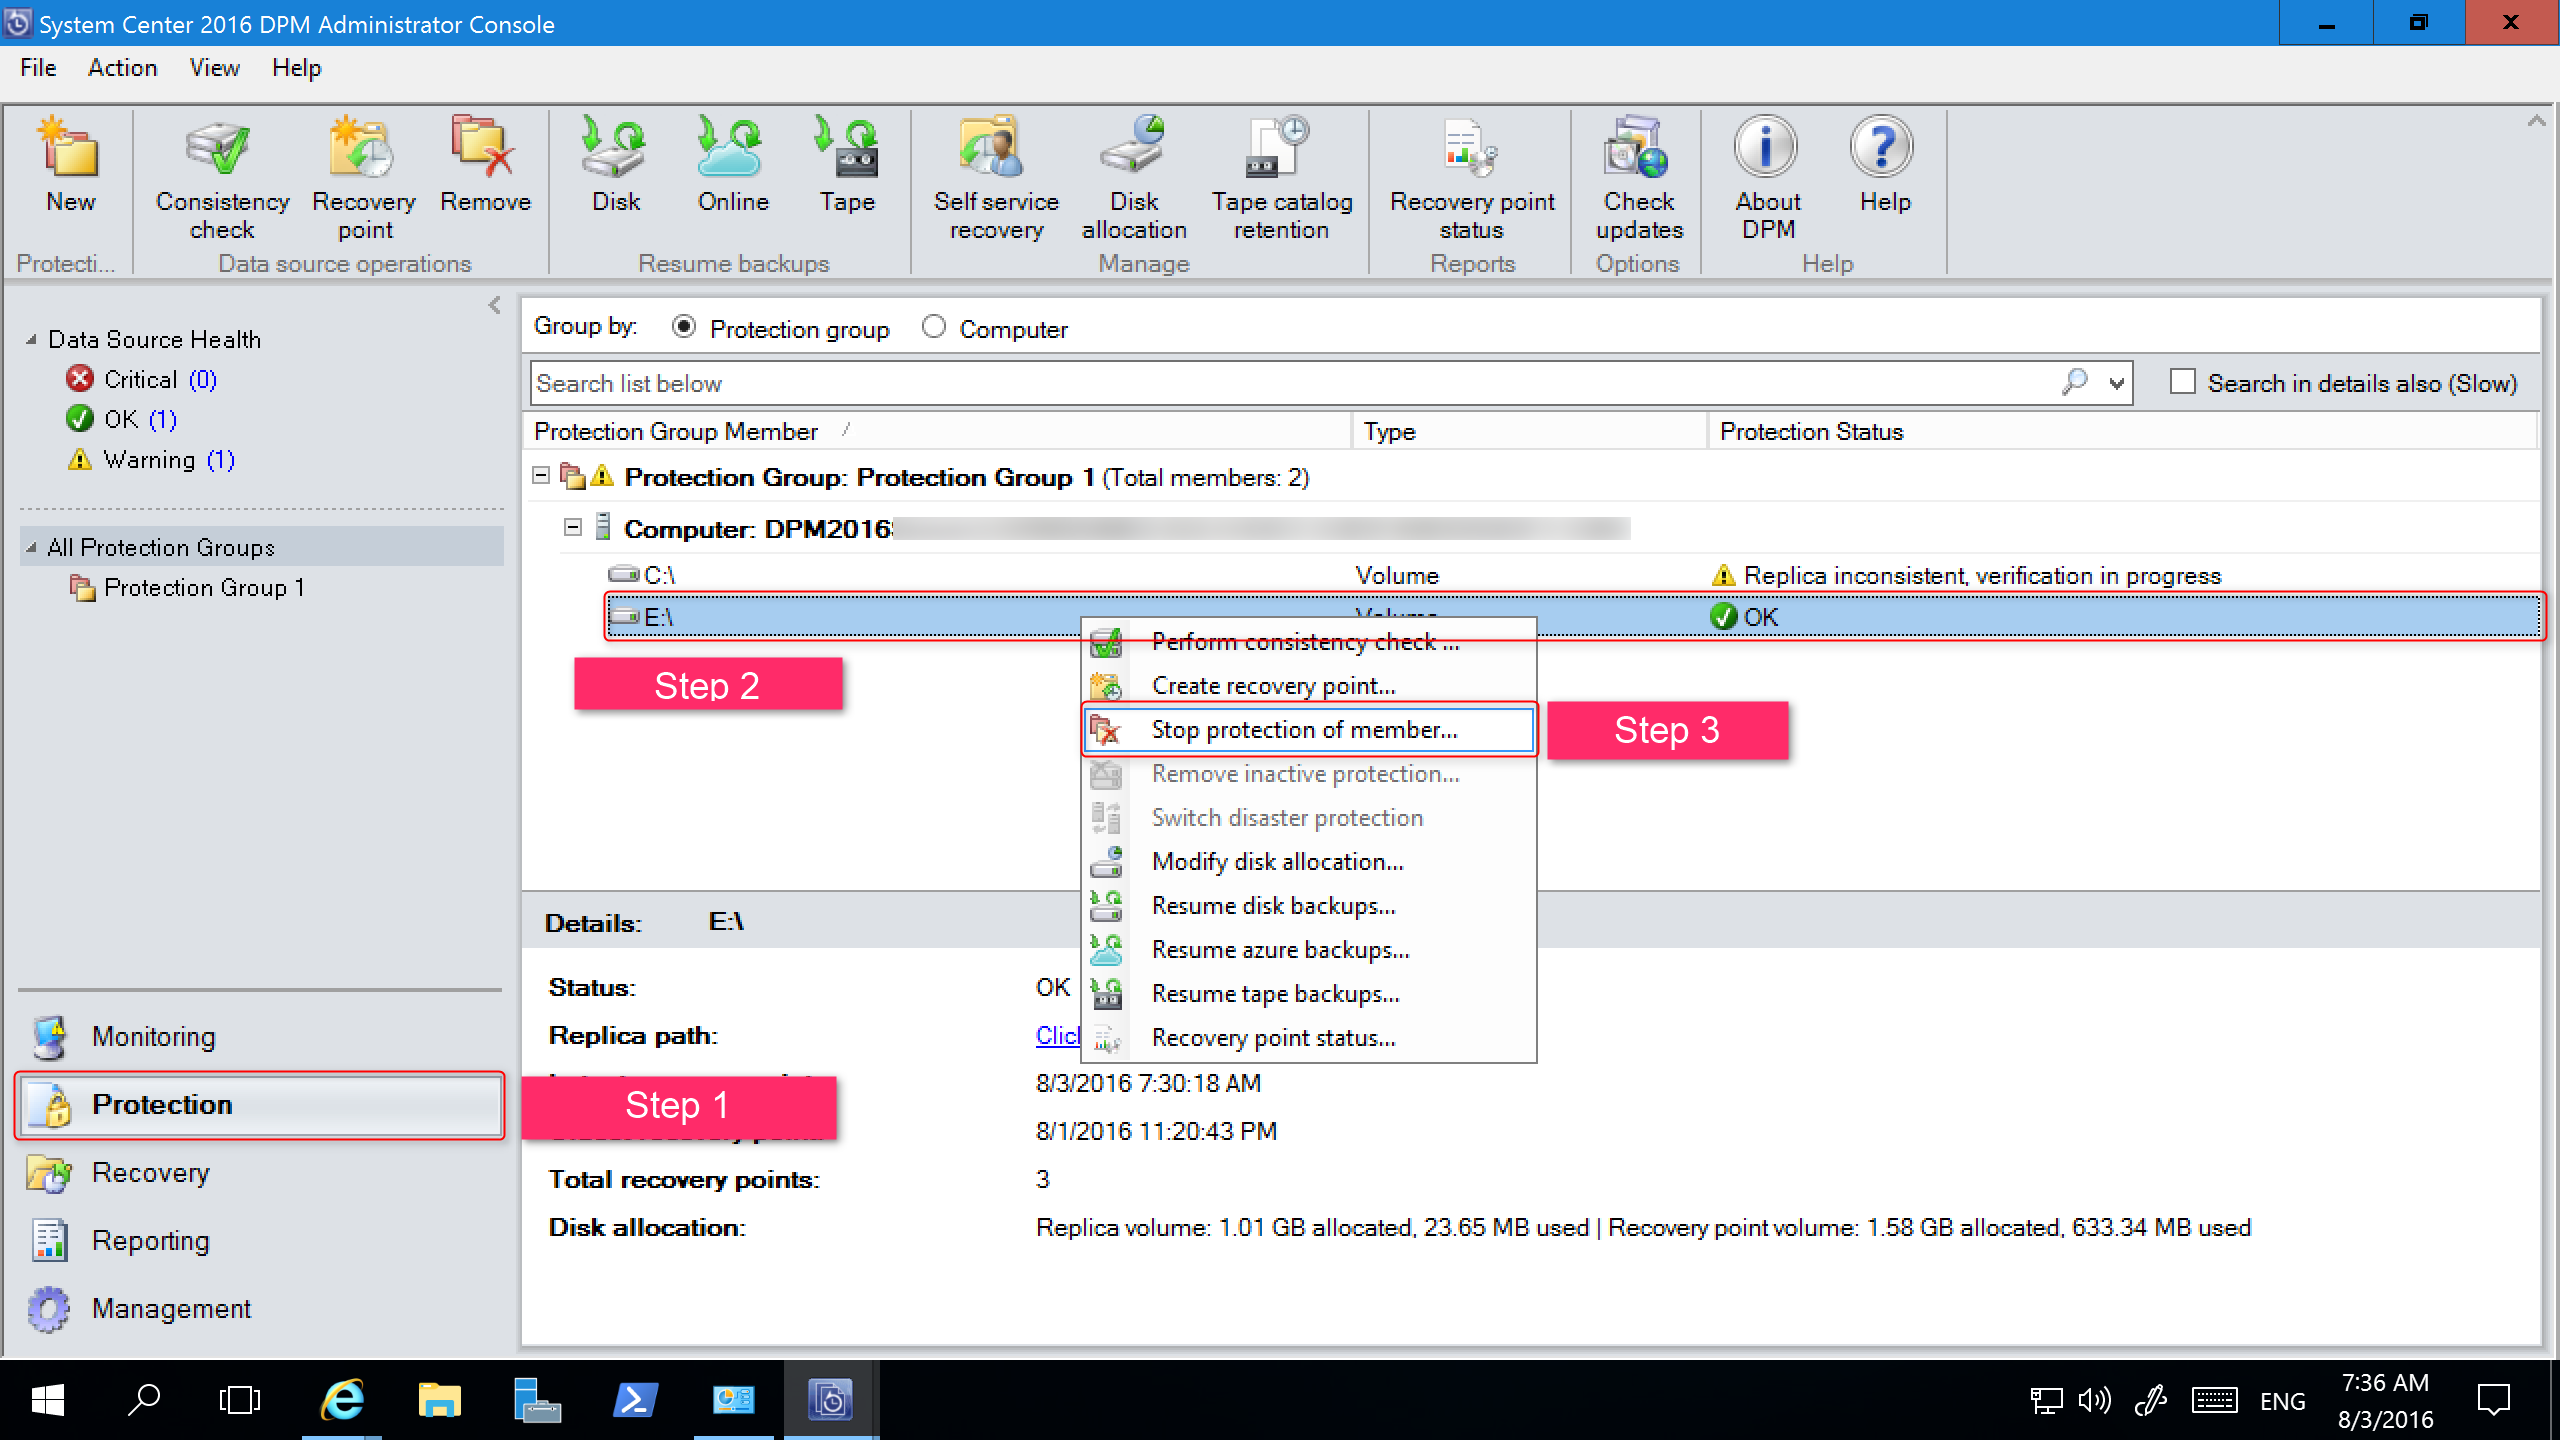
In the Administrator Console, select the Protection feature. In the Protection Group Member list, right-click the member, and then select Stop protection of member.
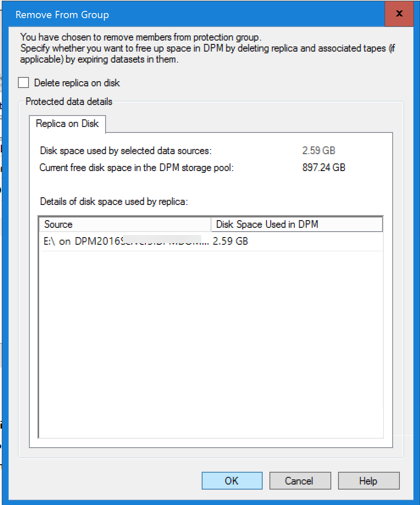
In the Remove from Group dialog box, review the used disk space and the available free space for the storage pool. The default is to leave the recovery points on the disk and allows them to expire per their associated retention policy. Select OK.
If you want to immediately return the used disk space to the free storage pool, select the Delete replica on disk check box to delete the backup data (and recovery points) associated with that member.
Create a protection group that uses Modern Backup Storage. Include the unprotected data sources.
Add disks to increase legacy storage
If you want to use legacy storage with Backup Server, you might need to add disks to increase legacy storage.
To add disk storage, follow these steps:
In the Administrator Console, select Management > Disk Storage > Add.
In the Add Disk Storage dialog, select Add disks.
In the list of available disks, select the disks you want to add, select Add, and then select OK.
Next steps
After you install Backup Server, learn how to prepare your server, or begin protecting a workload.