Create a user-assigned identity for Azure Monitor SCOM Managed Instance
This article describes how to create a user-assigned identity, provide admin access to Azure SQL Managed Instance, and grant Get and List access on a key vault.
Note
To learn about the Azure Monitor SCOM Managed Instance architecture, see Azure Monitor SCOM Managed Instance.
Create a managed service identity
The managed service identity (MSI) provides an identity for applications to use when they're connecting to resources that support Microsoft Entra ID authentication. For SCOM Managed Instance, a managed identity replaces the traditional four System Center Operations Manager service accounts. It's used to access the Azure SQL Managed Instance database. It's also used to access the key vault.
Note
- Ensure that you're a contributor in the subscription where you create the MSI.
- The MSI must have admin permission on SQL Managed Instance and read permission on the key vault that you use to store the domain account credentials.
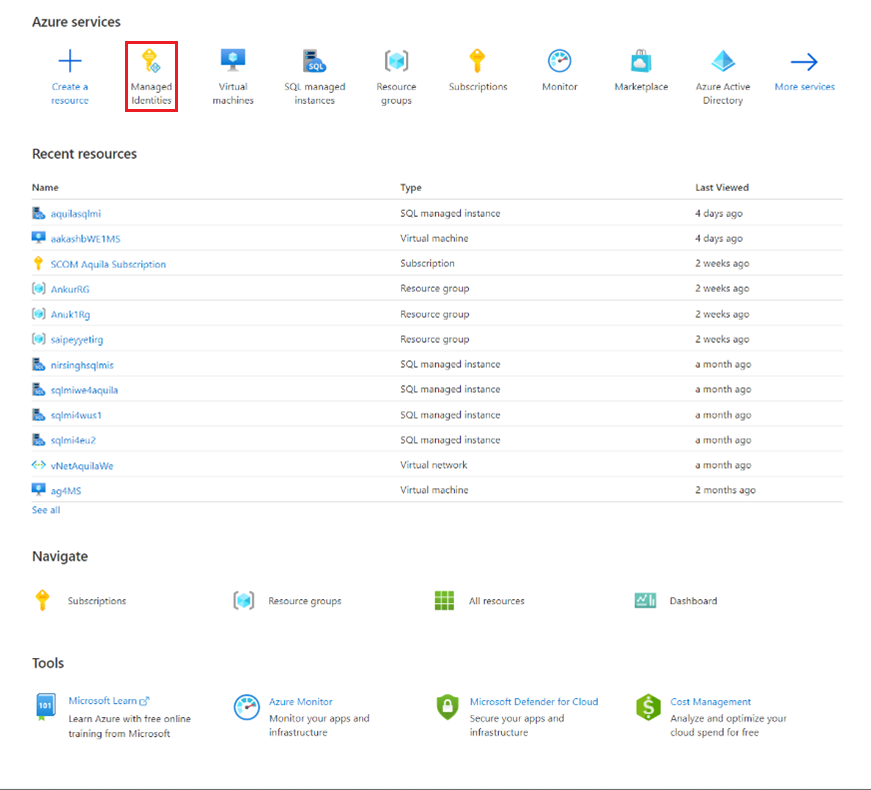
Sign in to the Azure portal. Search for and select Managed Identities.
On the Managed Identities page, select Create.
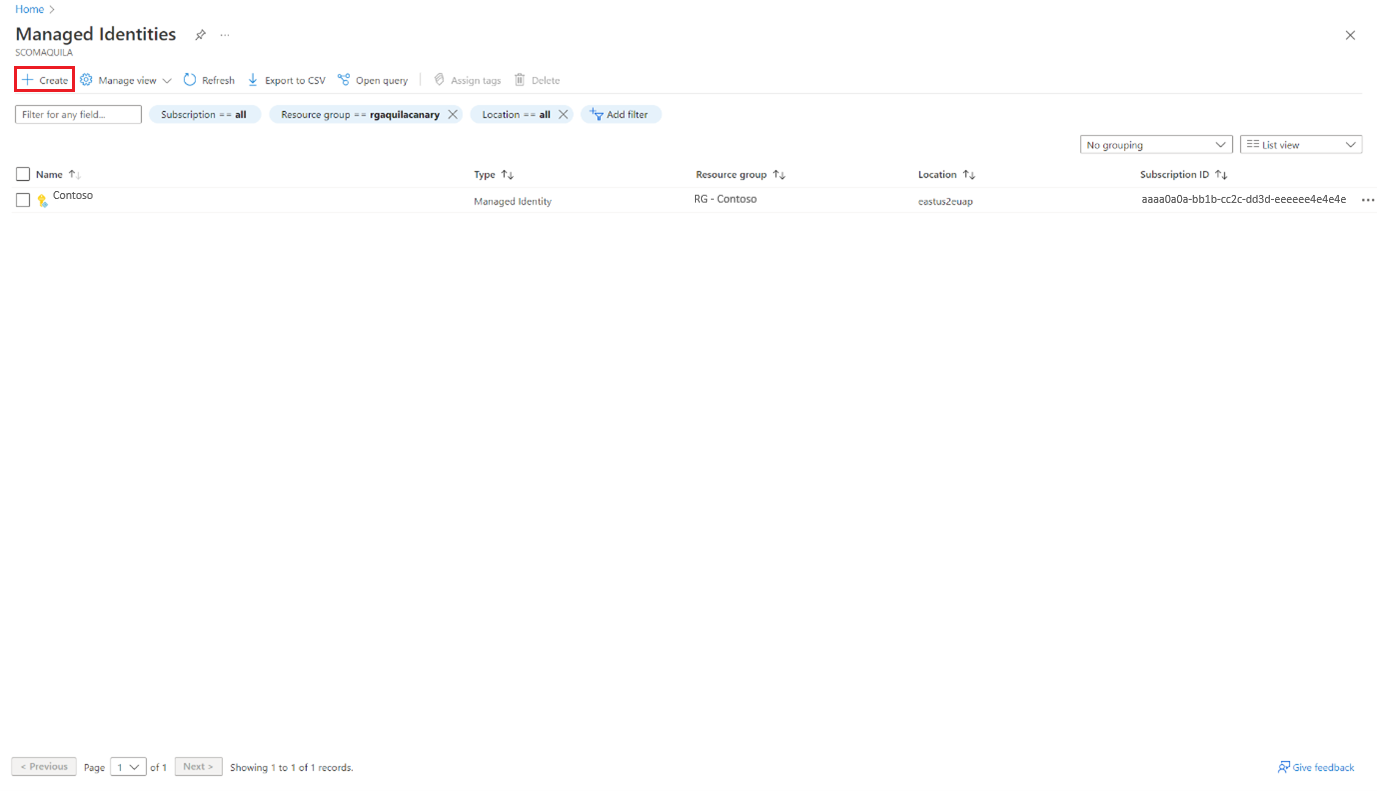
The Create User Assigned Managed Identity pane opens.
Under Basics, do the following:
- Project details:
- Subscription: Select the Azure subscription in which you want to create the SCOM Managed Instance.
- Resource group: Select the resource group in which you want to create the SCOM Managed Instance.
- Instance details:
- Region: Select the region in which you want to create the SCOM Managed Instance.
- Name: Enter a name for the instance.
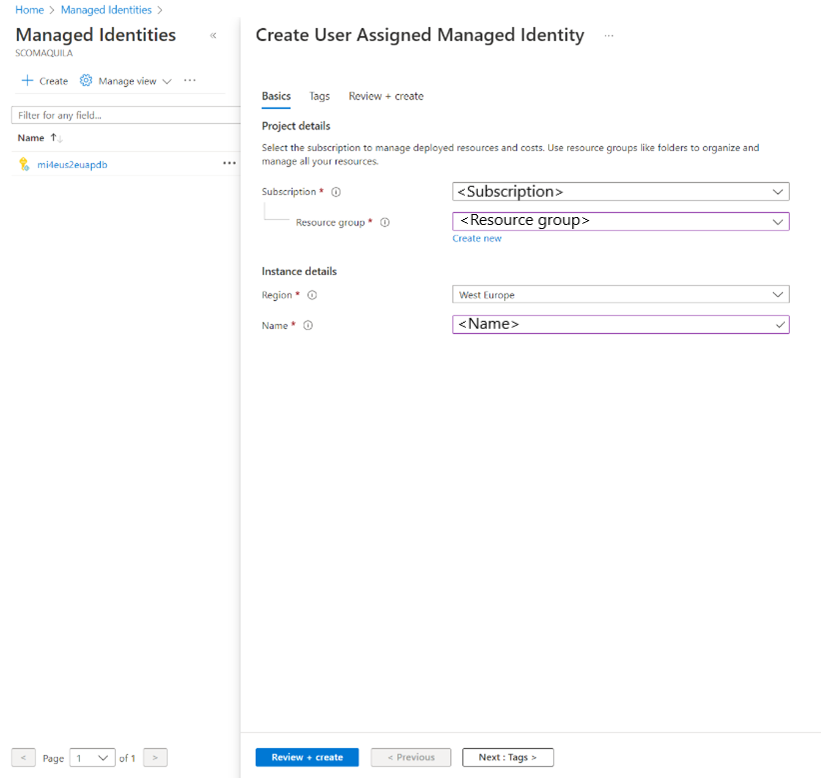
- Project details:
Select Next: Tags.
On the Tags tab, enter the Name value and select the resource.
Tags help you categorize resources and view consolidated billing by applying the same tags to multiple resources and resource groups. For more information, see Use tags to organize your Azure resources and management hierarchy.
Select Next: Review + create.
On the Review + create tab, review all the information that you provided and select Create.
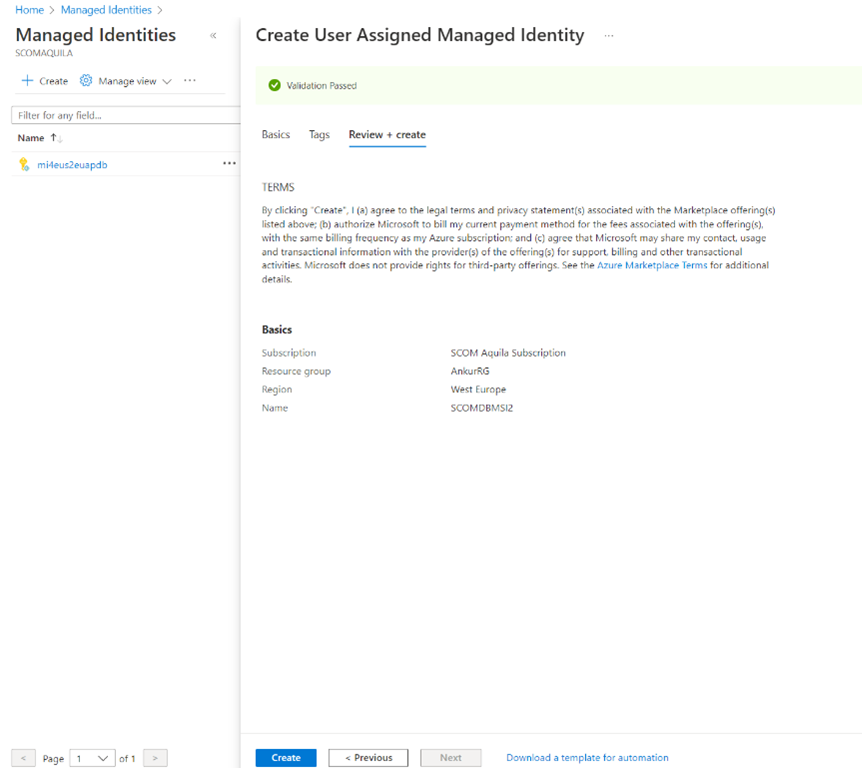
Your deployment is now created on Azure. You can access the resource and view its details.
Set the Microsoft Entra admin value in the SQL managed instance
To set the Microsoft Entra admin value in the SQL managed instance that you created in step 3, follow these steps:
Note
You must have Privileged Role Administrator permissions for the subscription to perform the following operations.
Important
Using Groups as Microsoft Entra admin is currently not supported.
Open the SQL managed instance. Under Settings, select Microsoft Entra admin.
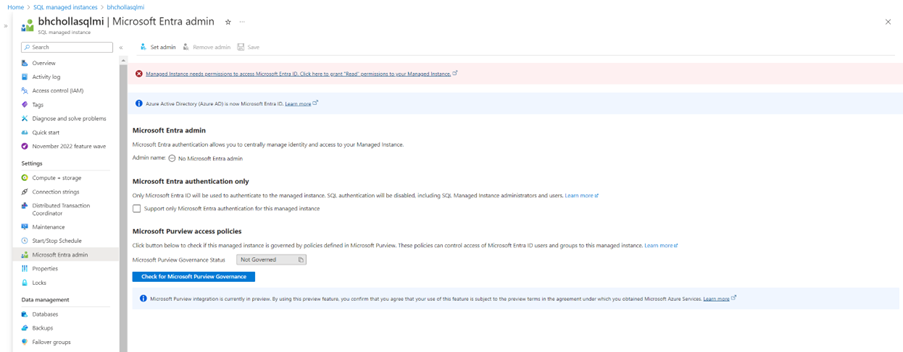
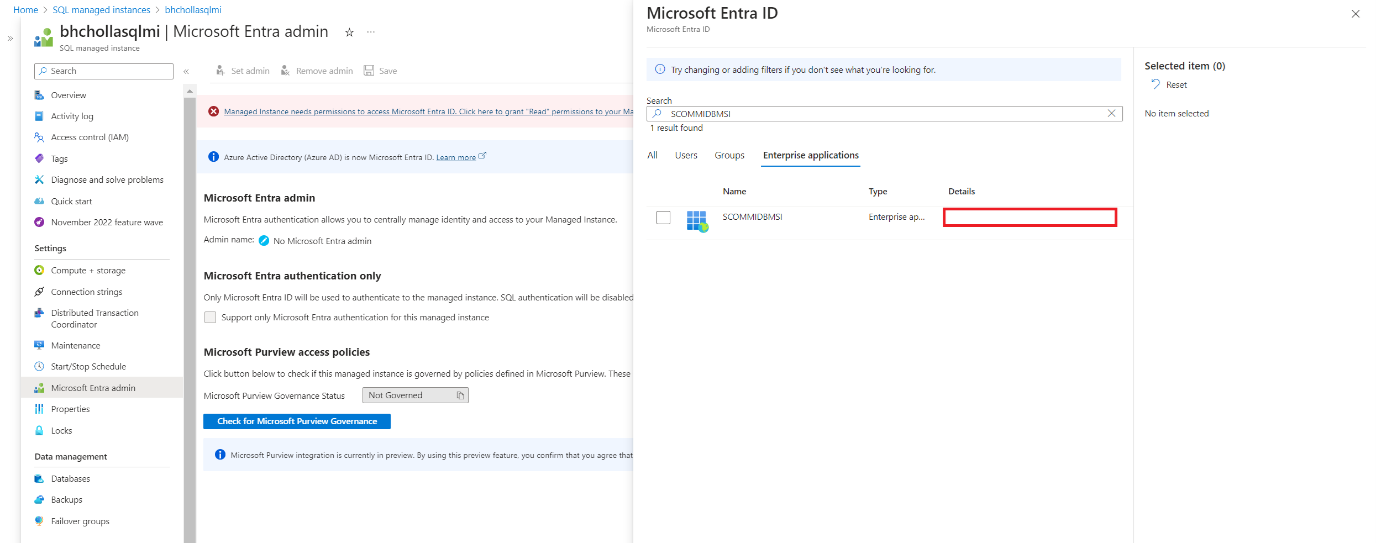
Select the error-box message to provide Read permissions to the SQL managed instance on Microsoft Entra ID. Grant permissions pane opens to grant the permissions.
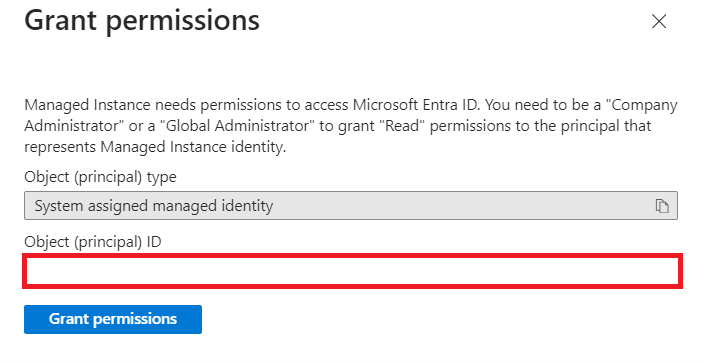
Select Grant Permissions to initiate the operation and once it is completed, you can find a notification for successfully updating the Microsoft Entra read permissions.

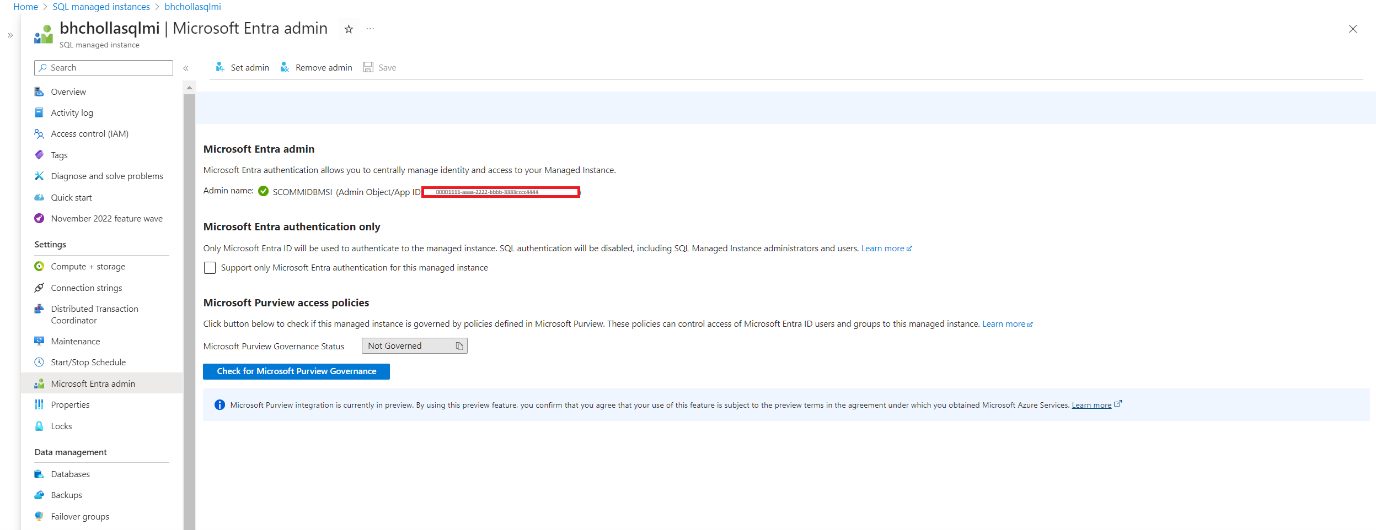
Select Set admin, and search for your MSI. This MSI is the same one that you provided during the SCOM Managed Instance creation flow. You find the admin added to the SQL managed instance.
If you get an error after you add a managed identity account, it indicates that read permissions aren't yet provided to your identity. Be sure to provide the necessary permissions before you create your SCOM Managed Instance or else your SCOM Managed Instance creation fails.
For more information about permissions, see Directory Readers role in Microsoft Entra ID for Azure SQL.
Grant permission on the key vault
To grant permission on the key vault that you created in step 4, follow these steps:
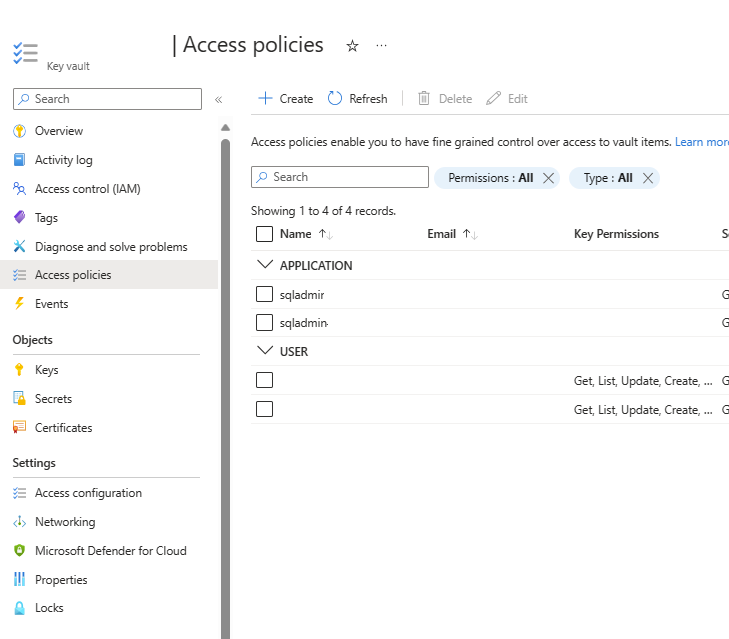
Go to the key vault resource that you created in step 4 and select Access policies.
On the Access policies page, select Create.
On the Permissions tab, select the Get and List options.
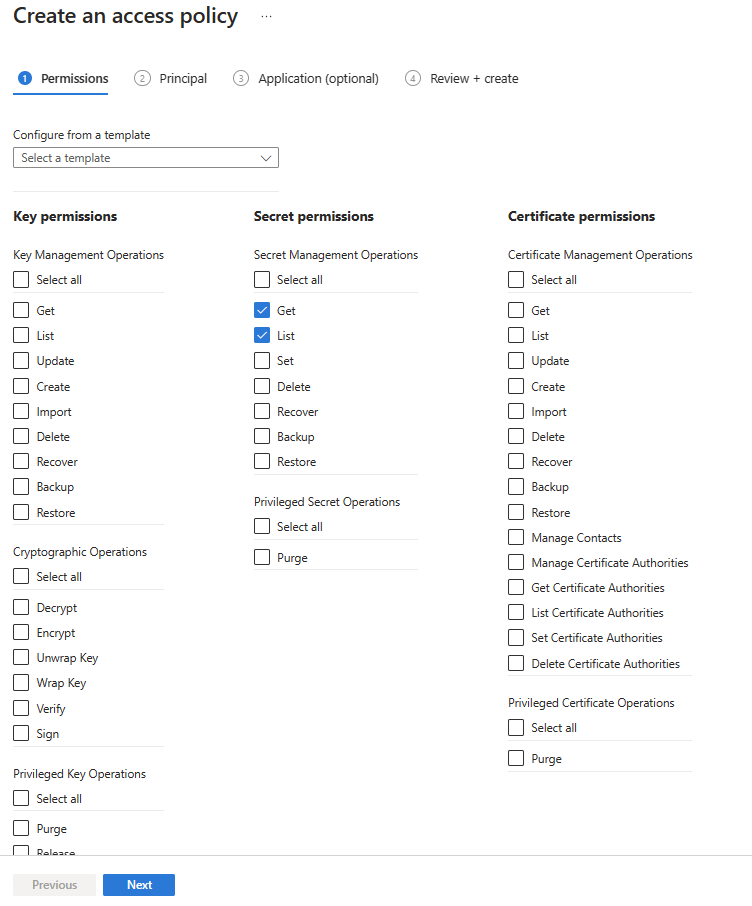
Select Next.
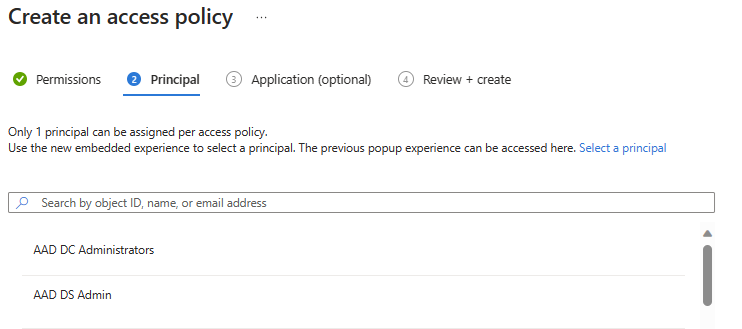
On the Principal tab, enter the name of the MSI you created.
Select Next. Select the same MSI that you used in the SQL Managed Instance admin configuration.
Select Next > Create.
