Manage VM extensions on Azure Local virtual machines
Applies to: Azure Local 2311.2 and later
This article describes how to install and manage virtual machine (VM) extensions on Azure Local via the Azure portal.
The VM extensions on your Azure Arc VMs on Azure Local are useful for post-deployment configuration, software installation, or other management tasks. To install VM extensions, you must enable Azure guest management on your Azure Arc VMs.
Supported VM extensions
For a full list of supported VM extensions, see:
Prerequisites
- Access to an Azure Arc VM running on Azure Local with guest management enabled. Guest management is supported on Windows and Linux VMs. For information on how to create an Azure Arc VM, see Create Azure Arc virtual machines on Azure Local.
Verify that guest management is enabled
To manage VMs on Azure Local, you must enable guest management on the VMs. When you enable guest management on a VM, an agent is installed on the VM.
You must verify that guest management is enabled on your VMs before you install VM extensions.
Note
Extensions for domain join are supported only for Windows VMs. You can enable and install these extensions only during VM creation, via the Azure portal. For more information, see Create Azure Arc virtual machines on Azure Local.
To verify that guest management is enabled:
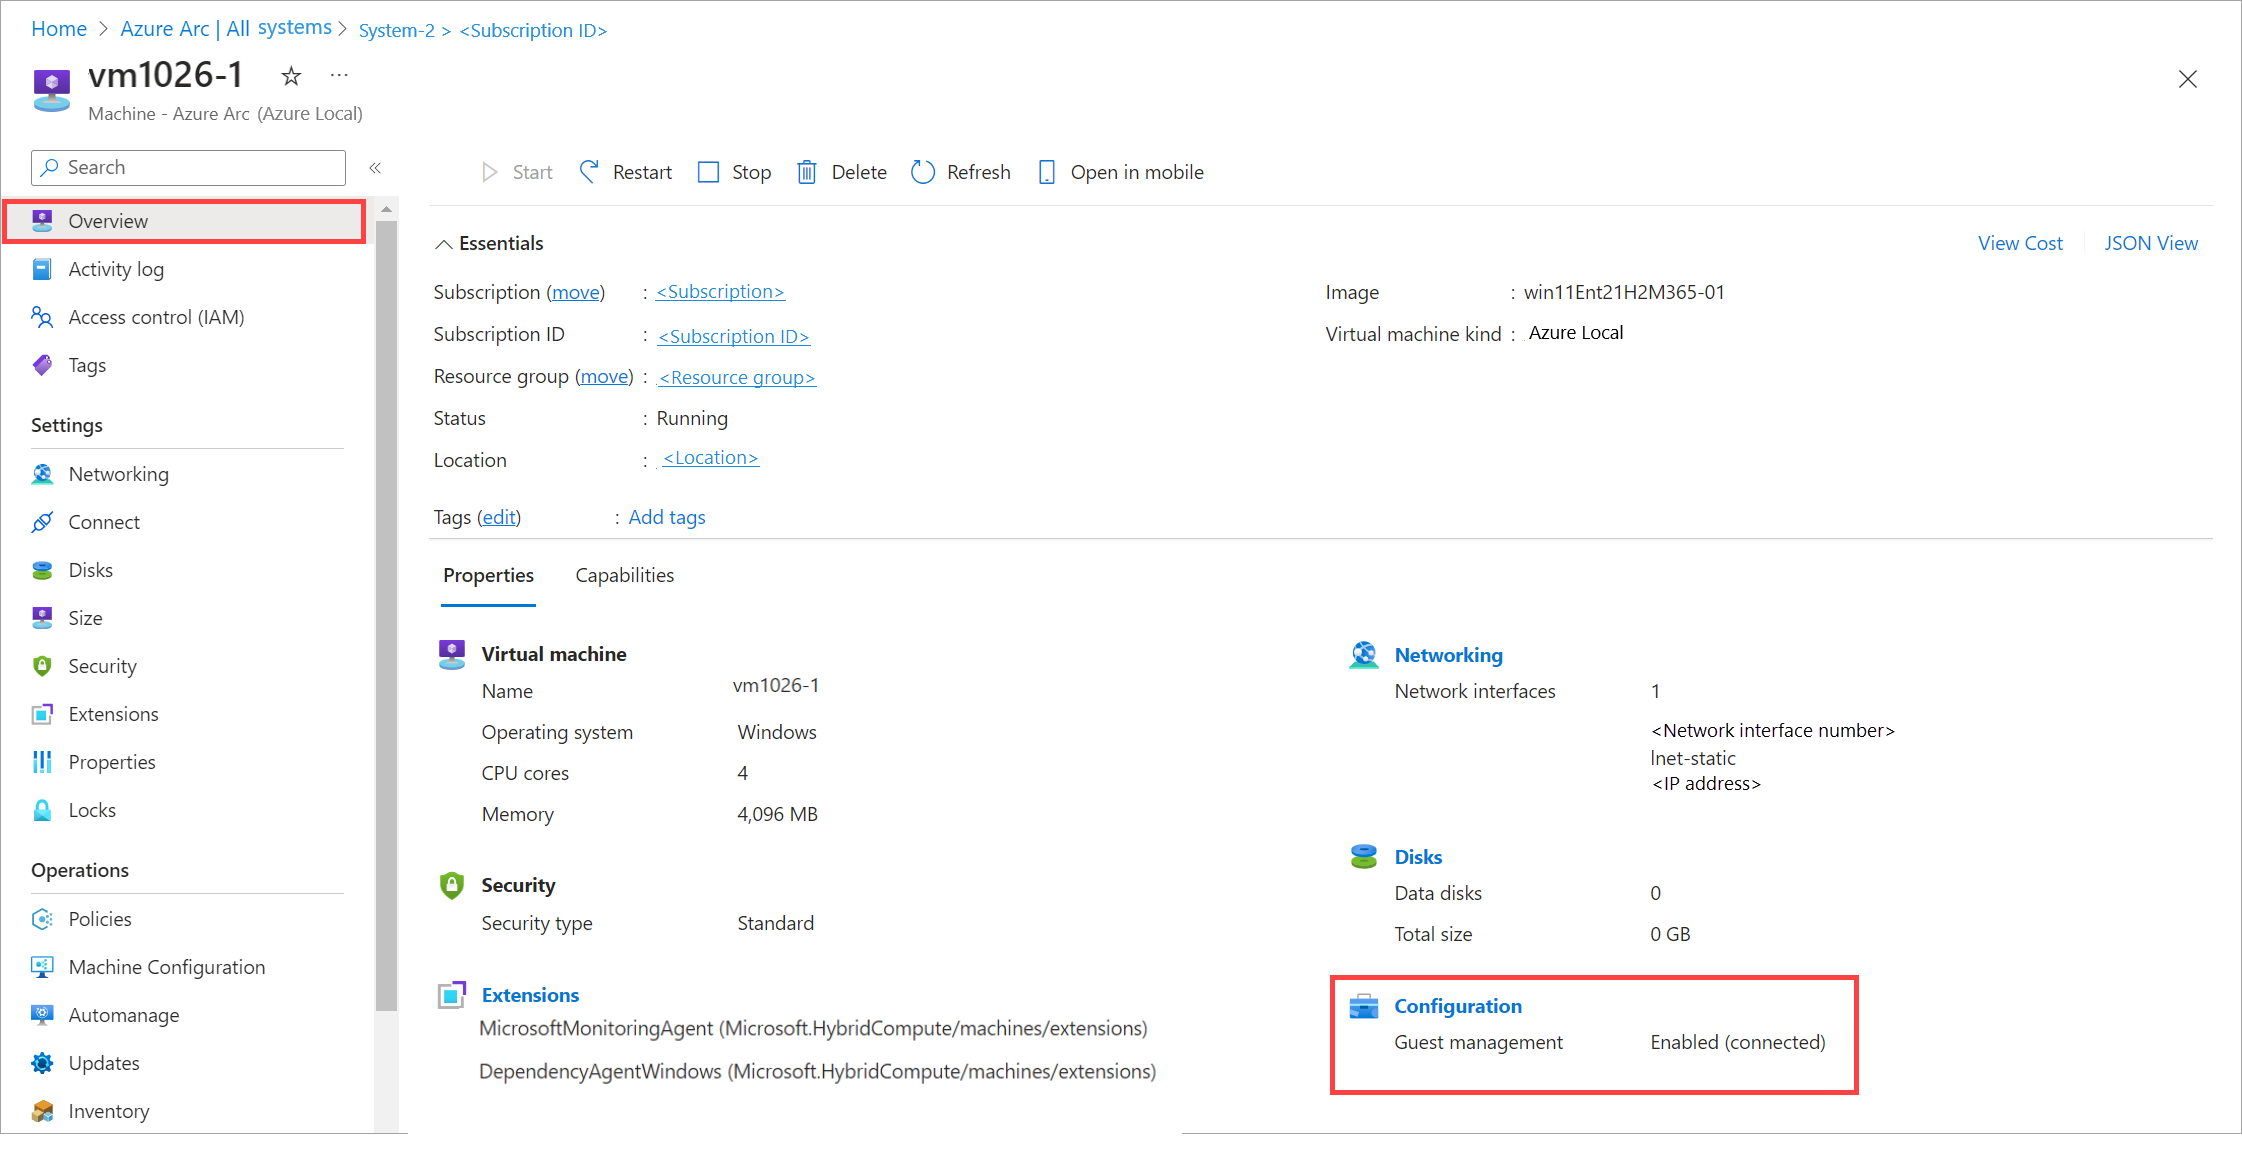
In the Azure portal for your Azure Local resource, go to Resources > Virtual machines.
In the list of VMs, select the VM where you want to install the extension.
On the Overview pane, under Properties > Configuration, verify that Guest management shows Enabled.

Add a VM extension
After you verify that guest management is enabled, follow these steps to add a VM extension:
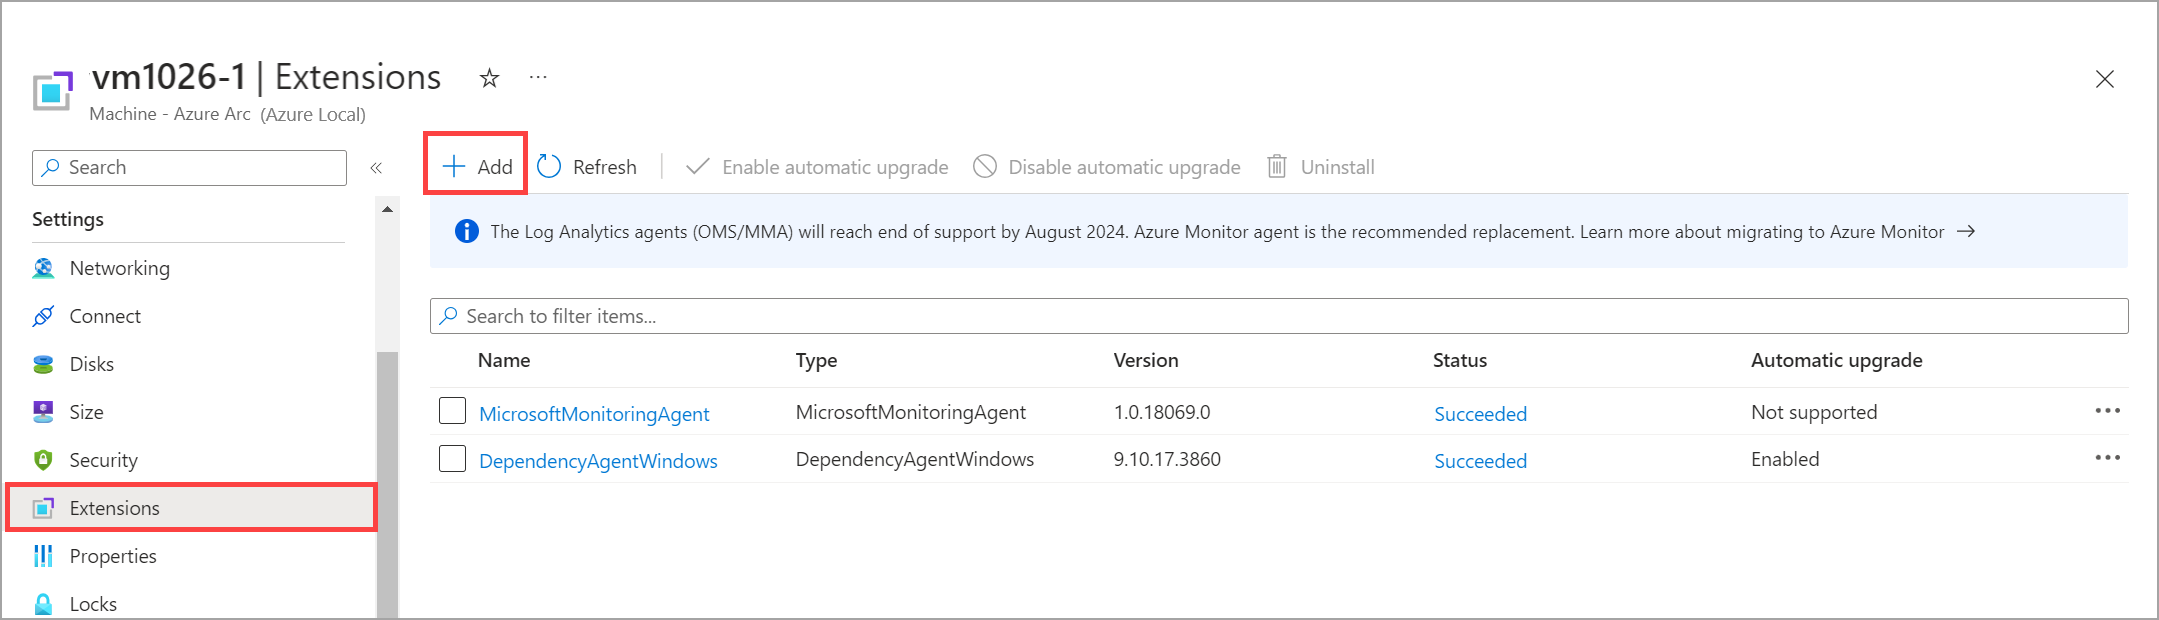
In the Azure portal for your Azure Local resource, go to Resources > Virtual machines.
Select your VM, and then go to Settings > Extensions.
On the command bar, select + Add.
On the Install extension pane, choose from the available extensions. In this example, we'll deploy Azure Monitor Agent for Windows (Recommended).
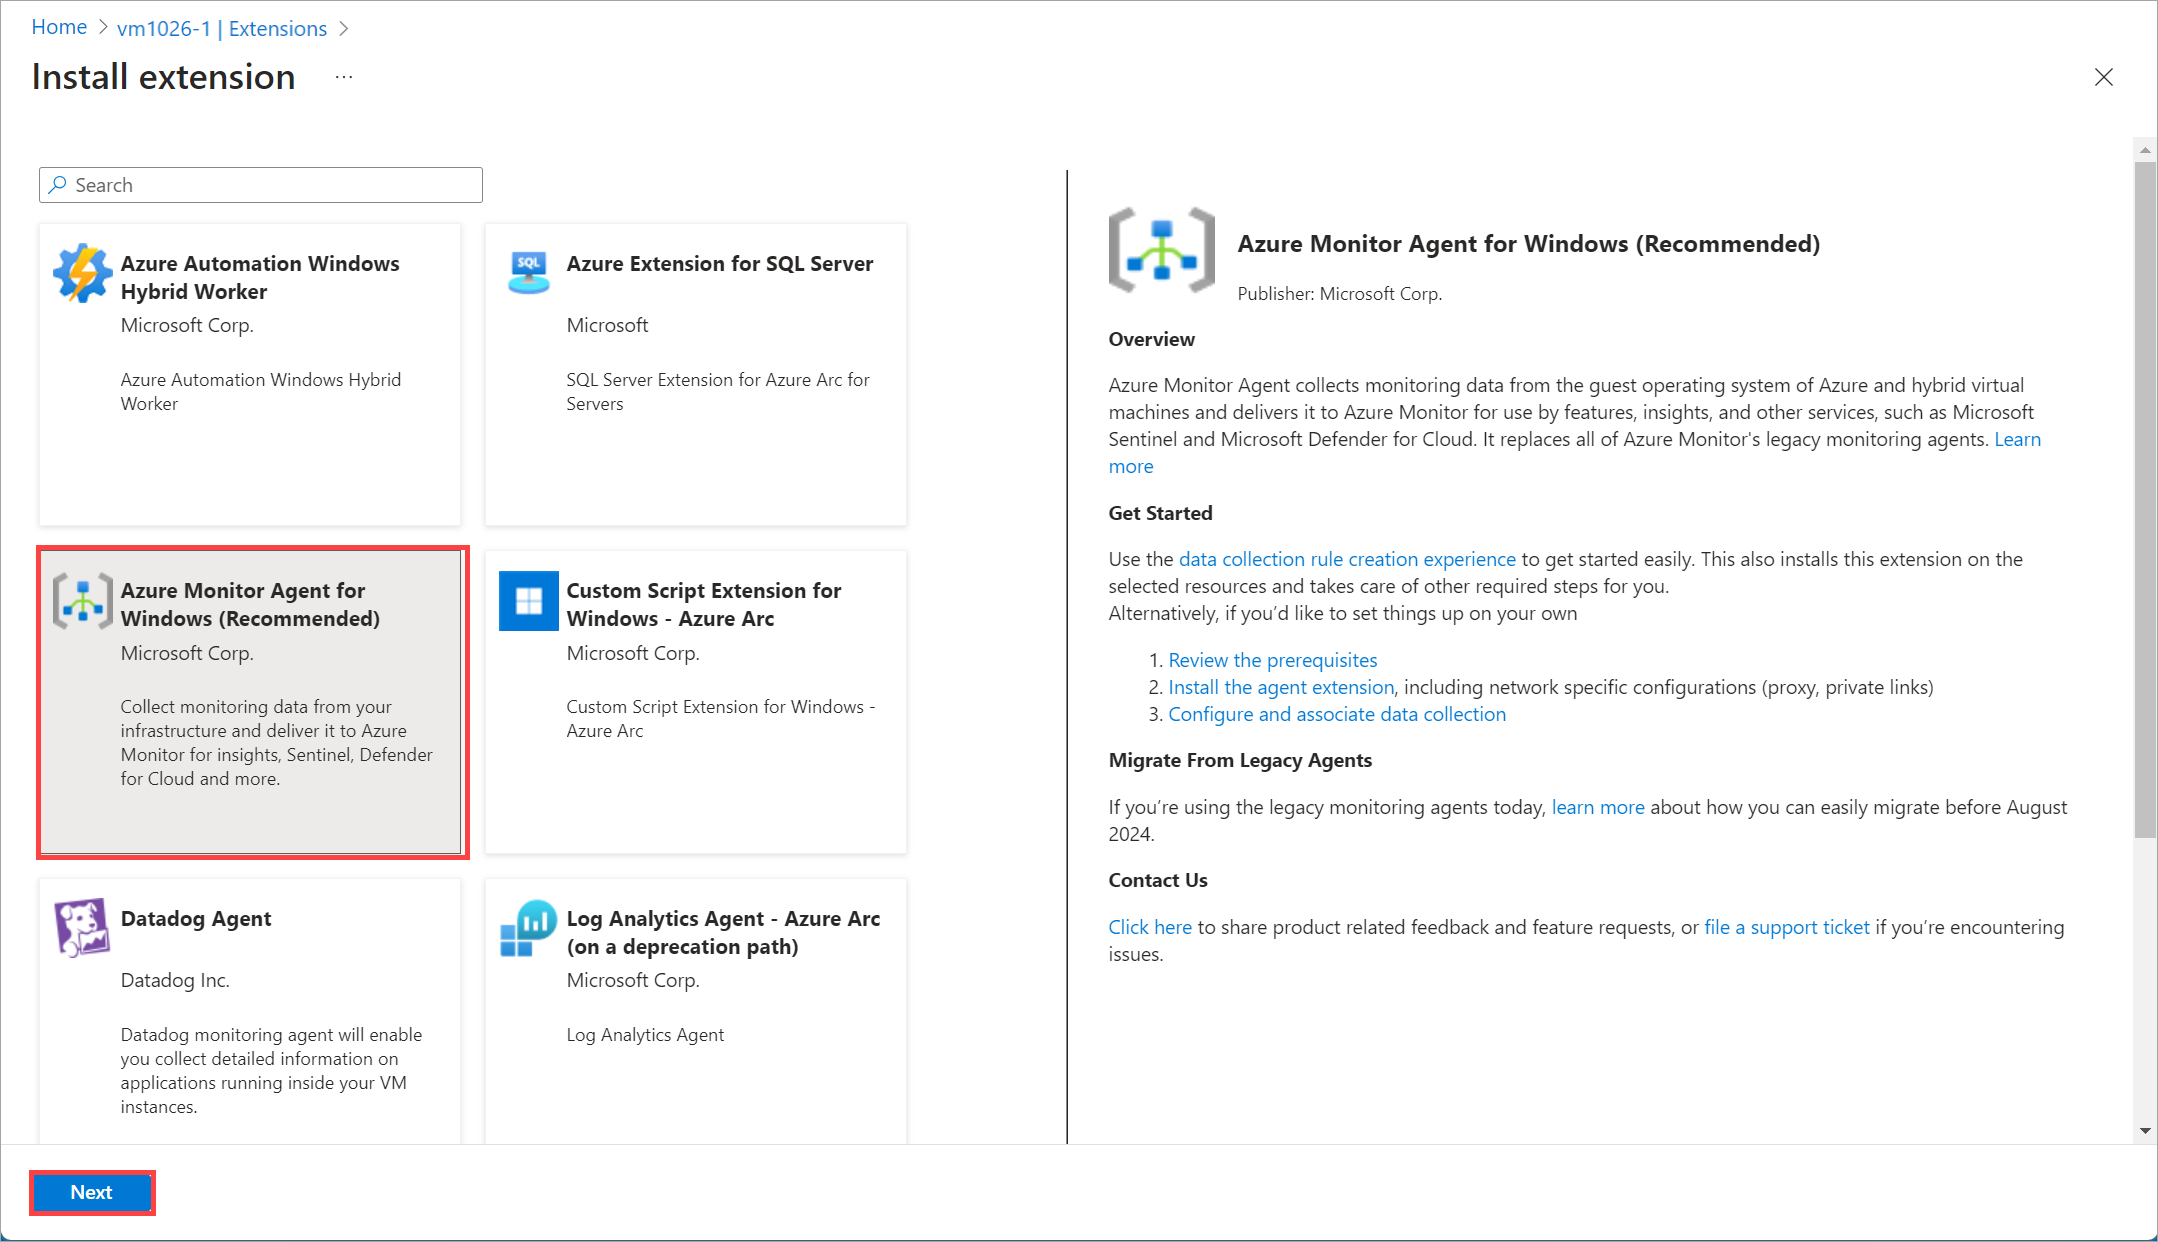
Provide the parameters to configure the selected VM extension.
In this example, you specify if you want to use a proxy for your VM. You also specify corresponding proxy settings, such as proxy server URL and port number.
Select Review + Create.


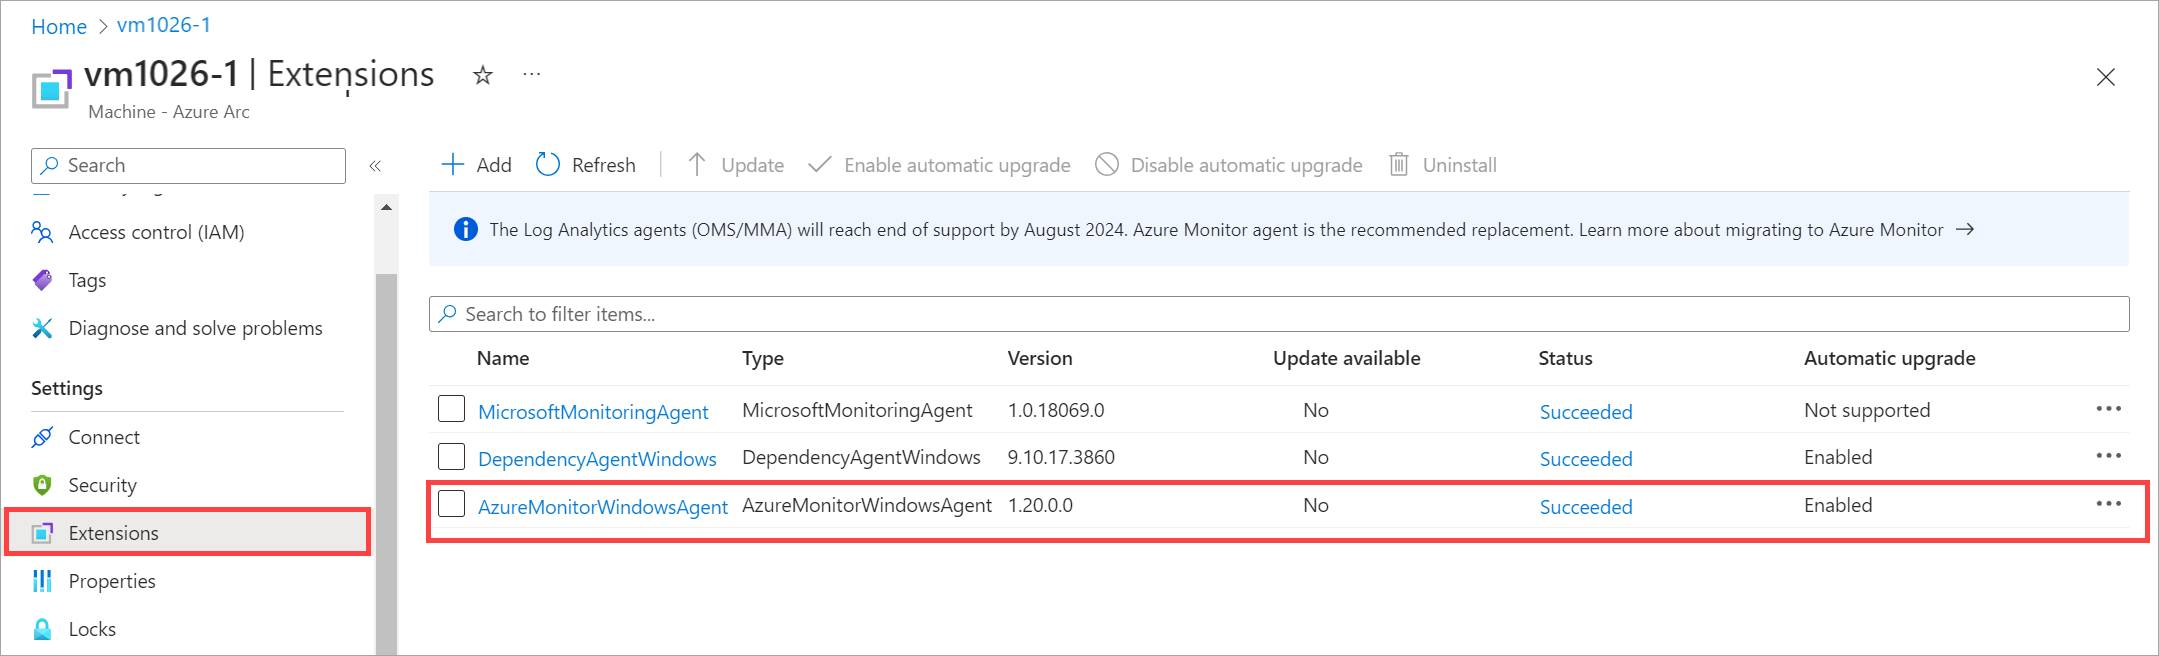
The extension might take a few minutes to install. After the extension is installed, the list refreshes to display the newly installed extension.
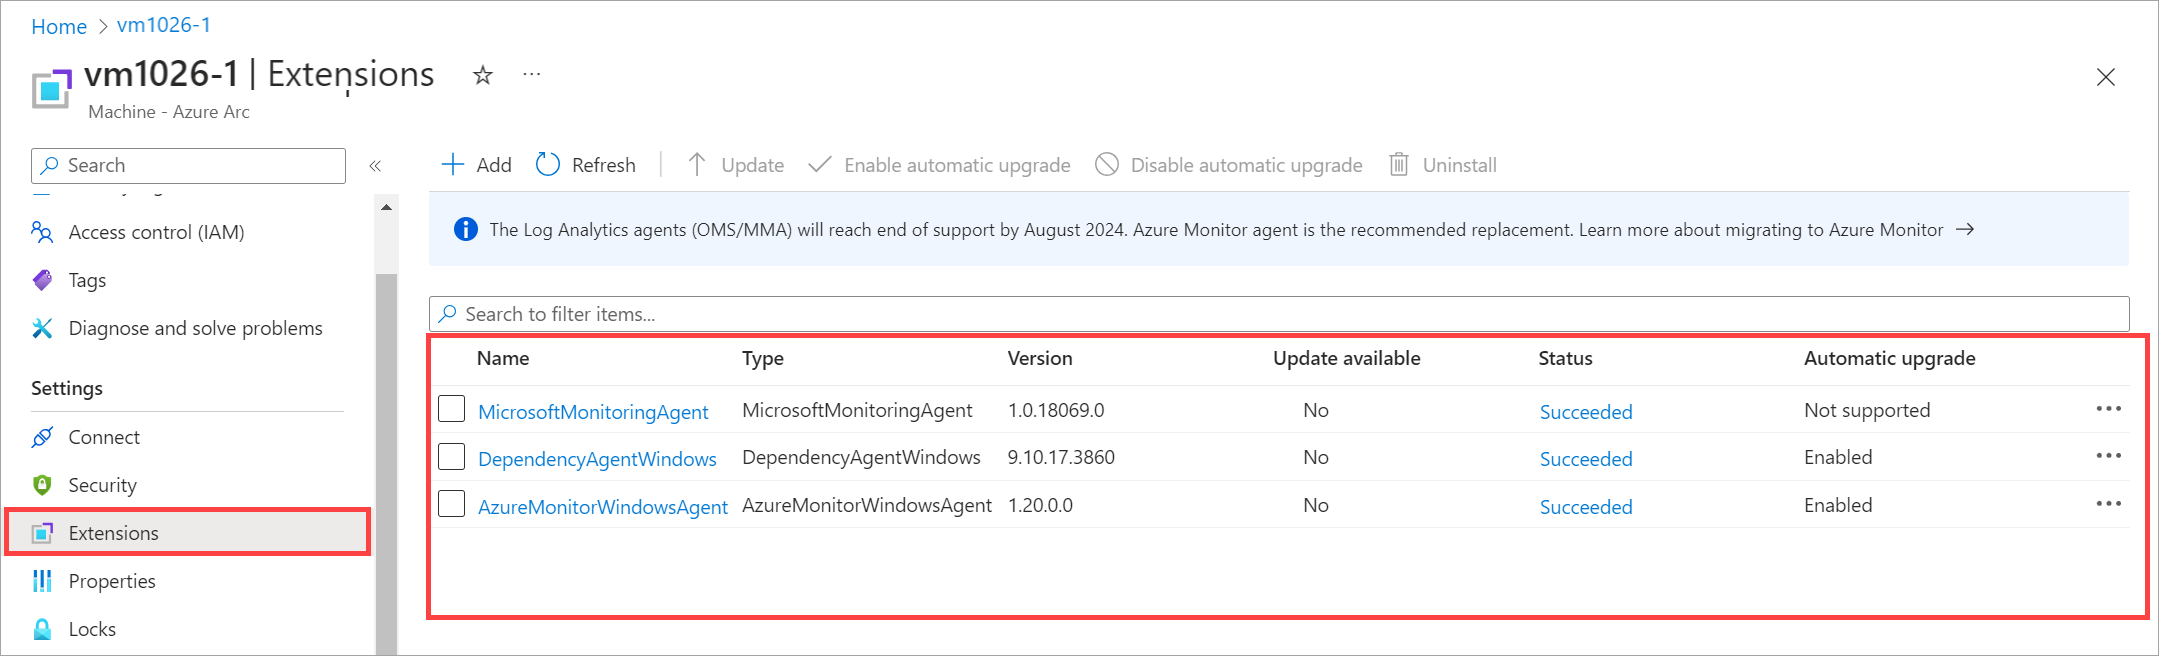
List installed extensions
To list all the VM extensions installed on your Azure Local instance:
In the Azure portal for your Azure Local resource, go to Resources > Virtual machines.
Select your VM, and then select Extensions.
The Extensions pane shows the list of extensions on your VM.

Delete a VM extension
You might want to delete a VM extension if the installation fails or if you no longer need the extension.
In the Azure portal for your Azure Local resource, go to Resources > Virtual machines.
Select your VM, and then select Extensions.
In the list of extensions on your VM, select the extension that you want to delete.
On the command bar, select Uninstall to delete the extension.
In this example, AzureMonitorWindowsAgent is selected for deletion.
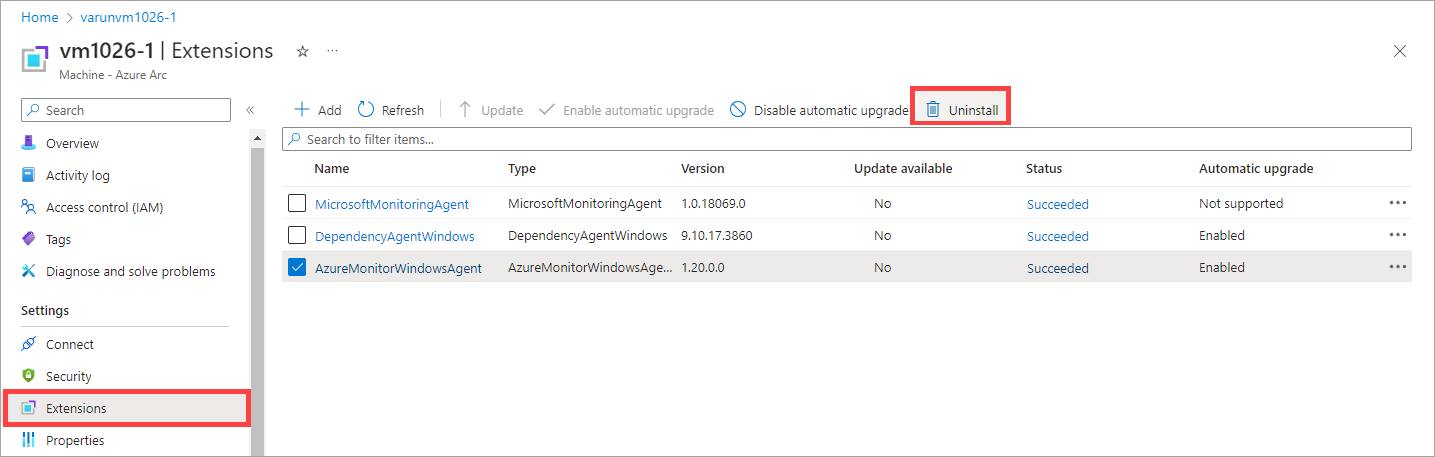

Removal of the extension from the list should take a couple of minutes.