Configure disk encryption for Azure Managed Redis (preview) instances using customer managed keys
Data in a Redis server is stored in memory by default. This data isn't encrypted. You can implement your own encryption on the data before writing it to the cache. In some cases, data can reside on-disk, either due to the operations of the operating system, or because of deliberate actions to persist data using export or data persistence.
Azure Managed Redis (preview) offers platform-managed keys (PMKs), also know as Microsoft-managed keys (MMKs), by default to encrypt data on-disk in all tiers. Azure Managed Redis additionally offers the ability to encrypt the OS and data persistence disks with a customer-managed key (CMK). Customer managed keys can be used to wrap the MMKs to control access to these keys. This makes the CMK a key encryption key or KEK. For more information, see key management in Azure.
Scope of availability for CMK disk encryption
| Tier | Memory Optimized, Balanced, Compute Optimized | Flash Optimized |
|---|---|---|
| Microsoft managed keys (MMK) | Yes | Yes |
| Customer managed keys (CMK) | Yes | Yes |
Encryption coverage
In Azure Managed Redis, disk encryption is used to encrypt the persistence disk, temporary files, and the OS disk:
- persistence disk: holds persisted RDB or AOF files as part of data persistence
- temporary files used in export: temporary data used exported is encrypted. When you export data, the encryption of the final exported data is controlled by settings in the storage account.
- the OS disk
MMK is used to encrypt these disks by default, but CMK can also be used.
In the Flash Optimized tier, keys and values are also partially stored on-disk using nonvolatile memory express (NVMe) flash storage. However, this disk isn't the same as the one used for persisted data. Instead, it's ephemeral, and data isn't persisted after the cache is stopped, deallocated, or rebooted. MMK is only supported on this disk because this data is transient and ephemeral.
| Data stored | Disk | Encryption Options |
|---|---|---|
| Persistence files | Persistence disk | MMK or CMK |
| RDB files waiting to be exported | OS disk and Persistence disk | MMK or CMK |
| Keys & values (Flash Optimized tier only) | Transient NVMe disk | MMK |
Prerequisites and limitations
General prerequisites and limitations
- Only user assigned managed identity is supported to connect to Azure Key Vault. System assigned managed identity is not supported.
- Changing between MMK and CMK on an existing cache instance triggers a long-running maintenance operation. We don't recommend this for production use because a service disruption occurs.
Azure Key Vault prerequisites and limitations
- The Azure Key Vault resource containing the customer managed key must be in the same region as the cache resource.
- Purge protection and soft-delete must be enabled in the Azure Key Vault instance. Purge protection isn't enabled by default.
- When you use firewall rules in the Azure Key Vault, the Key Vault instance must be configured to allow trusted services.
- Only RSA keys are supported
- The user assigned managed identity must be given the permissions Get, Unwrap Key, and Wrap Key in the Key Vault access policies, or the equivalent permissions within Azure Role Based Access Control. A recommended built-in role definition with the least privileges needed for this scenario is called KeyVault Crypto Service Encryption User.
How to configure CMK encryption in Azure Managed Redis
Use the portal to create a new cache with CMK enabled
Sign in to the Azure portal and start the Create an Azure Managed Redis instance quickstart guide.
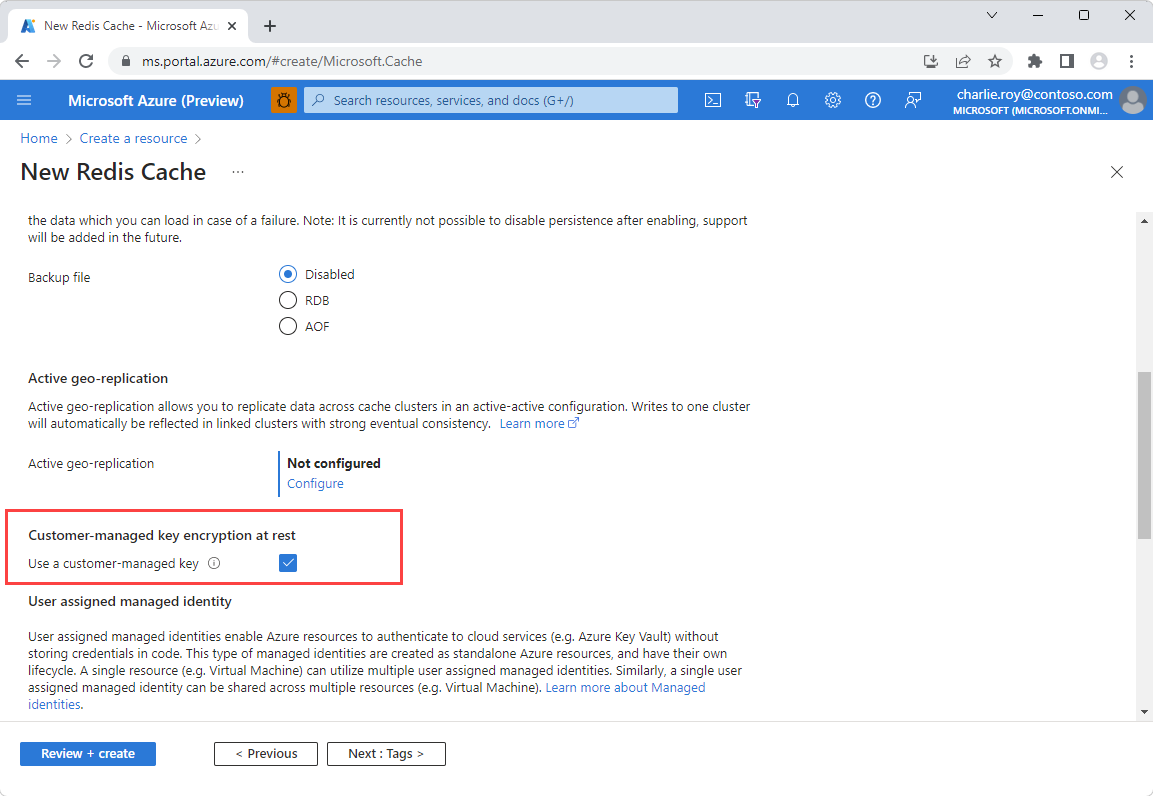
On the Advanced page, go to the section titled Customer-managed key encryption at rest and enable the Use a customer-managed key option.
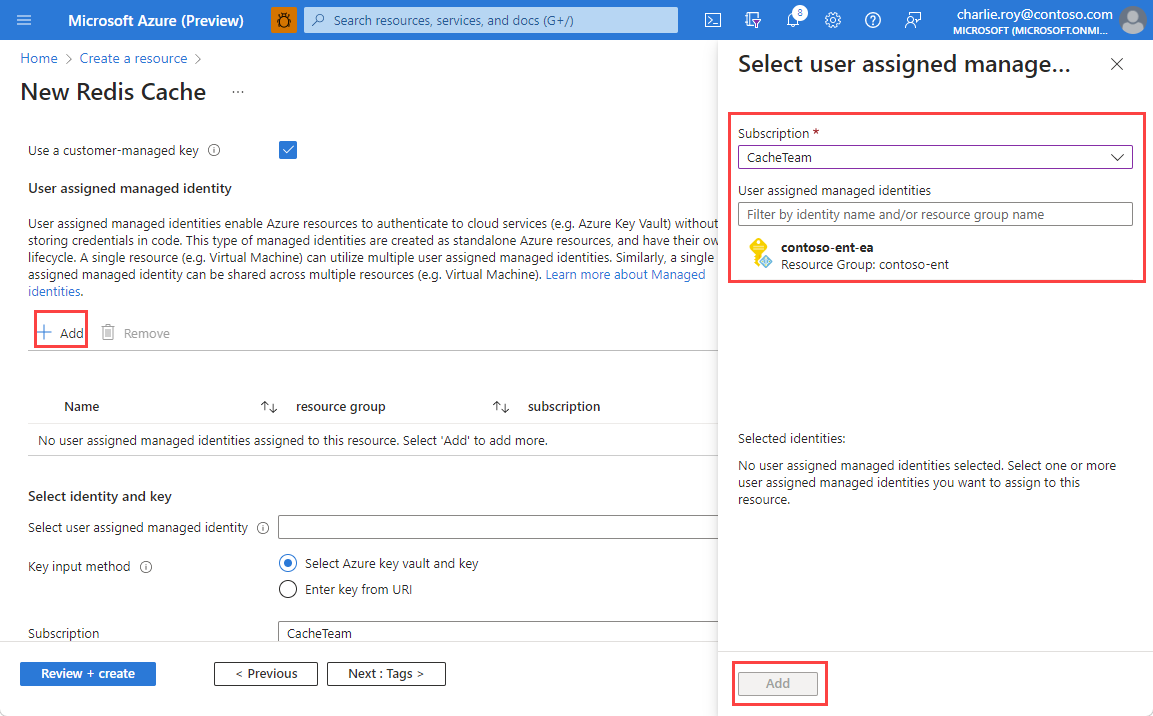
Select Add to assign a user assigned managed identity to the resource. This managed identity is used to connect to the Azure Key Vault instance that holds the customer managed key.
Select your chosen user assigned managed identity, and then choose the key input method to use.
If using the Select Azure key vault and key input method, choose the Key Vault instance that holds your customer managed key. This instance must be in the same region as your cache.
Note
For instructions on how to set up an Azure Key Vault instance, see the Azure Key Vault quickstart guide. You can also select the Create a key vault link beneath the Key Vault selection to create a new Key Vault instance. Remember that both purge protection and soft delete must be enabled in your Key Vault instance.
Choose the specific key and version using the Customer-managed key (RSA) and Version drop-downs.
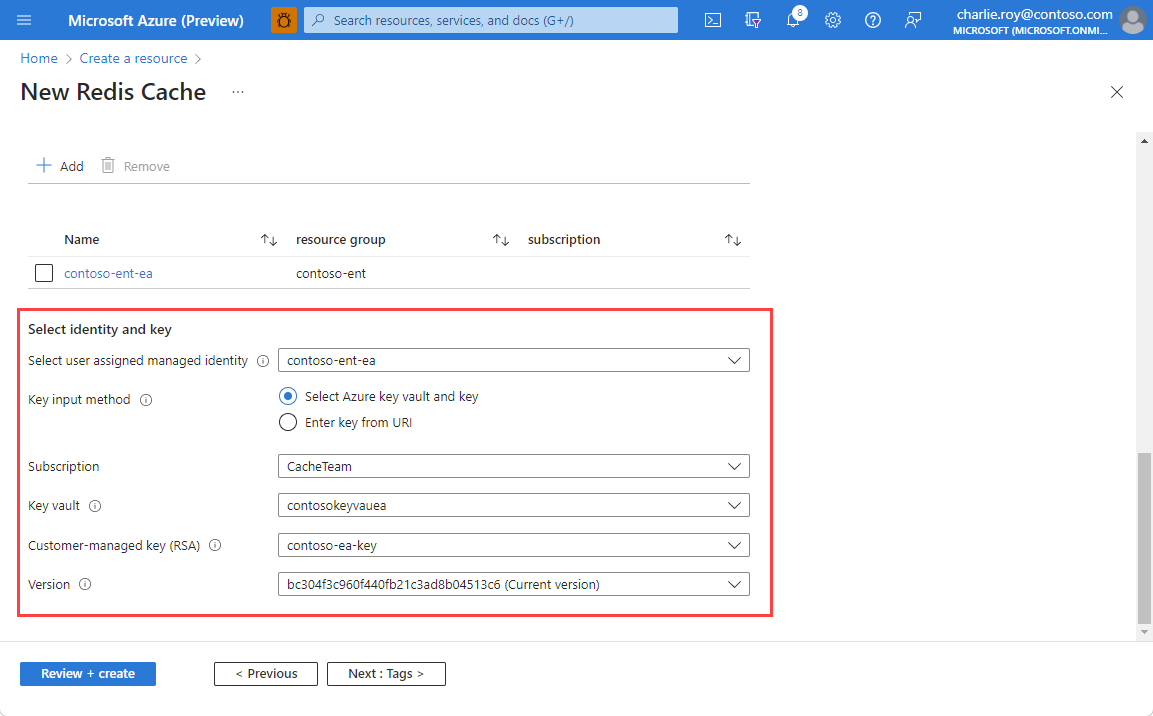
If using the URI input method, enter the Key Identifier URI for your chosen key from Azure Key Vault.
When you've entered all the information for your cache, select Review + create.
Add CMK encryption to an existing Azure Managed Redis instance
Go to the Encryption in the Resource menu of your cache instance. If CMK is already set up, you see the key information.
If you haven't set up or if you want to change CMK settings, select Change encryption settings
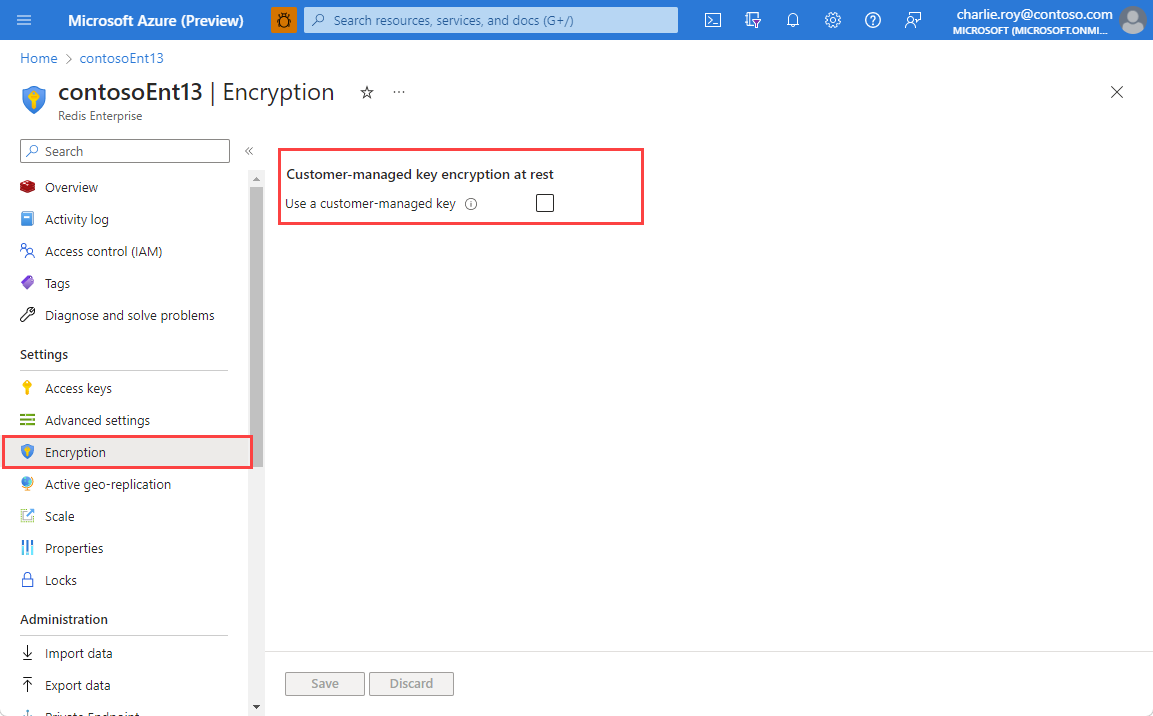
Select Use a customer-managed key to see your configuration options.
Select Add to assign a user assigned managed identity to the resource. This managed identity is used to connect to the Azure Key Vault instance that holds the customer managed key.
Select your chosen user assigned managed identity, and then choose which key input method to use.
If using the Select Azure key vault and key input method, choose the Key Vault instance that holds your customer managed key. This instance must be in the same region as your cache.
Note
For instructions on how to set up an Azure Key Vault instance, see the Azure Key Vault quickstart guide. You can also select the Create a key vault link beneath the Key Vault selection to create a new Key Vault instance.
Choose the specific key using the Customer-managed key (RSA) drop-down. If there are multiple versions of the key to choose from, use the Version drop-down.
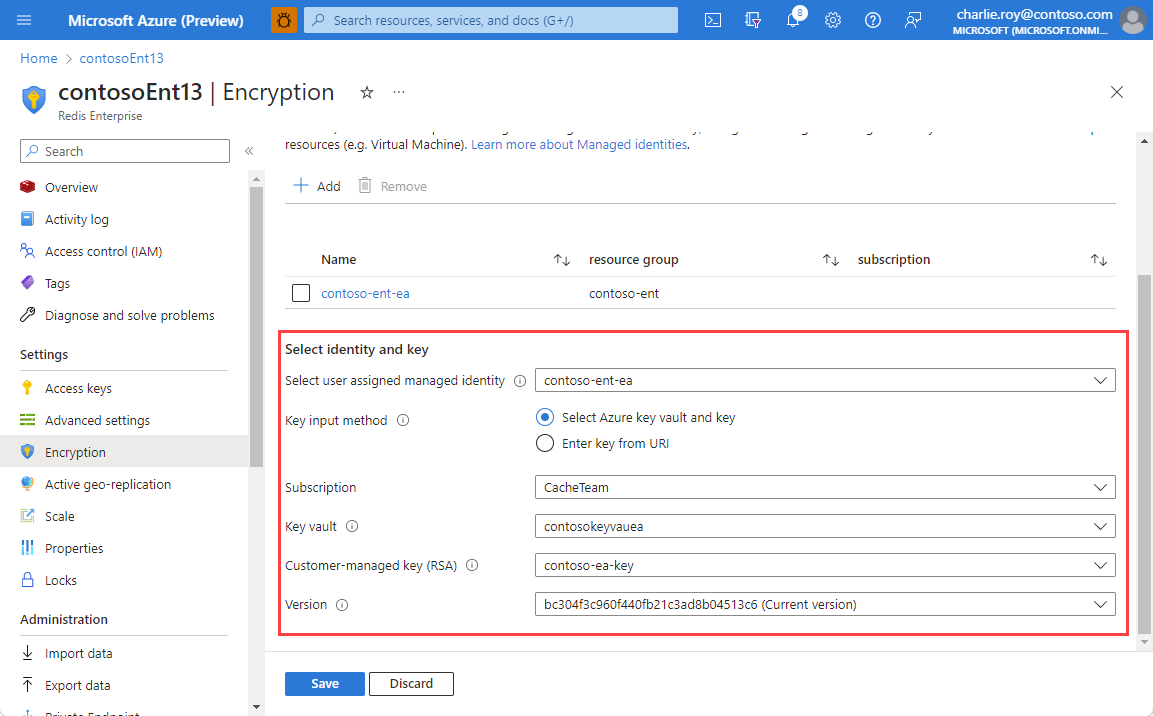
If using the URI input method, enter the Key Identifier URI for your chosen key from Azure Key Vault.
Select Save