Python tool for flows in Azure AI Foundry portal
Important
Items marked (preview) in this article are currently in public preview. This preview is provided without a service-level agreement, and we don't recommend it for production workloads. Certain features might not be supported or might have constrained capabilities. For more information, see Supplemental Terms of Use for Microsoft Azure Previews.
The prompt flow Python tool offers customized code snippets as self-contained executable nodes. You can quickly create Python tools, edit code, and verify results.
Build with the Python tool
Create or open a flow in Azure AI Foundry. For more information, see Create a flow.
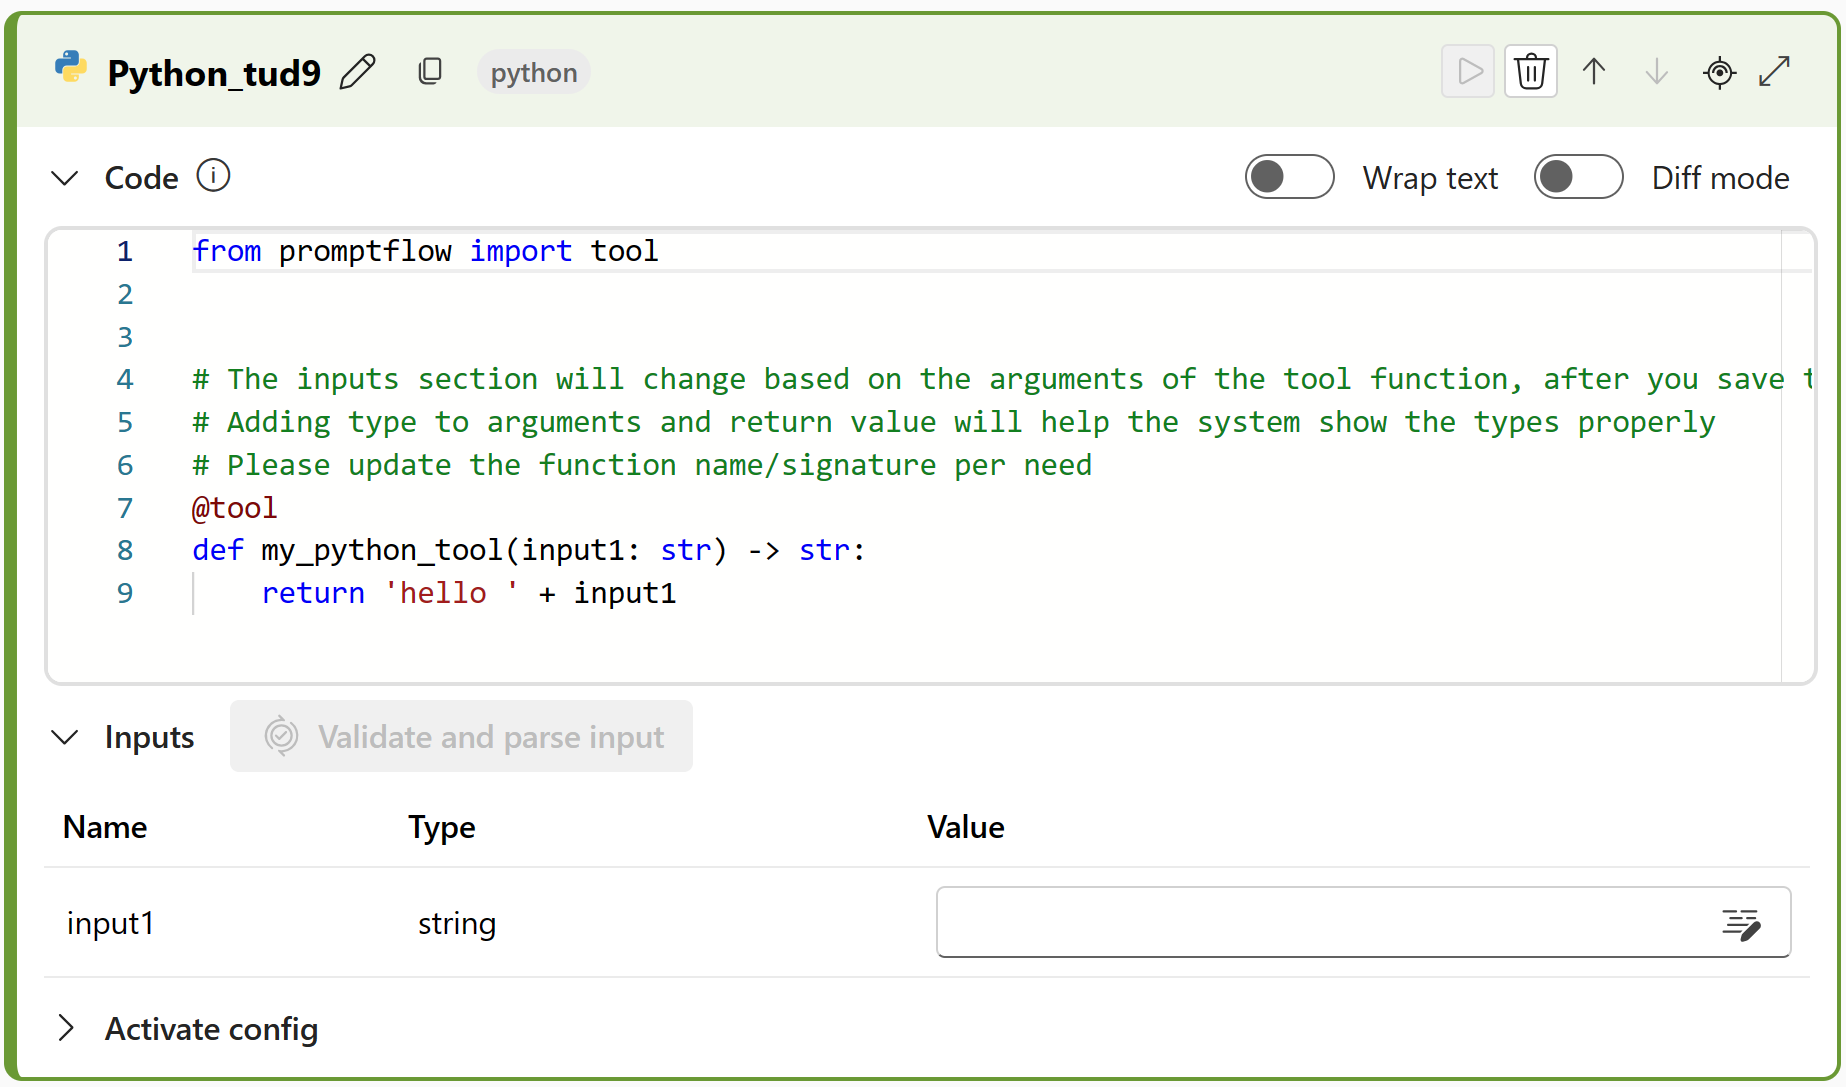
Select + Python to add the Python tool to your flow.
Enter values for the Python tool input parameters that are described in the Inputs table. For example, in the Code input text box, you can enter the following Python code:
from promptflow import tool

@tool
def my_python_tool(message: str) -> str:
    return 'hello ' + message
For more information, see Python code input requirements.
Add more tools to your flow, as needed. Or select Run to run the flow.
The outputs are described in the Outputs table. Based on the previous example Python code input, if the input message is "world," the output is
hello world.
Inputs
The list of inputs change based on the arguments of the tool function, after you save the code. Adding type to arguments and return values helps the tool show the types properly.
| Name | Type | Description | Required |
|---|---|---|---|
| Code | string | The Python code snippet. | Yes |
| Inputs | - | The list of the tool function parameters and its assignments. | - |
Outputs
The output is the return value of the Python tool function. For example, consider the following Python tool function:
from promptflow import tool

@tool
def my_python_tool(message: str) -> str:
    return 'hello ' + message
If the input message is "world," the output is hello world.
Types
| Type | Python example | Description |
|---|---|---|
| int | param: int | Integer type |
| bool | param: bool | Boolean type |
| string | param: str | String type |
| double | param: float | Double type |
| list | param: list or param: List[T] | List type |
| object | param: dict or param: Dict[K, V] | Object type |
| Connection | param: CustomConnection | Connection type is handled specially. |
Parameters with Connection type annotation are treated as connection inputs, which means:
- The prompt flow extension shows a selector to select the connection.
- During execution time, the prompt flow tries to find the connection with the same name from the parameter value that was passed in.
Note
The Union[...] type annotation is only supported for connection type. An example is param: Union[CustomConnection, OpenAIConnection].
Python code input requirements
This section describes requirements of the Python code input for the Python tool.
- Python tool code should consist of a complete Python code, including any necessary module imports.
- Python tool code must contain a function decorated with
@tool(tool function), serving as the entry point for execution. The@tooldecorator should be applied only once within the snippet. - Python tool function parameters must be assigned in the
Inputssection. - Python tool function shall have a return statement and value, which is the output of the tool.
The following Python code is an example of best practices:
from promptflow import tool

@tool
def my_python_tool(message: str) -> str:
    return 'hello ' + message
Consume a custom connection in the Python tool
If you're developing a Python tool that requires calling external services with authentication, you can use the custom connection in a prompt flow. It allows you to securely store the access key and then retrieve it in your Python code.
Create a custom connection
Create a custom connection that stores all your large language model API key or other required credentials.
Go to the Management center page for your project.
Under either the Hub or Project heading, select Connected resources.
Select + New Connection.
Select Custom service. You can define your connection name. You can add multiple key-value pairs to store your credentials and keys by selecting Add key-value pairs.
Note
Make sure at least one key-value pair is set as secret. Otherwise, the connection won't be created successfully. To set one key-value pair as secret, select is secret to encrypt and store your key value.
Consume a custom connection in Python
To consume a custom connection in your Python code:
- In the code section in your Python node, import the custom connection library
from promptflow.connections import CustomConnection. Define an input parameter of the typeCustomConnectionin the tool function. - Parse the input to the input section. Then select your target custom connection in the value dropdown list.
For example:
from promptflow import tool
from promptflow.connections import CustomConnection

@tool
def my_python_tool(message: str, myconn: CustomConnection) -> str:
    # Get authentication key-values from the custom connection
    connection_key1_value = myconn.key1
    connection_key2_value = myconn.key2
