How to use Azure AI Agent Service with OpenAPI Specified Tools
You can now connect your Azure AI Agent to an external API using an OpenAPI 3.0 specified tool, allowing for scalable interoperability with various applications. Enable your custom tools to authenticate access and connections with managed identities (Microsoft Entra ID) for added security, making it ideal for integrating with existing infrastructure or web services.
OpenAPI Specified tool improves your function calling experience by providing standardized,
automated, and scalable API integrations that enhance the capabilities and efficiency of your agent.
OpenAPI specifications provide a formal standard for
describing HTTP APIs. This allows people to understand how an API works, how a sequence of APIs
work together, generate client code, create tests, apply design standards, and more. Currently, we support 3 authentication types with the OpenAPI 3.0 specified tools: anonymous, API key, managed identity.
Prerequisites
Ensure you've completed the prerequisites and setup steps in the quickstart.
Check the OpenAPI spec for the following requirements:
operationIdshould only contain letters,-and_. You can modify it to meet the requirement. We recommend using descriptive name to help models efficiently decide which function to use.
Authenticating with API Key
Verify that the OpenAPI spec supports API keys: it has
securitySchemessection and has one scheme of type `apiKey". An example would be:"securitySchemes": { "apiKeyHeader": { "type": "apiKey", "name": "x-api-key", "in": "header" } }If the security schemes include multiple schemes, we recommend keeping only one of them.
Remove any parameter in the OpenAPI spec that needs API key, because API key will be stored and passed through a connection, as described later in this article.
Create a
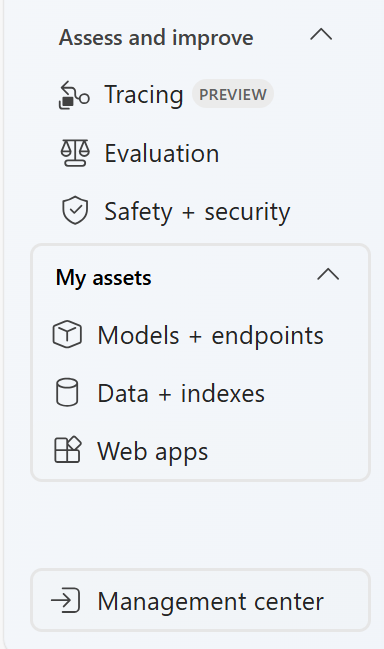
custom keysconnection to store your API key.Go to the Azure AI Foundry portal and select the AI Project. Click connected resources.

Select + new connection in the settings page.
Note
If you re-generate the API key at a later date, you need to update the connection with the new key.
Select custom keys in other resource types.
Enter the following information
- key:
nameof your security scheme. In this example, it should bex-api-key"securitySchemes": { "apiKeyHeader": { "type": "apiKey", "name": "x-api-key", "in": "header" } } - value: YOUR_API_KEY
- Connection name: YOUR_CONNECTION_NAME (You will use this connection name in the sample code below.)
- Access: you can choose either this project only or shared to all projects. Just make sure in the sample code below, the project you entered connection string for has access to this connection.
- key:
Step 1: Create an agent with OpenAPI Spec tool
Create a client object, which will contain the connection string for connecting to your AI project and other resources.
import os
import jsonref
from azure.ai.projects import AIProjectClient
from azure.identity import DefaultAzureCredential
from azure.ai.projects.models import OpenApiTool, OpenApiAnonymousAuthDetails


# Create an Azure AI Client from a connection string, copied from your Azure AI Foundry project.
# At the moment, it should be in the format "<HostName>;<AzureSubscriptionId>;<ResourceGroup>;<HubName>"
# Customer needs to login to Azure subscription via Azure CLI and set the environment variables

project_client = AIProjectClient.from_connection_string(
    credential=DefaultAzureCredential(),
    conn_str=os.environ["PROJECT_CONNECTION_STRING"],
)
Step 2: Enable the OpenAPI Spec tool
You might want to store the OpenAPI specification in another file and import the content to initialize the tool. Please note the sample code is using anonymous as authentication type.
with open('./weather_openapi.json', 'r') as f:
    openapi_spec = jsonref.loads(f.read())

# Create Auth object for the OpenApiTool (note that connection or managed identity auth setup requires additional setup in Azure)
auth = OpenApiAnonymousAuthDetails()

# Initialize agent OpenAPI tool using the read in OpenAPI spec
openapi = OpenApiTool(name="get_weather", spec=openapi_spec, description="Retrieve weather information for a location", auth=auth)
If you want to use connection, which stores API key, for authentication, replace the line with
auth = OpenApiConnectionAuthDetails(security_scheme=OpenApiConnectionSecurityScheme(connection_id="your_connection_id"))
Your connection ID looks like /subscriptions/{subscription ID}/resourceGroups/{resource group name}/providers/Microsoft.MachineLearningServices/workspaces/{project name}/connections/{connection name}.
If you want to use managed identity for authentication, replace the line with
auth = OpenApiManagedAuthDetails(security_scheme=OpenApiManagedSecurityScheme(audience="https://your_identity_scope.com"))
An example of the audience would be https://cognitiveservices.azure.com/.
Step 3: Create a thread
# Create agent with OpenAPI tool and process assistant run
with project_client:
    agent = project_client.agents.create_agent(
        model="gpt-4o-mini",
        name="my-assistant",
        instructions="You are a helpful assistant",
        tools=openapi.definitions
    )
    print(f"Created agent, ID: {agent.id}")

    # Create thread for communication
    thread = project_client.agents.create_thread()
    print(f"Created thread, ID: {thread.id}")
Step 4: Create a run and check the output
Create a run and observe that the model uses the OpenAPI Spec tool to provide a response to the user's question.
# Create message to thread
    message = project_client.agents.create_message(
        thread_id=thread.id,
        role="user",
        content="What's the weather in Seattle?",
    )
    print(f"Created message, ID: {message.id}")

    # Create and process agent run in thread with tools
    run = project_client.agents.create_and_process_run(thread_id=thread.id, assistant_id=agent.id)
    print(f"Run finished with status: {run.status}")

    if run.status == "failed":
        print(f"Run failed: {run.last_error}")

    # Delete the assistant when done
    project_client.agents.delete_agent(agent.id)
    print("Deleted agent")

    # Fetch and log all messages
    messages = project_client.agents.list_messages(thread_id=thread.id)
    print(f"Messages: {messages}")

