Installing Linux in Hyper-V
This is one of two “side posts” that have come out of putting together What does Team Foundation Server 2013 offer the non-Windows user? In order to take a look at the new Web Test capabilities in TFS 2013 I wanted to try them out in a non-Windows environment, so I decided to create a Linux desktop virtual machine. I wanted to record a few points that I found made the installation and use of the virtual machine that much easier. I’ve also posted an equivalent note on installing Team Explorer Everywhere in Eclipse.
Preparing the virtual machine
Installing Linux in Hyper-V is essentially straightforward:
- Get hold of your Linux distro. In my case Fedora 19.
- In Hyper-V Manager create a new Virtual Machine:
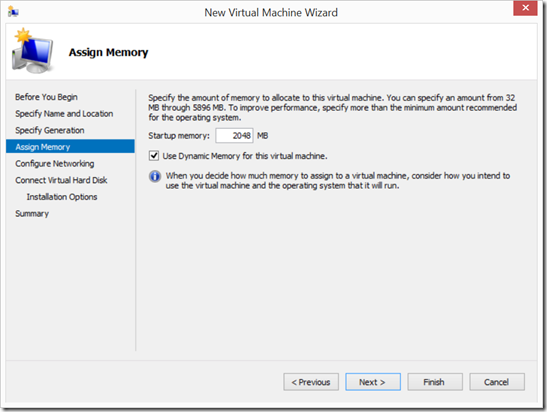
- I assign 2048 MB for RAM, as that’s plenty for general use, but I make it dynamic in case it’s needed:
- Leave Configure Networking as Not Connected and we’ll sort that in the section below:
- I set my hard disk size to be 20GB as that should be plenty for a standard install with Eclipse:
- Then just add the Linux distro iso file as a bootable DVD:
That’s it, the virtual machine is ready to be used. But before starting the machine for the first time see the section below.
Important networking step before starting the installation
Networking. It’s much easier to get the Linux installation to do the configuration, and I think the easiest way to do that is to setup a legacy network adapter in the virtual machine. If you’re using a Linux distro that’s supported in Hyper-V you can use the Linux Integration Services, but here I’m using an “unsupported” distro, as this is more likely for desktop installs.
- With the virtual machine selected in Hyper-V Manager, select the virtual machine settings
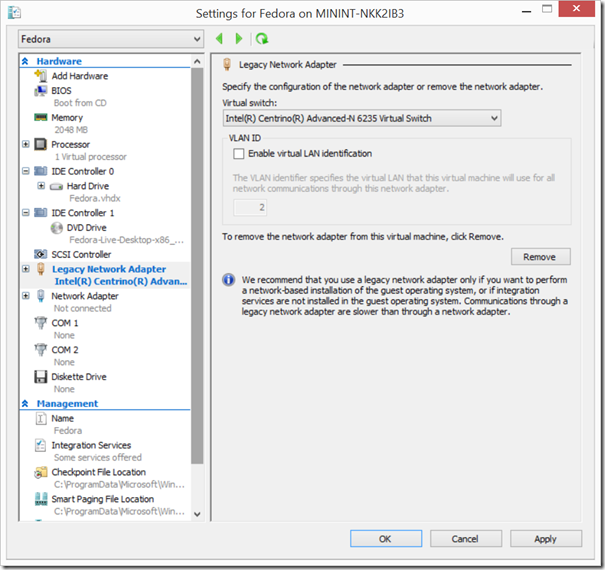
- Then select Add Hardware and choose Legacy Network Adapter:
- Click Add and select a virtual switch that gives the connectivity you want. In my case using my network card for external access. If this isn’t available, you need to set it up in Hyper-V Manager as a virtual switch.
- Click Apply
- Next, remove the “non legacy” Network Adapter:
- Click OK
- Now, you can start the virtual machine and follow the installation steps for the distro. Once you’ve installed it, ejected the bootable DVD and restarted you should be in and with a working network connection:
- In my case the network settings were setup for me on my network:
That’s it. You should now have a clean Linux install with networking configured, enabled and working.
Cheers,
Giles
Windows Live Tags: Linux,Hyper-V,Team Foundation Server,installation,Eclipse,Fedora,configuration,setup,legacy,adapter,settings,Hardware,Network
Comments
Anonymous
April 29, 2014
Thanks !!! It saved my time with n/w configuration for non windows os in Hyper-V.Anonymous
February 21, 2015
it gets stuck in hyper v! i have virtualisation enables 4gig ram and i5


