Construct 2 Windows 8 Object – Open Windows Store
There’s so much to do with the Windows 8 object, where did we leave off last time? Oh yeah…we added the ability for our Live Tile Text to reflect each time the user got a new high score. Where do we go from there? How about giving the user a button to open the Windows Store and either rate the app, view its app listing page, or to open your publisher page. Each of these options are pretty valuable.
One of the most important things to a mobile apps developer is positive reviews…and lots of them! However, typically users are not eager to go out of their way to review an app. In fact, they are more likely to go out of their way to leave negative reviews, so we want to make it as easy as possible for users to leave positive feedback. Additionally, you have the option to bring up the publisher page, which will display a list of the publisher’s app. The more apps you have, the more cross promotion there is and the more likely someone is to find out about your other apps. Both of these scenarios, including taking the user to the app listing page, becomes incredibly easy with the Windows 8 Object, so lets get started!
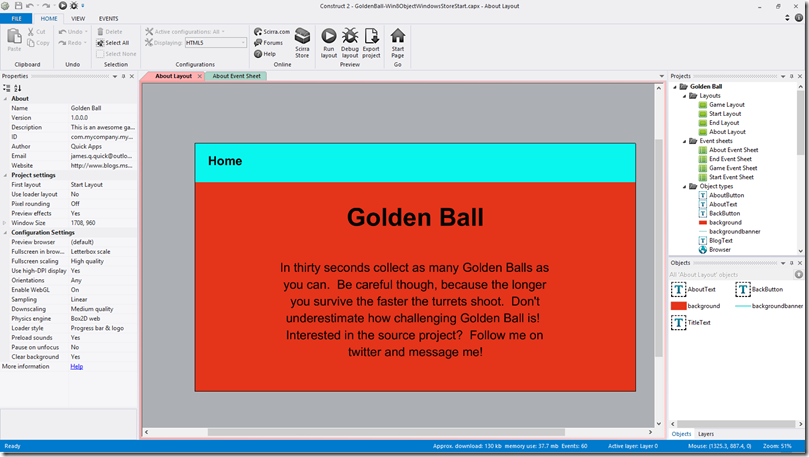
First let’s pick up where we left off in the previous tutorial, Construct 2 Windows 8 Object - Live Tile Text. If you worked through that tutorial you can open up that same project, or you can find the starting project, here. Go ahead and open it up, and open up the About layout and About Event Sheet.
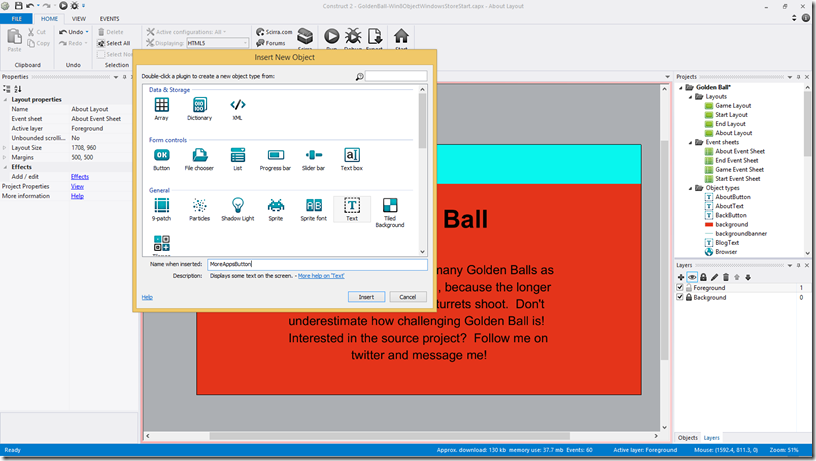
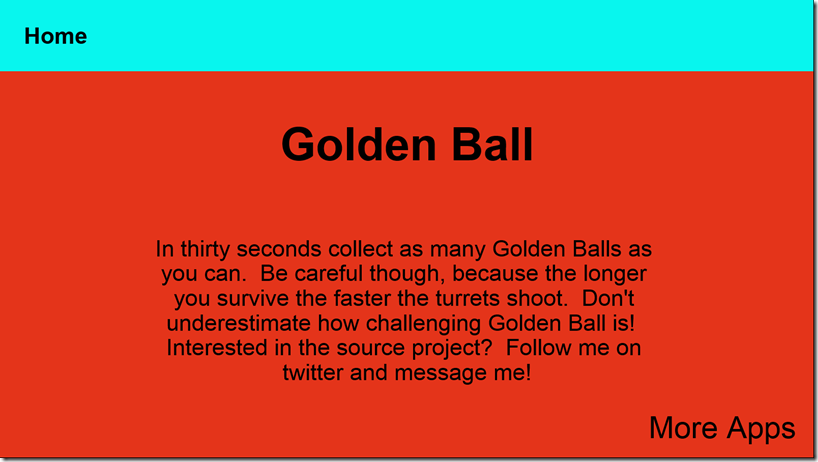
On the About layout, we just want to add a simple text that says, “More Apps”. We are going to be focused specifically on opening up the Windows Store to your Developer Page because we are unable to test the other two scenarios until the app is actually published. So, go ahead and create a Text object called MoreAppsButton.
Resize and display somewhere on the About Layout. Mine is located in the bottom right.
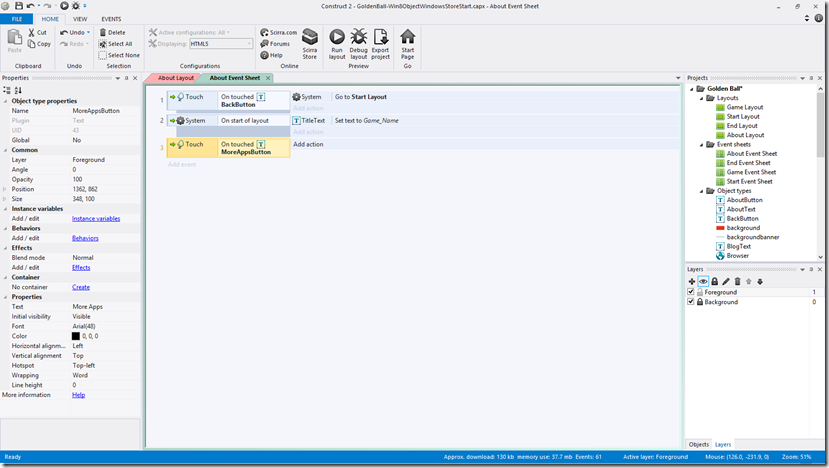
Now, open up the About Event Sheet where we want to add a touch event for our MoreAppsButton. So, click Add Event-Touch-On TouchedObject->MoreAppsButton. Your event should look like the one below.
Let’s now add our action. We want to choose Add Action->Windows 8.
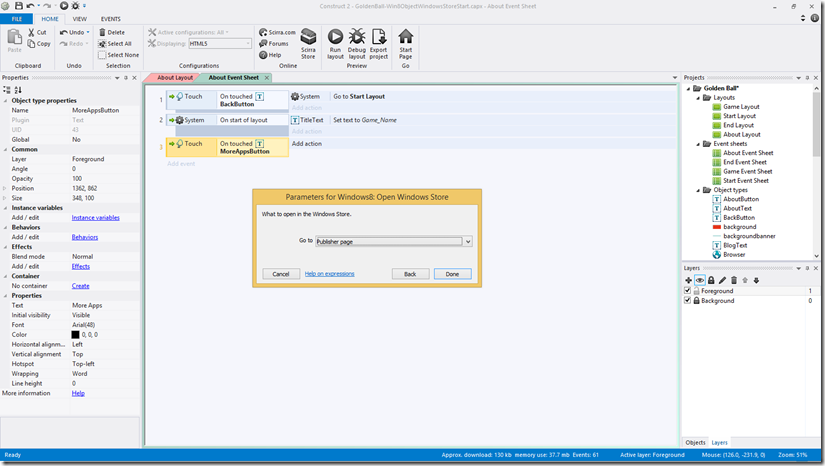
Choose “Open Windows Store”.
Choose “Publisher Page”. Again, the other two options “App Listing Page” and “Review App” are only testable once the app has been published but you can easily select one or the other with the dropdown menu.
After you have added your action, the event sheet should look like this.
Now we need to export our project to Windows and test to see if our button is working correctly. Take a look here for my post on Exporting a Construct 2 Project to Windows. You can export your project as either Windows 8, Windows 8.1 or Windows Universal App. I personally will be exporting as a Universal App. After you export, open up your Visual Studio solution file (.sln).
After opening up your solution, you will need to create a test certificate to run your game. If you do not know how to create a test certificate for your game, you can follow my post here, Creating a Test Certificate For Windows Apps. After you have created your test certificate, your package.appxmanifest file should be error free with all of the packaging details filled out as shown below! Pay special attention to the property, “Publisher Display Name”. This is the publisher name that will be used when our MoreAppsButton is clicked. In other words, when that button is pushed, the store will be opened up the Publisher Page for the publisher name stated in the appmanifest.
After you have the packaging and the publisher name correct, go ahead and run the app for Windows 8.
From the Home page, click on About.
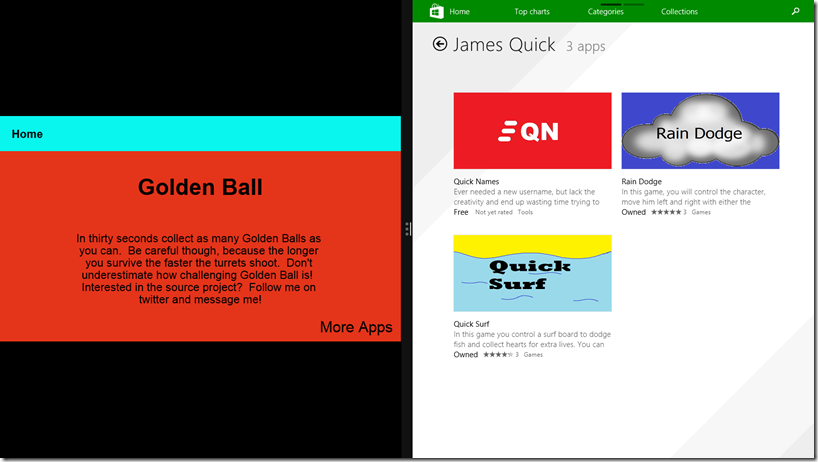
Then, click on More Apps and notice that the store is brought up in split screen. Below you can see my publisher page, and on your screen, you should see yours. Woohoo!
Don’t forget that when you are ready to publish your app, you can use the above steps to create a Rate My App button by simply switching to “Review App” in the dropdown menu of the Open Windows Store action. Again, super easy to allow users to rate your game or find your other apps and games in the store!
Find the finished solution here.
Please comment below of find me on twitter @jamesqquick with any questions, comments, or concerns!
