How to decrypt an SSL or TLS session by using Wireshark
[Updated on 26th October 2013]
The following blog post is the newer version of this blog post:
Hi there,
In this blog post, I would like to talk about decrypting SSL/TLS sessions by using Wireshark provided that you have access to the server certificate’s private key. In some cases it may be quite useful to see what is exchanged under the hood of an SSL/TLS session from troubleshooting purposes. You’ll find complete steps to do this on Windows systems. Even though there’re a couple of documentations around (you can find the references at the end of the blog post), all steps from one document doesn’t fully apply and you get stuck at some point. I tested the following steps a couple of times on a Windows 2008 server and it seems to be working fine.
Here are the details of the process:
First of all we’ll need the following tools for that process: (At least I tested with these versions)
https://www.wireshark.org/download.html
Wireshark -> Version 1.2.8
https://www.slproweb.com/products/Win32OpenSSL.html
(Win32 OpenSSL v1.0.0.a Light)
openssl -> 1.0.0a
1) We first need to export the certificate that is used by the server side in SSL/TLS session with the following steps:
Note: The Certificate export wizard could be started by right clicking the related certificate from certificates mmc and selecting “All Tasks > Export” option.


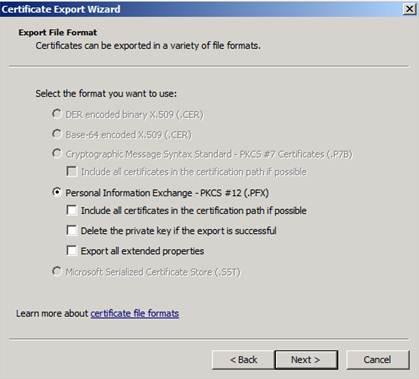
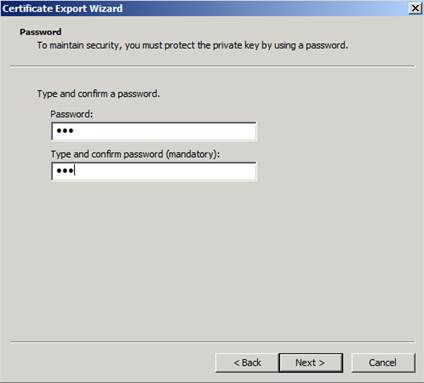
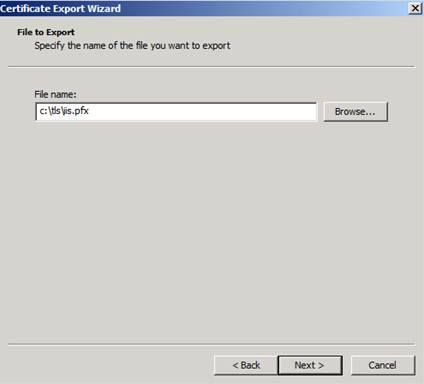
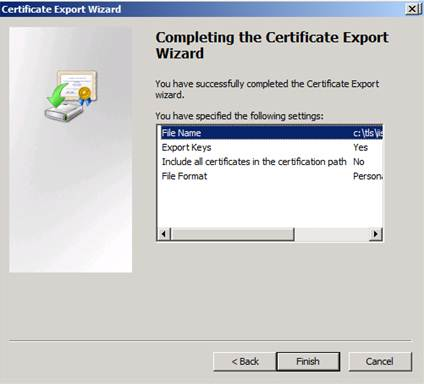
2) In the second stage, we’ll need to convert the private key file in PKCS12 format to PEM format (which is used by Wireshark) in two stages by using the openssl tool:
c:\OpenSSL-Win32\bin> openssl pkcs12 -nodes -in iis.pfx -out key.pem -nocerts -nodes
Enter Import Password: <<Password used when exporting the certificate in PKCS12 format>>
c:\OpenSSL-Win32\bin> openssl rsa -in key.pem -out keyout.pem
writing RSA key
=> After the last command, the outfile “keyout.pem” should be seen in the following format:
-----BEGIN RSA PRIVATE KEY-----
jffewjlkfjelkjfewlkjfew.....
...
akfhakdfhsakfskahfksjhgkjsah
-----END RSA PRIVATE KEY-----
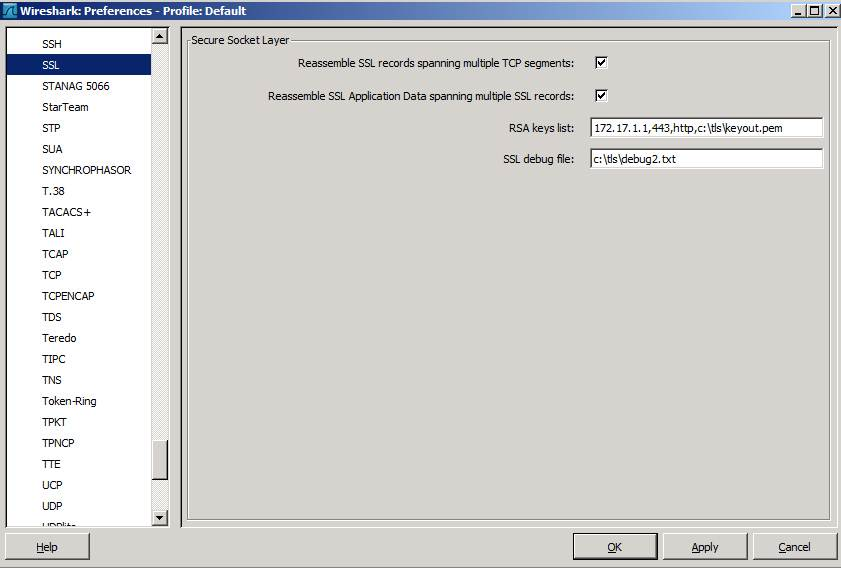
3) Now we can use the private key file in Wireshark as given below:
Note: The following dialog box could be seen by first selecting Edit > Preferences and then selecting “Protocols” from the left pane and selecting SSL at the left pane again:
Notes:
- 172.17.1.1 is server IP address. This is the server using the certificate that we extracted the private key from.
- 443 is the TCP port at the server side.
- http is the protocol carried inside the SSL/TLS session
- c:\tls\keyout.pem is the name of the file which includes the converted private key
- c:\tls\debug2.txt is the name of the file which includes information about the decryption process
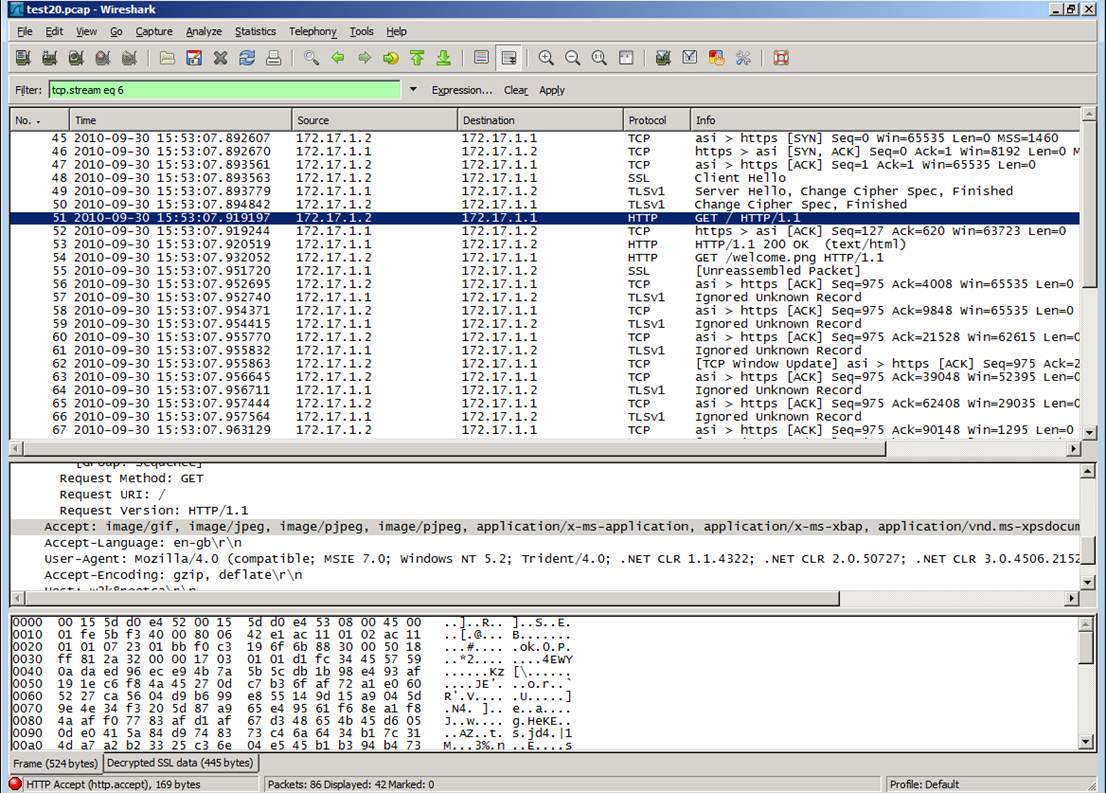
4) Once all is ready, you can click “Apply” to start the decryption process. Wireshark will show you the packets in the given session in an unencrypted fashion. Here is the difference between the encrypted and unencrypted versions:
a) How it is seen before Wireshark decrypts SSL/TLS session:

b) How it is seen after Wireshark decrypts SSL/TLS session:
5) Since the private key of a certificate could be considered as a password, we couldn’t ask for that from our customers given that you're troubleshooting a problem on behalf of your customers not for your environment . The following alternatives could be used in that case:
Note: It looks like a capture file decrypted by using the private key couldn’t be saved as a different capture file in unencrypted format.
- After decrypting the traffic, we could examine it in a live meeting session where the customer shares his desktop
- The decrypted packets could be printed to a file from File > Print option (by choosing the “Output to file” option)
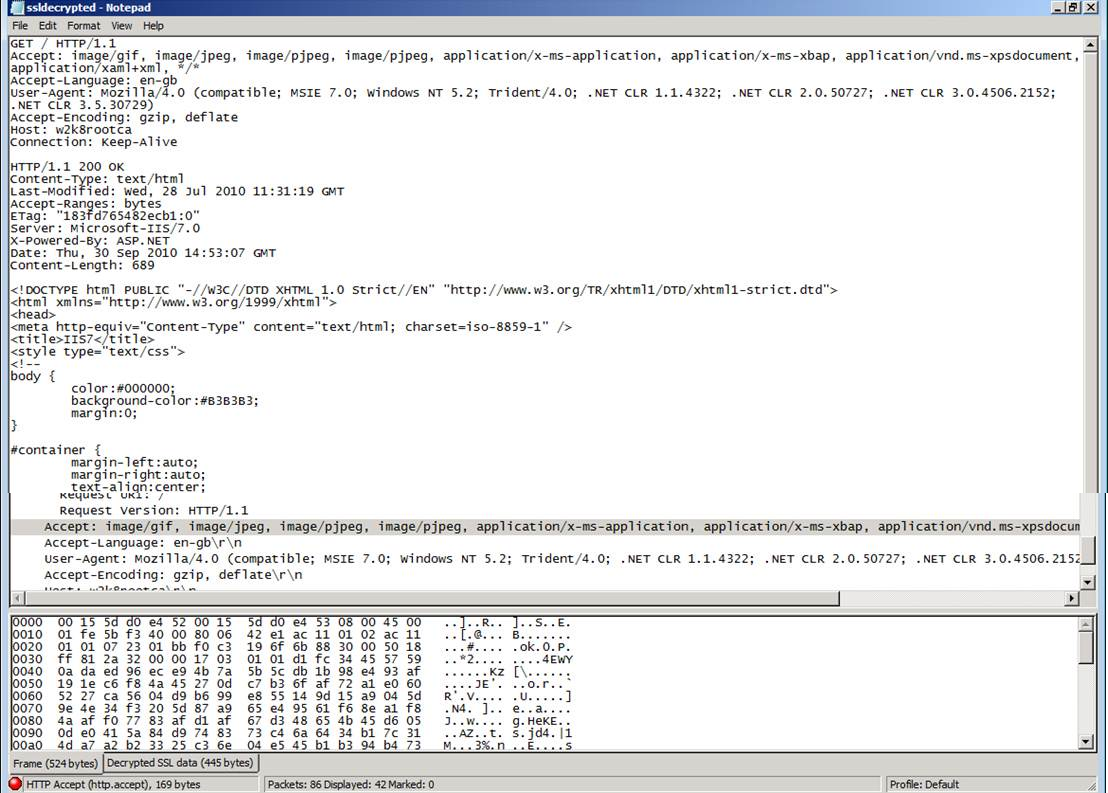
- By right clicking one of the decrypted packets and selecting “Follow SSL Stream”, we can save the session content to a text file. The following is an example of such a file created that way:
6) More information could be found at the following links:
Citrix
https://support.citrix.com/article/CTX116557
Wireshark
https://wiki.wireshark.org/SSL
Hope this helps
Thanks,
Murat
Comments
- Anonymous
November 04, 2013
The comment has been removed - Anonymous
January 29, 2014
Thanks for the article - Anonymous
April 22, 2014
- c:tlsdebug2.txt is the name of the file which includes information about the decryption process
Do you have any information on how to get that ....? - Anonymous
August 07, 2014
Ben, the file listed as "c:tlsdebug2.txt" is written to (it is wireshark's log file), not read from. indicating where it should be written to is all that is needed - Anonymous
August 19, 2014
who's ip address is to write in RSA keylist ??? - Anonymous
August 30, 2014
PLEASE PRIVATE KEY FOR FACEBOOK - Anonymous
October 14, 2014
Hamed you are a fool - Anonymous
May 18, 2015
Can we decrypt SRTP in wireshark using this process?? - Anonymous
August 04, 2015
Thanks for this. - Anonymous
February 13, 2016
This was very helpful, thank you