Visual Studio Management Pack Authoring Series - Part 3 - Create a class based on Windows Local Application along with a registry discovery
For detailed training, please see the Brian Wren MVA series. There are a number of relevant chapters for this including:
- Creating a Management Pack solution
- An introduction to classes
- Building Classes and Relationships
- Registry Discoveries
So first, lets create our Management Pack Solution
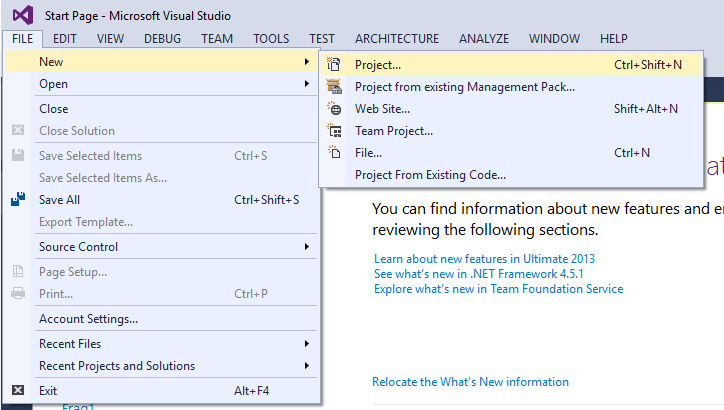
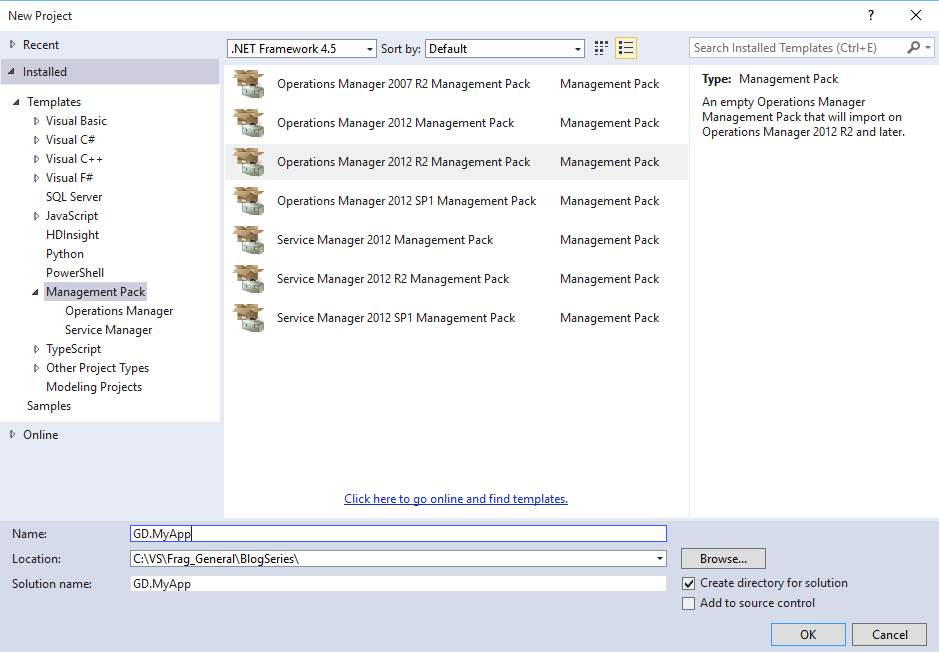
1. Fire up Visual Studio and Choose File, New, Project
For the example I'm going to use the following. Feel free to use something different and perhaps map your changes here.
Name: GD.MyApp
Solution Name: GD.MyApp
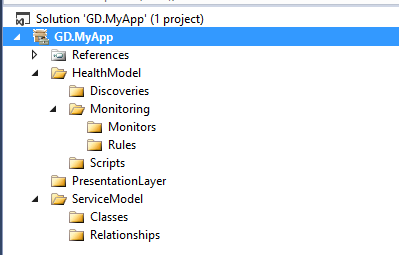
There are many different ways of organising your work in Visual Studio. Some people like to create a folder structure like the following for organising the fragments:
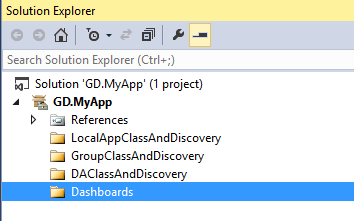
However, I prefer this (note - there is no "right" answer here). I find it easier to segregate work in this manner as all the code for a specific component is in one place rather than spread potentially across separate folders for classes, relationships, discoveries and views.
Now lets look at the fragment that creates our class and registry based discovery.
I'm going to assume that we are looking to monitor an application that runs on one or more servers and that we'll identify whether that application is running by checking for a registry key.
Additionally, I want the health of the application to roll up to the windows computer that hosts the application. So I'll use a base class of Microsoft.Windows.LocalApplication - we could also choose Microsoft.Windows.ComputerRole as both will automatically roll up health. This
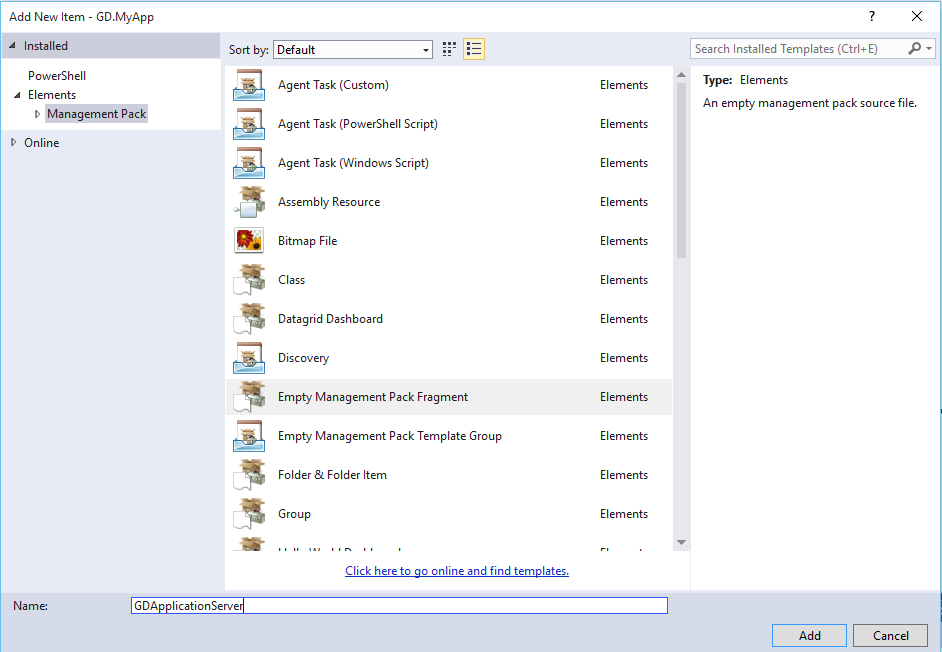
Right Click LocalAppClassAndDiscovery and choose Add, New Item
Add Empty Management Pack Fragment and choose a name of GDApplicationServer (again, feel free to use different names!).
Copy and Paste this code between the <ManagementPackFragment></ManagementPackFragment> tags
You'll need to do a find \ replace for 2 items. The first changes the class namespace for the application class and discovery. The second changes the Display Name.
1. Class Namespace and Discovery
Find What: GD.Application
Replace With: GD.MyApp
2. Display Name
Find What: GD Application Server
Replace With: GD My App Server
Also, look for the following and change the path to the registry key that needs to be discovered (Remember, this is always under HKEY_LOCAL_Machine)
<Path>SOFTWARE\SCOMDiscoveryData\RegistryKeyName</Path>
Finally, lets configure the Management Pack properties
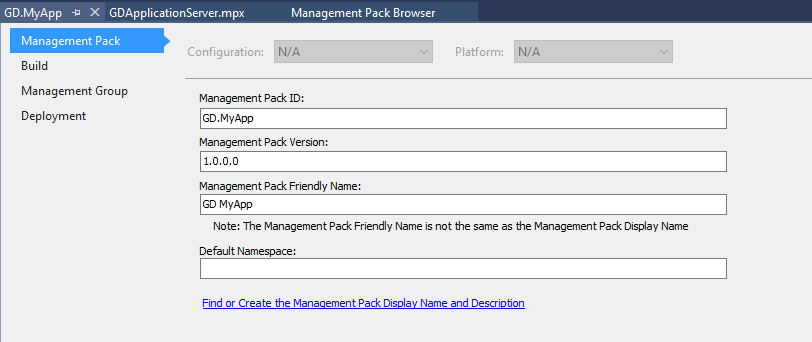
Go to Project, GD.MyApp properties (the name will be different if you have used a different Management Pack Name). Enter a more Friendly Name for the Management Pack and clear the default namespace.
Then click on the blue line (hyper link) at the bottom of this window and Change the Name and Description Tags to show the Application Name
<Name>GD My App Management Pack</Name>
<Description></Description>
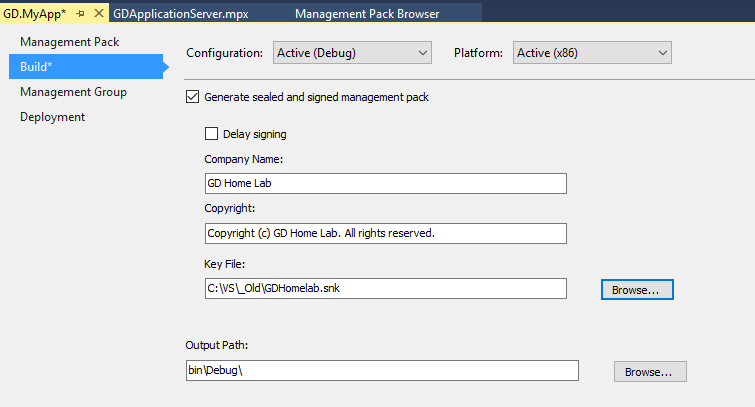
Build Tab
Make the check box “Generate sealed and signed management pack” is selected.
Complete the Company Name and Copyright text boxes.
Browse through to the key file.
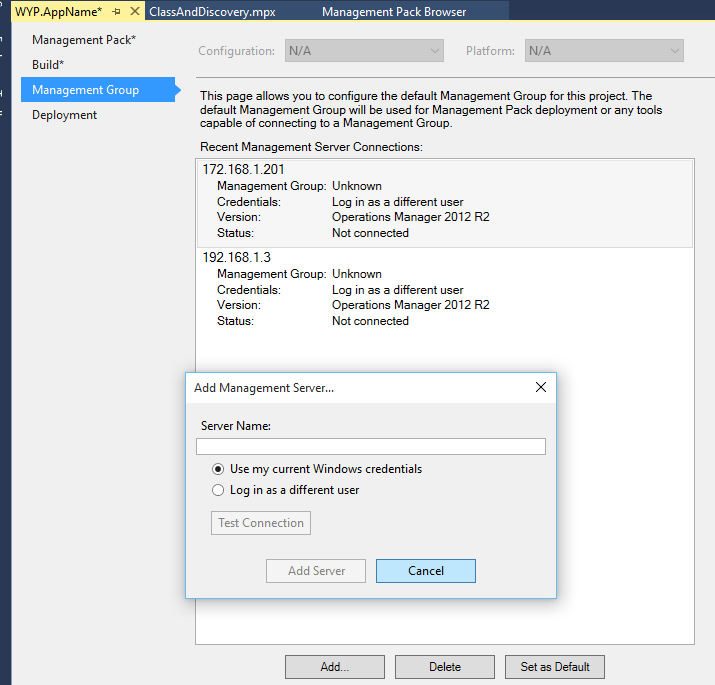
Management Group Tab
Set the Default Management Group. You can add in new Management Groups as required. This allows you to push to Dev and then when you are happy push the same Management Pack to Production without any Dev specific groups or views.
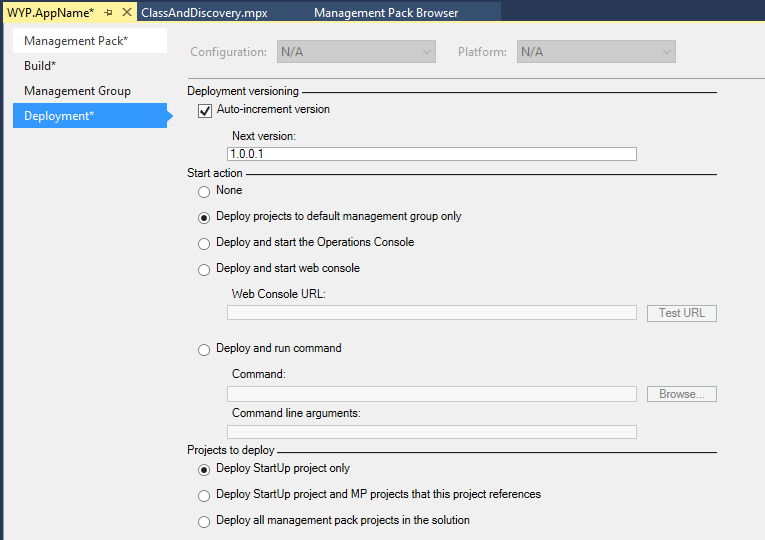
Deployment
Rather than having to manually import management packs, you can select “Deploy projects to default management group only”
Check Code and Export to Management Group
To validate the code, choose Build, Build from the menu bar.
If the project builds successfully then you can click on Start and this will export it into the default Management Group.
Note:
There is a backward compatibility check for sealed Management Packs that will fail if:
- You have deleted classes from a previous version of the Management Pack
- You have not incremented the version number
To check that the discovery is successful, scope Discovered Inventory to the class GD.MyApp and make sure that a server is listed (it will be listed as Not Monitored as we have no monitoring targeted at this class).
Disclaimer:
All information on this blog is provided on an as-is basis with no warranties and for informational purposes only. Use at your own risk.
The opinions and views expressed in this blog are those of the author and do not necessarily state or reflect those of my employer.
Comments
- Anonymous
August 25, 2015
As promised, here is a run through of authoring Management Packs using Visual Studio and the Operations - Anonymous
July 14, 2016
Any chance of re-uploading the code for the discovery? It seems to no longer be available.
