Application build, deploy and test automation in Lab Management
Let’s look at an important application lifecycle management (ALM) scenario – end to end automation for building, deploying and testing a multi-tier application. Application deployment for a multi-tier application typically involves
· provisioning of multiple machines
· running cleanup scripts on each machine to get rid of older application binaries and configuration; or reinstalling the OS and application prerequisite stack from a scratch
· running various installation and configuration scripts on each machine
This process is time consuming and error prone, if not fully automated. On top of it, agile development demands that new builds be tested more frequently.
VS2010 Lab management solves this major pain point in a simple and elegant way by leveraging distributed Team Foundation Build workflow. Lab Management workflow activities are bundled with Team Foundation Build Service. You can drag and drop these activities in Windows workflow designer to create custom workflows that allow you to
· quickly provision a virtual environment
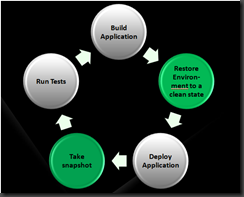
· revert to ‘clean’ environment in tens of seconds by using environment snapshot instead of running multiple ‘cleanup’ scripts or reinstalling OS and application prerequisites
· using distributed workflow, run setup and configuration scripts on virtual machines
· Take post deployment environment snapshots, etc.
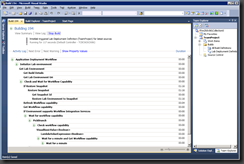
A typical end to end workflow could be similar to the picture shown below.
To get you jump started with application deployment workflow for a virtual environment, we are providing a lab-specific default workflow template that you can download. The rest of the post covers the following aspects of using lab default workflow template:
· Where to check-in the template file.
· How to use the Lab Default Template as it is.
· How to customize Lab Default Template.
How to Give Permission For Running the Lab Default Template.
Pre-requisites
· Lab is installed and configured on a TFS server. Refer to Lab Management 2010 Beta 1 for further details on setting up lab.
· You have at least one virtual environment either running on a host or stored in a library
Where to check-in Lab default workflow template file?
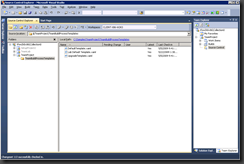
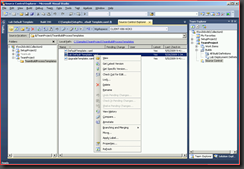
The lab default workflow template is a XAML file that should be checked-in to TeamBuildProcessTemplates folder under the Team Project you are working in. Once you have successfully checked-in the Lab default template, you will see three files in TeamBuildProcessTemplates folder as shown below.
How to use the Lab Default Template it as is
1. Download the Lab Default Template-Beta1.xaml. By right click on it and selecting save as.
2. Overview of the Lab Default Template: Let’s look at what Lab Default Template does? Lab Default Template provisions the specified Environment and optionally it restores to a given snapshot name and then runs the application deployment commands on the virtual machines inside environment. When the application deployment completes it optionally takes one more snapshot of the environment and completes the workflow. Lab Default Template consists of Process Parameters and set of Lab Activities. Process Parameters are similar to variables and Activities are similar to functions in a language respectively. There are various process parameters in the Lab Default Template. For example, “Team Project Library Share Name” where you specify the Library share name from where you want to provision your Lab environment. Process Parameters are discussed in detail in the later section. In case you want to customize the deployment workflow beyond process parameters, you can do that as described later in the ‘ How to customize it’ section. The next few steps describe how you create a new build definition from the template, schedule it and review the output logs.
3. Create a new build definition
a. In Team explorer pane, do a right mouse click on Builds node under the team project and choose New Build Definition as shown below. This will open the new Build definition window.
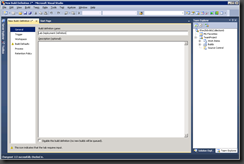
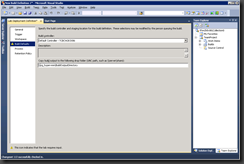
b. Enter the name of the build definition (for example here “Lab Deployment Definition”) in the ‘Build definition name” edit field as shown below.
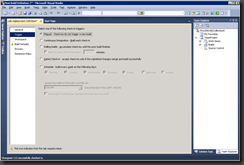
c. Now go to the “Trigger” step listed in the left pane of the wizard and on right hand side select the radio button with text “Manual – check -ins do not trigger a new build” as shown in the screen shots below. This is the most appropriate option for running deployment workflow as you are using a previously generated build as opposed to compiling application code.
d. Now go to the “Build Defaults” step and select the build controller (for example here “Default Controller - TCBCw2K3XB6”) you had specified at the time of the Environment creation in Microsoft Test and Lab Manager. In the field “Copy build output to the following drop folder (UNC path, such as \\server\share)” give a valid shared path location here. Lab default template does not use this field so any shared location path will do as shown below in the screen shot. There is workspace step also but we can ignore it and leave as it is.
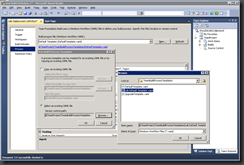
e. Now go to the “Process” step. In the right hand side pane go to “Build Process File (Windows Workflow XAML):” field and press on new button, this will open up a dialogue box named” New Build Process Template”. In this dialog box, select the radio button with text “Select an existing XAML file” and then click browse and select the Lab Default Template.xaml file that we checked in the source control and press OK button; and one more OK button as shown in the screenshot below.
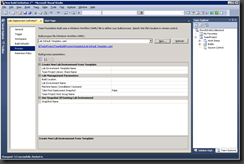
f. This will update the “Build Process Parameters:” field as shown below in the screenshot.
Now you can start filling up the Process Parameter Variable as described below.
There are three main headings in the Process parameter pane. Those are:
· Create New Lab Environment From Template.
· Lab Management Parameters.
· Use Snapshot Of Existing Lab Environment
Under each of these heading there are various Process parameters, let’s start by first heading “Create New Lab Environment from Template” under which there are two optional process parameters which allow you to use an existing environment template in the Team Project Library Share and bring it to running state on a host.
· Lab Environment Template Name: Name of the lab environment template stored in a team project library share.
· Team Project Library Share Name: if you specify the “Lab Environment Template Name”, then this process parameter is compulsory. It specifies the Library share in which Lab Environment Template is stored.
The second Heading is “Lab Management Parameters” under which there are five Process parameters.
· Build Location: this is the source path from there deployment scripts will pick up the application binaries and other files; and drop them in the destination locations on various machines that are part of the environment.
· Lab Environment Name: here you specify the Lab Environment Name on which you want to run the Application deployment script. If you specify the “Lab Environment Template Name” and “Lab Environment Name” then the new environment is created from the “Lab Environment Template Name” and given the name specified in the “Lab Environment Name”. If you do not specify the “Lab Environment Template Name” then it means that you will be connecting to an already running environment specified by “Lab Environment Name”.
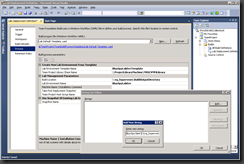
· Machine Name|Installation Command: here you specify the string which is formed by the virtual machine name (not the computer name) separated by pipe symbol and the installation command that you want to run on that machine. These machine names are the same that you specified when you created the environment in Microsoft Test and Lab Manager. For example, “IBuySpyclient|\\Vg_Hpypervmm\share\install.bat silentinstall” command means that run the Install.Bat silentinstall command on IBuySpyclient machine name. You can specify multiple strings and the commands therein will be run sequentially in the specified order. E.g.
“IBuySpyclient|\\Vg_Hpypervmm\share\install.bat silentinstall “
“IBuySpywebserver|\\Vg_Hpypervmm\share\configureweb.bat “
The screenshot below shows how you enter the values for this parameter.
By default, the working directory for these commands is %windir%\system32. You can override it by specifying working directory after the command string; separated by pipe symbol. For example,
“IBuySpywebserver|\\Vg_Hpypervmm\share\configureweb.bat |c:\temp” will run the configureweb.bat command on virtual machine IBuySpywebserver in C:\temp directory.
· Take Post Deployment Snapshot: if you specify it as true then after running the deployment commands specified by “Machine Name|Installation command” parameters, an environment snapshot will be taken. The name of the snapshot will be Build definition name appended by date and time. The default value of this parameter is false.
· Team Project Host Group: it is the host group on which the Lab environment virtual machines will run. .
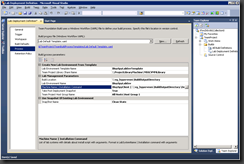
· The third Heading is “Use Snapshot of Existing Lab Environment” which has one process parameter “SnapShot Name”. It is an optional parameter. If you specify the snapshot name, the Lab Environment will be restored to it before the app deployment commands specified by the “Machine Name|Installation Command” process parameter are run. The screenshot below shows a sample with all process parameters values filled up.
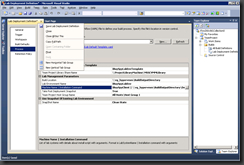
4. Right click on “Lab Deployment Definition” on the top where it shows “Lab Deployment Definition *” and choose “Save Lab Deployment Definition” to save the definition as shown below in the screenshot. The build definition would show up under the “Builds” node in Team Explorer.
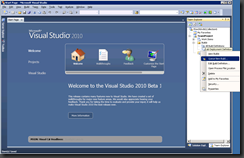
5. In Team explorer, right click on the “Lab Deployment Definition” and choose “Queue New Build” as show below. This will open up the “Queue Build” Dialogue box. Click on the Queue Button.
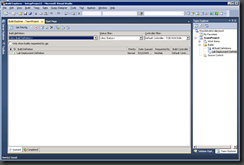
6. Once you click on the Queue Button in above step it will open up a new sub window named “Build Explorer” as shown below in the screenshot.
7. Inside that window you can double click on the Lab Deployment Definition. This will open up another sub window which will show the Build definition summary. You can go through the summary and if you want to see the detailed logs, click on the "View log” link as shown below.
How to customize Lab Default Template?
1. Go back to the Source Control Explorer. Go to TeamProject and then to TeamBuildProcessTemplates in folders view. Go to right hand side pane and right click on the Lab Default Template.xaml and click on view as shown below in the screenshot.
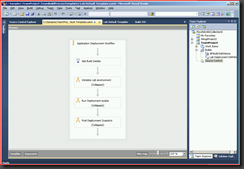
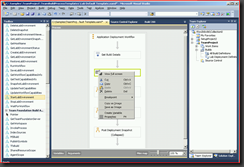
2. This will open Workflow Designer as shown below in the screen shot.
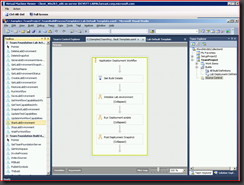
3. In the workflow Designer window you can see the Lab Default Template workflow. Now go to left hand side and click on Toolbox. This will open up the Toolbox window as shown below in the screenshot. There are many activities listed under different headings. The Lab Activities are listed under “Team Foundation Lab Activities”. Team Build activities are listed under “Team Foundation Build Activities”.
4. To add new activities, drag and drop them from the Toolbox to the workflow designer canvas. You can right mouse click on the activity icon and modify its properties as shown below. You can also delete existing activities in the workflow. If you want to use “If then else” or “switch” statement you can use the activities under “Procedural Heading”. To edit variables associated with an activity, select it and click on the ‘Variables’ field at bottom left corner of workflow canvas. If an activity encompasses more activities, you can browse one level below by double clicking on it.
5. If you made any changes, save them and check in the updated version to source code control.
How to give Permission for running the Lab Default Template.
The Build Agent which is running as the service with the particular login account should have been added under Project Contributor as well as the user who is queuing the Lab default Template for running should be also added under Project Contributor.for How to add the user to Project Contributor Group please follow the link.
Lab Default Template-Beta1.xaml
Comments
Anonymous
May 26, 2009
PingBack from http://microsoft-sharepoint.simplynetdev.com/application-build-deploy-and-test-automation-in-lab-management/Anonymous
May 27, 2009
タイトルの通りなのですが、なかなか多層なアプリケーションのテスト環境を構築し、そつなくテストを実施するには、手間がかかります。ただしくビルドできているのか?はまだしも、ただしく配置できているか?は、死活問題です。Anonymous
June 01, 2009
Today as we build more and more complex applications the complexity of development and testing environmentsAnonymous
August 29, 2012
the link for download the Lab Default Template-Beta1.xaml is not working.
