Moving an existing Virtual Machine into a Virtual Network Subnet without losing your virtual hard disk (or your mind)
I often suggest that once you get onto Windows Azure, before you create any Virtual machines, make sure you create a Virtual Network. There will be a time when you want to connect that VM to another or create some layers of logical organization or security boundaries, trust me. So, in order to help al those who got excited and created a VM outside a VNET, here is a step-by-step on how to move it into a subnet of your VNET. Please warned that you will lose your VIP since you cannot move the existing Cloud Service into the VNET and you will at one point have to create it again. Ok so with that out of the way here goes!
1. Firstly log in to the Azure management portal and select Virtual machines and then the machine you wish to move into a VNET:
2. Next select DELETE in the lower tool bar and make sure you select KEEP THE ATTACHED DISKS option.
3. Click on the Disk tab under Virtual Machines and ensure your Virtual Disk is no longer attached to any running VM’s
4. Delete the Cloud Service from the Cloud Services Tab: WARNING you will lose your VIP and be assigned a new one once you create the new VM under a new cloud service in the following steps.
5. Now Click NEW in the bottom toolbar and select Virtual Machine->From Gallery
6. Select MY DISKS from the right hand menu and then select the disk containing your VM:
7. Give the VM a name and choose the size VM you require; then click next
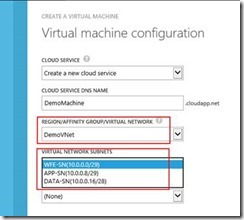
8. Once on Tab number 3 select Create a new Cloud Service and then select your VNET under Region/affinity/virtual Network and then select the Virtual Network Subnet of your choice
9. On the 4th and last tab ensure you open the required ports for the service you need or just leave the defaults if these are sufficient.
10. Don’t forget to re-attach any data disk that were previous part of your VM and also to reconfigure endpoint monitoring, alerts and Availability groups.
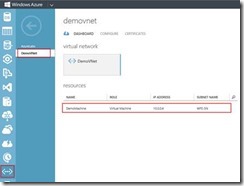
11. For confirmation you can check under Virtual Networks, select your network and verify the VM is deployed to the correct VNET subnet.
Comments
- Anonymous
March 18, 2015
Good Article Thanks for sharing.


