DevOps with bots: CI/CD Pipeline with the Bot Framework and Azure - end-to-end walkthrough
So you're building a bot (C#) and want to involve your stakeholders early in the development lifecycle - no problem, read the steps here and you'll be able to setup your own Continuous Integration and Continuous Deployment pipeline right into production. Building bots with the MS BotFramework is no different to building a Web API, therefore we can use very similar deployment techniques to push our code from our source repository straight into our development, test or even production environments.
I'm developing a bot and like the sound of this, is it hard to do?
No, absolutely not. If you're already familiar with Azure App Services for hosting, or Visual Studio Team Services for Continuous Integration & Release Management you can skip much of this article. But here, I'm starting from the ground up - to create a simple walkthrough anyone can follow.
I'm all in, what is needed?
- VS 2017 (It's RTM now, there's no excuse)
- VSTS (provides source control and build/deployment tasks)
- Azure (for hosting your bot)
- Bot (for registration)
Ok, you said you were going to walk me through this..
#1. Start by registering your bot in the Bot Framework portal. You may want to register more than 1 bot to reflect different environments you need to support (we'll come back to this later). You can configure each of the actual messaging endpoints when you know them.
[caption id="attachment_1305" align="alignnone" width="300"]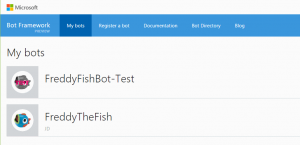 Supporting bots across multiple environments[/caption]
#2. Next, Create a new VS Project based on the Bot Framework Template (or follow guide here if required). Then add your development bot ID and password to the web.config. You've now got a basic bot, now it's up to you to give it some high value functionality - but that is beyond the scope of this article, so we'll leave it there for now.
[caption id="attachment_1315" align="alignnone" width="300"]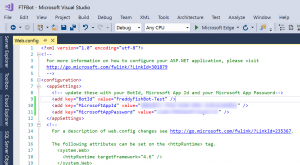 Bot configuration settings[/caption]
#3. Create a new project within VSTS for your Bot and push your code up there:
[caption id="attachment_1325" align="alignnone" width="300"]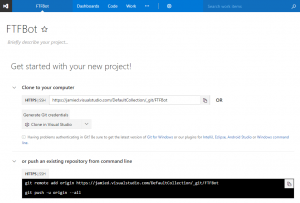 Creating new project within VSTS[/caption]
[caption id="attachment_1365" align="alignnone" width="300"]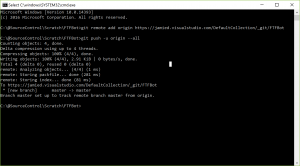 Add git remote[/caption]
From Visual Studio, commit your local project to the central repository:
[caption id="attachment_1355" align="alignnone" width="275"]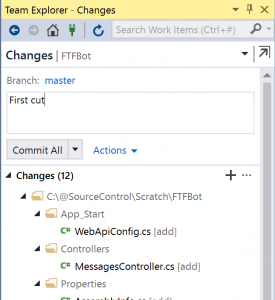 Commit changes up to the VSTS server[/caption]
#3. Now deploy the bot to Azure
[caption id="attachment_1335" align="alignnone" width="300"]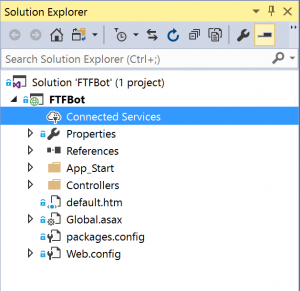 Connect Azure to your VS project[/caption]
[caption id="attachment_1385" align="alignnone" width="300"]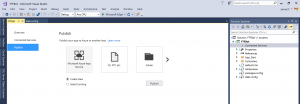 VS Azure publish to Azure App Service[/caption]
[caption id="attachment_1675" align="alignnone" width="300"]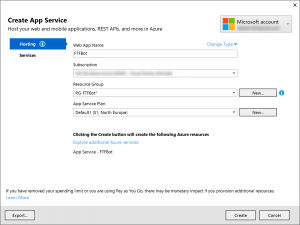 Creating a new Azure App Service[/caption]
When the publish task begins you'll see this in the VS Output window:
[caption id="attachment_1395" align="alignnone" width="300"]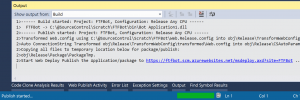 VS Azure publish progress[/caption]
It only takes a couple of minutes to complete, then you'll see this - note the endpoint URL, the SSL of this will be used in the dev.botframework.com portal as your messaging endpoint with the additional routing path added. So in this sample: https://ftfbot.azurewebsites.net/api/messages
[caption id="attachment_1396" align="alignnone" width="300"]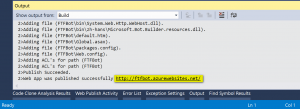 VS Azure publish complete[/caption]
#4. Now configure a CI build within VSTS. Navigate to the portal and select the following:
[caption id="attachment_1375" align="alignnone" width="300"]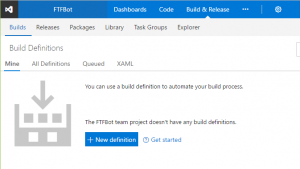 VSTS New Build using the ASP.NET (Preview) template[/caption]
[caption id="attachment_1405" align="alignnone" width="300"]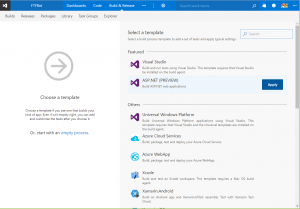 VSTS new build definition[/caption]
[caption id="attachment_1415" align="alignnone" width="300"]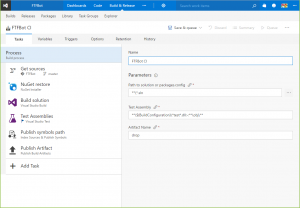 VSTS new build defaults[/caption]
Enable Continuous Integration so that every sync up to the central repository invokes a new build
[caption id="attachment_1425" align="alignnone" width="300"]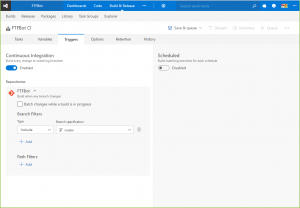 VSTS enabling CI[/caption]
Ok, I've followed so far, but what about the Continuous Deployment bit you promised?
Glad you asked, we're now going to configure a Release pipeline that's triggered from a successful Continuous Integration build. The output of our build will be packaged and deployed straight into our Azure App Service.
Oh man, that sounds way complicated, do I need to hire a DevOps team to set this up?
No. Absolutely not. The VSTS Build and Release process support VSTS Tasks, there are a whole raft of them that do different things such as building, testing or deploying components (you can even write your own). However, here it's just a case of some configuration and knowledge of your Azure App Service settings. I walk you through it here:
#1. Create a new Release Definition
[caption id="attachment_1465" align="alignnone" width="300"] VSTS new Release definition[/caption]
#2. Select the Azure App Service Deployment template
[caption id="attachment_1475" align="alignnone" width="270"]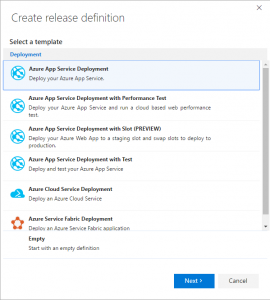 VSTS New release definition using Azure App Service template[/caption]
#3. Enable Continuous Deployment within your release definition - select the CI Build we created above
[caption id="attachment_1485" align="alignnone" width="300"]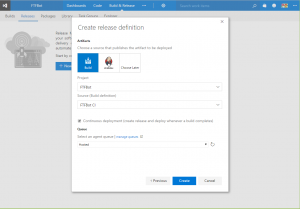 VSTS enabling CD[/caption]
#4. Configure your Azure Subscription and select the App Service name we created from Visual Studio at the beginning of this walkthrough. Here you will also need to configure VSTS to be able to connect to Azure under the "Services" tab by creating a New Service Endpoint linked to the relevant Azure subscription.
[caption id="attachment_1495" align="alignnone" width="300"]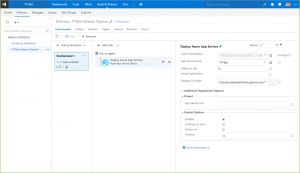 VSTS CD template configuration[/caption]
[caption id="attachment_1505" align="alignnone" width="300"]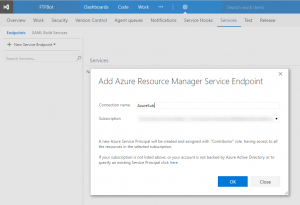 VSTS Azure service endpoint[/caption]
[caption id="attachment_1515" align="alignnone" width="300"]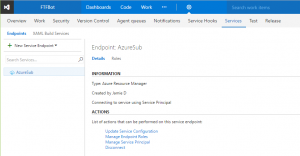 VSTS Azure endpoint configured[/caption]
Done. Now any changes you commit to the repository will automatically be built and deployed into the Azure App Service.
What? I don't believe you, show me
Ok. So back to Visual Studio, let's make a simple change to the source code then commit and sync that back to the central repository.
#1. Making a code change
[caption id="attachment_1525" align="alignnone" width="300"]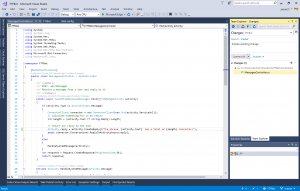 VS commit and sync changes[/caption]
#2. Quick, back to VSTS - blink and you'll miss it. A new build has been automatically queued
[caption id="attachment_1535" align="alignnone" width="300"] VSTS triggering a CI build automatically[/caption]
#3. When it finishes, now jump to the Release tab
[caption id="attachment_1545" align="alignnone" width="300"]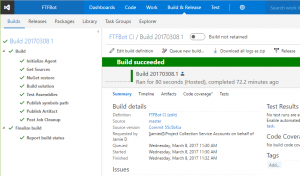 VSTS CI Build status success[/caption]
#4. You see, a new release has been invoked. As the build was successful, the packaged code is now being deployed automatically into the cloud
[caption id="attachment_1555" align="alignnone" width="300"]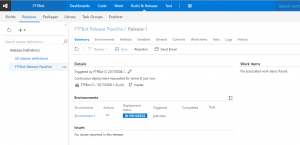 VSTS running CD[/caption]
But how do I know that CD has worked?
Simple. Test it (or read the deployment logs). We can do that a variety of ways since this is a bot and there are a number of channels it can be configured to run under. The simplest is to use the dev.botframework.com portal where you can send messages direct to the bot and check responses.
[caption id="attachment_1556" align="alignnone" width="300"]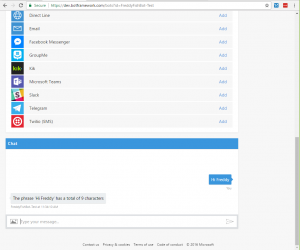 Testing the deployed bot in the BF portal[/caption]
What that's it? Seriously?
Well it could be, if you like to deploy all developer changes straight into production. However, if you're a bit more risk adverse you'll want to leverage Deployment Slots with the VSTS Release Pipeline management. Earlier we created multiple bots within the Bot Framework portal - this was so that each one could be deployed and managed in isolation.
Here we are going to look at deployment slots to create additional environments for test, staging and production.
# 1. Create additional deployment slots in the Azure Web App Deployment for "UAT" and "Staging"
[caption id="attachment_1565" align="alignnone" width="300"]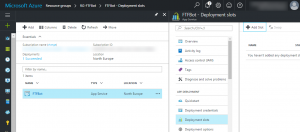 Azure - adding a new deployment slot[/caption]
[caption id="attachment_1585" align="alignnone" width="300"] Azure - deployment slot created[/caption]
# 2. Select the Deployment Slot you created above by double clicking it, then check the following Application Settings as "slot setting" within the portal. This is to make them sticky to that slot, so that we can do slot swaps without overwriting them with our dev/test/uat version of our Bot.
[caption id="attachment_1665" align="alignnone" width="300"]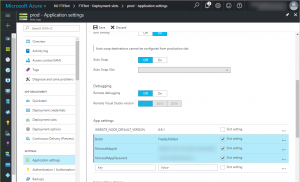 Azure - making your App settings sticky to the slot[/caption]
#3. Amend your VSTS Release definition - create a new environment for Production. Here we're just going to use a manual sign-off process by an imaginary QA team, this can just as easily be automated if there are no manual steps required.
[caption id="attachment_1596" align="alignnone" width="270"]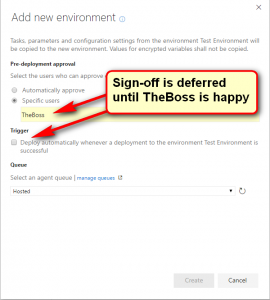 VSTS - Production environment configuration[/caption]
#4. Within this production environment, first we deploy to our staging environment and then we slot-swap with the production slot in order to minimise downtime and disruption on the live bot
[caption id="attachment_1605" align="alignnone" width="300"]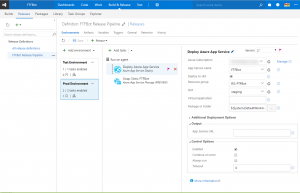 VSTS - Release to staging slot[/caption]
#5. Then perform a slot-swap
[caption id="attachment_1615" align="alignnone" width="300"]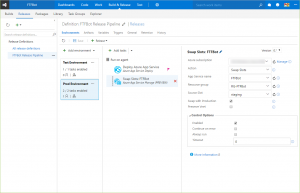 VSTS - Release slot-swap[/caption]
#5. Now all that's left is to configure your Test/UAT versions of the bot within the dev.botframework.com portal with the correct endpoints of the deployment slots created above eg:
[caption id="attachment_1655" align="alignnone" width="291"]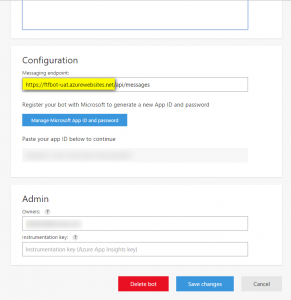 BF - Configuration of messaging endpoint with the slot url[/caption]
Now, when any change is committed to source control, a CI build will be triggered. Only on success will a CD release be triggered. This will automatically deploy the latest code changes into the UAT slot (thus the UAT version of the bot will always have the latest changes), User Acceptance Testing can be completed on this instance. The Product Owner (TheBoss) or whoever is empowered can trigger the final deployment of the code into the staging environment. When this is completed the staging slot is swapped out with the product slot - so the production bot now has all the latest changes.
[caption id="attachment_1645" align="alignnone" width="300"]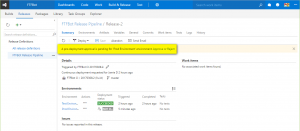 VSTS - Production environment release approval confirmation[/caption]
Hope you find this useful.