1-800-GETNAV (Nav on Docker #4)
What a cool phone number to have if you are a NAV partner in the US. Inspired by that and modernized it to the cloud world, it would be:
aka-ms-getnav
So here you are, probably the easiest way to spin up a NAV on Docker environment on Azure for development and test. The mechanism has been used over the last 2 months or so in the NAV Developer preview and in fact, it is the same set of PowerShell scripts that lies behind.
https://aka.ms/getnav
Much like the https://aka.ms/navdeveloperpreview, the https://aka.ms/getnav just points to an Azure Resource Manager template, which will deploy a Windows Server 2016 with Containers image on Azure and run some PowerShell scripts to initialize and setup a NAV on Docker container on the VM. The process is very simple. Navigate to the URL (https://aka.ms/getnav), login to your Azure subscription and fill out the template:
Note:
- do NOT press the Edit template button as this will de-couple the deployment from the template and make it NOT work.
- Resource group name needs to be unique in the selected subscription
- Vm Name needs to be globally unique
- Admin Password will be used as the password everywhere in the VM where a password is required - do not use double quotes in the password
- Select the Nav on Docker Image from https://hub.docker.com/r/microsoft/dynamics-nav you want to deploy (if you want to use an image from a private registry, you can replace the container later).
- Specify a secure URL to your development license file (or leave blank to use the demo license, which will allow you to make v2 extensions development in the range 50100 to 50149). See this blog post for info on how to create a secure url.
- Agree to the license terms, pin to the dashboard and press Purchase.
On your dashboard you will see

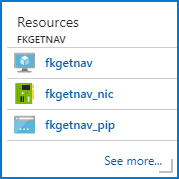
for some minutes and then it will change into:

Making you think that it is done but it isn't really done.
Click the link next to the virtual machine image (the first fkgetnav in lower case) in order to navigate to the Virtual Machine Resource. Hover over the DNS name and copy the URL to the clipboard:

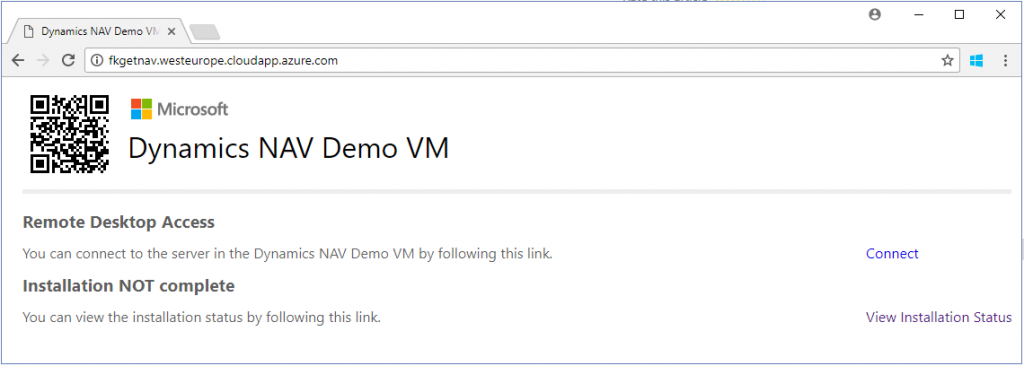
This is your NAV Demo VM landing page. Open the URL in a browser and you will see:

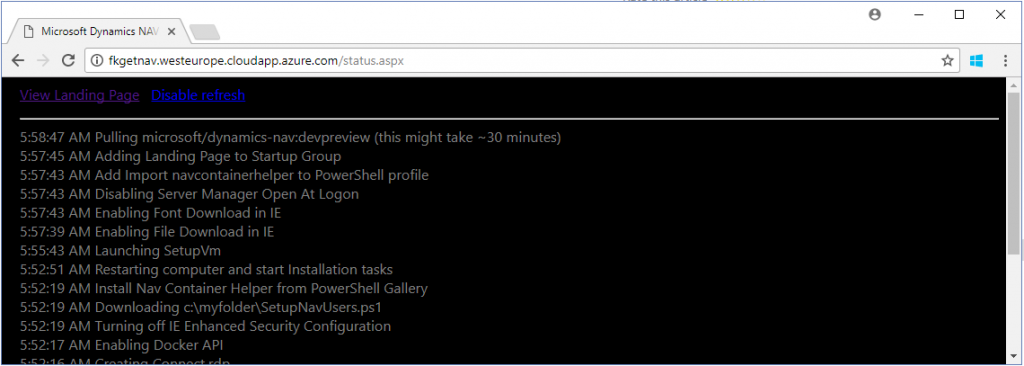
if you click the View Installation Status, you will see something like:

In this image, it is pulling the NAV on Docker image. Status updates every 10 seconds, just wait it out (unless it errors out or takes significantly longer than suggested).
Note: If you during the installation phase reboot the VM, you will have to start over.
When you are done, you should have a landing page like this:

Note:
- Click the appropriate browser link under Download Self Signed Certificate to see the instructions and use the Download Certificate link to install the self-signed certificate on your local box.
- Hit the Connect link to open a remote desktop to the Azure VM
- View the installation status and make sure that no errors are present. Note, that errors are not always marked in red so things might indicate success, but if your installation status says:

then you have a non-functional container and I would recommend you to start over. (In this case the License File Secure Url was invalid). We are working on making failing deployments more obvious (like landing page saying Installation Failed!) - Hit the Web Client link to connect to the Web Client
- Copy the launch.json and the app.json settings if you want to do VS Code development towards this server.
- Download the AL Extension for VS Code, which matches the version of NAV in the Azure VM by clicking the al-0.10.13928 link
The Azure VM has a primary container called navserver. The navserver container have public ports mapped to the host in order to allow you to connect to the Web Client or do VS Code development from public internet towards the VM.
On the desktop, you will also find a shortcut to a PowerShell prompt with the NAV Container Helper. You can use the NAV Container Helper to create additional NAV on Docker containers for CSide development and automatic conversion to AL. Much more about the NAV Container Helper later.
On the Azure VM you will find a folder called C:\DEMO in which you will find the PowerShell scripts which have been used to setup the VM.
If you want to investigate these, have a look at SetupNavContainer.ps1 and SetupDesktop.ps1.
If you want to replace or recreate the primary container (the navserver container), the navcontainerhelper has functions for this: Replace-NavServerContianer and Recreate-NavServerContainer. These functions are only for use in the Azure VM.
I want to create my own template!
If you want to create your own template, it is "easy". Have a look at https://www.github.com/microsoft/nav-arm-templates, fork the repository and make your changes. Then create your own Short-Url, where you can use https://bitly.com/, https://goo.gl/ or other providers. The advantage of using Google here is, that if you ever forget anything, you can be absolutely sure that Google has it stored somewhere:-)
The Long Url, which is pointed to by aka.ms/getnav is:
https://portal.azure.com/#create/Microsoft.Template/uri/https%3A%2F%2Fraw.githubusercontent.com%2FMicrosoft%2Fnav-arm-templates%2Fmaster%2Fgetnav.json
or to put it in another way:
https://portal.azure.com/#create/Microsoft.Template/uri/
followed by an escaped public URL to your ARM template manifest.
Enjoy
Freddy Kristiansen
Technical Evangelist
Comments
- Anonymous
November 30, 2017
Hi FreddyI think it would be nice to have the option to create a virtual machines running on SSDs. I tried changing the "storageAccountType" in the template from "Standard_LRS" to "Premium_LRS" but I got some weird error messages. Can you help me out here?Džoka- Anonymous
December 04, 2017
How did you modify the template?If you edit the template in the portal, the template looses the connection to the github repo and then you will see errors.To be honest, I thought that the SSD support was given by the vmSize selection.- Anonymous
December 05, 2017
Yes I modified the template on the portal, saved it and then clicked on 'Purchase' after I typed in all the settings. So I guess I have to create my own template as described and try it out again.From https://docs.microsoft.com/en-us/azure/virtual-machines/windows/premium-storage:"Premium Storage supports DS-series, DSv2-series, GS-series, Ls-series, and Fs-series VMs. You can use standard and premium storage disks with these VM types. You cannot use premium storage disks with VM series that are not Premium Storage-compatible."And that's what I tried... is selected Standard_DS2_v2 and changed the storageAccountType to “Premium_LRS”. So my idea is that we have the option to change the storageAccountType from Standard_LRS to Premium_LRS.- Anonymous
December 05, 2017
It won't work today. Changing the template breaks the scripts.I will see if I can fix it so that this doesn't happen.
- Anonymous
- Anonymous
- Anonymous
