Machine Learning Tools Powerhouse with Azure RemoteApp
Wouldn’t it be nice to have all your Machine Learning (ML) tools available wherever you are, and on any device? Azure RemoteApp is built exactly for that. While traveling, I usually carry my Surface Pro 3 that does not have any ML tools, and at home I have my monster ThinkPad W350 with all the ML tools, as well as an iMac to work on all the cool Open Source and Mac-friendly Microsoft software. I would like to use my ML tools on-the-go from airplanes to boring meetings. In this article, I will describe the process of creating a custom Azure RemoteApp template with your favorite Machine Learning tools installed, and then streaming these tools to any device. Ready for the ride?
Pre-Requisites
- Azure Subscription with Access to RemoteApp
- Knowledge of creating Azure Virtual Machines
Which Virtual Machine to use?
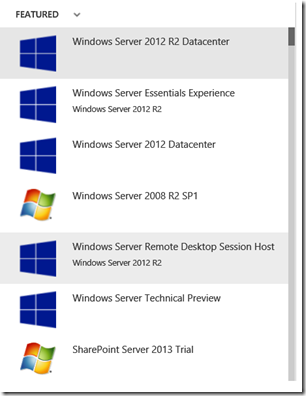
The RemoteApp team has created a “Windows Remote Desktop Session Host” server image for your convenience to quickly get started with the right configuration required by a RemoteApp custom template. If you want to start from scratch, here are more details.
Login to Azure portal and create a new “Windows Remote Desktop Session Host” VM
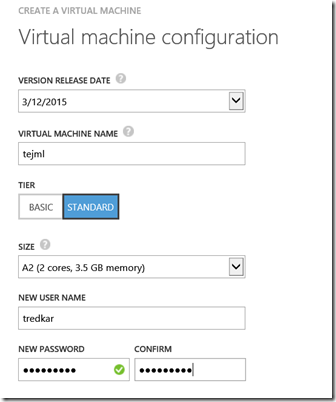
Below is the VM configuration I used for this exercise.
Installing Machine Learning Software
Once the VM is ready, login to the VM and install your favorite Machine Learning client tools. I installed the following ones:
- Python
- Anaconda
- R
- R Studio
- Notepad++, SublimeText (for text editing if required).
You can install more of your favorite tools if you like.
Start Menu Requirement
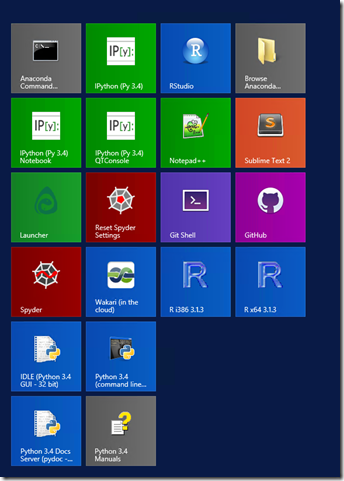
After installation is complete, add the installed software to the Start Menu by right-clicking and selecting “Pin to Start Menu”. RemoteApp will pick up the software listed in the Start Menu.
My Start Menu looks like this.
Validating Image
Next, the RemoteApp team has created a nice tool called “ValidateRemoteAppImage” for validating the VM for RemoteApp publishing. This tool is available on the Desktop of the “Windows Remote Desktop Session Host” VM image.
Double-click the tool to validate the VM (as shown below). If there are errors, fix them as suggested.
Capturing the Image
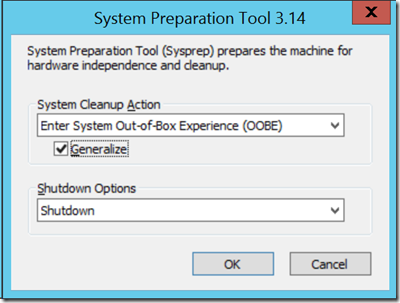
RemoteApp requires captured VM images to publish, deploy, and stream the applications. Follow the procedure listed here to capture the VM image. Make sure you generalize and shutdown during sysprep as shown below.
After the image is shutdown, click the capture button from the Azure drawer menu for the VM.
After the image is captured, the VM will be deleted and the image will appear in the Images section of the portal
Adding Image to the RemoteApp Template library
Next, we need to let the RemoteApp know that we want to use this VM image for creating our collection. Go to the Template Images section of RemoteApps and click on “Upload or Import a Template Image”.
Next, click on “Import an image from your Virtual Machine library”
On the “Import a Template Image” page, select the VM image you created earlier.
On the next screen, give your VM Template image a name and select the location. After successful import, the template will be listed in the “Template Images” section of RemoteApp.
Creating a Remote App Cloud Collection
The custom VM template portion of the exercise is now complete. Create a new RemoteApp collection as shown below
In the Template Image dropdown, you will see your VM image listed. Please specify your preferred name, region, and plan (Standard Recommended for Machine Learning Tools) for the collection. The collection should get listed in the “RemoteApp Collections” section of the portal.
Publishing Applications
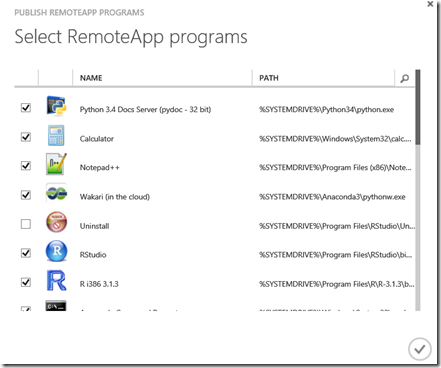
Remember those apps that you added to the start menu earlier? We need to publish those to RemoteApp individually. On the RemoteApp Collection page, click “Publish remoteapp programs” and select the apps you want to publish.
Adding Users
Next, to add users, click on “Configure user access” and add the identities of the users. For more information on supported user identities, please refer to the following link.
https://azure.microsoft.com/en-us/documentation/articles/remoteapp-user/
Running the Remote App
Our Remote App is now ready, lets start using it. Download the RemoteApp client from https://www.remoteapp.windowsazure.com
For Mac users, the website will automatically redirect you to the Mac App Store for downloading “Microsoft Remote Desktop” app. The Microsoft Remote Desktop App has a menu item for Azure RemoteApp.
Install and login to the Azure Remote App client using one of the user access accounts you created earlier. On successful login, you should see the apps you published in the Azure RemoteApp console.
Running the Apps
Double-click on any of these tools to run on any supported device. Let’s start with Anaconda, a scientific Python distribution.
NLTK Dispersion Plot
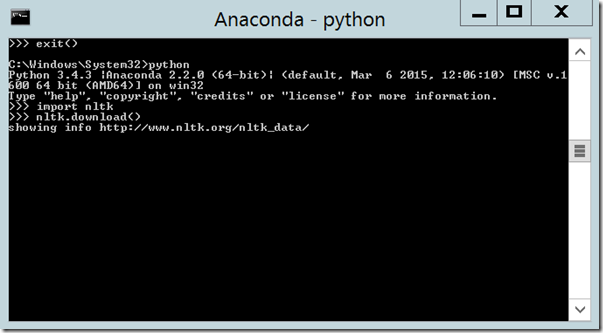
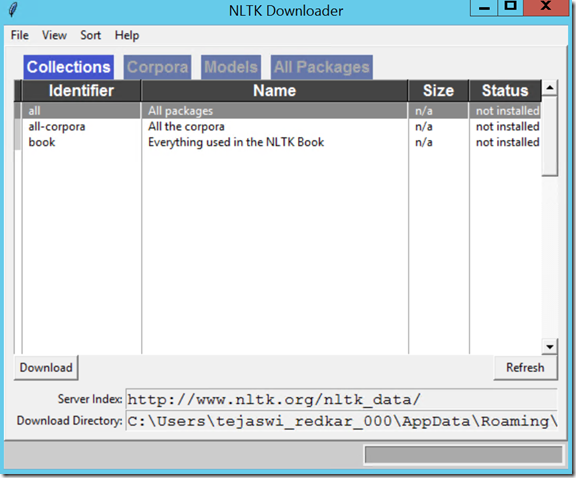
Start Anaconda command prompt and type python to enter Python’s interactive environment. NLTK is packaged with Anaconda distribution, but you still need to download the required corpora for testing. As shown below, download all the NLTK corpora using NLTK downloader.
Note the Download directory. Every user has a specific directory on the RemoteApp VM. There is nothing magic going on behind the scenes. The RemoteApp infrastructure runs an instance of the VM template we created and then streams the published apps to the end-user. Every permitted user gets an account and shares the same VM instance.
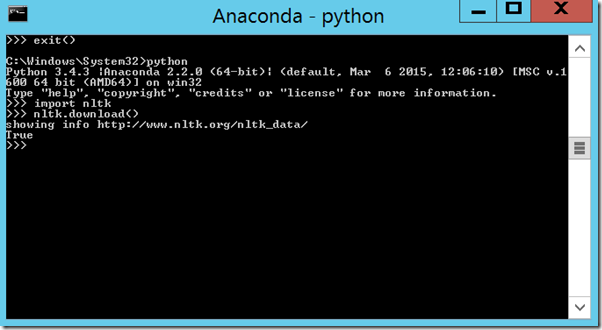
Once the NLTK downloading is complete, we can start testing it.
Import the NLTK book corpora from the command prompt as shown below.
>>> from nltk.book import *
*** Introductory Examples for the NLTK Book ***
Loading text1, ..., text9 and sent1, ..., sent9
Type the name of the text or sentence to view it.
Type: 'texts()' or 'sents()' to list the materials.
text1: Moby Dick by Herman Melville 1851
text2: Sense and Sensibility by Jane Austen 1811
text3: The Book of Genesis
text4: Inaugural Address Corpus
text5: Chat Corpus
text6: Monty Python and the Holy Grail
text7: Wall Street Journal
text8: Personals Corpus
text9: The Man Who Was Thursday by G . K . Chesterton 1908
>>>
Next, let’s create a dispersion plot of certain words against specific corpora. text4 is the US Presidential inaugural address corpora, so lets try to find out common words spoken by all the presidents.
>>> text4.dispersion_plot(["citizens", "democracy", "freedom", "duties", "America", "dream", "independence", "government", "democrat", "republican"])
From the figure above, you can derive interesting insights from the textual content. If you run the same words against another corpora, what would the dispersion plot look like?
For more information on NLTK, please visit https://www.nltk.org
R Text Analytics
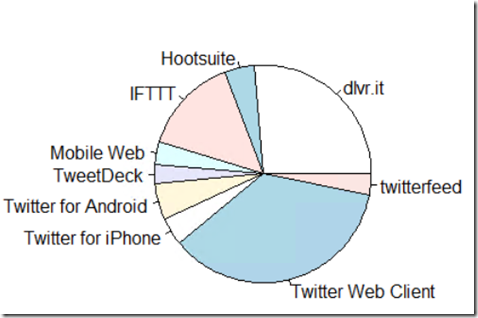
Now let’s try R, another popular language with Data Scientists. In this exercise, lets try to build a pie chart of the types of client applications used for tweeting “#microsoft”. I have used the sample from the twitteR package documentation (Source: https://geoffjentry.hexdump.org/twitteR.pdf )
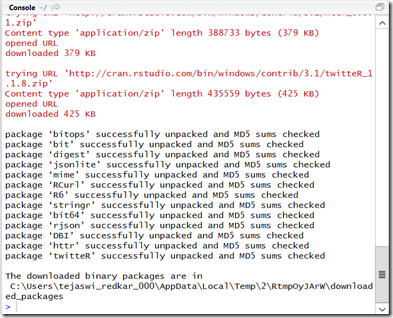
Start R Studio and install twitteR package from Tools > Install Packages
Setting up Twitter Client
Use this link for setting up and accessing Twitter API using the twitteR client. Once the client is setup and tested, we will call the APIs as listed below for building our pie chart. In R Studio, type the following.
> r_tweets<-searchTwitter("#microsoft",n=3000)
> sources<-sapply(r_tweets,function(x)x$getStatusSource())
> head(sources)
[1] "<a href=\" https://twitter.com\" rel=\"nofollow\">Twitter Web Client</a>"
[2] "<a href=\" https://ifttt.com\" rel=\"nofollow\">IFTTT</a>"
[3] "<a href=\" https://twitter.com\" rel=\"nofollow\">Twitter Web Client</a>"
[4] "<a href=\" https://dlvr.it\" rel=\"nofollow\">dlvr.it</a>"
[5] "<a href=\" https://twitter.com\" rel=\"nofollow\">Twitter Web Client</a>"
[6] "<a href=\" https://twitter.com\" rel=\"nofollow\">Twitter Web Client</a>"
> sources<-gsub("</a>","",sources)
> sources<-strsplit(sources,">")
> sources<-sapply(sources,function(x)ifelse(length(x)>1,x[2],x[1]))
> head(sources)
[1] "Twitter Web Client" "IFTTT" "Twitter Web Client" "dlvr.it"
[5] "Twitter Web Client" "Twitter Web Client"
> source_table=table(sources)
> pie(source_table[source_table>50])
Conclusion
RemoteApp is one of the killer apps for Azure. It will save you significant amount of time and money just by moving your desktop apps to a service consumption model. It's not just the cost that’s driving the adoption, but also its scale and reach. RemoteApp will be available in all the Azure datacenters around the world. Imagine building this service yourself from scratch with similar scale and global reach. The scenario mentioned in this article is just scratching the surface of enhancing worker productivity through Azure RemoteApp.
References and Resources
Text Analytics using R
https://www.rdatamining.com/examples/text-mining
twitteR documentation
https://geoffjentry.hexdump.org/twitteR.pdf
RemoteApp Resources
Creating a RemoteApp Template Image
Creating Cloud Collection
https://azure.microsoft.com/en-us/documentation/articles/remoteapp-create-cloud-deployment/
Creating Custom Image
https://azure.microsoft.com/en-us/documentation/articles/remoteapp-create-custom-image/
Creating Hybrid Collection
https://azure.microsoft.com/en-us/documentation/articles/remoteapp-create-hybrid-deployment/
Azure Remote App Forum
Azure RemoteApp Documentation
https://azure.microsoft.com/en-us/documentation/services/remoteapp/
