Resource Management - Configure Synchronization Service to manage New Resource.
Now that you have created a new resource possibly with the assistance of the post Schema Management - Creating a New Resource you may wish to synchronize this resource with an External Data source. Before you can synchronize data from external data sources to the FIM Portal via the Synchronization Service we need to do a few things.
- Add the new Resource to the Synchronization Filter, to allow external resources to be synchronized to the new resource in the FIM portal.
- Prepare the FIM MA to manage the new resource in the Synchronization Service.
- Examine the Metaverse and determine if you need a new resource to map to or if you wish to use an existing one.
- Give permissions to the Synchronization Service to manage the new resource
- Create a Synchronization Rule to synchronize the new resource into and out of the Metaverse.
Add the new Resource to the Synchronization Filter
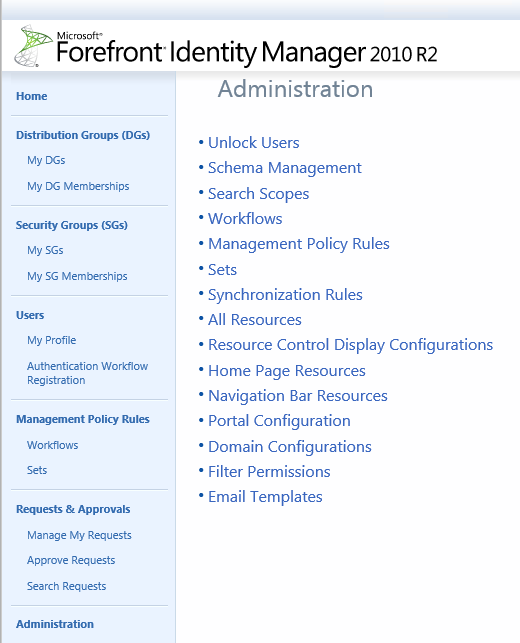
- From the Administration Page of the Portal Click on All Resources
- From the All Resources search for Synchronization Filter.
- unless you been creating a lot of resources the Synchronization Filter Resource should be on page 2.
- Once you locate the Synchronization Filter Resource, click on the link to open the User Interface for the resource.
- No your not seeing double the Synchronization Filter resource has 1 object and yes it is named Synchronization Filter. This object is an object the same as a user is an object of the user resource, Click on the Synchronization Filter object to open the user interface for this object..
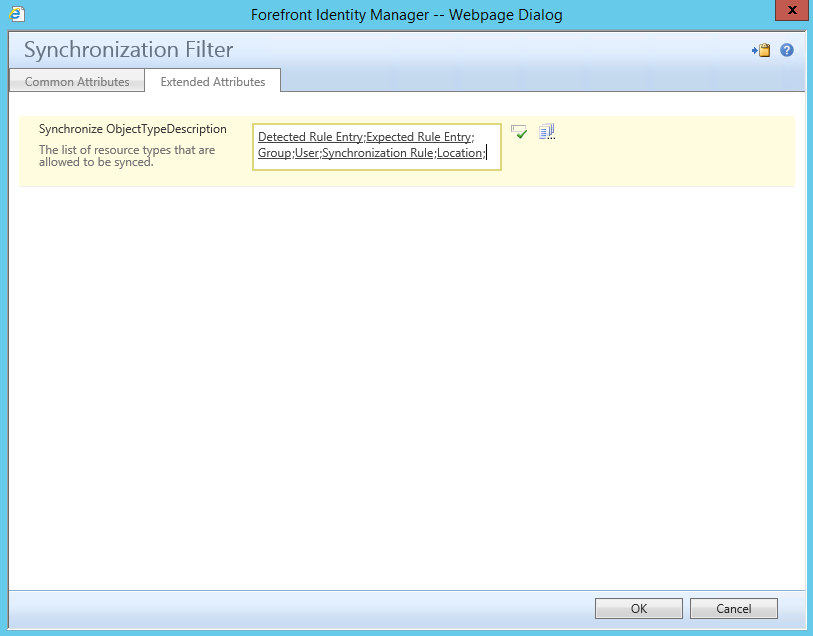
- This first Tab doesn't really tell us much, I would not recommend changing any of the default information, click on the Extended Attributes Tab
- On this tab you will notice 1 option, Synchronize ObjectTypeDescription which if you read the description states that this is "The list of resource types that are allowed to be synched", this is where we will add the new resource we created in the Schema Management - Creating a New Resource post.
- In the Text box type in the name of the resource that we would like to add to be synchronized in the Synchronization Service. In the Schema Management - Creating a New Resource post we created a new resource called Location, so in the text box type Location and validate so that it now underlined.
- After the new resource has been added and validated click on Ok
- After you verify that the information is correct click on Submit.
Creating a new Object Type in the Metaverse if needed
- Log on the server that the Synchronization Service has been installed on.
- Click on Metaverse Designer
- Just like in the FIM Portal there are Resources for the Synchronization service. In the Metaverse Designer there is already a Resource for Organizational Unites called organizationalUnit. We will be using this resource. but before we continue lets examine how we would create a new resource in the Metaverse.
- If you notice on the top right you will see an actions window.
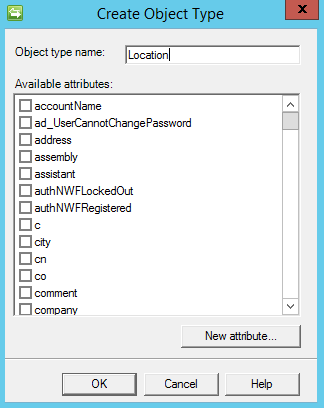
- Clicked on Create Object Type
- Type in Location
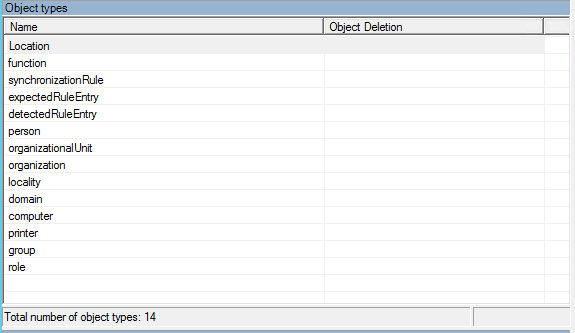
- Click on Ok, you would now see the new Object Type (Resource in the Metaverse)
- In this example I deleted this new Object type because I will be using the organizationalUnit object type, I just wanted to walk through the steps of creating a new Object Type (Resource) in the Synchronization Service.
- Your are now ready to Create the Synchronization Rule to Synchronize the Organizational Units from Active Directory in the FIM Metaverse and than you will need to set the precedence.
Prepare the FIM MA
- Log on the server that the Synchronization Service has been installed on, Open the FIM Synchronization Service
- Click on the TAB "Management Agents" Locate the FIMMA
- Right Click on the FIMMA Management Agent and a window will appear with options
- Click on Refresh Schema, this will open up another window
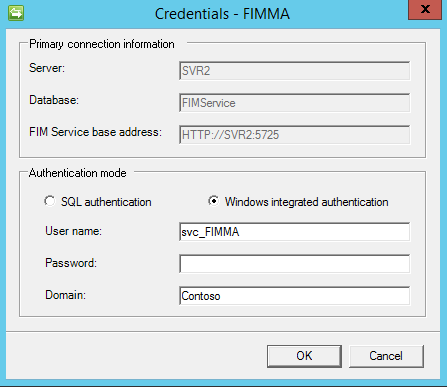
- Click on Ok, you will than be prompted for credentials
- Enter the credentials, the Service account that you used when creating the FIMMA. In this example we used a service account svc_FIMMA
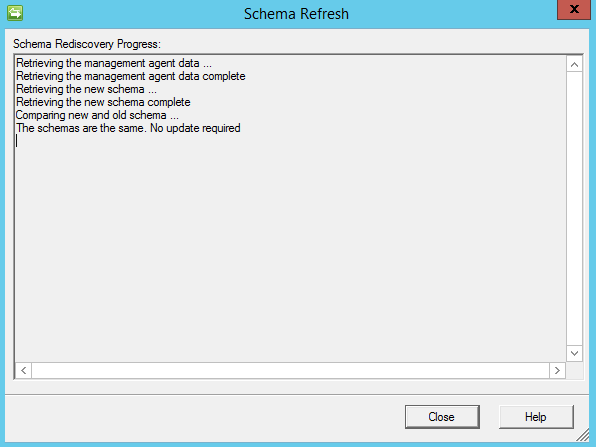
- If you a Refresh Schema has not been completed after you have created a new resource you will see information be processed if no Refresh Schema is needed that you will be presented with the statement "The Schema's are the Same, No update required"
- Click on Close
- Reopen the FIM Management Agent.
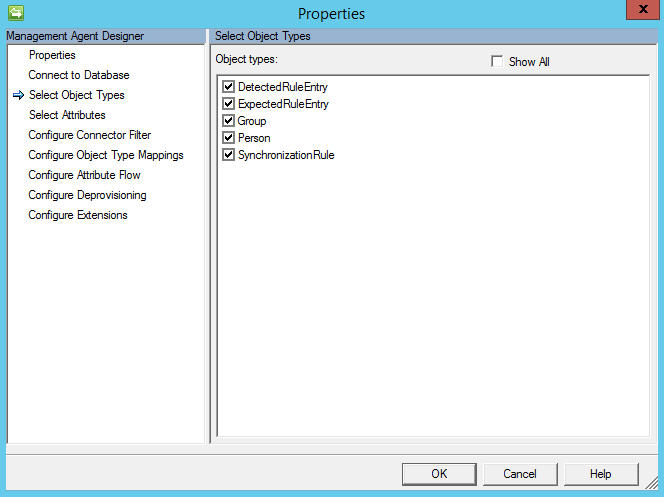
- When open click on Select Object Types
- Notice the New FIM Resource we created previously is not in the list of Object Types to select, Click on Show All
- You should now see the new Resource we created previously, Click on the Object Type (Resource) Location.
- Now click on Configure Object Type Mapping
- Notice that the Object Type Location is not yet mapped to another Object type or Resource , Click on the Object Type Location, click on Add Mapping
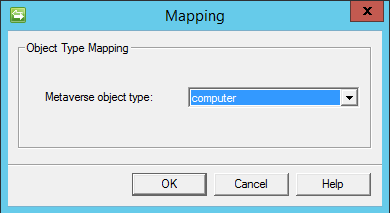
- A window will open for Object Type Mapping, Change the Metaverse object type from Computer to organizationUnit
- organizationalUnit will now be selected, click on OK
- In the Configure Object Type Mappings window verify that the mapping is correct, in the example described in this post we are mapping the Location Resource Object type from the FIM Portal to the organizationalUnit Object type in the FIM Metaverse.
- Click on OK, If the following error is displayed follow steps to add the csObjectID attribute to the organizationalUnit Object Type.
- Close the current set of windows until you only see the Default Management Agent window of the Synchronization Service.
- Click on the Metaverse Designer Tab
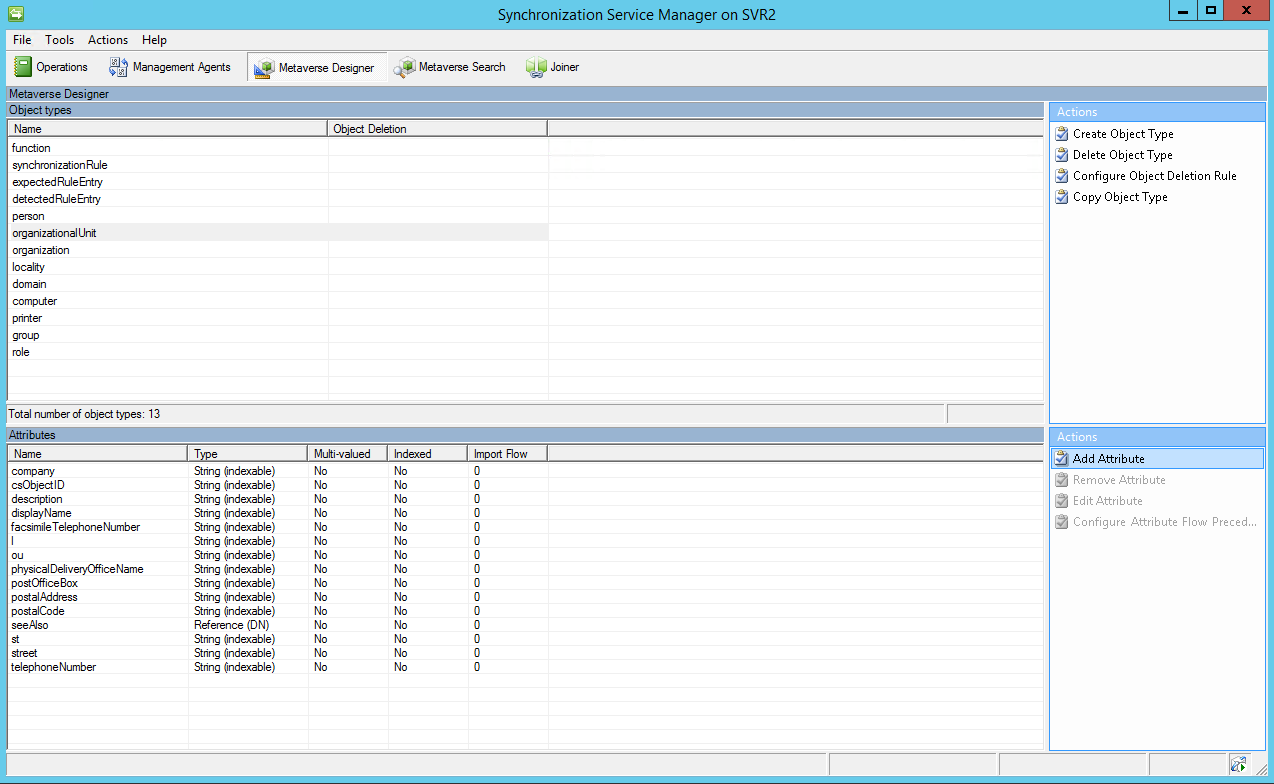
- Click on the organizationalUnit Object type
- In the bottom right window Actions Window Pane click on Add Attributes
- In the Add attribute To Object Type Window in the Available attribute section search for csObjectID, you may need to scroll down to locate.
- Select the attribute csObjectID so that a check is placed in the box to the left of the attribute, Once selected click on OK
- Verify the attribute csObjectID is now displayed in the list of attributes in the bottom left Attributes Window Pane
- In the Synchronization Service Manager click on the Management Agents Tab.
- Lets go back to the Configure Object type Mapping, Reopen the FIM Management Agent.
- When open click on Select Object Types
- Notice the New FIM Resource we created previously is not in the list of Object Types to select, Click on Show All
- You should now see the new Resource we created previously, Click on the Object Type (Resource) Location.
- Now click on Configure Object Type Mapping
- Notice that the Object Type Location is not yet mapped to another Object type or Resource , Click on the Object Type Location, click on Add Mapping
- A window will open for Object Type Mapping, Change the Metaverse object type from Computer to organizationalUnit
- organizationalUnit will now be selected, click on OK
- In the Configure Object Type Mappings window verify that the mapping is correct, in the example described in this post we are mapping the Location Resource Object type from the FIM Portal to the organizationalUnit Object type in the FIM Metaverse
- Click on OK, This time you should be able to continue to the next page Configure Attribute Flow
- Expand Object Type: Location
- Just like configuring the Attribute flows for the initial Management Agents you created add the needed attribute flows for import and export.
- Once all attribute flows have been added click on OK, In some cases you may realize that you are missing an attribute that you wish to configure an attribute flow for, In those cases add all attribute flows you can complete than add the remaining attributes latter.
