Creating and Binding Custom Portal Attributes
Today I'd like to discuss something that comes up with pretty much all FIM deployments: custom attributes. There may be times where you find yourself in need of an attribute that doesn’t exist (i.e. a custom attribute from an HR system that displays an employee ID number). In such instances, we can create the custom attribute in the Portal and Sync engine and map it to an existing target attribute in one or more data sources.
To begin, navigate to the Portal home screen. On the right-hand administration menu, click on “Schema Management”.
This will display the “Schema Management” screen.
In the top navigation menu, select “All Attributes”.
From here, click “New”.
This will display the new attribute wizard. Under the “General” tab, choose a name for you attribute in the “System name” and “Display Name” fields, and select the “Data Type”. In this case, the “Data Type” is an “Indexed String”. Once complete, click “Next”.
This will display the “Localization” tab. Here, select your “Supported Languages”, (if any), and click “Next”.
This will display the “Validation” tab. Here we may enter a string pattern (such as a regular expression) if necessary. In this case, we are not, so click “Next”.
Here we see the “Summary” tab. Review your selections, and click “Submit” to finish.
Now we must create a binding for our newly created attribute. In the top navigation bar, select “All Bindings”.
From here, select “New”.
This will display the “Create Binding” dialogue. In the “General” tab, select a “Resource Type” (in this case, we are binding to a “user” resource type). In the “Attribute Type” box, enter the name of the attribute we just created. Choose whether or not to require the attribute (in this instance, no), and select “Next” to continue.
This will display the “Attribute Override” tab. Enter a “Display Name” for the binding. If you wish the name of the attribute/binding to be displayed differently in the Portal, enter the desired name here. When finished, click “Next”.
As with the attribute, under the “Localization” tab, select the desired supported language (if any), and click “Next” to continue.
For “Validation”, enter a “string pattern” if necessary. Otherwise, click “Next” to continue.
This will display the “Summary” tab. Verify the information you have entered, then click “Submit” to finish.
Now that our custom attribute has been created and bound, we must edit the associated Management Policy Rule (MPR) to be aware of it.
To begin, navigate to the Portal home screen, and in the right hand administration menu, select “Management Policy Rules”.
This will display the MPR screen. In the top navigation bar, enter “sync” in the “Search for:” field, then click on the magnifying glass.
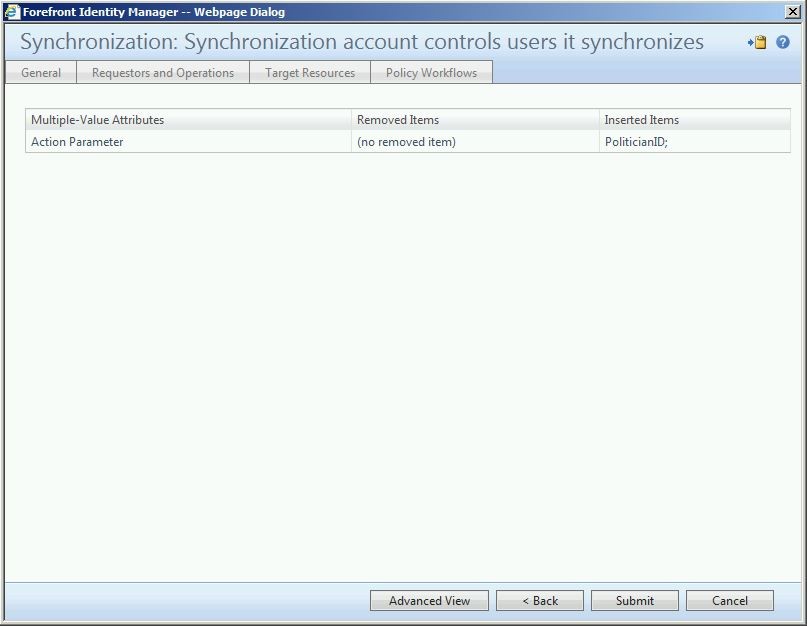
Of the returned MPRs, choose “Synchronization: Synchronization account controls users it synchronizes”.
This will open the MPR. Of the tabs, select “Target Resources”.
Under “Resource Attributes”, scroll to the end of the list and enter the name of the newly created attribute, then click “OK”.
Click “Submit” to finish.
Now we must create the attribute in the Synchronization engine. From the Synchronization Service Manager, click on “Metaverse Designer”.
Under “Object types”, select “Person”. Next, in the “Actions” menu in the bottom right corner, select “Add Attribute”.
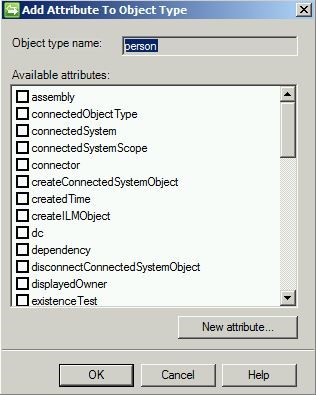
This will open the “Add Attribute To Object Type” menu. Select “New Attribute”.
Enter the “Attribute name:” and select the “Attribute type”. When finished, click “OK”.
At this point we must make the attribute we created in the Portal visible to the FIM MA connector space. To do this, from the Sync engine, select the FIM Management Agent and in the right hand “Actions” menu, select “Refresh Schema”.
To proceed, click “OK”
You will now be prompted for credentials. Enter the password for the service account used (in this case the “FIMMA” account), and click “OK”.
If the new attribute is detected, you should see the following. Click “Close”.
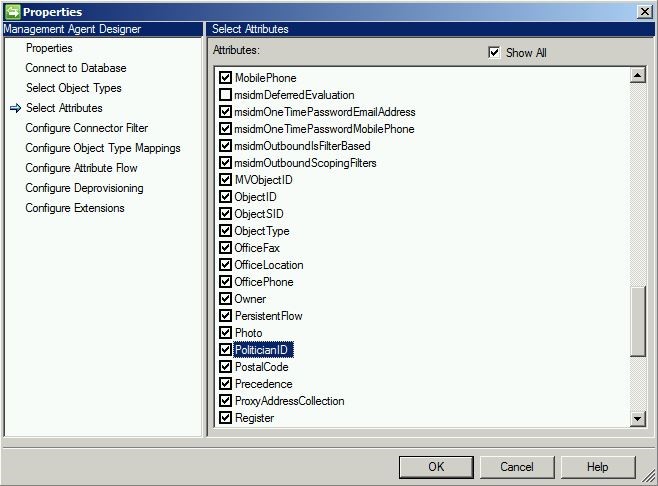
Next, right click on the FIM Management Agent and select “Properties”.
Under “Select Attributes”, check the box for “Show All”. You should now see your newly created attribute listed. Check the corresponding box beside it and click “OK” to finish.
We must now determine what connected data source attribute we will be mapping to our new custom attribute. A generalization cannot be made here due to the vast differences of all environments. In this scenario, our connected data source is Active Directory, and the AD attribute we are mapping to is “employeeNumber”. Regardless of the attribute being used, it must be brought in before we can use it.
To begin, from the sync engine, right click on the management agent and select “Properties”.
Under the “Select Attributes” tab, scroll through the list until you find the attribute you wish to use, check the box next to it then click “OK”.
Once selected, we need to run a Full Import on the management agent to pull that attribute in from our connected data source.
In the job statistics section in the lower left hand corner, you should now see corresponding updates.
Finally, we will create an import/export flow on our FIM management agent. Right click on the FIMMA, select “Properties”, and choose the “Configure Attribute Flow” tab. Create a “person” type mapping of the attribute for both import and export flow directions, as shown below:
Questions? Comments? Love FIM so much you can't even stand it?
EMAIL US>WE WANT TO HEAR FROM YOU!<
## https://blogs.msdn.com/connector_space # #
Comments
- Anonymous
July 28, 2016
Thank you for this article. I am doing a new install of MIM 2016 (replace instance of FIM 2010) and it really helped me out! - Anonymous
September 07, 2018
The comment has been removed- Anonymous
September 18, 2018
The comment has been removed
- Anonymous


