Intel® SCS Add-on 2.1 and SC2012 R2 ConfigMgr Integration (RCS Database mode) - Part 5
Intel SCS Add-on Installation
This paragraph will cover Intel SCS Add-on installation procedure.
For details about installing Intel SCS Add-on, please refer to Intel(R)_SCS_Addon_SCCM_2012.pdf document included in the Intel SCS Add-on for Microsoft System Center Configuration Manager package.
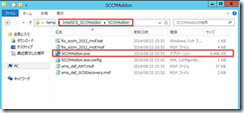
1. From the Intel SCS Add-on package, run SCCMAddon.exe.
2. Click [Next]
3. Select [I accept the terms of the license agreement] and click [Next]
4. Click [Next]
5. For [Solution Framework], [Platform Discovery] and [Intel AMT] , select the […] button and specify the component path. Each component is included in Intel SCS package.

6. The [Solution Framework] component path is ”IntelSCS\Solutions_Framework\Framework\”.
7. Select [HostSolutionManagerInstaller.msi] then click [OK]. [Platform Discovery] and [Intel AMT] component path will be inserted automatically.

8. Verify that all [Action] are set to “Install” and check each [RCS Integration] option. Click [Next]

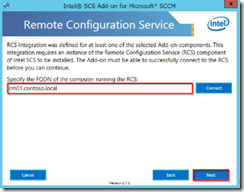
9. Type the FQDN of RCS server (in my case, it is the ConfigMgr site server) and click [Next]
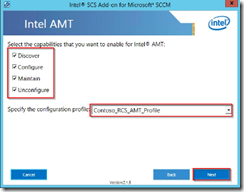
10. Check [Discover], [Configure], [Maintain] and [Unconfigure] and select the profile created on step 2.4 [Contoso_RCS_AMT_Profile].
Click [Next]
11. Click [Browse]
12. Select “Entire Directory” from the [Locations] and type the account name “CM_AMT” and click [OK].
13. Type the account [Password] and Click on [Next]
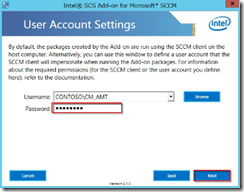
14. Click on [Browse]
15. Select Intel SCS package path and click [OK]
16. Verify the path and click [Next]

17. Wait for the installation to finish and click [Next]
18. Click [Finish]
Post installation tasks
Once Intel SCS Add-on has been installed, we need to take care of some post installation tasks.
Update collections
In the ConfigMgr console, [Asset and intelligence]-[Overview]-[Device collections], [Update Membership] of all collection which name starts with “Intel”.
Configuration of task sequences schedule
1. From [Software Library]-[Overview]-[Operating Systems]-[Task Sequences], we’re going to setup schedules of the following 3 task sequences:
- Intel AMT: Remote Configuration
- Intel AMT: Remote Maintenance
- Intel AMT: Remote Unconfigure
Select each task sequence and from the bottom part of the console, click on [Deployments] tab and open the properties of the deployment.
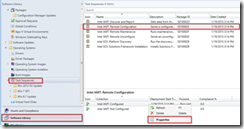
2. From [Scheduling] tab, click on [New]
3. Click on [Schedule] button
4. As a recurrence pattern, select [Custom Interval] and select to recur every [1 Days]. Click [OK]
5. Click [OK]
6. Verify that the schedule has been added and click [OK]

7. From [Software Library]-[Overview]-[Operating Systems]-[Task Sequences], we’re going to setup schedules of the following 2 task sequences:
- Intel AMT: Discovery and Report
- Intel SCS: Platform Discovery
Select each task sequence and from the bottom part of the console, click on [Deployments] tab and open the properties of the deployment.

8. From [Scheduling] tab, click on [New]
9. Click on [Schedule] button
10. As a recurrence pattern, select [Weekly] and select to recur every [1 weeks].
Click [OK]
11. Click [OK]
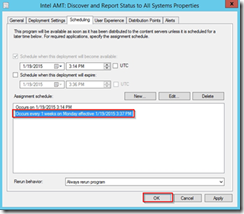
12. Verify that the schedule has been added and click [OK]

