3D Scenes Studio (preview) for Azure Digital Twins
Azure Digital Twins 3D Scenes Studio (preview) is an immersive 3D environment, where end users can monitor, diagnose, and investigate operational data with the visual context of 3D assets. 3D Scenes Studio empowers organizations to enrich existing 3D models with visualizations powered by Azure Digital Twins data, without the need for 3D expertise. The visualizations can be easily consumed from web browsers.
With a digital twin graph and curated 3D model, subject matter experts can leverage the studio's low-code builder to map the 3D elements to digital twins, and define UI interactivity and business logic for a 3D visualization of a business environment. The 3D scenes can then be consumed in the hosted 3D Scenes Studio, or in a custom application that leverages the embeddable 3D viewer component.
This article gives an overview of 3D Scenes Studio and its key features. For comprehensive, step-by-step instructions on how to use each feature, see Use 3D Scenes Studio (preview).
Studio overview
Work in 3D Scenes Studio is built around the concept of scenes. A scene is a view of a single business environment, and is comprised of 3D content, custom business logic, and references to an Azure Digital Twins instance. You can have multiple scenes for a single digital twin instance.
Scenes are configured in the builder inside the 3D Scenes Studio. Then, you can view your finished scenes in the studio's built-in view experience, or embedded in custom web applications. You can extend the built-in viewer or create your own viewers that access the 3D Scenes files and your Azure Digital Twins graph.
Environment and storage
From an Azure resource perspective, a 3D Scenes Studio environment is formed from a unique pairing of an Azure Digital Twins instance and an Azure storage container. You'll create these Azure resources separately, and connect 3D Scenes Studio to both of them to set up a unique 3D Scenes Studio environment. You can then start building scenes in this environment.
Each 3D scene relies on two files, which will be stored inside your storage container:
- A 3D file, which contains scenario data and meshes for your visualization. You import this file into 3D Scenes Studio.
- A configuration file, which is automatically created for you when you create a 3D Scenes Studio environment. This file contains the mapping definition between 3D content and Azure Digital Twins, as well as all of the user-defined business logic.
Note
Because you manage the storage container in your Azure account, you'll be able to modify any of the stored scene files directly. However, it's not recommended to manually edit the configuration file, as this creates a risk of inconsistencies in the file that might not be handled correctly in the viewer experience.
Once you've created a 3D Scenes Studio environment with an Azure Digital Twins instance and an Azure storage container, it's possible to switch out either of these resources for a different instance or container to change the environment. Here are the results of these actions:
- Switching to a new Azure Digital Twins instance will switch the underlying digital twin data for the scene. This is not recommended, because it may result in broken digital twin references in your scene.
- Switching to a new storage container means switching to a new configuration file, which will change the set of scenes that are showing in the studio.
To share your scenes with someone else, the recipient will need at least Reader-level access to both the Azure Digital Twins instance and the storage container in the environment, as well as URL information about these resources. For detailed instructions on how to share your environment with someone else, see Share your environment.
Set up
To work with 3D Scenes Studio, you'll need the following required resources:
An Azure storage account, and a private container in the storage account
To view 3D scenes, you'll need at least Storage Blob Data Reader access to these storage resources. To build 3D scenes, you'll need Storage Blob Data Contributor or Storage Blob Data Owner access.
You can grant required roles at either the storage account level or the container level. For more information about Azure storage permissions, see Assign an Azure role.
You should also configure Cross-Origin Resource Sharing (CORS) for your storage account, so that 3D Scenes Studio will be able to access your storage container. For complete CORS setting information, see Use 3D Scenes Studio (preview).
Then, you can access 3D Scenes Studio at this link: 3D Scenes Studio.
Once there, you'll link your 3D environment to your storage resources, and configure your first scene. For detailed instructions on how to perform these actions, see Initialize your 3D Scenes Studio environment and Create, edit, and view scenes.
Builder
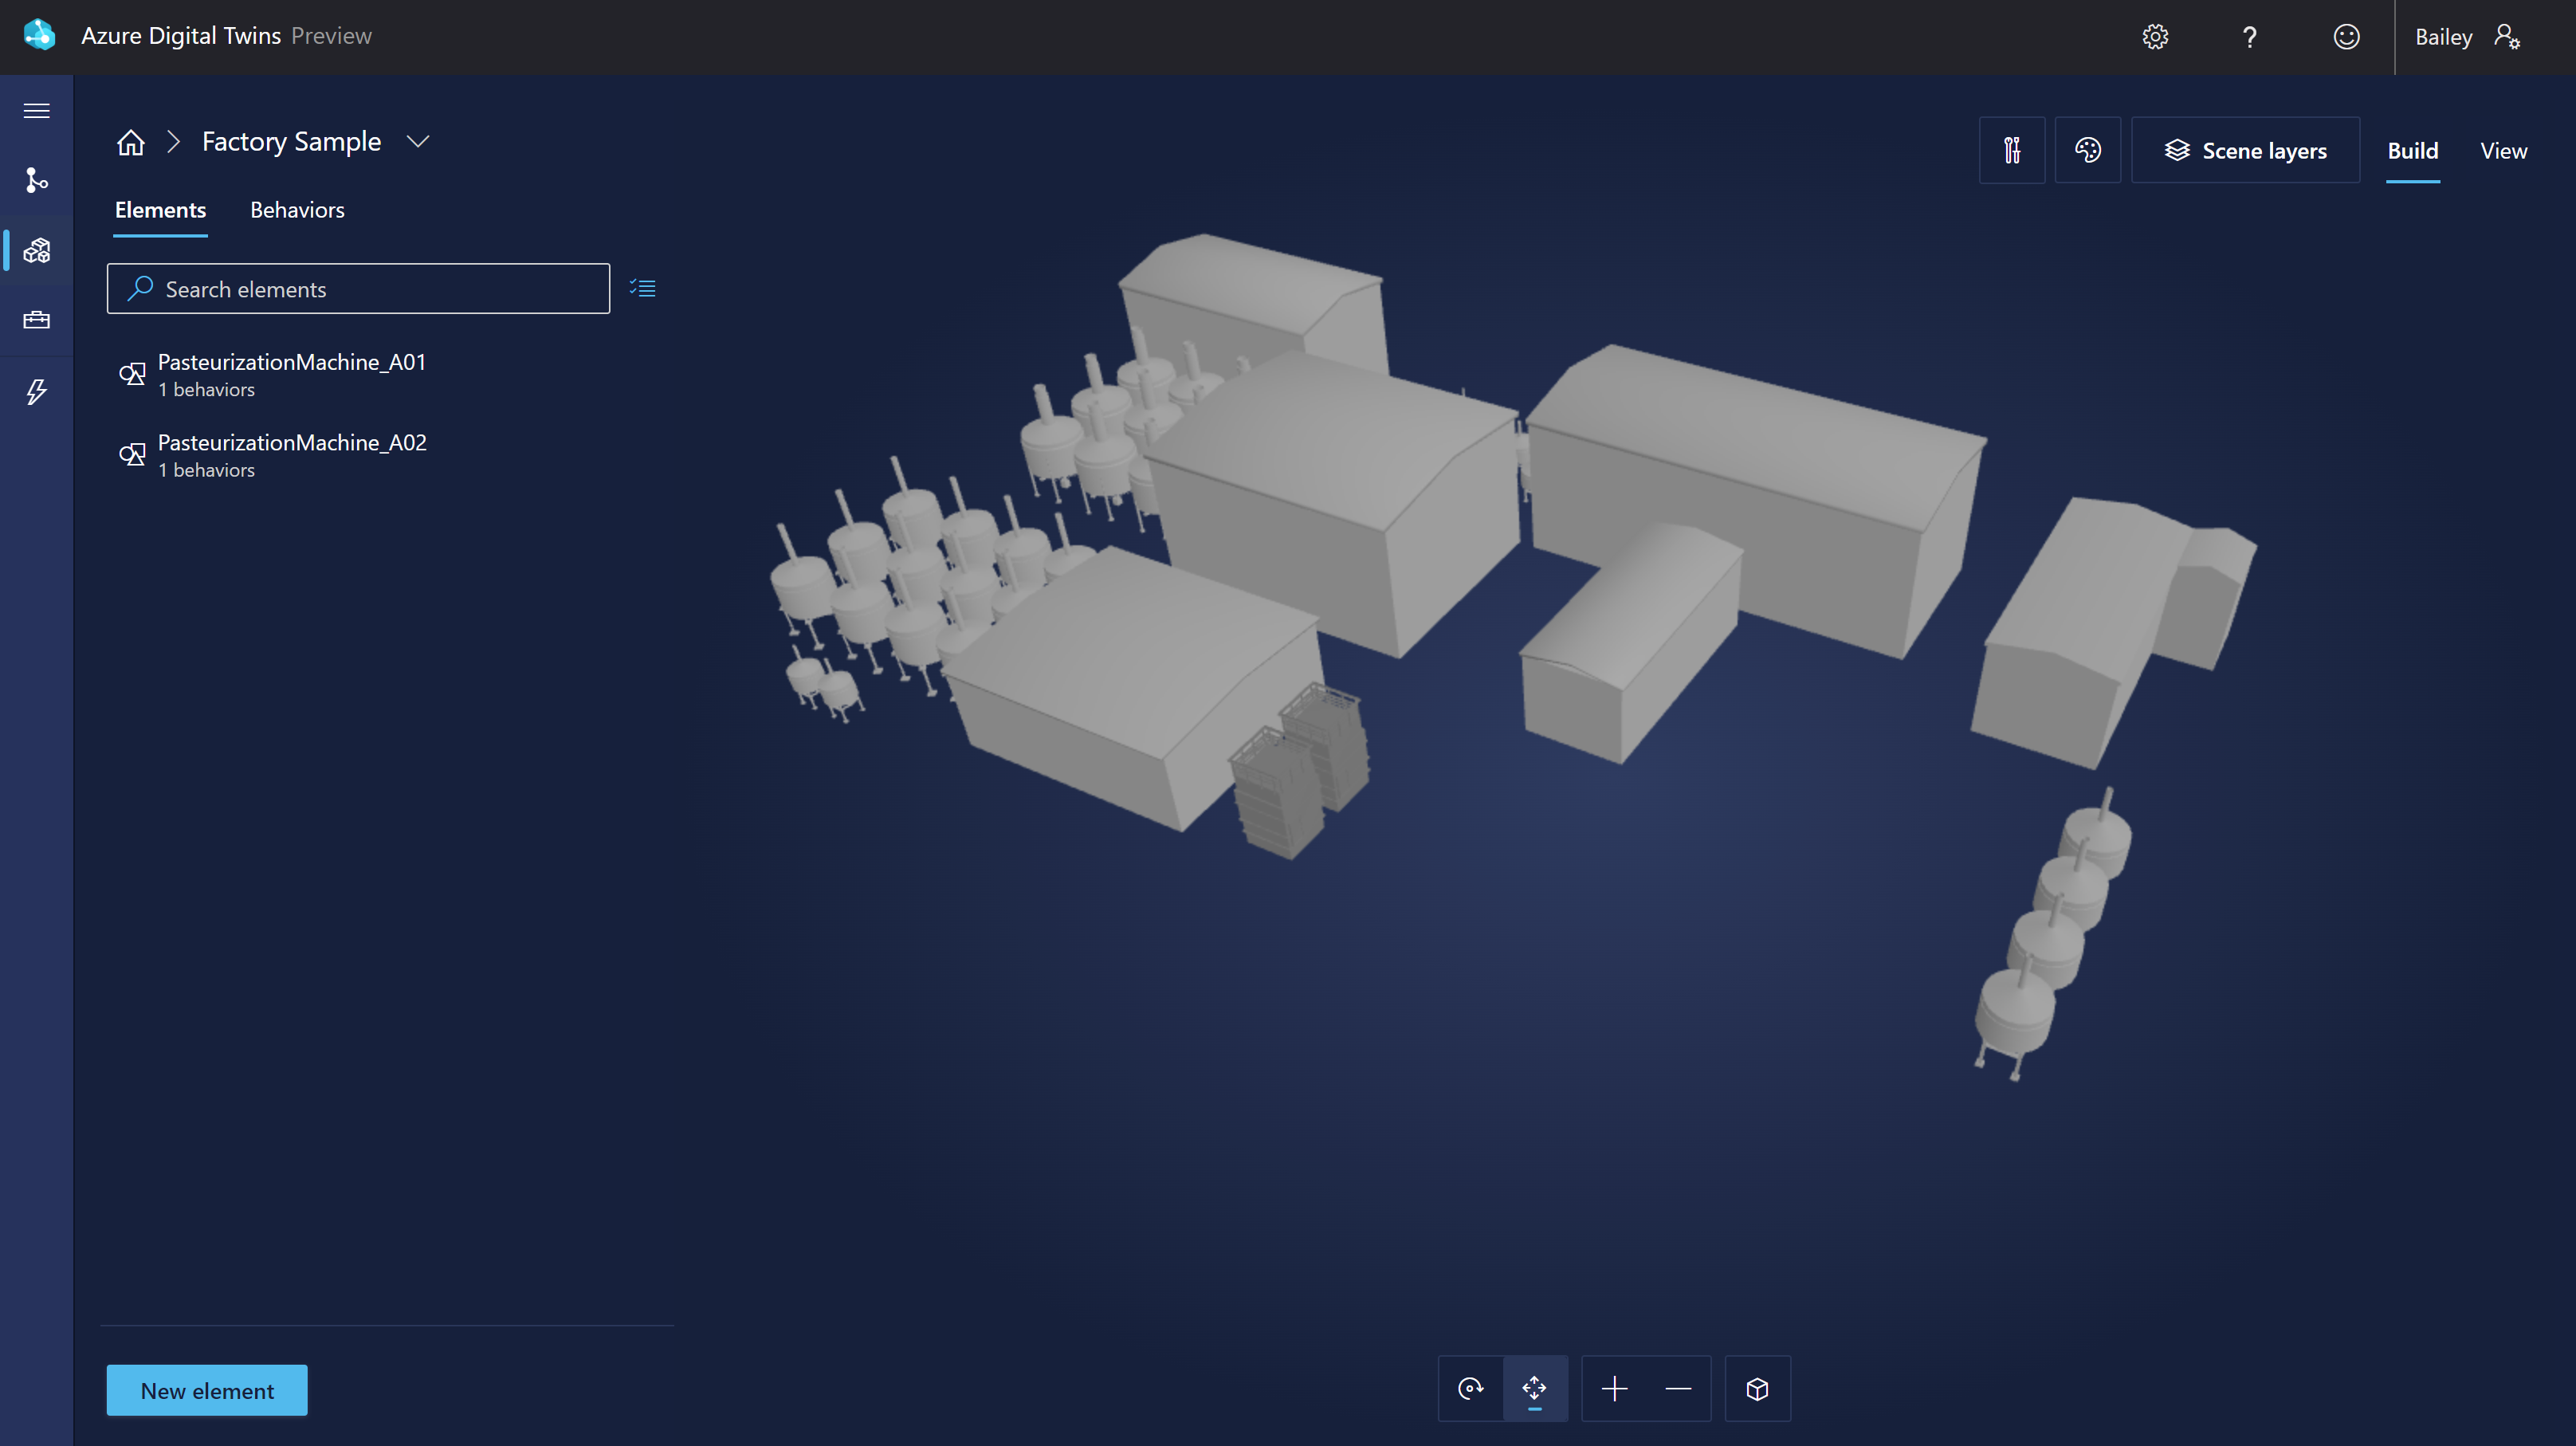
The builder in 3D Scenes Studio is the primary interface for configuring your scenes. It is a low-code, visual experience.
Here's what the builder looks like:
In the builder, you'll create elements and behaviors for your scene. The following sections explain these features in more detail.
Elements
Elements are user-defined 3D meshes that are linked to digital twins, mapping the visualization pieces to relevant twin data.
When creating an element in the builder, you'll define the following components:
- Primary twin: Each element is connected to a primary digital twin counterpart. You connect the element to a twin in your Azure Digital Twins instance so that the element can represent your twin and its data within the 3D visualization.
- Name: Each element needs a name. You might want to make it match the
$dtIdof its primary twin. - Meshes: Identify which components of the 3D model represent this element.
- Behaviors: Behaviors describe how elements appear in the visualization. You can assign behaviors to this element here.
- Other twins: If you want, you can add secondary digital twin data sources for an element. You should only add other twins when there are additional twins with data beyond your primary twin that you want to leverage in your behaviors. After configuring another twin, you'll be able to use properties from that twin when defining behaviors for that element.
Behaviors
Behaviors are business logic rules that use digital twin data to drive visuals in the scene.
When creating a behavior for an element, you'll define the following components:
- Elements: Behaviors describe the visuals that are applied to each element in the visualization. You can choose which elements this behavior applies to.
- Twins: Identify the set of twins whose data is available to this behavior. This includes the targeted elements' primary twins, and any other twins.
- Visual rules: Visual rules are data-driven overlays on your elements that you can configure to indicate the health or status of the element.
- Widgets: Widgets are data-driven visuals that provide additional data to help you diagnose and investigate the scenario that the behavior represents. Configuring widgets will help you make sure the right data is discoverable when a particular condition is active.
You can also create layers in your scene to help organize your behaviors. Layers act like tags on the behaviors, enabling you to define which behaviors need to be seen together, thus creating custom views of your scene for different roles or tasks.
Viewer
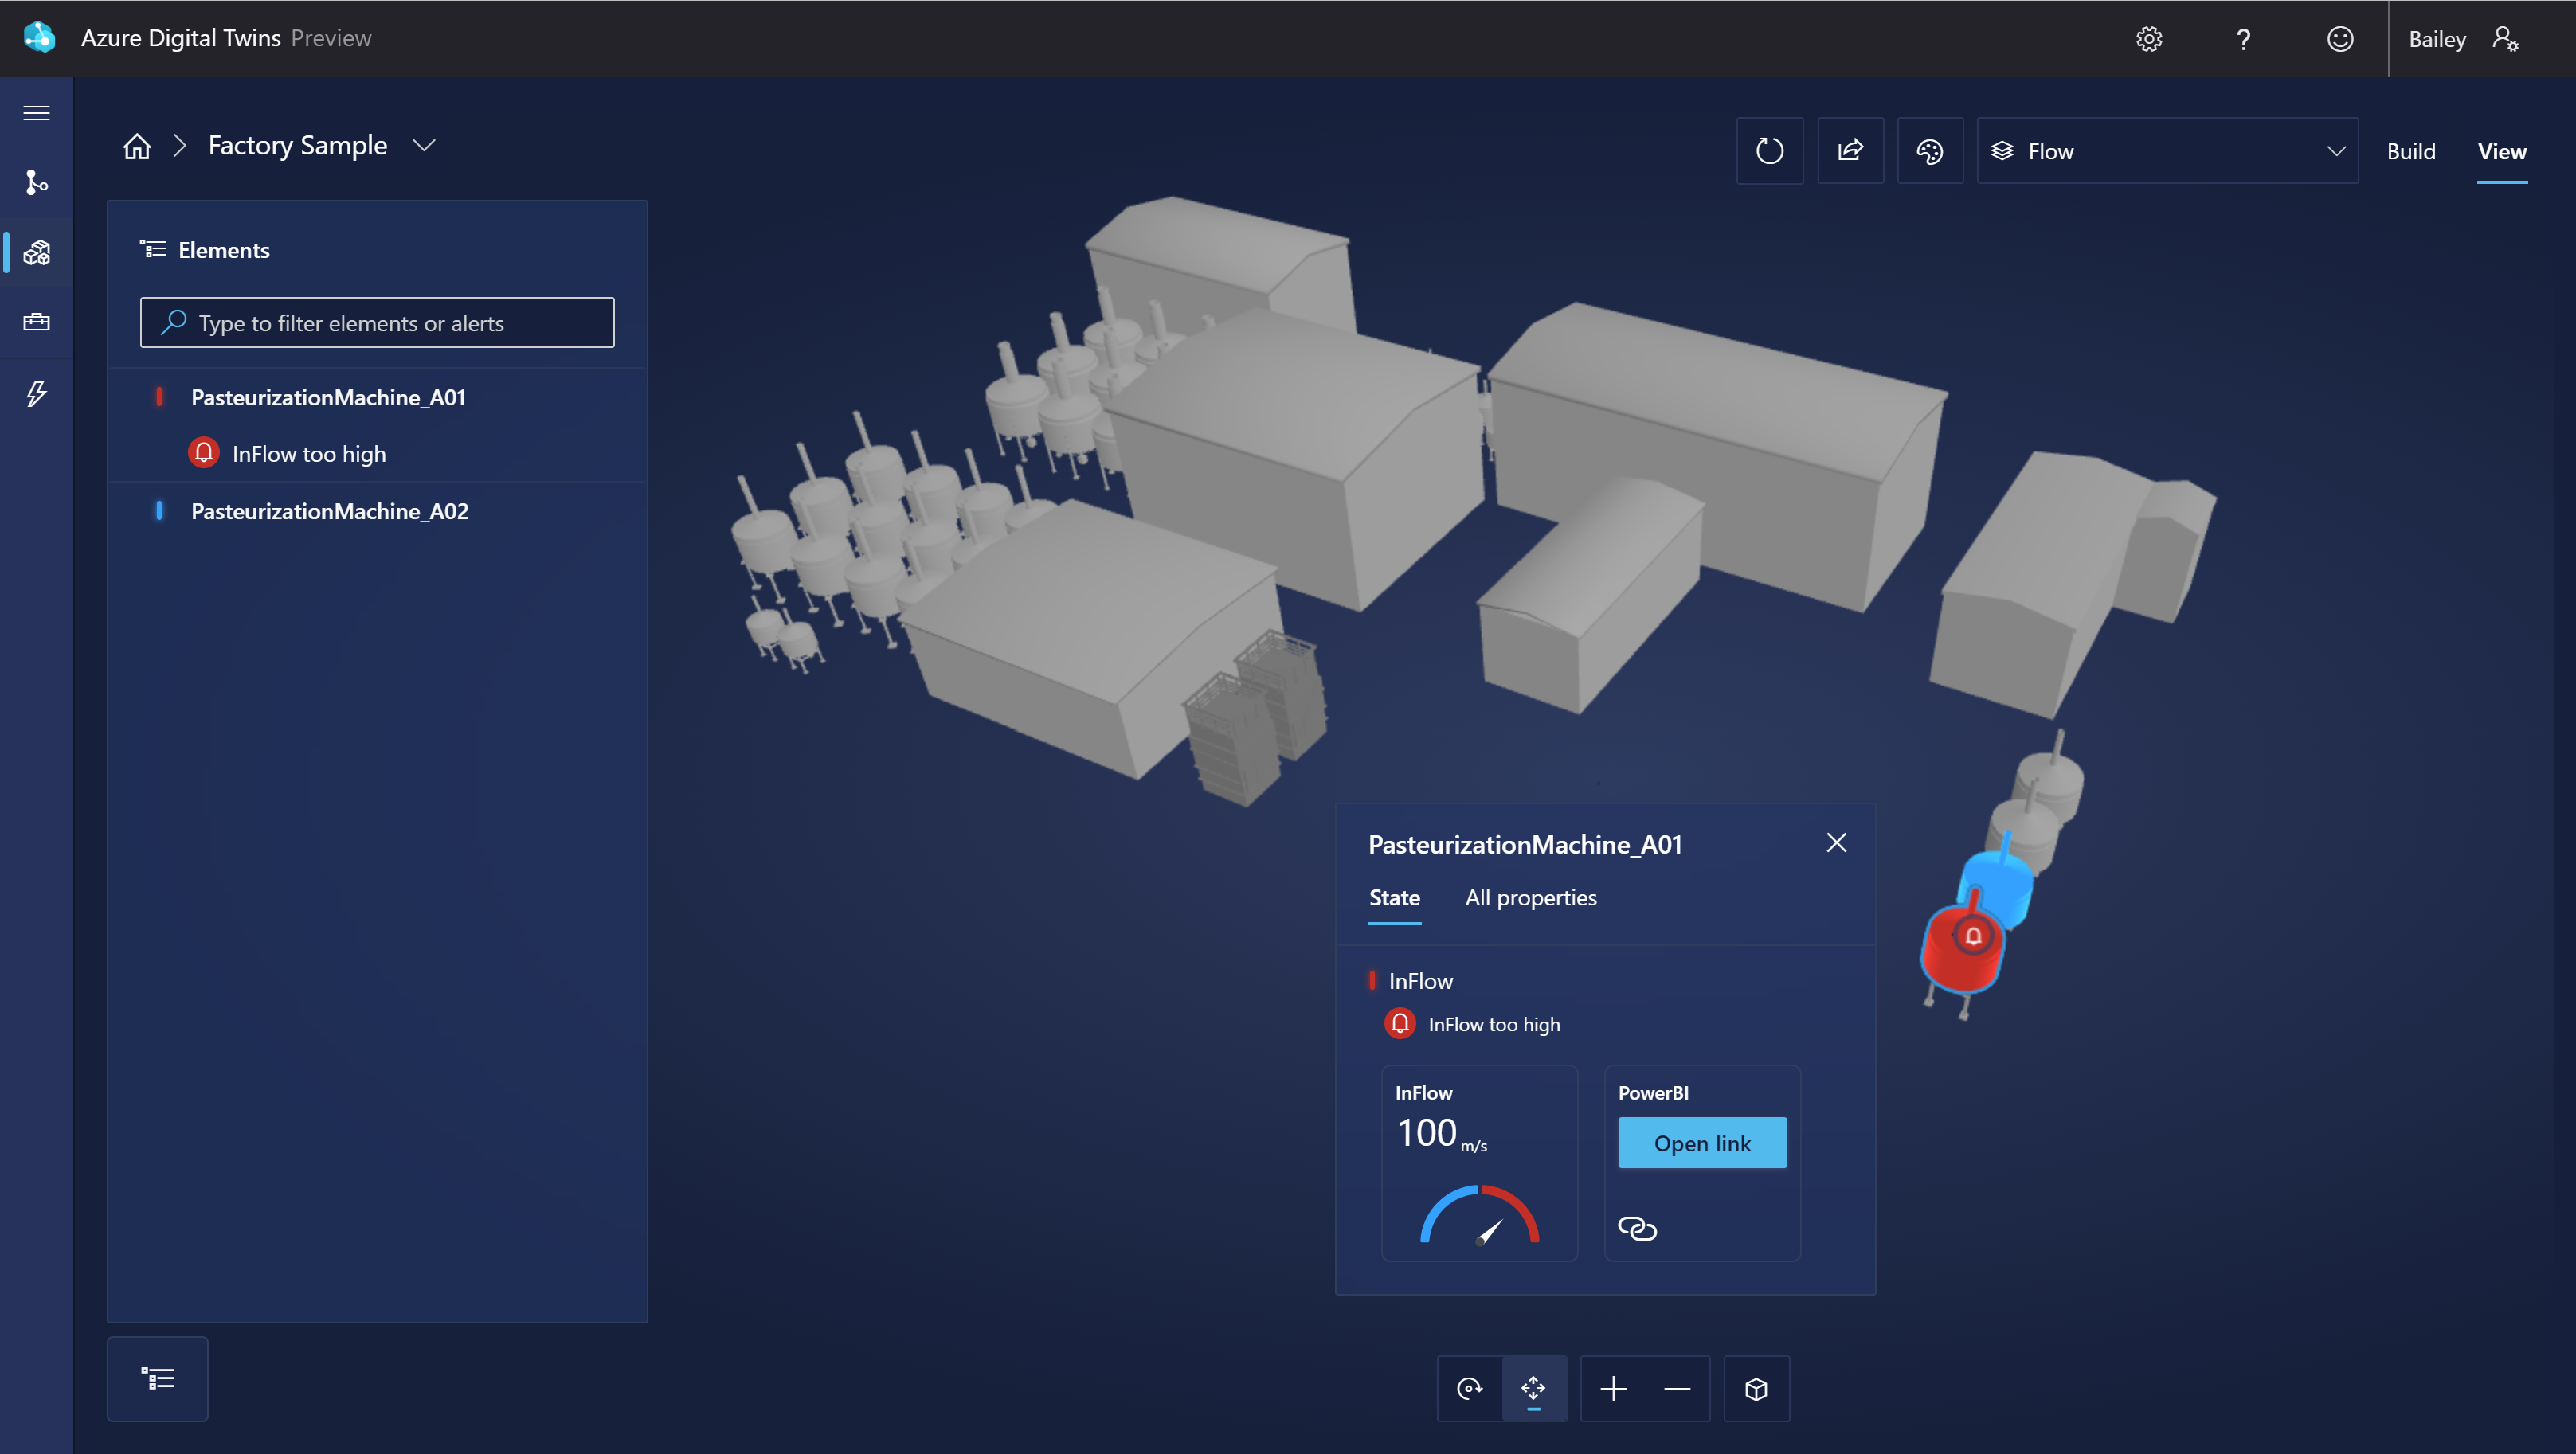
3D Scenes Studio also contains a viewer, which end users (like operators) can use to explore the 3D scene.
Here's what the viewer looks like:
You can use the Elements list to explore all the elements and active conditions in your scene, or you can click elements directly in the visualization to explore their details.
Embeddable viewer component
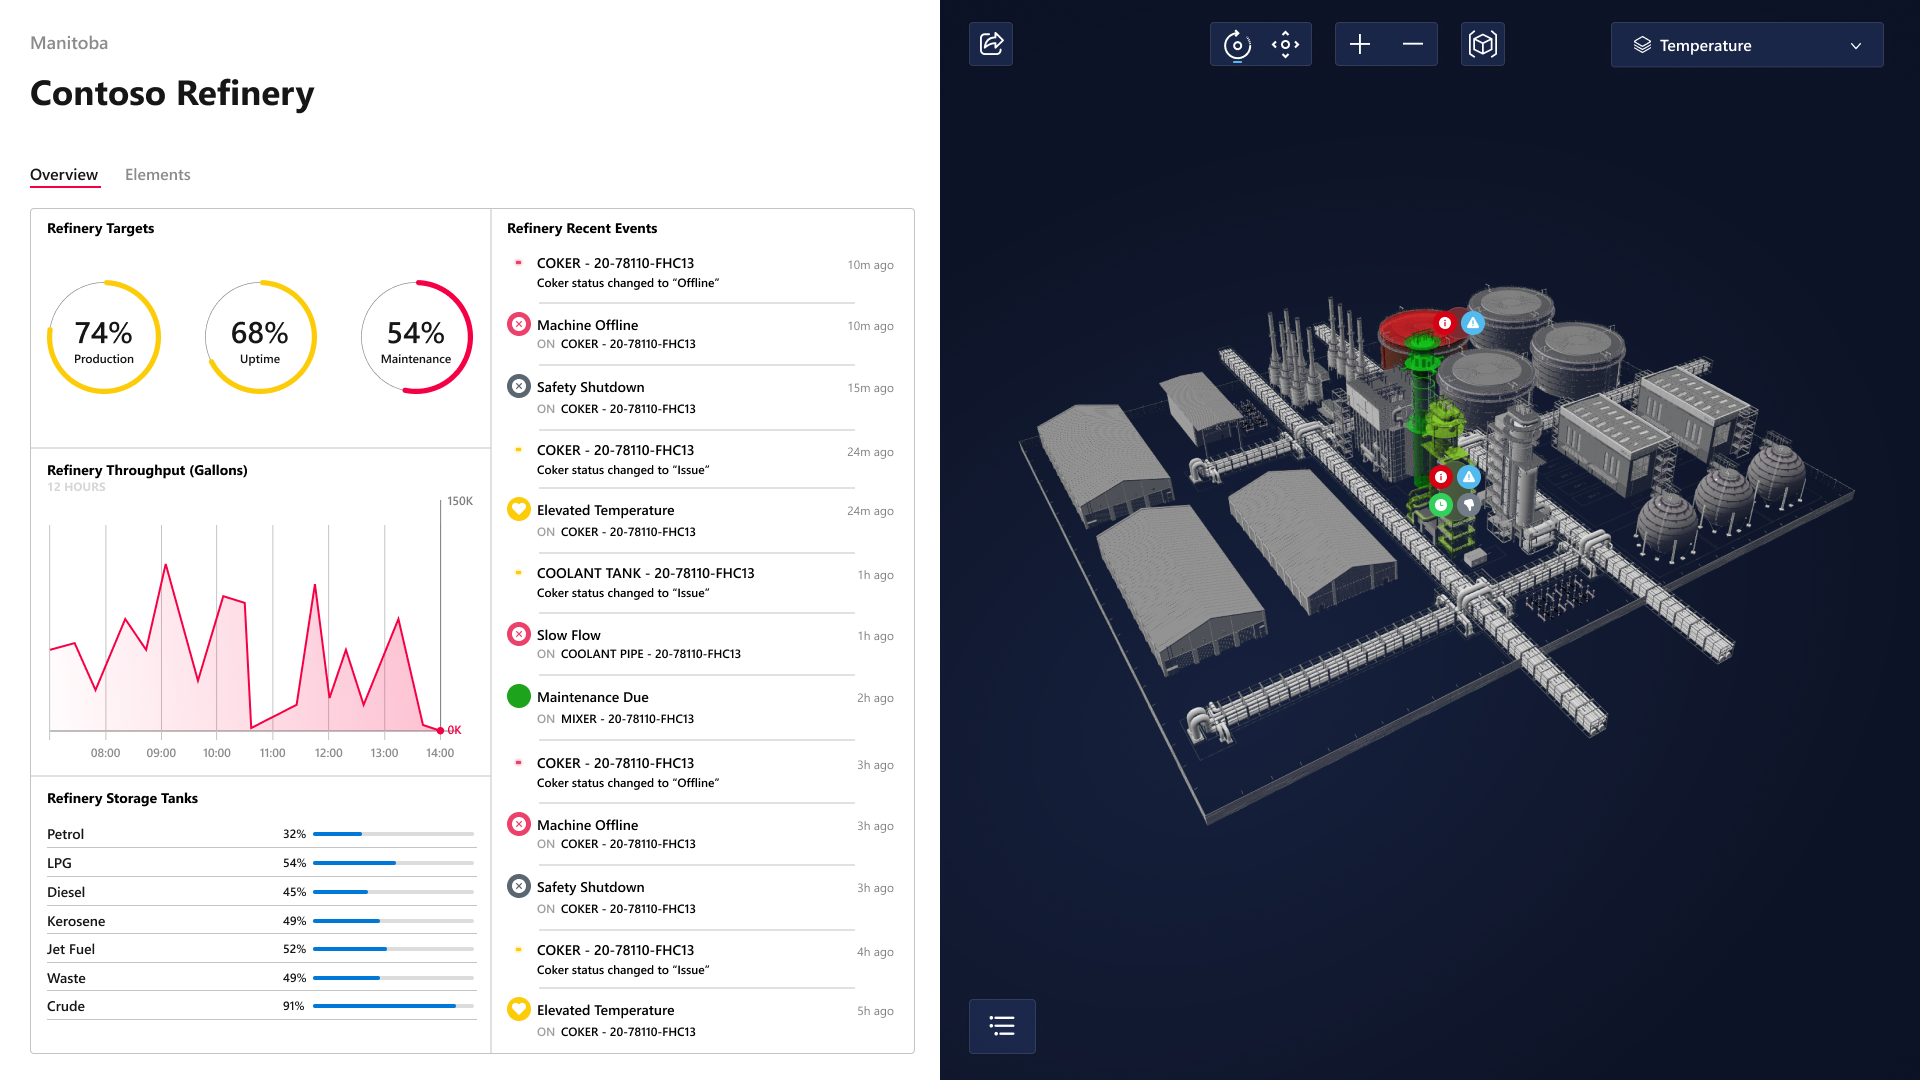
3D Scenes Studio is extensible to support additional viewing needs. The viewer component can be embedded into custom applications, and can work in conjunction with 3rd party components.
Here's an example of what the embedded viewer might look like in an independent application:
The 3D visualization component library is available in GitHub, in the iot-cardboard-js repository. This is an open source React component library for creating internet of things (IoT) web experiences.
For instructions on how to use the library to embed 3D experiences into custom applications, see the repository's wiki, Embedding 3D Scenes. You can also use the CRA IoT Cardboard sample, which deploys a Create React App template for the library, to get started building a custom app with an embedded viewer.
Limits and performance
When working with 3D Scenes Studio, it's recommended to stay within the following limits. If you exceed these recommended limits, you may experience degraded performance or unintended application behavior.
| Capability | Recommended limit |
|---|---|
| Number of linked twins (including all unique primary twins and secondary twins on elements) | No limit, but consider performance implications as number of twins increases. For more detail, see Refresh rate and performance below. |
| Size of 3D file | 100 MB |
These limits are recommended because 3D Scenes Studio leverages the standard Azure Digital Twins APIs, and therefore is subject to the published API rate limits. As the number of digital twins linked to the scenes increases, so does the amount of data that is pulled into your scene on a regular data refresh (see the next part of this section for more detail about refresh rates). This means that you will see these additional API calls reflected in billing meters and operation throughput.
Refresh rate and performance
The default refresh rate of the 3D scene viewer starts at 10 seconds for fewer than 100 twins. It increases as the number of twins increases, at a rate of about one second for every 10 twins.
The minimum refresh rate can also be configured manually, to exercise some control over how often data is pulled and the resulting impact on performance. You can configure the minimum refresh rate for the viewer to be anywhere between 10 seconds and one hour. The viewer will never drop below the minimum refresh rate that you set. The viewer may, however, raise the actual refresh rate as the number of twins increases, in an effort to improve performance.
For instructions on how to configure the minimum refresh rate for the viewer, see Configure minimum refresh rate.
Next steps
Try out 3D Scenes Studio with a sample scenario in Get started with 3D Scenes Studio.
Or, learn how to use the studio's full feature set in Use 3D Scenes Studio.


