Install Microsoft Defender for IoT on-premises management console software (Legacy)
Important
Defender for IoT now recommends using Microsoft cloud services or existing IT infrastructure for central monitoring and sensor management, and plans to retire the on-premises management console on January 1st, 2025.
For more information, see Deploy hybrid or air-gapped OT sensor management.
This article is one in a series of articles describing the deployment path for a Microsoft Defender for IoT on-premises management console for air-gapped OT sensors.
Use the procedures in this article when installing Microsoft Defender for IoT software on an on-premises management console. You might be reinstalling software on a pre-configured appliance, or you may be installing software on your own appliance.
Caution
Only documented configuration parameters on the OT network sensor are supported for customer configuration. Do not change any undocumented configuration parameters or system properties, as changes may cause unexpected behavior and system failures.
Removing packages from your sensor without Microsoft approval can cause unexpected results. All packages installed on the sensor are required for correct sensor functionality.
Prerequisites
Before installing Defender for IoT software on your on-premises management console, make sure that you have:
An OT plan in Defender for IoT on your Azure subscription.
Access to the Azure portal as a Security Reader, Security Admin, Contributor, or Owner user
A physical or virtual appliance preparedfor your on-premises management console.
Download software files from the Azure portal
Download on-premises management console software from Defender for IoT in the Azure portal.
Select Getting started > On-premises management console and select the software version you want to download.
Important
If you're updating software from a previous version, alternately use the options from the Sites and sensors > Sensor update (Preview) menu. Use this option especially when you're updating your on-premises management console together with connected OT sensors. For more information, see Update Defender for IoT OT monitoring software.
All files downloaded from the Azure portal are signed by root of trust so that your machines use signed assets only.
Install on-premises management console software
This procedure describes how to install OT management software on an on-premises management console, for a physical or virtual appliance.
The installation process takes about 20 minutes. After the installation, the system is restarted several times.
Note
Towards the end of this process you will be presented with the usernames and passwords for your device. Make sure to copy these down as these passwords will not be presented again.
To install the software:
Mount the ISO file onto your hardware appliance or VM using one of the following options:
Physical media – burn the ISO file to your external storage, and then boot from the media.
- DVDs: First burn the software to the DVD as an image. Your physical media must have a minimum of 4-GB storage.
Virtual mount – use iLO for HPE appliances, or iDRAC for Dell appliances to boot the ISO file.
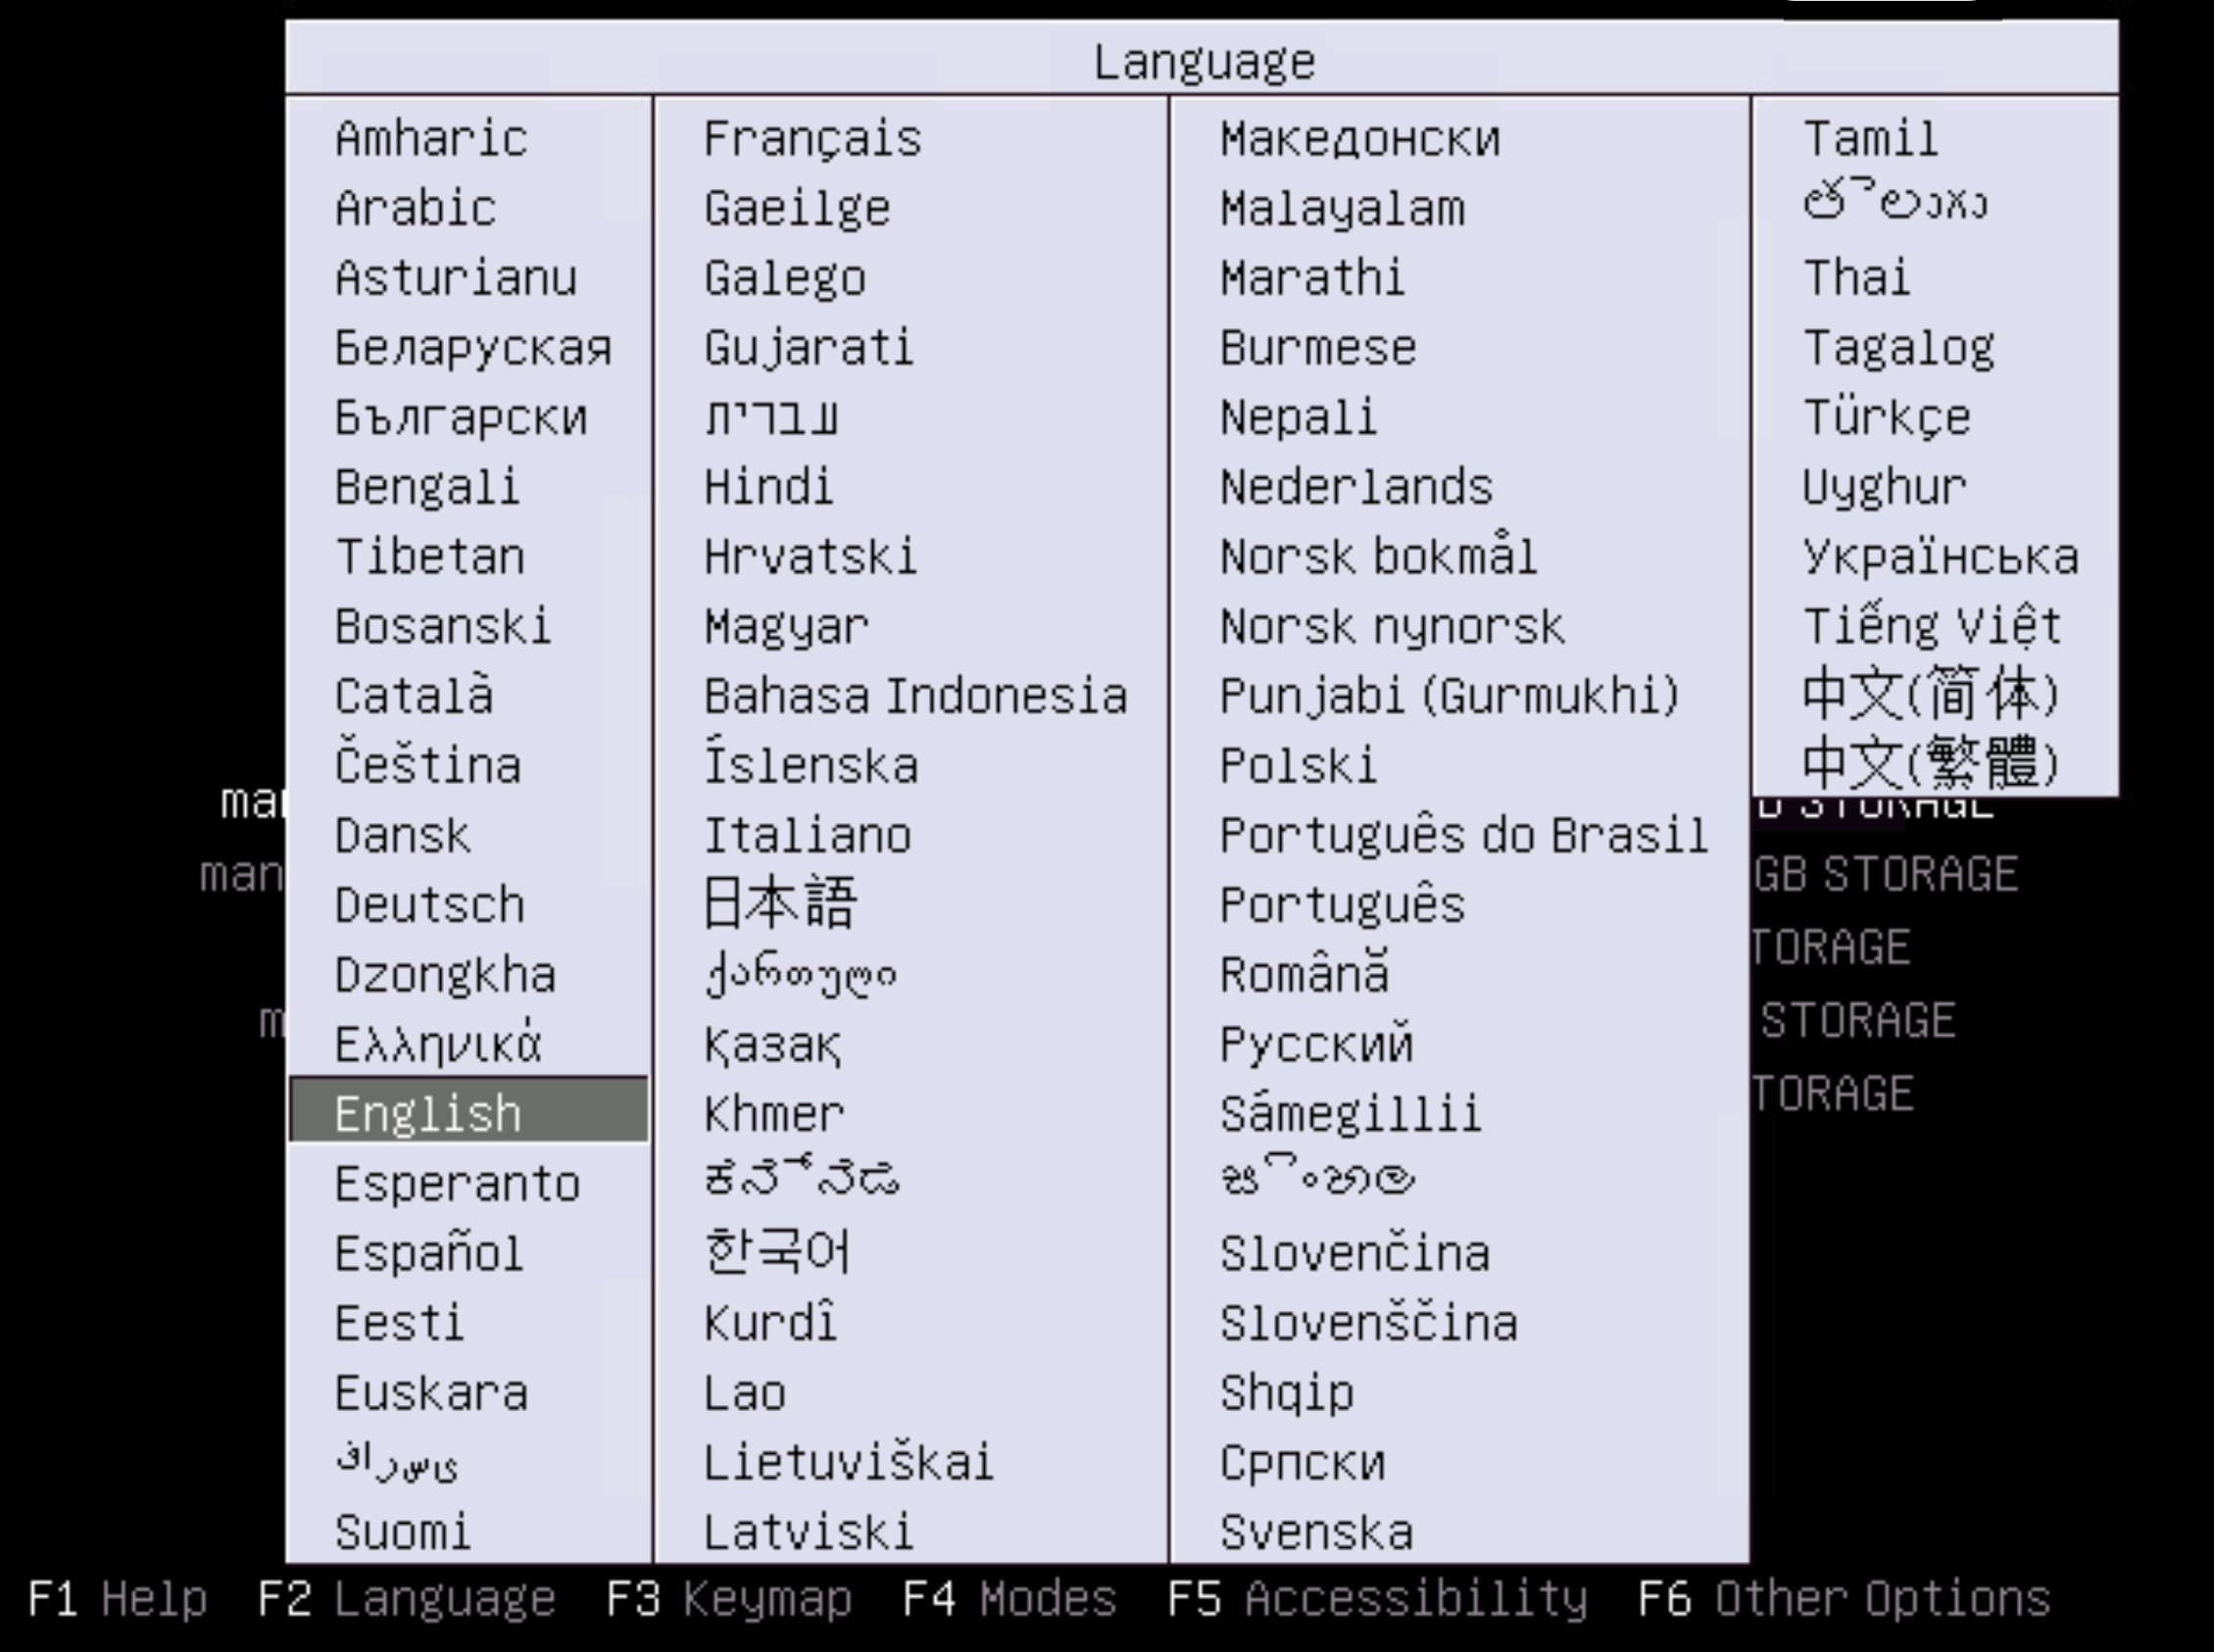
The initial console window lists installation languages. Select the language you want to use. For example:

The console lists a series of installation options. Select the option that best matches your requirements.
The installation wizard starts running. This step takes several minutes to complete, and includes system reboots.
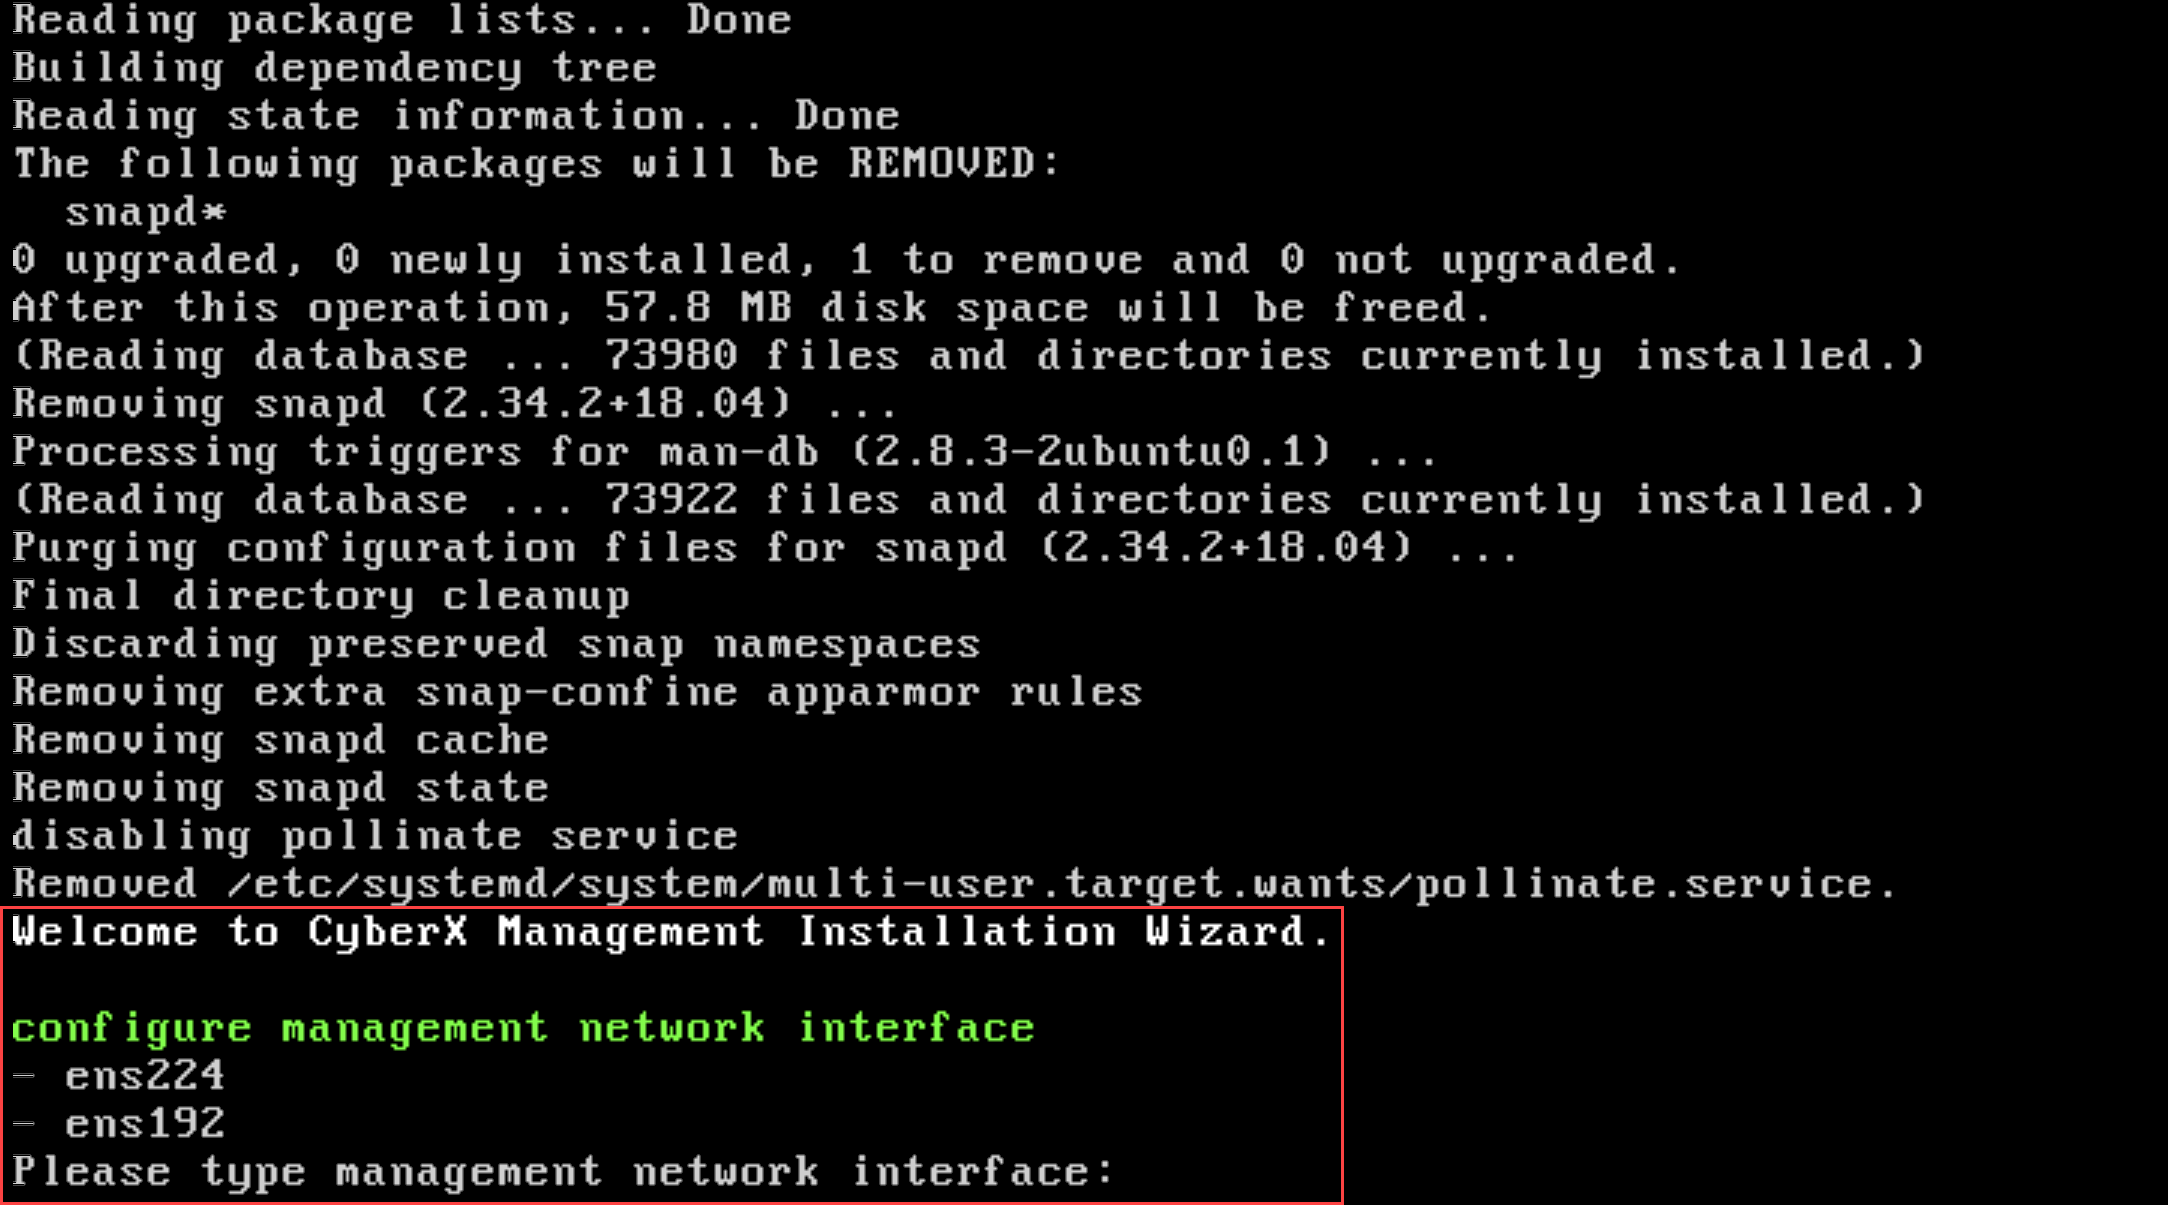
When complete, a screen similar to the following appears, prompting you to enter your management interface:

At each prompt, enter the following values:
Prompt Value configure management network interfaceEnter your management interface. For the following appliances, enter specific values:
- Dell: Entereth0, eth1
- HP: Enterenu1, enu2
Other appliances may have different options.configure management network IP addressEnter the on-premises management console's IP address. configure subnet maskEnter the on-premises management console's subnet mask address. configure DNSEnter the on-premises management console's DNS address. configure default gateway IP addressEnter the IP address for the on-premises management console's default gateway. (Optional) Enhance security to your on-premises management console by adding a secondary NIC dedicated for attached sensors within an IP address range. When you use a secondary NIC, the first is dedicated for end-users, and the secondary supports the configuration of a gateway for routed networks.
If you're installing a secondary Network Interface Card (NIC), enter the following details for the sensor's monitoring interface as prompted:
Prompt Value configure sensor monitoring interfaceEnter eth1or another value as needed for your system.configure an IP address for the sensor monitoring interfaceEnter the secondary NIC's IP address configure a subnet mask for the sensor monitoring interfaceEnter the secondary NIC's subnet mask address. If you choose not to install the secondary NIC now, you can do so at a later time.
When prompted, enter
Yto accept the settings. The installation process runs for about 10 minutes.When the installation process is complete, an appliance ID is displayed with a set of credentials for the cyberx privileged user. Save the credentials carefully as they won't be displayed again.
When you're ready, press ENTER to continue. An appliance ID is displayed with a set of credentials for the support privileged user. Save these credentials carefully as well, as they won't be displayed again either.
For more information, see Default privileged on-premises users.
When you're ready, press ENTER to continue.
The installation is complete and you're prompted to sign in. Sign in using one of the privileged user credentials you saved from the previous step. At this point, you can also browse to the on-premises management console's IP address in a browser and sign in there.
Configure network adapters for a VM deployment
After deploying an on-premises management console sensor on a virtual appliance, configure at least one network adapter on your VM to connect to both the on-premises management console UI and to any connected OT sensors. If you've added a secondary NIC to separate between the two connections, configure two separate network adapters.
On your virtual machine:
Open your VM settings for editing.
Together with the other hardware defined for your VM, such as memory, CPUs, and hard disk, add the following network adapters:
For more information, see:
- Your virtual machine software documentation
- On-premises management console (VMware ESXi)
- On-premises management console (Microsoft Hyper-V hypervisor)
- Networking requirements
Find a port on your appliance
If you're having trouble locating the physical port on your appliance, sign into the on-premises management console and run the following command to find your port:
sudo ethtool -p <port value> <time-in-seconds>
This command causes the light on the port to flash for the specified time period. For example, entering sudo ethtool -p eno1 120, will have port eno1 flash for 2 minutes, allowing you to find the port on the back of your appliance.
Next steps
For more information, see Troubleshoot the on-premises management console.
