Tutorial: Copy data from Azure Data Box via SMB
This tutorial describes how to connect to and copy data from your Data Box to an on-premises server using the local web UI. The Data Box device contains the data exported from your Azure Storage account.
In this tutorial, you learn how to:
- Prerequisites
- Connect to Data Box
- Copy data from Data Box
Prerequisites
Before you begin, make sure that:
- You have placed the order for Azure Data Box.
- For an import order, see Tutorial: Order Azure Data Box.
- For an export order, see Tutorial: Order Azure Data Box.
- You've received your Data Box and the order status in the portal is Delivered.
- You have a host computer to which you want to copy the data from your Data Box. Your host computer must
- Run a Supported operating system.
- Be connected to a high-speed network. We strongly recommend that you have at least one 10-GbE connection. If a 10-GbE connection isn't available, use a 1-GbE data link but the copy speeds will be impacted.
Connect to Data Box
Based on the storage account selected, Data Box creates up to:
- Three shares for each associated storage account for GPv1 and GPv2.
- One share for premium storage.
- One share for blob storage account.
Under block blob and page blob shares, first-level entities are containers, and second-level entities are blobs. Under shares for Azure Files, first-level entities are shares, second-level entities are files.
The following table shows the UNC path to the shares on your Data Box and Azure Storage path URL where the data is uploaded. The final Azure Storage path URL can be derived from the UNC share path.
| Blobs and Files | Paths and URLs |
|---|---|
| Azure Block blobs | \\<DeviceIPAddress>\<StorageAccountName_BlockBlob>\<ContainerName>\files\a.txthttps://<StorageAccountName>.blob.core.windows.net/<ContainerName>/files/a.txt |
| Azure Page blobs | \\<DeviceIPAddress>\<StorageAccountName_PageBlob>\<ContainerName>\files\a.txthttps://<StorageAccountName>.blob.core.windows.net/<ContainerName>/files/a.txt |
| Azure Files | \\<DeviceIPAddress>\<StorageAccountName_AzFile>\<ShareName>\files\a.txthttps://<StorageAccountName>.file.core.windows.net/<ShareName>/files/a.txt |
If using a Windows Server host computer, follow these steps to connect to the Data Box.
The first step is to authenticate and start a session. Go to Connect and copy. Select Get credentials to get the access credentials for the shares associated with your storage account.

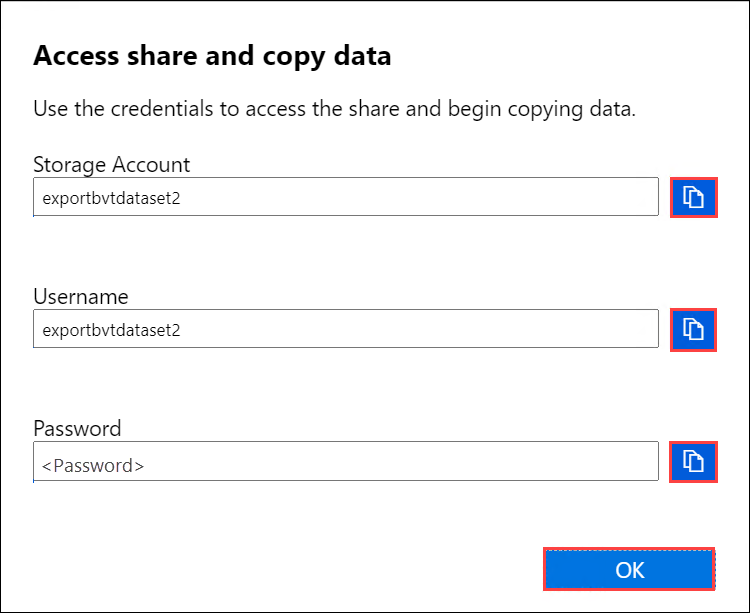
In the Access share and copy data dialog box, copy the Username and the Password corresponding to the share. Select OK.

To access the shares associated with your storage account (exportbvtdataset2 in the following example) from your host computer, open a command window. At the command prompt, type:
net use \\<IP address of the device>\<share name> /u:<IP address of the device>\<user name for the share>Depending upon your data format, the share paths are as follows:
- Azure Block blob -
\\169.254.143.85\exportbvtdataset2_BlockBlob - Azure Page blob -
\\169.254.143.85\exportbvtdataset2_PageBlob - Azure Files -
\\169.254.143.85\exportbvtdataset2_AzFile
- Azure Block blob -
Enter the password for the share when prompted. The following sample shows connecting to a share via the preceding command.
C:\Users\Databoxuser>net use \\169.254.143.85\exportbvtdataset2_BlockBlob /u:169.254.143.85\exportbvtdataset2
Enter the password for 'exportbvtdataset2' to connect to '169.254.143.85':
The command completed successfully.
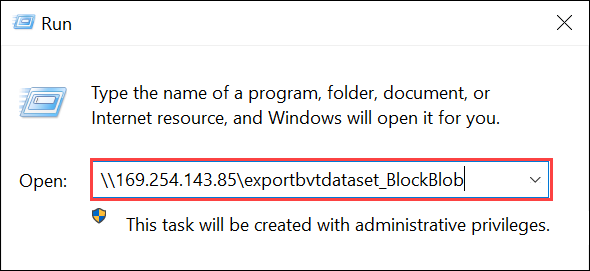
Press Windows + R. In the Run window, specify the
\\<device IP address>. Select OK to open File Explorer.
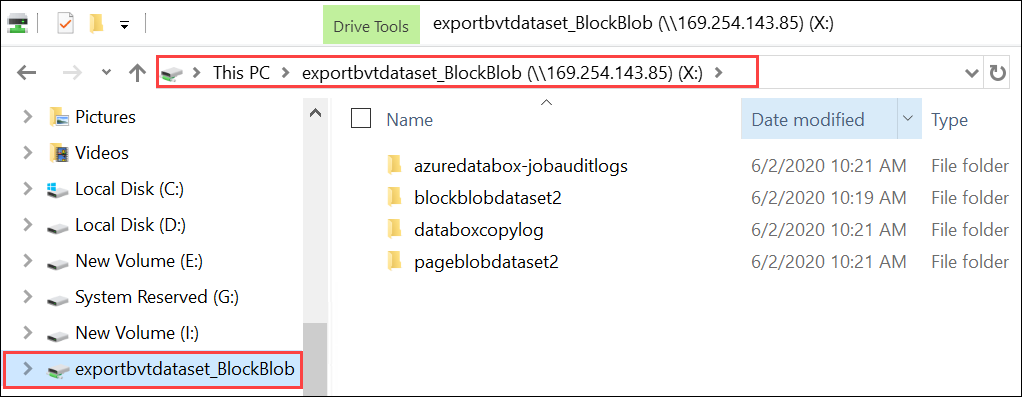
You should now see the shares as folders.

If using a Linux client, use the following command to mount the SMB share. The "vers" parameter below is the version of SMB that your Linux host supports. Plug in the appropriate version in the command below. For versions of SMB that the Data Box supports see Supported file systems for Linux clients
sudo mount -t nfs -o vers=2.1 169.254.143.85:/exportbvtdataset2_BlockBlob /home/databoxubuntuhost/databox
Copy data from Data Box
Once you're connected to the Data Box shares, the next step is to copy data.
Before you begin the data copy:
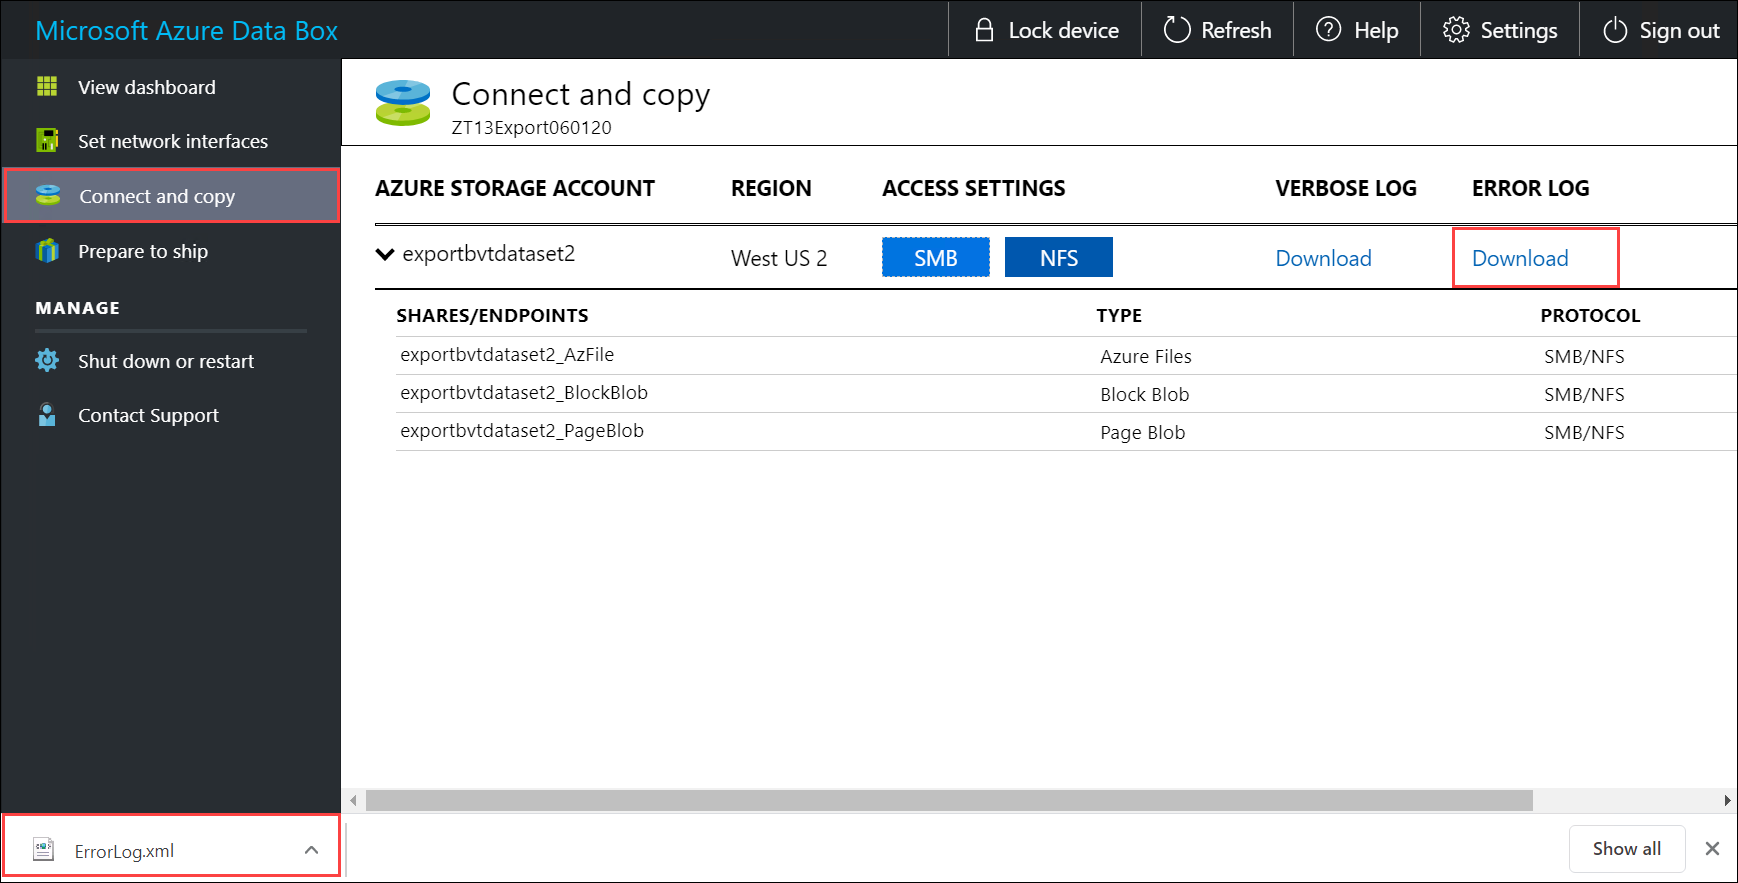
Download the copy log. In the Connect and copy page, select Copy log. When prompted, save the log on your system.
If your copy log size is too large, you will need to use Azure Storage Explorer or AzCopy in order to download the copy log and prevent any failures.
- If you are using Azure Storage Explorer to download the copy log, you can map your Azure storage account in Azure Storage Explorer and then download the raw file.
- If you are using AzCopy to download the copy log, you can use the
AzCopy copycommand to copy the log file from your storage account to your local system.

Repeat the steps to download the verbose log.
Review the verbose log. The verbose log contains a list of all the files that were successfully exported from Azure Storage account. The log also contains file size and checksum computation.
<File CloudFormat="BlockBlob" Path="validblobdata/test1.2.3.4" Size="1024" crc64="7573843669953104266">
</File><File CloudFormat="BlockBlob" Path="validblobdata/helloEndWithDot..txt" Size="11" crc64="7320094093915972193">
</File><File CloudFormat="BlockBlob" Path="validblobdata/test..txt" Size="12" crc64="17906086011702236012">
</File><File CloudFormat="BlockBlob" Path="validblobdata/test1" Size="1024" crc64="7573843669953104266">
</File><File CloudFormat="BlockBlob" Path="validblobdata/test1.2.3" Size="1024" crc64="7573843669953104266">
</File><File CloudFormat="BlockBlob" Path="validblobdata/.......txt" Size="11" crc64="7320094093915972193">
</File><File CloudFormat="BlockBlob" Path="validblobdata/copylogb08fa3095564421bb550d775fff143ed====..txt" Size="53638" crc64="1147139997367113454">
</File><File CloudFormat="BlockBlob" Path="validblobdata/testmaxChars-123456790-123456790-123456790-123456790-123456790-123456790-123456790-123456790-123456790-123456790-123456790-123456790-123456790-123456790-123456790-123456790-123456790-123456790-123456790-123456790-12345679" Size="1024" crc64="7573843669953104266">
</File><File CloudFormat="BlockBlob" Path="export-ut-container/file0" Size="0" crc64="0">
</File><File CloudFormat="BlockBlob" Path="export-ut-container/file1" Size="0" crc64="0">
</File><File CloudFormat="BlockBlob" Path="export-ut-container/file4096_000001" Size="4096" crc64="16969371397892565512">
</File><File CloudFormat="BlockBlob" Path="export-ut-container/file4096_000000" Size="4096" crc64="16969371397892565512">
</File><File CloudFormat="BlockBlob" Path="export-ut-container/64KB-Seed10.dat" Size="65536" crc64="10746682179555216785">
</File><File CloudFormat="BlockBlob" Path="export-ut-container/LiveSiteReport_Oct.xlsx" Size="7028" crc64="6103506546789189963">
</File><File CloudFormat="BlockBlob" Path="export-ut-container/NE_Oct_GeoReport.xlsx" Size="103197" crc64="13305485882546035852">
</File><File CloudFormat="BlockBlob" Path="export-ut-container/64KB-Seed1.dat" Size="65536" crc64="3140622834011462581">
</File><File CloudFormat="BlockBlob" Path="export-ut-container/1mbfiles-0-0" Size="1048576" crc64="16086591317856295272">
</File><File CloudFormat="BlockBlob" Path="export-ut-container/file524288_000001" Size="524288" crc64="8908547729214703832">
</File><File CloudFormat="BlockBlob" Path="export-ut-container/4mbfiles-0-0" Size="4194304" crc64="1339017920798612765">
</File><File CloudFormat="BlockBlob" Path="export-ut-container/file524288_000000" Size="524288" crc64="8908547729214703832">
</File><File CloudFormat="BlockBlob" Path="export-ut-container/8mbfiles-0-1" Size="8388608" crc64="3963298606737216548">
</File><File CloudFormat="BlockBlob" Path="export-ut-container/1mbfiles-0-1" Size="1048576" crc64="11061759121415905887">
</File><File CloudFormat="BlockBlob" Path="export-ut-container/XLS-10MB.xls" Size="1199104" crc64="2218419493992437463">
</File><File CloudFormat="BlockBlob" Path="export-ut-container/8mbfiles-0-0" Size="8388608" crc64="1072783424245035917">
</File><File CloudFormat="BlockBlob" Path="export-ut-container/4mbfiles-0-1" Size="4194304" crc64="9991307204216370812">
</File><File CloudFormat="BlockBlob" Path="export-ut-container/VL_Piracy_Negtive10_TPNameAndGCS.xlsx" Size="12398699" crc64="13526033021067702820">
</File>
Review the copy log for any errors. This log indicates the files that could not be copied due to errors.
Here is a sample output of copy log when there were no errors and all the files were copied during the data copy from Azure to Data Box device.
<CopyLog Summary="Summary">
  <Status>Succeeded</Status>
  <TotalFiles_Blobs>5521</TotalFiles_Blobs>
  <FilesErrored>0</FilesErrored>
</CopyLog>
Here is a sample output when the copy log has errors and some of the files failed to copy from Azure.
<ErroredEntity CloudFormat="AppendBlob" Path="export-ut-appendblob/wastorage.v140.3.0.2.nupkg">
  <Category>UploadErrorCloudHttp</Category>
  <ErrorCode>400</ErrorCode>
  <ErrorMessage>UnsupportBlobType</ErrorMessage>
  <Type>File</Type>
</ErroredEntity><ErroredEntity CloudFormat="AppendBlob" Path="export-ut-appendblob/xunit.console.Primary_2020-05-07_03-54-42-PM_27444.hcsml">
  <Category>UploadErrorCloudHttp</Category>
  <ErrorCode>400</ErrorCode>
  <ErrorMessage>UnsupportBlobType</ErrorMessage>
  <Type>File</Type>
</ErroredEntity><ErroredEntity CloudFormat="AppendBlob" Path="export-ut-appendblob/xunit.console.Primary_2020-05-07_03-54-42-PM_27444 (1).hcsml">
  <Category>UploadErrorCloudHttp</Category>
  <ErrorCode>400</ErrorCode>
  <ErrorMessage>UnsupportBlobType</ErrorMessage>
  <Type>File</Type>
</ErroredEntity><CopyLog Summary="Summary">
  <Status>Failed</Status>
  <TotalFiles_Blobs>4</TotalFiles_Blobs>
  <FilesErrored>3</FilesErrored>
</CopyLog>
You have the following options to export those files:
- You can transfer the files that could not be copied over the network.
- If your data size was larger than the usable device capacity, then a partial copy occurs and all the files that were not copied are listed in this log. You can use this log as an input XML to create a new Data Box order and then copy over these files.
After you connected to the SMB share, begin data copy. You can use any SMB compatible file copy tool such as Robocopy to copy your data. Multiple copy jobs can be initiated using Robocopy.
For more information on Robocopy command, go to Robocopy and a few examples.
Once the copy is complete, go to the Dashboard and verify the used space and the free space on your device.
You can now proceed to ship your Data Box to Microsoft.
Next steps
In this tutorial, you learned about Azure Data Box topics such as:
- Prerequisites
- Connect to Data Box
- Copy data from Data Box
Advance to the next tutorial to learn how to ship your Data Box back to Microsoft.