Use the Azure portal to create and delete consumer users in Azure AD B2C
There might be scenarios in which you want to manually create consumer accounts in your Azure Active Directory B2C (Azure AD B2C) directory. Although consumer accounts in an Azure AD B2C directory are most commonly created when users sign up to use one of your applications, you can create them programmatically and by using the Azure portal. This article focuses on the Azure portal method of user creation and deletion.
To add or delete users, your account must be assigned the User administrator role.
Types of user accounts
As described in Overview of user accounts in Azure AD B2C, there are three types of user accounts that can be created in an Azure AD B2C directory:
- Work
- Guest
- Consumer
This article focuses on working with consumer accounts in the Azure portal. For information about creating and deleting Work and Guest accounts, see Add or delete users using Microsoft Entra ID.
Create a consumer user
- Sign in to the Azure portal.
- If you have access to multiple tenants, select the Settings icon in the top menu to switch to your Azure AD B2C tenant from the Directories + subscriptions menu.
- In the left menu, select Microsoft Entra ID. Or, select All services and search for and select Microsoft Entra ID.
- Under Manage, select Users.
- Select New user.
- Select Create Azure AD B2C user.
- Choose a Sign in method and enter either an Email address or a Username for the new user. The sign in method you select here must match the setting you've specified for your Azure AD B2C tenant's Local account identity provider (see Manage > Identity providers in your Azure AD B2C tenant).
- Enter a Name for the user. This is typically the full name (given and surname) of the user.
- (Optional) You can Block sign in if you wish to delay the ability for the user to sign in. You can enable sign in later by editing the user's Profile in the Azure portal.
- Choose Autogenerate password or Let me create password.
- Specify the user's First name and Last name.
- Select Create.
Unless you've selected Block sign in, the user can now sign in using the sign in method (email or username) that you specified.
Reset a user's password
As an administrator, you can reset a user's password, if the user forgets their password. When you reset the user's password, a temporary password is autogenerated for the user. The temporary password never expires. The next time the user signs in, the password will still work, regardless how much time has passed since the temporary password was generated. Then user must reset password to a permanent one.
Important
Before you reset a user's password, set up a force password reset flow in Azure Active Directory B2C, otherwise the user won't be able to sign-in.
To reset a user's password:
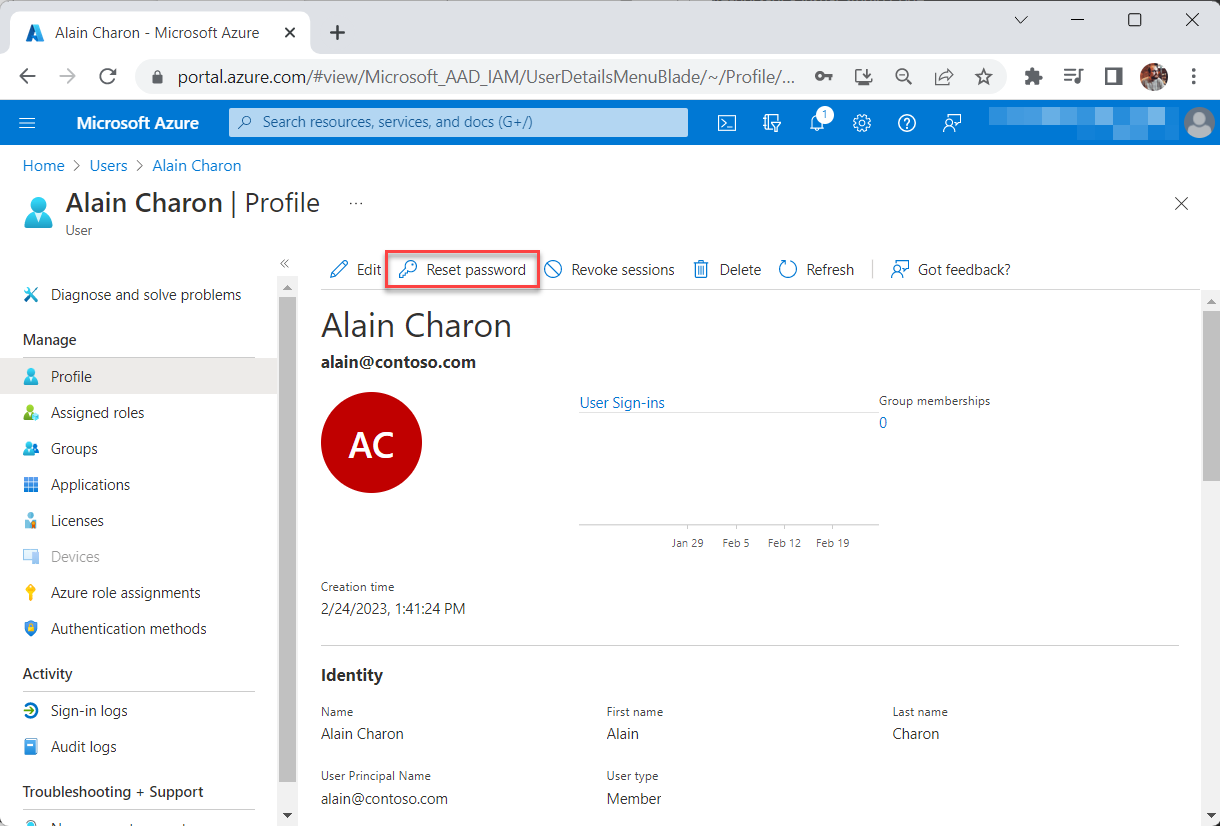
- In your Azure AD B2C directory, select Users, and then select the user you want to reset the password.
- Search for and select the user that needs the reset, and then select Reset Password.
- In the Reset password page, select Reset password.
- Copy the password and give it to the user. The user will be required to change the password during the next sign-in process.
Delete a consumer user
- In your Azure AD B2C directory, select Users, and then select the user you want to delete.
- Select Delete, and then Yes to confirm the deletion.
For details about restoring a user within the first 30 days after deletion, or for permanently deleting a user, see Restore or remove a recently deleted user using Microsoft Entra ID.
Export consumer users
- In your Azure AD B2C directory, search for Microsoft Entra ID.
- Select Users, and then select Bulk Operations and Download Users.
- Select Start, and then select File is ready! Click here to download.
When downloading users via Bulk Operations option, the CSV file will bring users with their UPN attribute with the format objectID@B2CDomain. This is by design since that's the way the UPN information is stored in the B2C tenant.
Revoke a consumer user's session
Currently, Azure AD B2C doesn't support user session revocation from the Azure portal. However, you can achieve this task by using Microsoft Graph PowerShell or Microsoft Graph API. If you choose to use Microsoft Graph PowerShell, use the following steps:
- If you haven't done so, install Microsoft Graph PowerShell module.
- In your Windows PowerShell, run the following command, then respond to the prompts. This command allows you to sign in with the required scopes. You need to sign in with your Azure AD B2C admin account to consent to the required scopes:
Connect-MgGraph -Scopes "User.ReadWrite.All" - After you successfully sign in, run the following command in your Windows PowerShell. Replace
$userIdwith the consumer user's objectId or UPN.Revoke-MgUserSign -UserId $userId
Next steps
For automated user management scenarios, for example migrating users from another identity provider to your Azure AD B2C directory, see Azure AD B2C: User migration.
