Add users to Azure Pipelines
TFS 2017 | TFS 2015
Permissions for build and release pipelines are primarily set at the object-level for a specific build or release, or for select tasks, at the collection level.
You can manage security for different types of resources such as variable groups, secure files, and deployment groups by adding users or groups to that role. Project administrator can grant or restrict access to project resources. If you want to allow a team member to edit pipelines, you must be a project administrator in order to do so.
Set permissions for build pipelines
From within your project, select Build and Release, and then select Builds to access your build pipelines.

Select Security to set the permissions for all build pipelines.

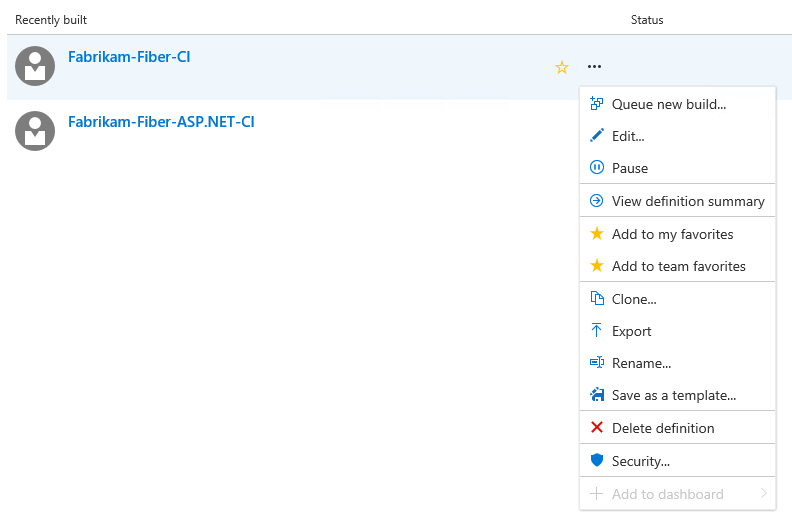
To set permissions for a specific build pipeline, select the context menu for that build and select Security.
Choose the group you want to set permissions for, and then change the permission setting to grant or restrict access. In the following example, we change the contributors permission to allow editing build definitions.
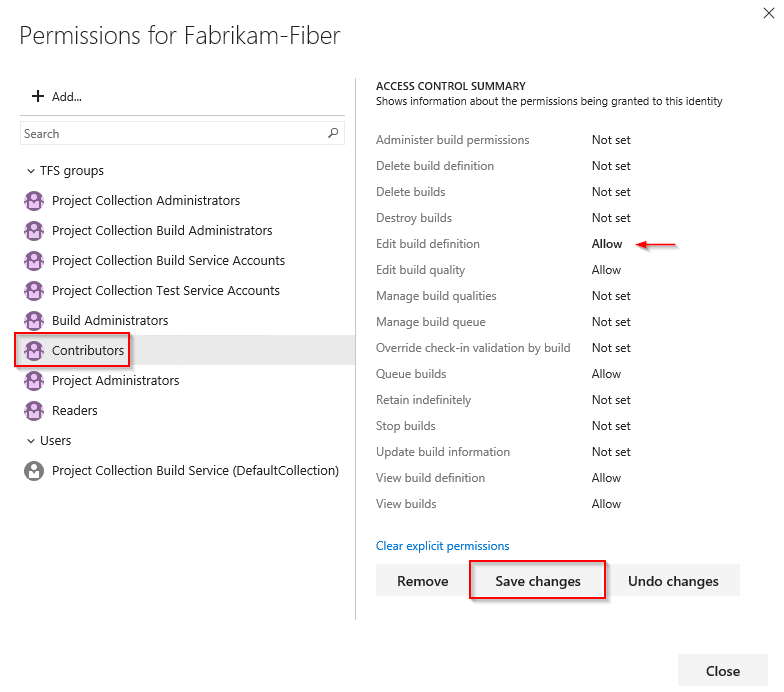
Select Save changes when you are done.
Set permissions for release pipelines
From within your project, select Build and Release, and then select Releases to access your release pipelines.
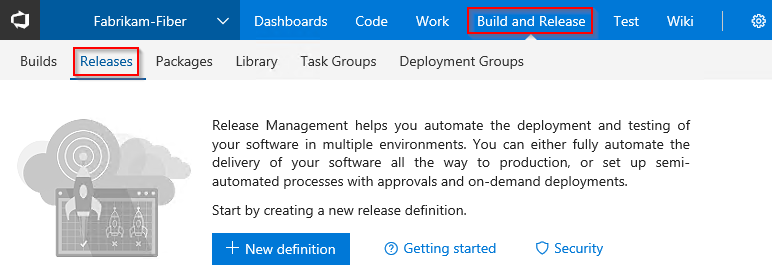
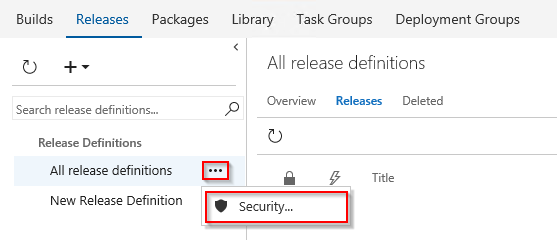
Select the context menu for All release definitions, and then select Security.
Choose the group you want to set permissions for, and then change the permission setting to grant or restrict access. In the following example, we change the contributors permission to prohibit the deletion of release definitions.
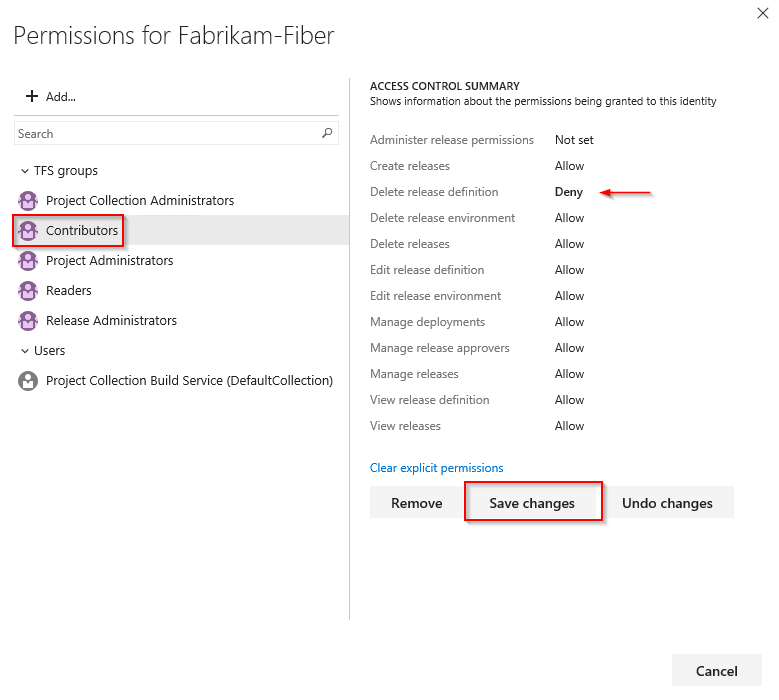
Select Save changes when you are done.
Manage Library roles for variable groups, secure files, and deployment groups
Permissions for variable groups, secure files, and deployment groups are managed by roles. Setting up permissions is similar for all the three different types. Variable groups and Secure files permissions are configured from Build and Release > Library while Deployment groups permissions are set from Build and Release > Deployment groups.
In the following example, we will configure permissions for variable groups.
From within your project, select Build and Release, and then select Library then Variable groups.

If you want to manage the permissions for a specific variable group, select the ellipsis for that variable group and then select Security.
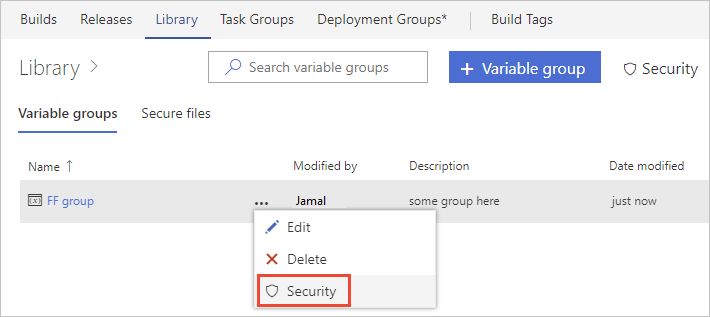
Add the user or group and choose the role you want them to have.
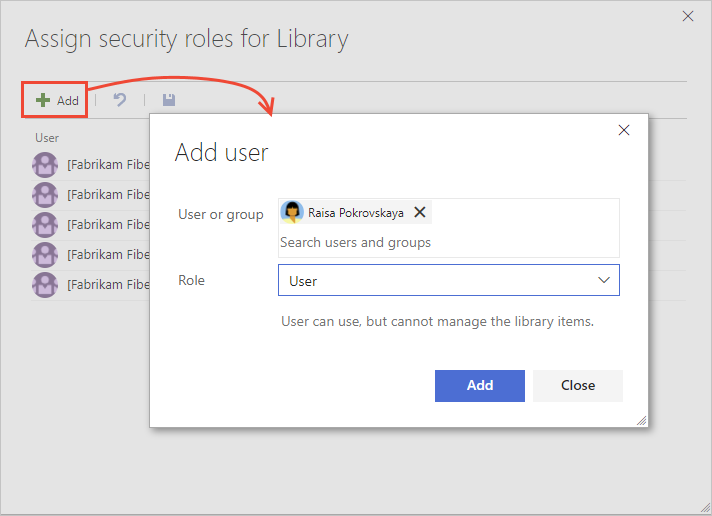
Select Add when you are done.
Manage task group permissions
Permissions for task groups are subject to a hierarchical model. You use task groups to encapsulate a sequence of tasks already defined in a build or a release pipeline into a single reusable task.
From within your project, select Build and Release, and then select Task groups.
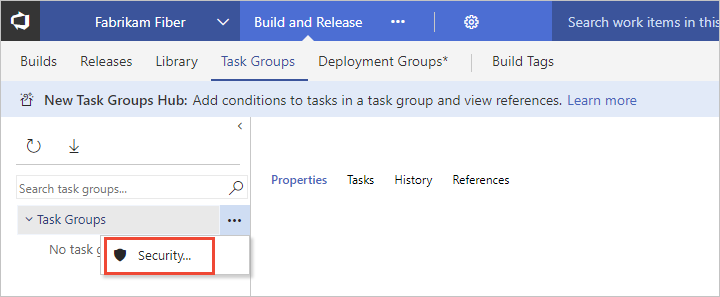
If you want to manage the permissions for a specific task group, select the ellipsis for that task group and then select Security.
Add the user or group and then set the permissions you want them to have.
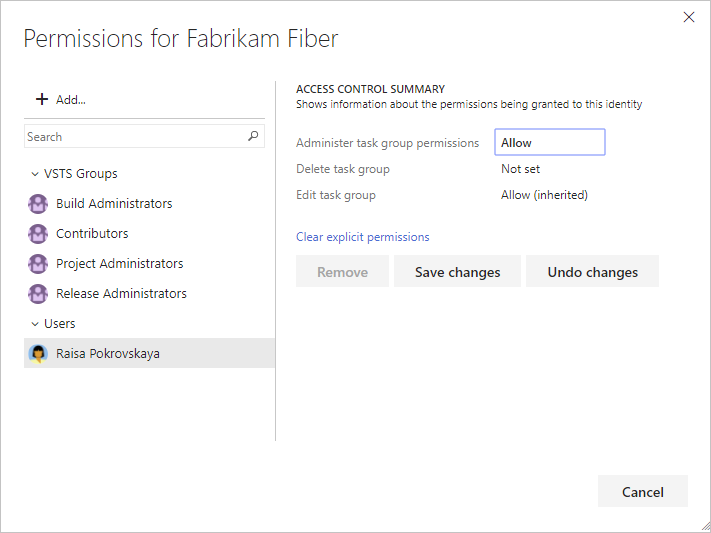
Select Save changes when you are done.
Manage permissions for build administrators group
From within your project, select the gear icon button
 , and then select Collection settings.
Select Security, and then select Project Collection Build Administrators. In this example, we want to allow the usage of build resources.
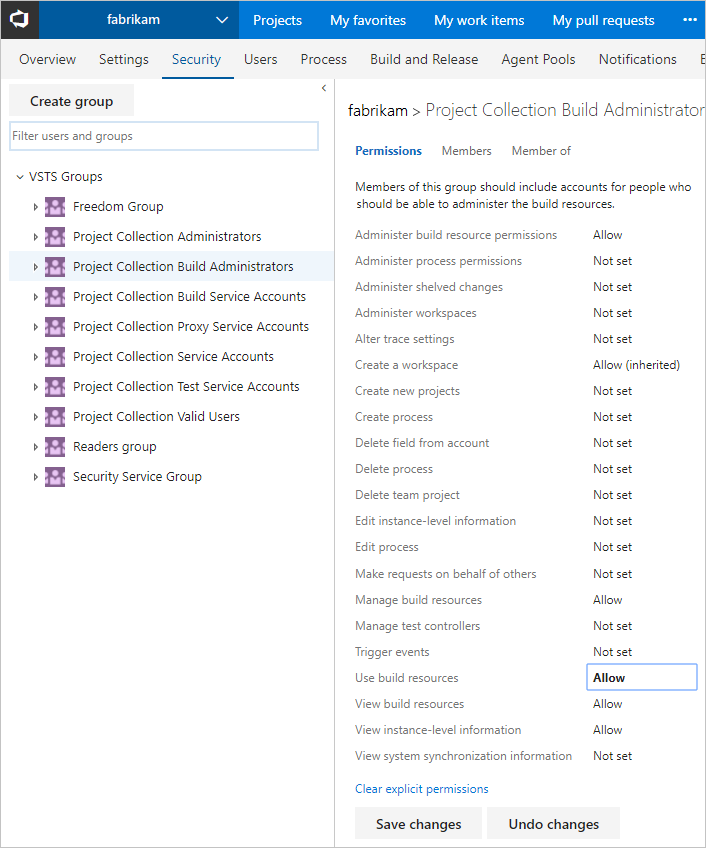
Select Save changes when you are done.
Manage permissions for service connections
You can set up permissions for service connections or agent pools by adding users or groups to a specific role. You will need to be a member of the Project Administrator group to manage the permissions for these resources.
In the following example, we will add an Administrator to a service connection.
From within your project, select the gear icon button
 , and then select Project settings.
Select Services, and then select the service connection that you want to manage. Select Roles to add a new role.
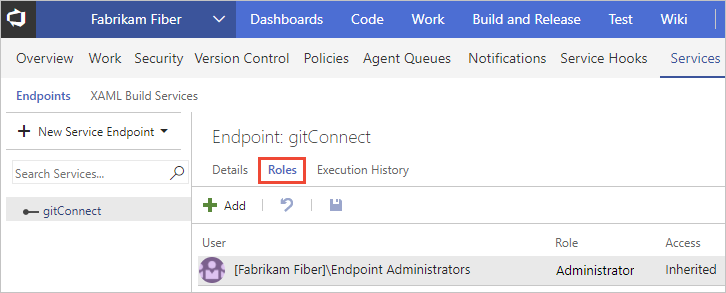
Add the user or group and choose the role you want them to have.
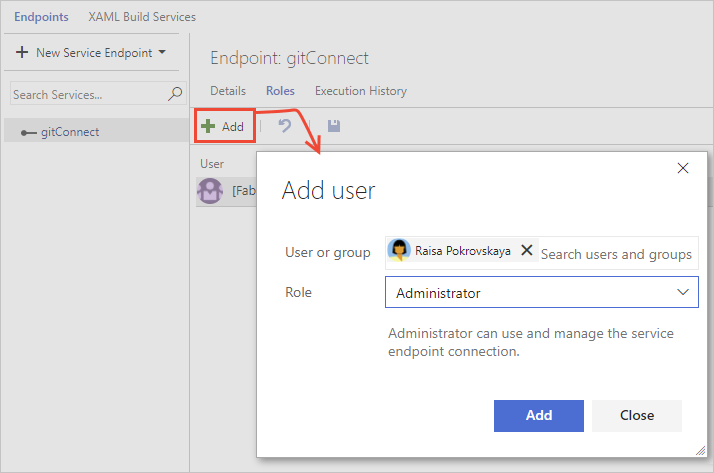
Select Add when you are done.