Add Apple as an identity provider (preview)
Applies to:  Workforce tenants
  External tenants (learn more)
By setting up federation with Apple, you can allow customers to sign in to your applications with their own Apple accounts. After you've added Apple as one of your application's sign-in options, on the sign-in page, customers can sign-in to Microsoft Entra External ID with an Apple account. (Learn more about authentication methods and identity providers for customers.)
Create an Apple application
To enable sign-in for customers with an Apple ID, you need to create an application in Apple Developer panel. If you don't already have an Apple ID, you can create one at Certificates, Identifiers & Profiles section.
Note
This document was created using the state of the provider’s developer page at the time of creation, and changes may occur.
Sign in to the Apple Developer Portal with your account credentials.
From the menu, select Certificates, IDs, & Profiles, and then select (+).
In the Register a New Identifier section, select App IDs, and then select Continue.
For Select a type, select App, and then select Continue.
To Register your App ID:
- Enter a Description.
- Enter the Bundle ID, such as
com.contoso.azure-ad. Explicit naming such ascom.myappdomain.myappnamerecommended. - For Capabilities, select Sign in with Apple from the capabilities list.
- Take note of your Team ID (App ID Prefix) from this step. You'll need it later.
- Select Continue and then Register.
From the menu, select Certificates, IDs, & Profiles, and then select (+).
In the Register a new identifier section, select Services IDs, and then select Continue.
In Register a Services ID:
- Enter a Description. The description is shown to the user on the consent screen.
- Enter the Identifier, such as
com.contoso.entra-service. Explicit naming such ascom.myappdomain.myappname.serviceis recommended. Take note of your Service ID identifier. The identifier is your Client ID. - Select Continue, and then select Register.
From Identifiers, select the Service ID identifier you created.
Select Sign In with Apple, and then select Configure.
- Select the Primary App ID you want to configure Sign in with Apple with.
- In Domains and Subdomains, enter the following by replacing
<tenant-id>with your tenant ID or your primary domain name, and<tenant-name>with your tenant name. All characters should be in lower-case. As an example:<tenant-name>.ciamlogin.com<tenant-id>.ciamlogin.com
In Return URLs, enter the following by replacing
<tenant-id>with your tenant ID or your primary domain name, and<tenant-name>with your tenant name. All characters should be in lower-case.As an example:
https://<tenant-id>.ciamlogin.com/<tenant-id>/federation/oauth2https://<tenant-id>.ciamlogin.com/<tenant-name>/federation/oauth2https://<tenant-name>.ciamlogin.com/<tenant-id>/federation/oauth2
Select Next, and then select Done.
When the pop-up window is closed, select Continue, and then select Save.
Create an Apple client secret
- From the Apple Developer portal menu, select Keys, and then select (+).
- To Register a New Key:
- Type a Key Name.
- Select Sign in with Apple, and then select Configure.
- For the Primary App ID, select the app you created previously, and then select Save.
- Select Continue, and then select Register to finish the key registration process.
- Take note of the Key ID. This key is required when you configure the identity provider.
- To Download Your Key, select Download to download the
.p8file that contains your key. - Select Done.
Important
Sign in with Apple requires the admin to renew their client secret every 6 months. You'll need to manually renew the Apple client secret if it expires and store the new value in the policy key. We recommend you set your own reminder within 6 months to generate a new client secret.
Configure Apple federation in Microsoft Entra External ID
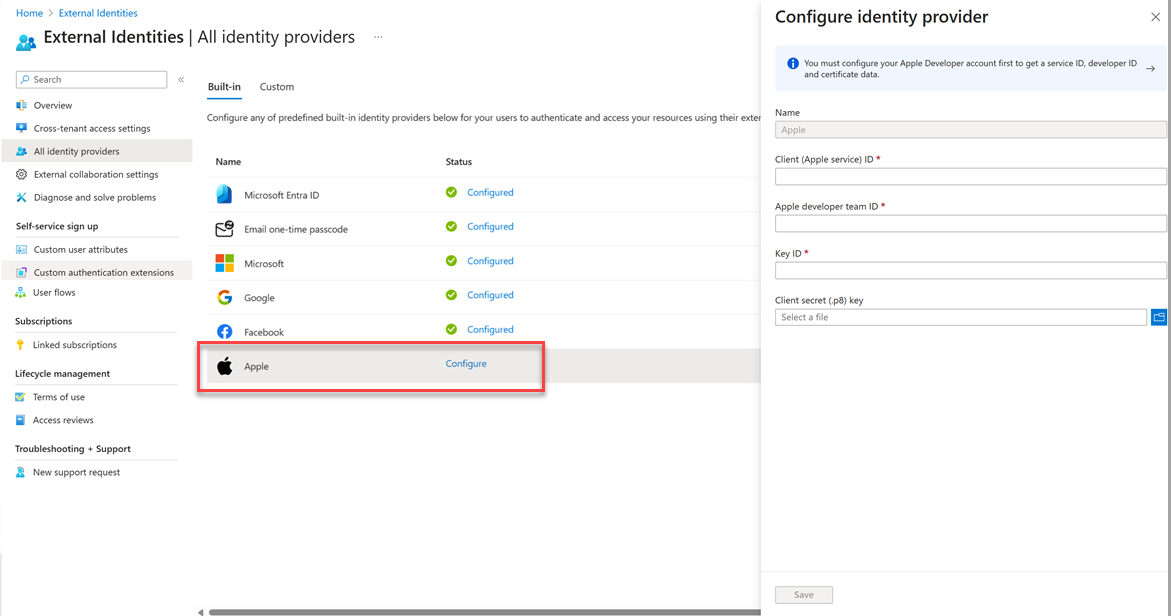
After you create the Apple app, in this step you set the Apple app details in Microsoft Entra External ID. You can use the Microsoft Entra admin center to do so. To configure Apple federation in the Microsoft Entra admin center, follow these steps:
Sign in to the Microsoft Entra admin center.
Browse to Identity > External Identities > All identity providers.
Under the Built-in tab, select Apple.

The Name Apple is autopopulated. It cannot be changed.
Enter the following details:
- Client (Apple service) ID: The client ID of the Apple application you created in the previous step.
- Apple developer team ID: The Apple developer team ID related to the Apple application you created in the previous step.
- Key ID: The key ID of the Apple application you created in the previous step.
- Client secret (.p8) key: The client secret key of the Apple application you created in the previous step.
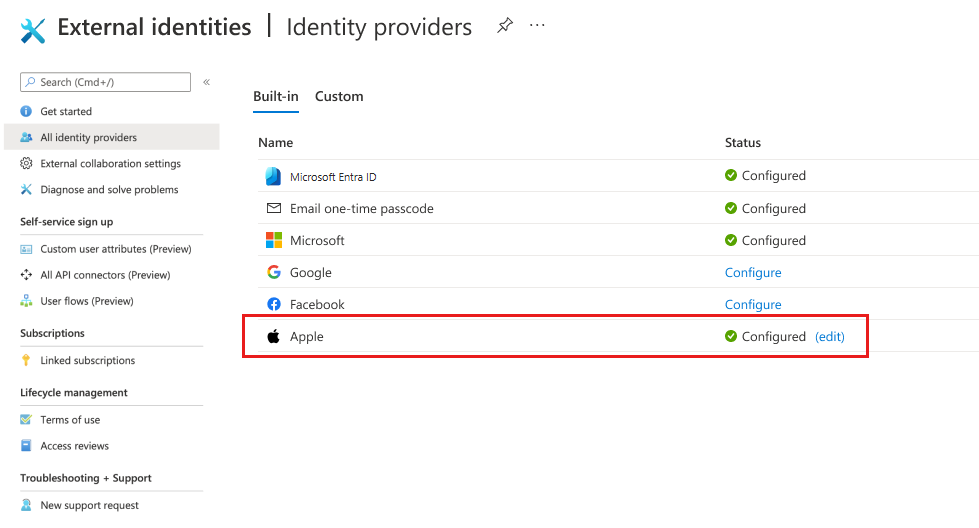
Select Save. You’ll see Apple listed as a configured identity provider.

Add Apple identity provider to a user flow
At this point, the Apple identity provider has been set up in your Microsoft Entra External ID, but it's not yet available in any of the sign-in pages. To add the Apple identity provider to a user flow:
- In your customer tenant, browse to Identity > External Identities > User flows.
- Select the user flow where you want to add the Apple identity provider.
- Under Settings, select Identity providers.
- Under Other Identity Providers, select Apple.
- Select Save.