Mostrar alertas en Xamarin.iOS
A partir de iOS 8, UIAlertController ha completado la sustitución de UIActionSheet y UIAlertView, que ahora están en desuso.
A diferencia de las clases que reemplaza, que son subclases de UIView, UIAlertController es una subclase de UIViewController.
Use UIAlertControllerStyle para indicar el tipo de alerta que se va a mostrar. Estos tipos de alertas son:
- UIAlertControllerStyleActionSheet
- Antes de iOS 8, habría sido uiActionSheet
- UIAlertControllerStyleAlert
- Antes de iOS 8, esto habría sido UIAlertView
Al crear un controlador de alertas, hay tres pasos necesarios:
Crear y configurar la alerta con:
- title
- message
- preferredStyle
(Opcional) Agregar un campo de texto
Agregar las acciones necesarias
Presentar el controlador de vista
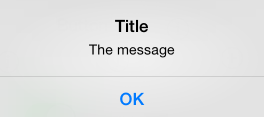
La alerta más sencilla contiene un solo botón, como se muestra en esta captura de pantalla:

El código para mostrar una alerta simple es el siguiente:
okayButton.TouchUpInside += (sender, e) => {

    //Create Alert
    var okAlertController = UIAlertController.Create ("Title", "The message", UIAlertControllerStyle.Alert);

    //Add Action
    okAlertController.AddAction (UIAlertAction.Create ("OK", UIAlertActionStyle.Default, null));

    // Present Alert
    PresentViewController (okAlertController, true, null);
};
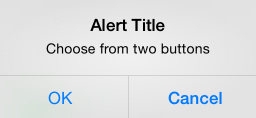
La visualización de una alerta con varias opciones se realiza de forma similar, pero agrega dos acciones. Por ejemplo, en la captura de pantalla siguiente se muestra una alerta con dos botones:

okayCancelButton.TouchUpInside += ((sender, e) => {

    //Create Alert
    var okCancelAlertController = UIAlertController.Create("Alert Title", "Choose from two buttons", UIAlertControllerStyle.Alert);

    //Add Actions
    okCancelAlertController.AddAction(UIAlertAction.Create("OK", UIAlertActionStyle.Default, alert => Console.WriteLine ("Okay was clicked")));
    okCancelAlertController.AddAction(UIAlertAction.Create("Cancel", UIAlertActionStyle.Cancel, alert => Console.WriteLine ("Cancel was clicked")));

    //Present Alert
    PresentViewController(okCancelAlertController, true, null);
});
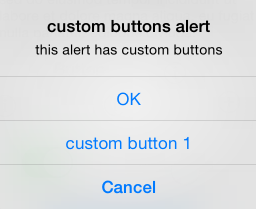
Las alertas también pueden mostrar una hoja de acciones, similar a la captura de pantalla siguiente:

Los botones se agregan a la alerta con el método AddAction:
actionSheetButton.TouchUpInside += ((sender, e) => {

    // Create a new Alert Controller
    UIAlertController actionSheetAlert = UIAlertController.Create("Action Sheet", "Select an item from below", UIAlertControllerStyle.ActionSheet);

    // Add Actions
    actionSheetAlert.AddAction(UIAlertAction.Create("OK",UIAlertActionStyle.Default, (action) => Console.WriteLine ("Item One pressed.")));

    actionSheetAlert.AddAction(UIAlertAction.Create("custom button 1",UIAlertActionStyle.Default, (action) => Console.WriteLine ("Item Two pressed.")));

    actionSheetAlert.AddAction(UIAlertAction.Create("Cancel",UIAlertActionStyle.Cancel, (action) => Console.WriteLine ("Cancel button pressed.")));

    // Required for iPad - You must specify a source for the Action Sheet since it is
    // displayed as a popover
    UIPopoverPresentationController presentationPopover = actionSheetAlert.PopoverPresentationController;
    if (presentationPopover!=null) {
        presentationPopover.SourceView = this.View;
        presentationPopover.PermittedArrowDirections = UIPopoverArrowDirection.Up;
    }

    // Display the alert
    this.PresentViewController(actionSheetAlert,true,null);
});