Quickstart: Docker in Visual Studio
Applies to: ![]() Visual Studio
Visual Studio ![]() Visual Studio for Mac
Visual Studio for Mac
Note
This article applies to Visual Studio 2017. If you're looking for the latest Visual Studio documentation, see Visual Studio documentation. We recommend upgrading to the latest version of Visual Studio. Download it here
With Visual Studio, you can easily build, debug, and run containerized ASP.NET Core apps and publish them to Azure Container Registry, Docker Hub, Azure App Service, or your own container registry. In this article, we'll publish to Azure Container Registry.
Prerequisites
- Docker Desktop
- Visual Studio 2017 with the Web Development, Azure Tools workload, and/or .NET Core cross-platform development workload installed
- To publish to Azure Container Registry, an Azure subscription. Sign up for a free trial.
Installation and setup
For Docker installation, first review the information at Docker Desktop for Windows: What to know before you install. Next, install Docker Desktop.
Add a project to a Docker container
From the Visual Studio menu, select File > New > Project.
Under the Templates section of the New Project dialog box, select Visual C# > Web.
Select ASP.NET Core Web Application or if you want to use the .NET Framework instead of .NET Core, select ASP.NET Web Application.
Give your new application a name (or take the default) and select OK.
Select Web Application.
Check the Enable Docker Support checkbox.

The screenshot shows .NET Core; if you're using .NET Framework, it looks a bit different.
Select the type of container you want (Windows or Linux) and click OK.
Dockerfile overview
A Dockerfile, the recipe for creating a final Docker image, is created in the project. Refer to Dockerfile reference for an understanding of the commands within it.:
FROM mcr.microsoft.com/dotnet/aspnet:2.1 AS base
WORKDIR /app
EXPOSE 59518
EXPOSE 44364

FROM mcr.microsoft.com/dotnet/sdk:2.1 AS build
WORKDIR /src
COPY HelloDockerTools/HelloDockerTools.csproj HelloDockerTools/
RUN dotnet restore HelloDockerTools/HelloDockerTools.csproj
COPY . .
WORKDIR /src/HelloDockerTools
RUN dotnet build HelloDockerTools.csproj -c Release -o /app

FROM build AS publish
RUN dotnet publish HelloDockerTools.csproj -c Release -o /app

FROM base AS final
WORKDIR /app
COPY --from=publish /app .
ENTRYPOINT ["dotnet", "HelloDockerTools.dll"]
The preceding Dockerfile is based on the microsoft/aspnetcore image, and includes instructions for modifying the base image by building your project and adding it to the container. If you're using the .NET Framework, the base image will be different.
When the new project dialog's Configure for HTTPS check box is checked, the Dockerfile exposes two ports. One port is used for HTTP traffic; the other port is used for HTTPS. If the check box isn't checked, a single port (80) is exposed for HTTP traffic.
Debug
Select Docker from the debug drop-down in the toolbar, and start debugging the app. You might see a message with a prompt about trusting a certificate; choose to trust the certificate to continue.
The Output window shows what actions are taking place.
Open the Package Manager Console (PMC) from the menu Tools> NuGet Package Manager, Package Manager Console.
The resulting Docker image of the app is tagged as dev. The image is based on the 2.1-aspnetcore-runtime tag of the microsoft/dotnet base image. Run the docker images command in the Package Manager Console (PMC) window. The images on the machine are displayed:
REPOSITORY        TAG                     IMAGE ID      CREATED         SIZE
hellodockertools  dev                     d72ce0f1dfe7  30 seconds ago  255MB
microsoft/dotnet  2.1-aspnetcore-runtime  fcc3887985bb  6 days ago      255MB
Note
The dev image does not contain the app binaries and other content, as Debug configurations use volume mounting to provide the iterative edit and debug experience. To create a production image containing all contents, use the Release configuration.
Run the docker ps command in PMC. Notice the app is running using the container:
CONTAINER ID        IMAGE                  COMMAND                   CREATED             STATUS              PORTS                   NAMES
baf9a678c88d        hellodockertools:dev   "C:\\remote_debugge..."   21 seconds ago      Up 19 seconds       0.0.0.0:37630->80/tcp   dockercompose4642749010770307127_hellodockertools_1
Publish Docker images
Once the develop and debug cycle of the app is completed, you can create a production image of the app.
Change the configuration drop-down to Release and build the app.
Right-click your project in Solution Explorer and choose Publish.
On the publish target dialog, select the Container Registry tab.
Choose Create New Azure Container Registry and click Publish.
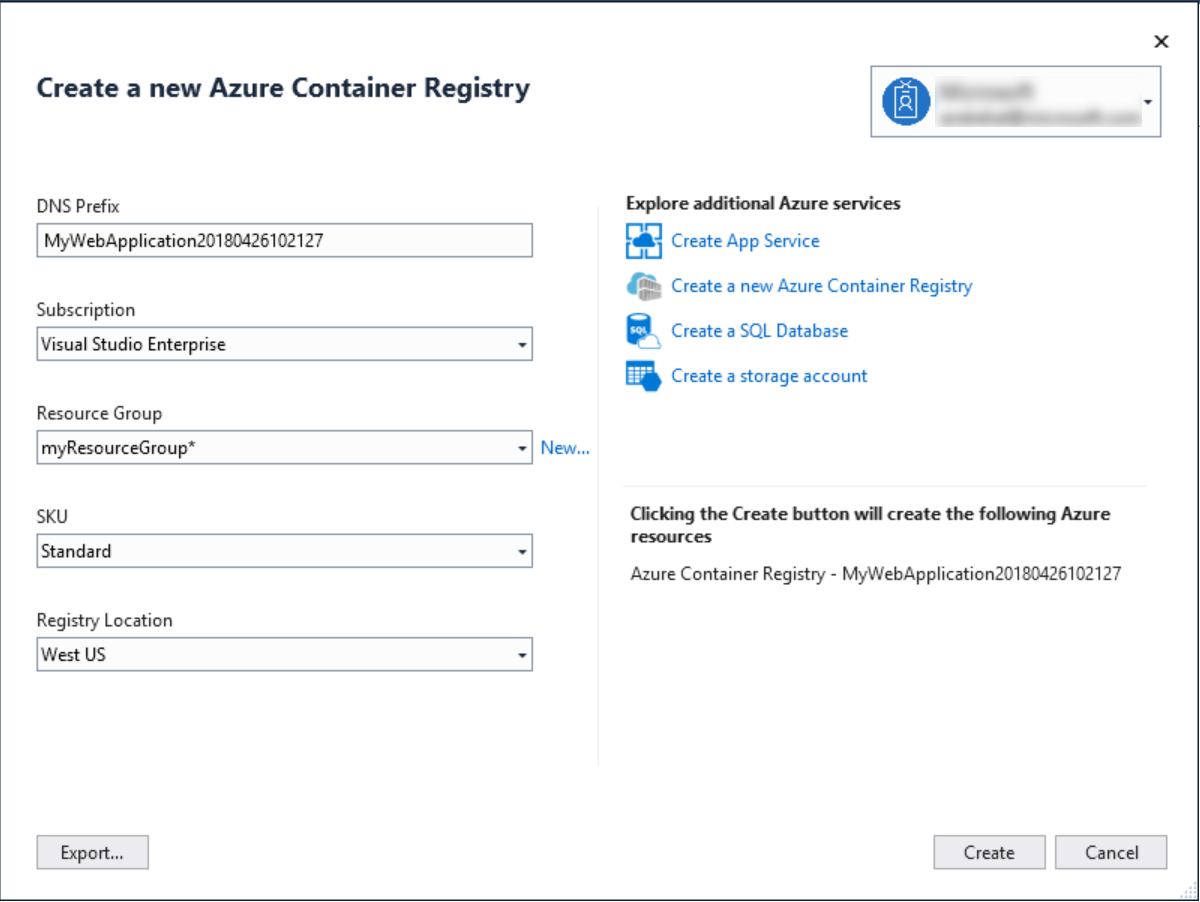
Fill in your desired values in the Create a new Azure Container Registry.
Setting Suggested value Description DNS Prefix Globally unique name Name that uniquely identifies your container registry. Subscription Choose your subscription The Azure subscription to use. Resource Group myResourceGroup Name of the resource group in which to create your container registry. Choose New to create a new resource group. SKU Standard Service tier of the container registry Registry Location A location close to you Choose a Location in a region near you or near other services that will use your container registry. 
Click Create
Next steps
You can now pull the container from the registry to any host capable of running Docker images, for example Azure Container Instances.