Step 2: Run Your Program
Note
This article applies to Visual Studio 2015. If you're looking for the latest Visual Studio documentation, see Visual Studio documentation. We recommend upgrading to the latest version of Visual Studio. Download it here
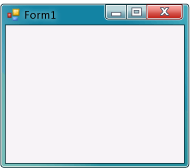
When you created a new solution, you actually built a program that runs. It doesn't do much yet—it just displays an empty window that shows Form1 in the title bar. But it does run, as you're about to find out.
 For a video version of this topic, see Tutorial 1: Create a Picture Viewer in Visual Basic - Video 1 or Tutorial 1: Create a Picture Viewer in C# - Video 1. These videos use an earlier version of Visual Studio, so there are slight differences in some menu commands and other user interface elements. However, the concepts and procedures work similarly in the current version of Visual Studio.
To run your program
Use one of the following methods to run your program.
Choose the F5 key.
On the menu bar, choose Debug, Start Debugging.
On the toolbar, choose the Start Debugging button, which appears as follows.
 Start Debugging toolbar button
Visual Studio runs your program, and a window called Form1 appears. The following diagram shows the program you just built. The program is running, and you will soon add to it.
 Windows Form Application program running
Go back to the Visual Studio integrated development environment (IDE), and look at the new toolbar. Additional buttons appear on the toolbar when you run a program. These buttons let you do things like stop and start your program, and help you track down any errors (bugs) it may have. For this example, we're just using it to start and stop the program.
 Debugging toolbar
Use one of the following methods to stop your program.
On the toolbar, choose the Stop Debugging button.
On the menu bar, choose Debug, Stop Debugging.
Choose the X button in the upper corner of the Form1 window.
Note
When you run your program from inside the IDE, it's called debugging because you typically do it to locate and fix bugs (errors) in the program. Although this program is small and doesn't really do anything yet, it's still a real program. You follow the same procedure to run and debug other programs. To learn more about debugging, see Debugger Basics.
To continue or review
To go to the next tutorial step, see Step 3: Set Your Form Properties.
To return to the previous tutorial step, see Step 1: Create a Windows Forms Application Project.