Set up Team Foundation Version Control on your dev machine
TFS 2018
Visual Studio 2019 | Visual Studio 2022
To set up Team Foundation Version Control (TFVC) on your dev machine, you create a workspace and then add your code.
Prerequisites
An Azure DevOps project. If you don't have a project, create one or get access to one.
Create a workspace and get the code
Press Ctrl+0, C to open the Connect page of the Visual Studio Team Explorer window.
Right-click a project, and then select Connect.
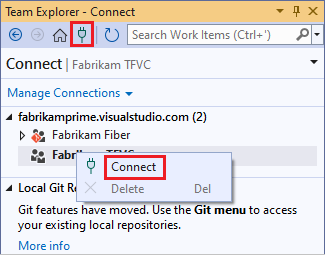
If the project you want isn't listed, select Manage Connections, select Connect to a Project, and then select the project you want. For more information, see connect to a project.
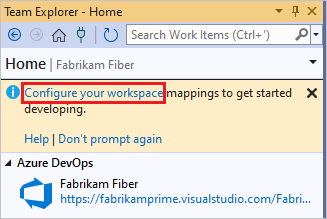
Select Configure your workspace to map the project to a folder on your dev machine.
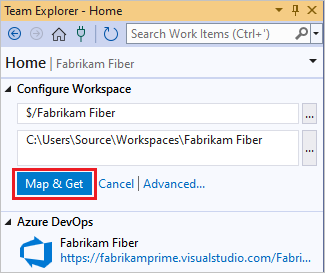
Select Map & Get to map the workspace and get your code.
Work in a Main folder
To prepare for when your team grows large enough to need branches to manage your work, put all your code in a parent folder called Main, for example $/MyTeamProject/Main.
Press Ctrl+0, H to open the Home page of Team Explorer.
Select Source Control Explorer.
In the Source Control Explorer window, select your project in the left pane.
On the Visual Studio menu bar, choose File > Source Control> New Folder.
In Source Control Explorer, rename the folder to Main.

Right-click the Main folder and choose Check in Pending Changes.
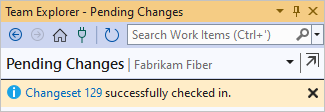
On the Pending Changes page, select Check In.
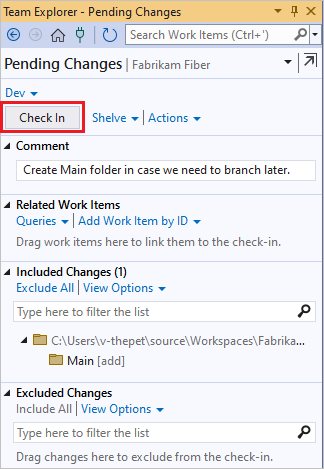
Your changeset is checked in.
When your team decides to branch the codebase, you can convert the Main folder to a branch. For more information, see Branch folders and files.
Add your code to version control
If you've got an idea for a new app, you can use TFVC version control from the start. Or, you can put an app in progress under TFVC source control.
When you create a new code project that you want to put under TFVC solution control, put it in your mapped workspace folder like c:\Users\<YourName>\Source\Workspaces\YourTeamProject\Main\.
Or, if you already have an app that you want to put under TFVC source control, move the solution into your workspace folder with Windows File Explorer.
In Visual Studio, press Ctrl+Shift+O and open your solution, and open Solution Explorer by pressing Ctrl+Alt+L.
In Solution Explorer, right-click your solution and select Add Solution to Source Control.
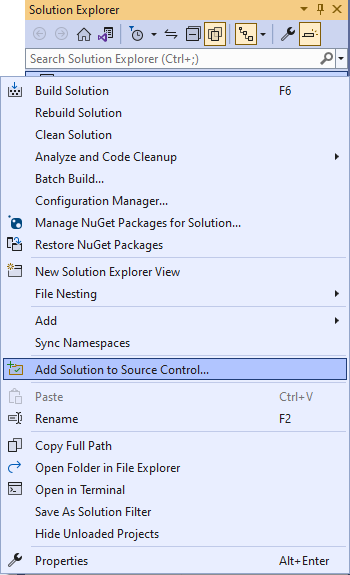
In the Add Solution to Source Control dialog box, review the details, and then select OK.
When you're ready, press Ctrl+0, P to check in your changes.
Next steps
If you're new to this process, you can get a detailed step-by-step walkthrough.
If your folder structure is complex or you use branches, you can create one or more workspaces and optimize them to meet your needs.