Excel 2016 offloading to Azure cluster
Prerequisites
- On-premises client machine installed with Excel 2016
- On-premises client machine installed with HPC Pack 2019 client utilities
Steps for Excel offloading
Step 1. Deploy HPC IaaS Excel cluster
Deploy HPC IaaS cluster using ARM template, after completing prerequisites in this instruction.
When customizing deployment configuration, change setting Compute Node Image to one of the items started with ComputerNodeWithExcelOnWindowsServer

Complete other configuration, and start deploying
After deployment completed, in Azure Portal, go to overview page of newly deployed head node, copy its DNS name for further use. It should be a string like "excelsampleqvszudyzsmysk.japaneast.cloudapp.azure.com"

Make sure your head node is not assigned compute node role, as there is no Excel installation on HPC head node.
RDP to your head node.
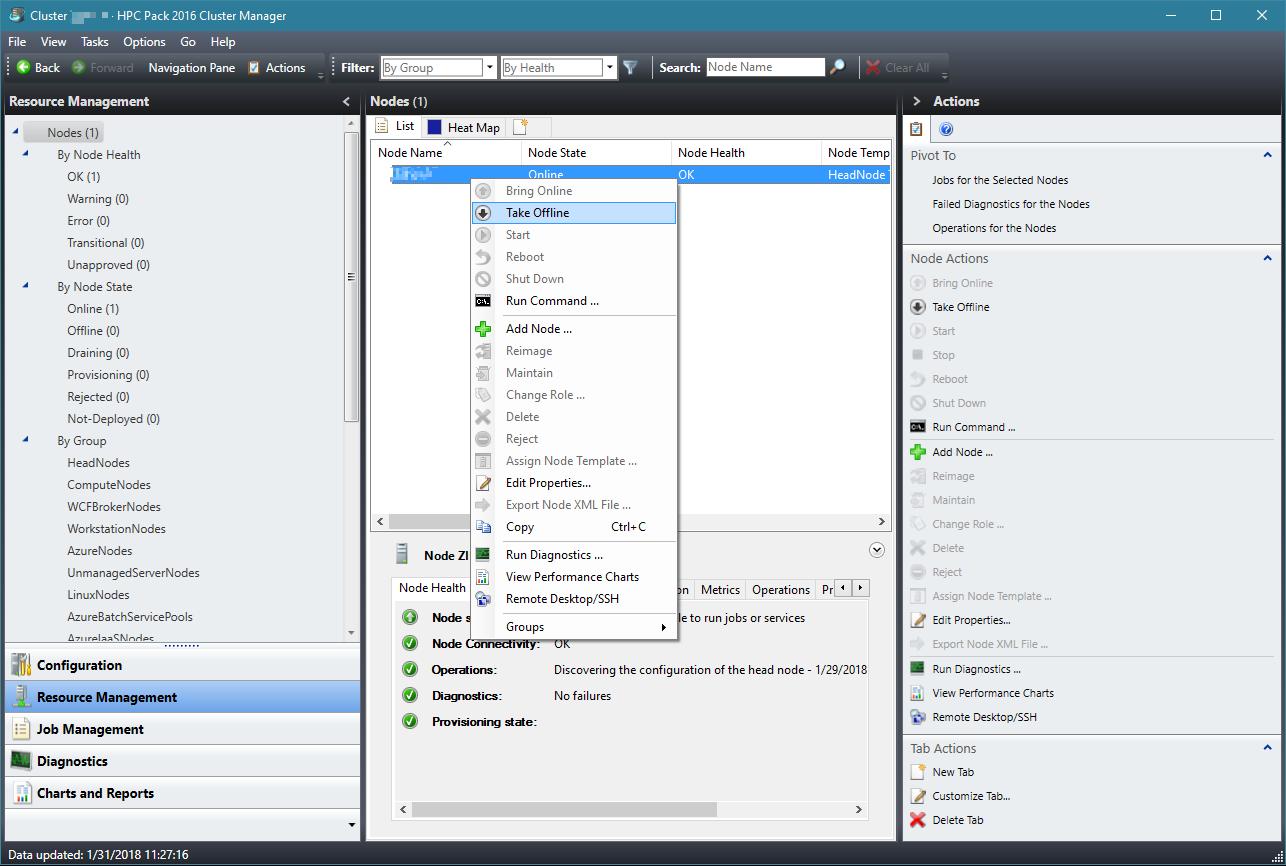
Take head node offline by right-clicking on head node in node list, and select Take Offline

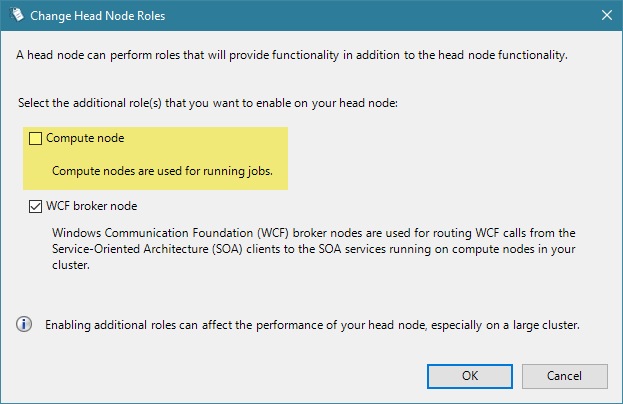
Remove compute node role from head node by right-clicking on head node in node list, select Change Role…, and uncheck Compute Node. Click Ok.

- Bring head node online by right-clicking on head node in node list, select Bring Online
Restart HpcSession service on headnode
Step 2. Excel activation
When using the ComputeNodeWithExcel VM image for production workloads, you need to provide a valid Microsoft Office license key to activate Excel on the compute nodes. Otherwise, the evaluation version of Excel expires after 30 days, and running Excel workbooks will fail with the COMException (0x800AC472).
You can rearm Excel for another 30 days of evaluation time: Log on to the head node and clusrun %ProgramFiles%\Microsoft Office\Office16\OSPPREARM.exe on all Excel compute nodes via HPC Cluster Manager. You can rearm a maximum of two times. After that, you must provide a valid Office license key.
The Office Professional Plus 2016 installed on the VM image is a volume edition with a Generic Volume License Key (GVLK). You can activate it via Key Management Service (KMS)/Active Directory-Based Activation (AD-BA), Multiple Activation Key (MAK) or Shared Computer Activation.
- To use KMS/AD-BA, use an existing KMS server or set up a new one by using the Microsoft Office 2013 Volume License Pack. (If you want to, set up the server on the head node.) Then, activate the KMS host key via the Internet or telephone. Then clusrun
ospp.vbsto set the KMS server and port and activate Office on all the Excel compute nodes. - To use MAK, first clusrun
ospp.vbsto input the key and then activate all the Excel compute nodes via the Internet or telephone.
Note
Retail product keys for Office Professional Plus 2016 cannot be used with this VM image. If you have valid keys and installation media for Office or Excel editions other than this Office Professional Plus 2016 volume edition, you can use them instead. First uninstall this volume edition and install the edition that you have. The reinstalled Excel compute node can be captured as a customized VM image to use in a deployment at scale.
- To use Shared Computer Activation, first you need to download the current version of the Office Deployment Tool and enable shared computer activation. Then download and deploy Office 365 ProPlus. After Office 365 ProPlus is installed, you can verify that shared computer activation is enabled on that computer.
Note
As we are going to activate O365 using Shared Computer Activation, when user login and launch Excel for the first time, Excel will retrieve licensing token for that user, and prompt him to accept Microsoft Office License. Configuring Microsoft.Hpc.Excel.ExcelService service as following can help us to respond that dialog automatically. Find
Microsoft.Hpc.Excel.ExcelService_<version>.configfile in directory%CCP_HOME%ServiceRegistrationon headnode, merge following configuration with it.<PopupBasherConfiguration Period="1000"> <Windows> <Window Title="First things first." Class="NUIDialog"> <Child Title="Accept" Role="ROLE_SYSTEM_PUSHBUTTON" Action="DoDefault" Search="Exact" /> </Window> </Windows> </PopupBasherConfiguration>
Step 3. Using Excel workbook offloading
download Excel workbook offloading sample ConvertiblePricing_Complete.xlsb here
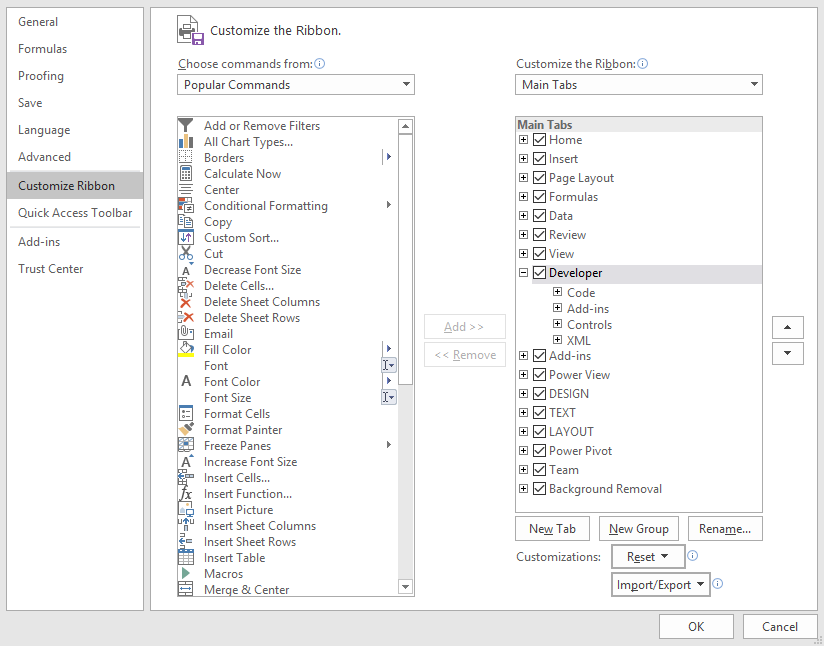
Open ConvertiblePricing_Complete.xlsb in Excel 2016. If Developer ribbon does not appear in Excel window, enable it in Excel Options -> Customize Ribbon

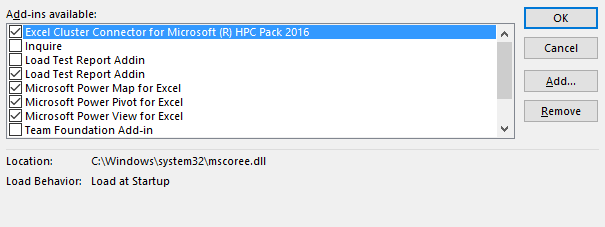
On the Develop ribbon, click COM Add-Ins, and confirm that the HPC Pack Excel COM add-in is loaded successfully

Edit the VBA macro HPCControlMacros in Excel by changing the commented lines as shown in the following script. Substitute appropriate values for your environment.
'change Private Const HPC_ClusterScheduler = "hpchn01laj2kdgetycrw.southeastasia.cloudapp.azure.com" to
Private Const HPC_ClusterScheduler = "<headnode DNS name saved above>"
'change Private Const HPC_DependFiles = "D:\tmp\iaasexcel\upload\ConvertiblePricing_Complete.xlsb=ConvertiblePricing_Complete.xlsb" to
Private Const HPC_DependFiles = "<upload directory path>\ConvertiblePricing_Complete.xlsb=ConvertiblePricing_Complete.xlsb"
'change HPCExcelClient.OpenSession headNode:=HPC_ClusterScheduler, remoteWorkbookPath:=HPCWorkbookPath, UserName:="hpc\hpcadmin", Password:="********" to
HPCExcelClient.OpenSession headNode:=HPC_ClusterScheduler, remoteWorkbookPath:=HPCWorkbookPath, UserName:="<domain>\<username>", Password:="<YourPassword>"
- Copy the Excel workbook to an upload directory such as D:\tmp\iaasexcel\upload. This directory is specified in the HPC_DependsFiles constant in the VBA macro.
- To run the workbook on the cluster in Azure, click the Cluster button on the worksheet.