Tutorial: Connecting Azure Data Factory (ADF) to Insights
This guide helps you get started using Azure Data Factory (ADF) along with Insights. After connecting, you can use Azure Data Factory to create workflows for orchestrating data movement and transforming game data at scale. To learn more about other tools you can connect Insights with, see Connecting external tools to Insights.
In this tutorial you learn how to:
- Create a data factory in Azure
- Create a pipeline
Note
PlayFab Insights Management was deprecated on December 11th, 2023. We recommend using Azure Data Explorer (ADX) Connections to manage your performance and cost going forward. If your title is still using Insights, continue to see this article for implementation details. For more information, see Insights Deprecation Blog.
Prerequisites
PlayFab account authenticated with AAD
You need a PlayFab account or user for which the authentication provider is set to Microsoft. The Microsoft authentication provider uses Azure Active Directory (AAD) for authentication which is required to use the Azure services. See Azure Active Directory Authentication for Game Manager for instructions on creating an AAD-authenticated account or user.
To verify that the account, or user, is set to use the Microsoft authentication provider:
- Navigate to developer.playfab.com.
- Select Sign in with Microsoft to access your PlayFab account.
If you can sign in, then the account is set to use the Microsoft authentication provider.
Game Manager permissions for Insights
You need to assign your account a user role with the following Game Manager permissions enabled:
- Admin status.
- Access to the Explorer tab and associated data.
- Read and write access to Analytics data.
You can either create a new user role or add these permissions to an existing role.
Other prerequisites
Create a new data factory
To create a new data factory:
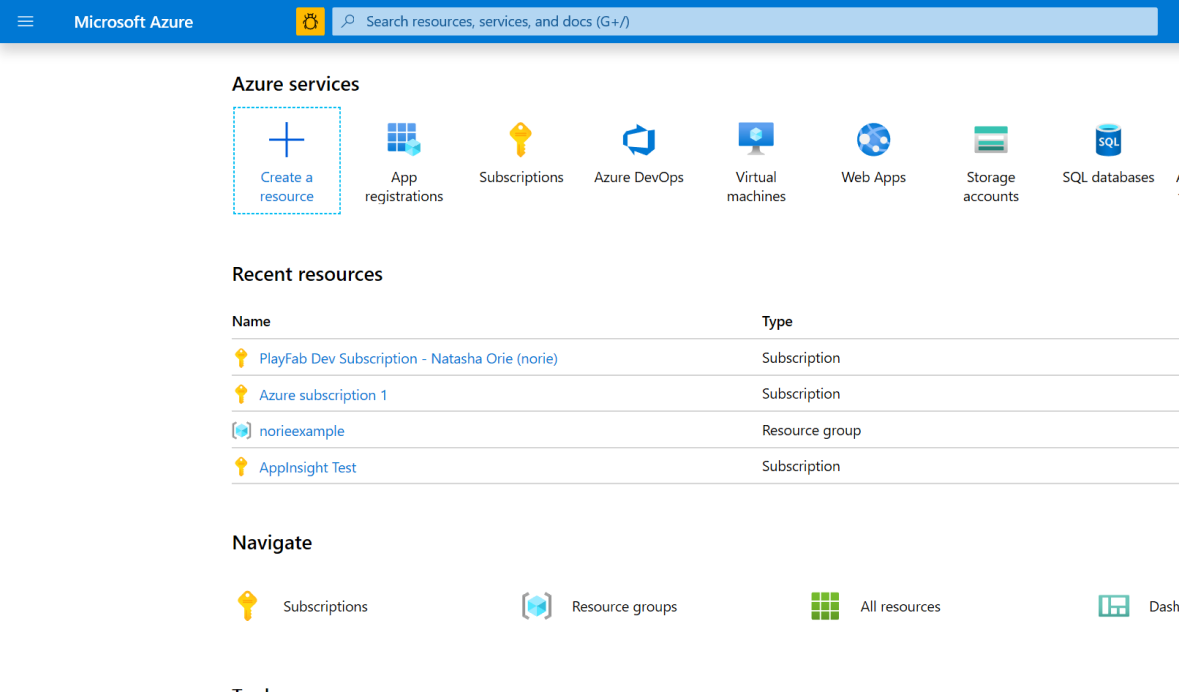
Sign in to the Azure portal. From the homepage under Azure Services, select Create a resource. Search for Data Factory, select it and then select Create.

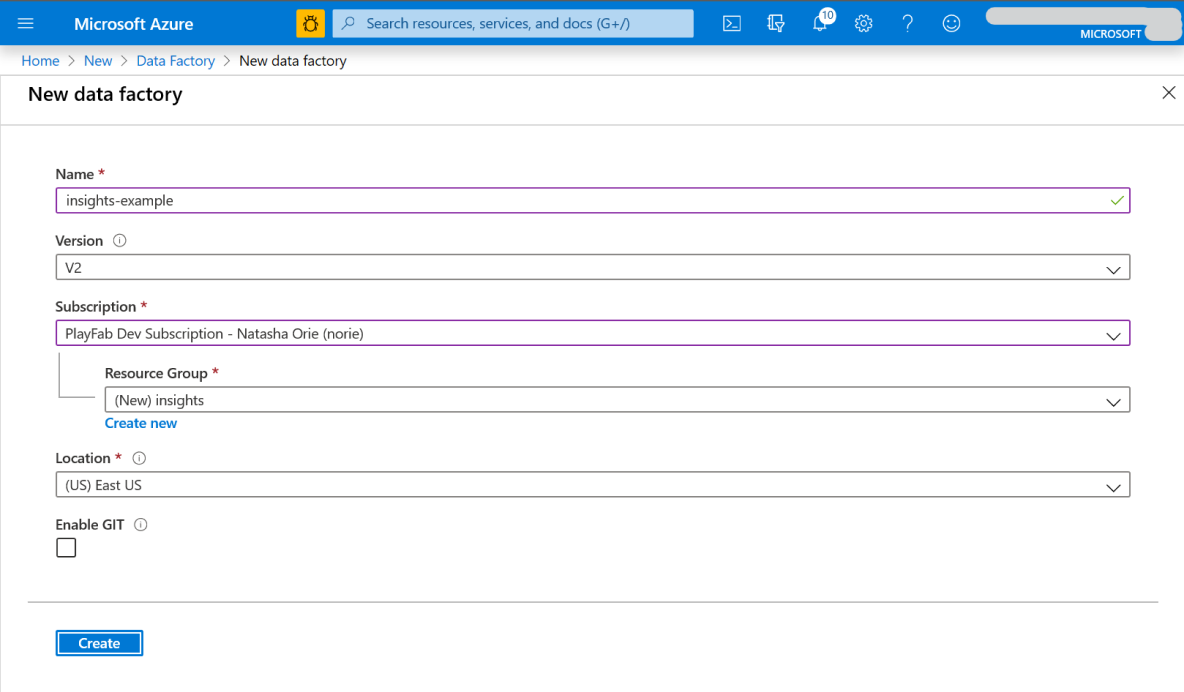
Fill out the required fields:
- For Name, choose a name for your data factory. The name must be globally unique.
- For Subscription, select your Azure subscription in which you want to create the data factory.
- For Resource Group, use one of the following steps:
- Select Use existing, and select an existing resource group from the list.
- Select Create new, and enter the name of a resource group.
- You do not need to enable GIT right now, so uncheck the box below.

Select Create. After the deployment completes, under Next steps select Go to resource.
To open the Data Factory UI in a separate tab, select Author & Monitor.
Create a pipeline
We are now going to create a new pipeline to get data from Insights. To create a pipeline:
On the Let's get started page, select Create pipeline.
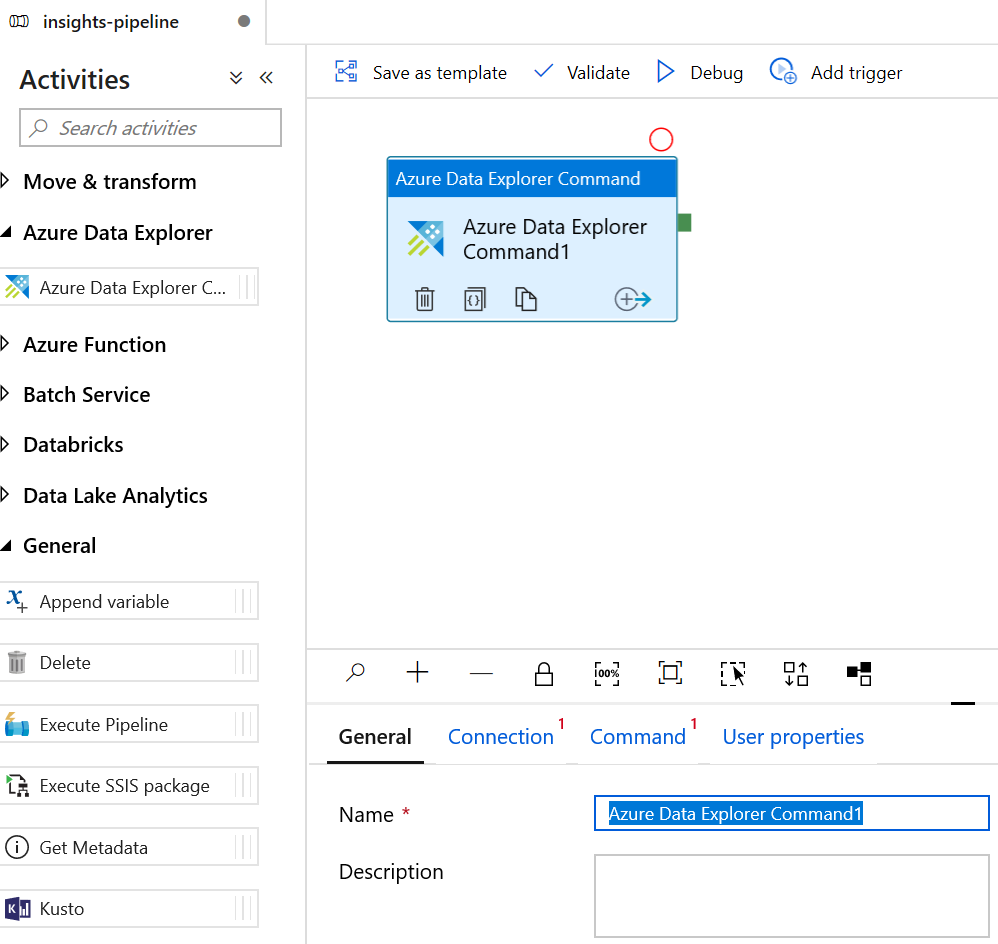
In the Activities panel under Azure Data Explorer, drag and drop an Azure Data Explorer Command into the blank workspace. In the bottom panel under General, fill out the name and description.

Select the Connection tab and select New.

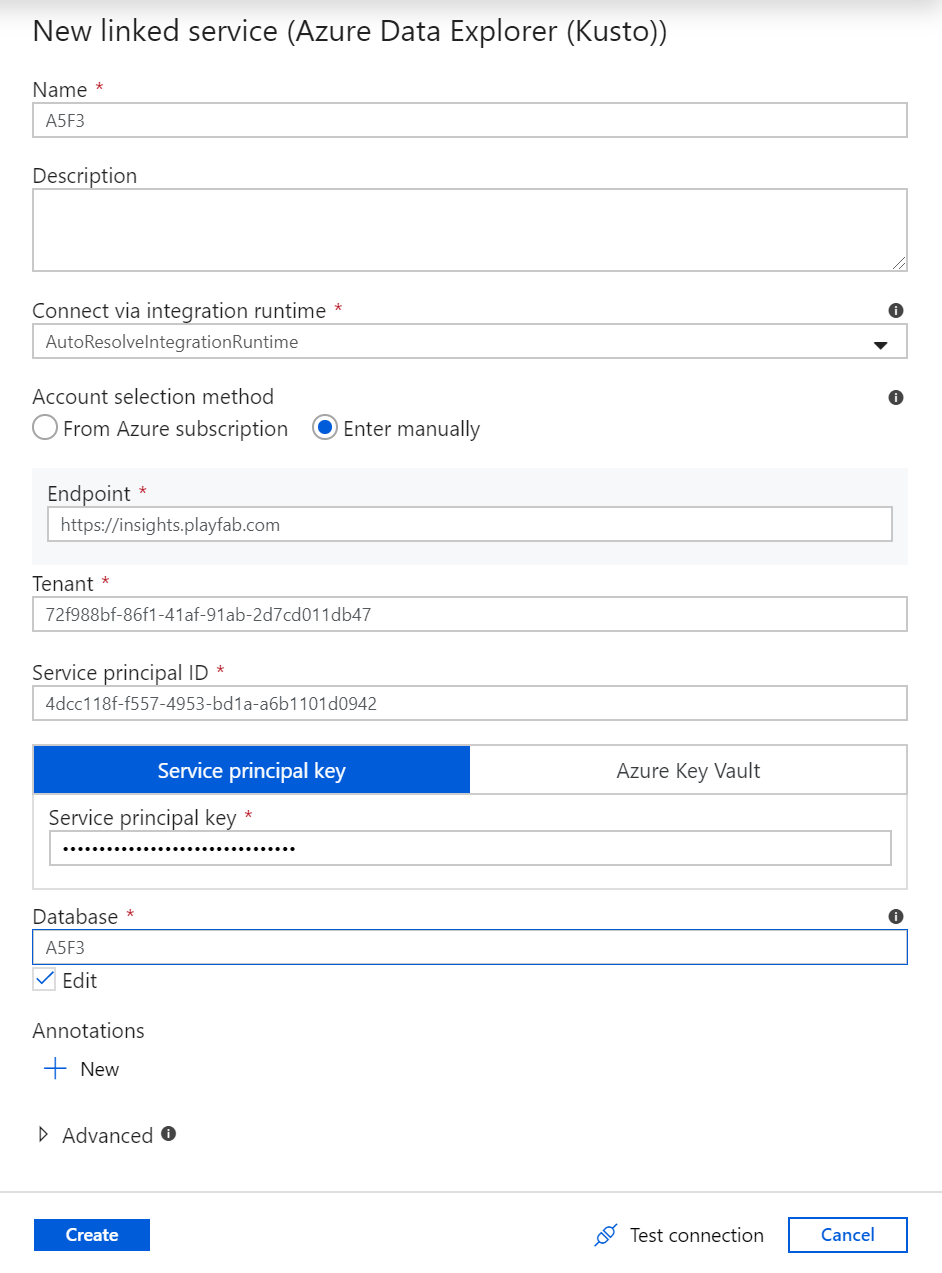
In the New linked service (Azure Data Explorer (Kusto)) window, fill out the fields:
- For Name, use the Title ID.
- For Account selection method, select Enter manually.
- For the Endpoint, use the PlayFab API endpoint, which is
https://insights.playfab.com. - For Service Principal ID, enter your Client ID from your Azure app.
- For Service Principal Key, enter your Client secret from your Azure app.
- In the Database box, type the Title ID in all upper case.

Select Create. Now the pipeline is ready. You can go back to the main pipeline view by clicking the pipeline name.
To verify that all of the information is correct, select Test connection. If everything is set up correctly, it returns a Connection successful response.

To validate and debug the pipeline, in the toolbar above the workspace, select Validate and then select Debug.
Additional resources
- Azure Data Factory (ADF) documentation
- To learn about other tools to connect to Insights, see Connecting external tools to Insights