Log extension events to Application Insights
This article explains how to log events to Customer Application Insights from Commerce runtime (CRT) and POS extensions.
Log an event to Application Insights
- Set up Application Insights in the Microsoft Azure portal, and generate the instrumentation key.
- Extend CRT to log events to Application Insights by using the instrumentation key that you generated.
Note
The RetailLogger class is no longer supported. Existing extensions that use this class must be migrated to the new model.
Set up and configure Application Insights in Azure
Follow the steps in Create an Application Insights resource to generate the instrumentation key or the connection string.
Copy the instrumentation key, which you will use in the CRT. For recent updates and new recommended options to log events, see Azure Application Insights documentation.
Extend the CRT extension project to log events to Application Insights
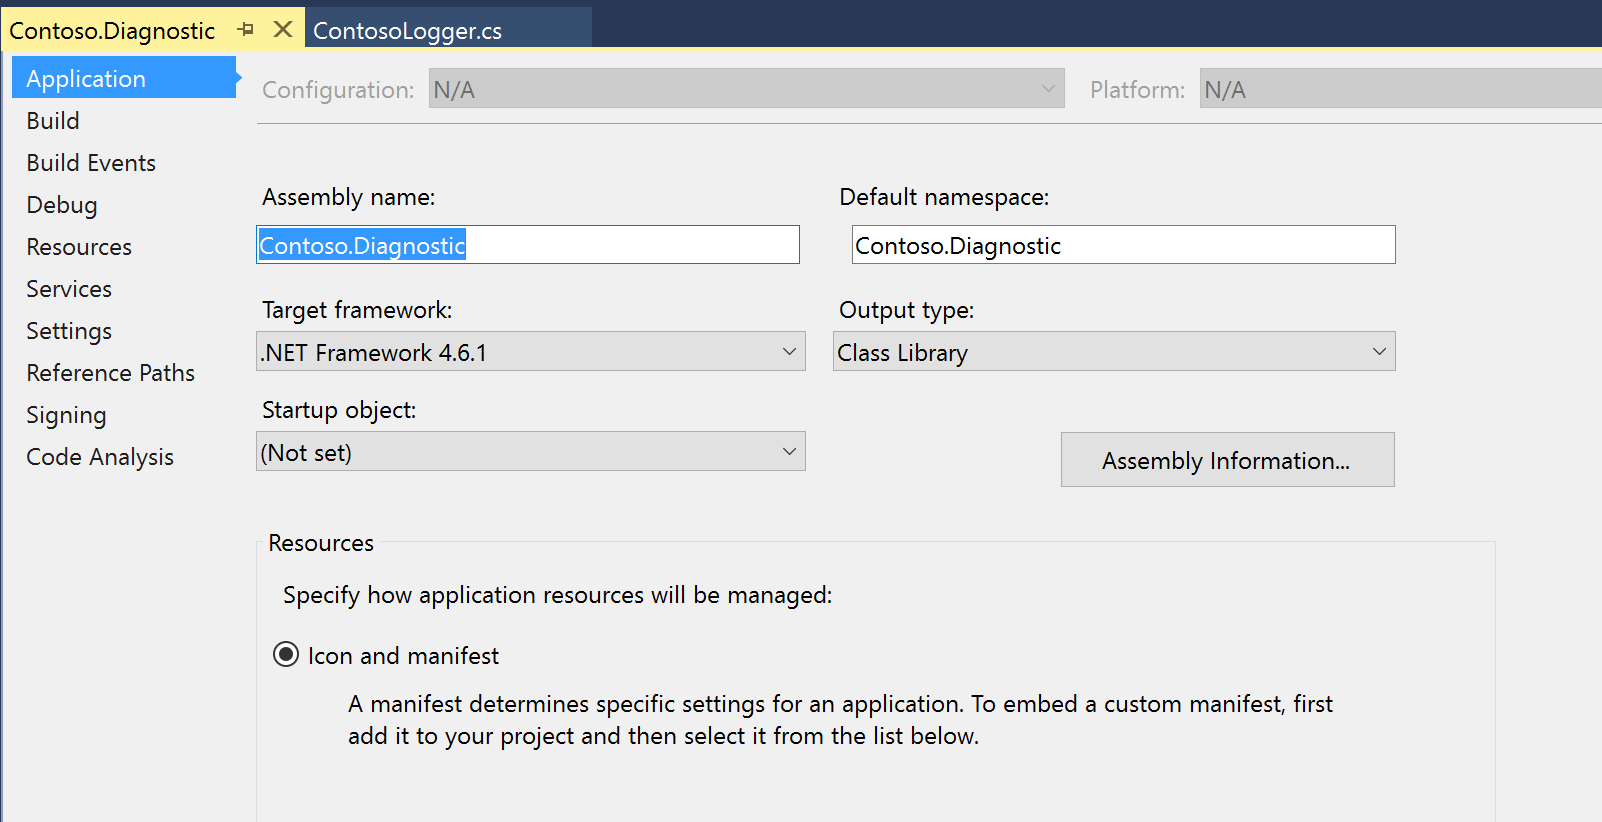
Create a new C# class library project, and name it Contoso.Diagnostic.

Add the NuGet package references to the following libraries:
- Microsoft.ApplicationInsights
- Netstandard
- Microsoft.Dynamics.Commerce.Runtime.Framework
Note
To install the Microsoft.ApplicationInsights assembly reference, install the Application Insights SDK for ASP.NET Core. The reference to Microsoft.Dynamics.Commerce.Runtime.Framework can be added from the ..\RetailSDK\Reference folder.
Add a new class file that is named ContosoLogger, and copy the following code into it.
using Microsoft.ApplicationInsights;
using Microsoft.ApplicationInsights.Extensibility;
using Microsoft.Dynamics.Commerce.Runtime;
using Microsoft.Dynamics.Commerce.Runtime.Extensions;
namespace Contoso.Diagnostic
{
    public static class ContosoLogger
    {
        private static readonly object lockObject = new object();
        private static TelemetryClient client = null;
        public static TelemetryClient GetLogger(RequestContext context)
        {
            if (client == null)
            {
                lock (lockObject)
                {
                    if (client == null)
                    {
                        string key = context.Runtime.Configuration.GetSettingValue("ext.AppInsightsKey") ?? string.Empty;
                        client = new TelemetryClient(new TelemetryConfiguration(key));
                    }
                }
            }
            return client;
        }
    }
}
Build the project, and copy the output library and the Microsoft.ApplicationInsights.dll file to the ..\RetailServer\webroot\bin\Ext folder for manual deployment and testing.
In the ..\RetailServer\webroot\bin\Ext folder, open the CommerceRuntime.Ext.config file, and update the <settings> section with the Applications Insights instrumentation key that you generated earlier. Here is an example.
<add name="ext.AppInsightsKey" value="xxxxxxx"/>Restart your Commerce Scale Unit.
Consume the logger in the CRT extension
To consume the ContosoLogger in the extension, add the ContosoDiagnostic and Microsoft.ApplicationInsights assembly references to the extension project.
To log events, use the TraceTelemetry class, and create the traces. Here is an example.
using Contoso.Diagnostic;
using Microsoft.ApplicationInsights.DataContracts;
var trace = new TraceTelemetry("CRT executing request", SeverityLevel.Information);
trace.Properties.Add("CustomDimensionColumn1", request.RequestContext.GetTerminalId().ToString());
trace.Properties.Add("CustomDimensionColumn2", "CRT demo - Save Cart request");
ContosoLogger.GetLogger(request.RequestContext).TrackTrace(trace);
Note
Trace properties are custom dimensions that you can easily add to query the traces.
Validate the trace events
Open the Azure portal, and sign in by using your Azure subscription credentials.
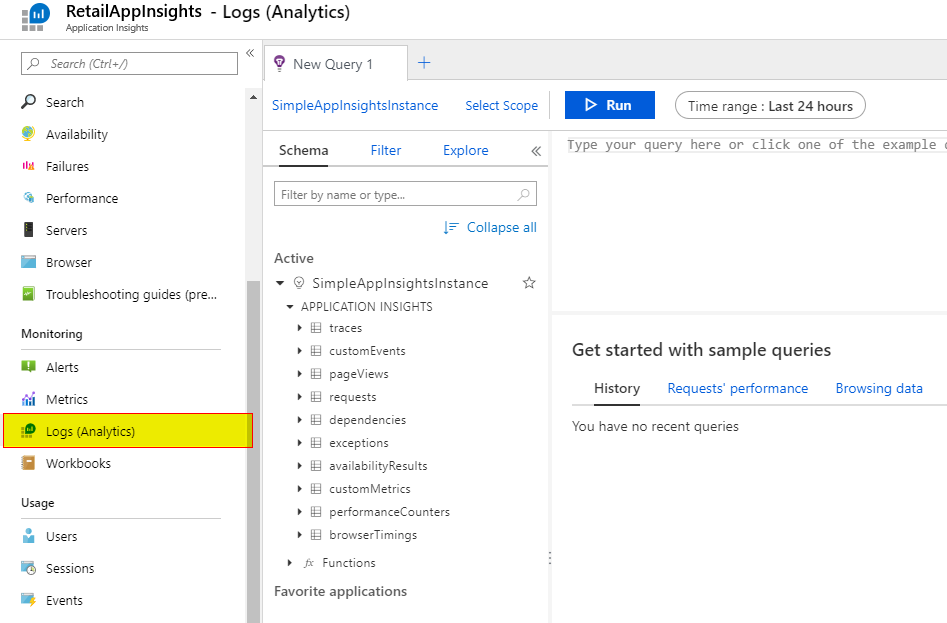
Go to the Application Insights instance, and then, under Monitoring, select Logs (Analytics) to open a new query editor.

On the Schema tab, double-click traces to add it to the query editor. The default time range is Last 24 hours.

Select Run to run the query. The logged event will appear in the results.

Build the deployable package
For detailed information about how to build deployable packages, see Create deployable packages.
Copy the Contoso.Diagnostic and Microsoft.ApplicationInsights assemblies to the \RetailSDK\References folder.
Update the BuildTools\Customization.settings file, and add the following entries in the <ItemGroup> section.
<ISV_CommerceRuntime_CustomizableFile Include="$(SdkReferencesPath)\\Contoso.Diagnostic.dll" />
<ISV_CommerceRuntime_CustomizableFile Include="$(SdkReferencesPath)\\Microsoft.ApplicationInsights.dll" />;
Open an MSBuild Command Prompt window for Microsoft Visual Studio 2015, and run the build command in the root of your Retail SDK folder.
Enter the following command to generate the deployable package.
msbuild /t:rebuildIn the RetailSDK\Packages\RetailDeployablePackage folder, find the deployable package. Go to the content.folder folder, and make sure that your three files are in the package (Packages\RetailDeployablePackage\content.folder\RetailServer\Code\bin\ext).
Upload the deployable package to your Shared asset library in Microsoft Dynamics Lifecycle Services (LCS).
In LCS, open your environment's main page, and select Environment Features > Retail and Commerce > Manage.
Select Apply Extension, and select the extension from your library.
After the extension has been successfully deployed, open an instance of Store Commerce that has been activated against the Commerce Scale Unit.
Run the extension scenario that that uses custom Application Insights logging.
Refresh the query in Application Insights to verify that the traces from the extension are logged correctly.
Log events to Application Insights in the POS extension projects
In the RetailSDK\POS\Extensions folder, create a new folder named Libraries.
Open a command prompt and navigate to the Libraries folder.
Install npm. The npm package can be downloaded and installed from OpenJS.
Run this command to install the npm package for the JavaScript Application Insights package.
npm i --save @microsoft/applicationinsights-web@2.5.8
Note
The sample documented here is based on applicationinsights-web npm package version 2.5.8. The sample may not work as-is in the updated applicationinsights-web package.
After the package is installed, the POS/Extensions/Libraries folder should contain the node_modules folder. The node_modules folder contains the Application Insights library files.
Check that the file POS/Extensions/Libraries/node_modules/@microsoft/applicationinsights-web/dist/applicationinsights-web.js exists in the library.
The file name might change in future versions of the Application Insights library. If the path changes, update the library path in steps 8 and 10 to a path that points to the main Application Insights library.
Open ModernPOS.sln or CloudPos.sln from RetailSDK\POS.
Open the tsconfig.json file from the POS.Extensions project. Under the exclude section, add an entry to the Libraries folder.
"exclude": [
    "Libraries"
  ],
Open the tsconfig.json file from the POS.Extensions project. Under the compilerOptions section, add the following properties.
"baseUrl": "./",
"paths": {
    "applicationinsights-web": [ "Libraries/node_modules/@microsoft/applicationinsights-web/dist/applicationinsights-web" ]
}
Edit the Pos.Extensions.csproj file in the CopyPosExtensionsFiles section. Add the following targets to copy the Application Insights library to the POS application, so that the targets can be consumed by the extension code.
<JavaScriptFileList Include="Libraries\\**\\*.js">
    <InProject>false</InProject>
    <Visible>false</Visible>
</JavaScriptFileList>
Include the following node in the manifest.json file of the POS extension folder (package) that is consuming the Application Insights library.
{
  "dependencies": [
    {
      "alias": "applicationinsights-web",
      "format": "amd",
      "modulePath": "../Libraries/node_modules/@microsoft/applicationinsights-web/dist/applicationinsights-web"
    }
  ]
}
The Application Insights library is now ready to be consumed and used in POS.
Consume the library and log events
Open the ModernPOS.sln or CloudPos.sln solution from RetailSDK\POS.
Create a new TypeScript file inside the POS extension folder (package) and name it AppInsights.ts.
Copy the following code to the file. The code is used by the extensions to track events using Application Insights. Use the instrumentation key created in Azure App Insights.
import { ApplicationInsights } from "applicationinsights-web";

/**
 * Example implementation of an Application Insights singleton that can be used to log events and metrics on Application Insights.
 */
export class AppInsights {
    private static _instance: AppInsights = null;
    private _applicationInsights: ApplicationInsights = null;

    /**
     * Gets a global reference to an Application Insights reference that can be used by other extension code.
     * @returns {ApplicationInsights} The ApplicationInsights instance that can be used to log events.
     */
    public static get instance(): ApplicationInsights {
        if (AppInsights._instance === null) {
            AppInsights._instance = new AppInsights();
        }

        return AppInsights._instance._applicationInsights;
    }

    /**
     * Initializes a new instance of AppInsights.
     */
    constructor() {
        this._applicationInsights = new ApplicationInsights({
            config: {
                instrumentationKey: 'YOUR_INSTRUMENTATION_KEY_GOES_HERE'
                /* ...Other Configuration Options... */
            }
        });
        this._applicationInsights.loadAppInsights();
    }
}
In the extension code, log the events by calling the AppInsights class as shown in the following code example.
AppInsights.instance.trackEvent({
    name: "extensionTest",
    properties: {
        "property1": "value1",
        "property2": "value2",
    },
    measurements: {
        "measurement1": 1,
        "measurement2": 2,
    },
});