Funnels
Funnels are an ordered group of user actions, providing a clear view of user progression through each step of the flow. The integration from heatmaps and recordings uncover user behaviors that influence your conversion rates. Clarity offers funnel creation without any code for maximum simplicity. You can add filters by funnel step and edit from the settings page.
View funnels
Dashboard
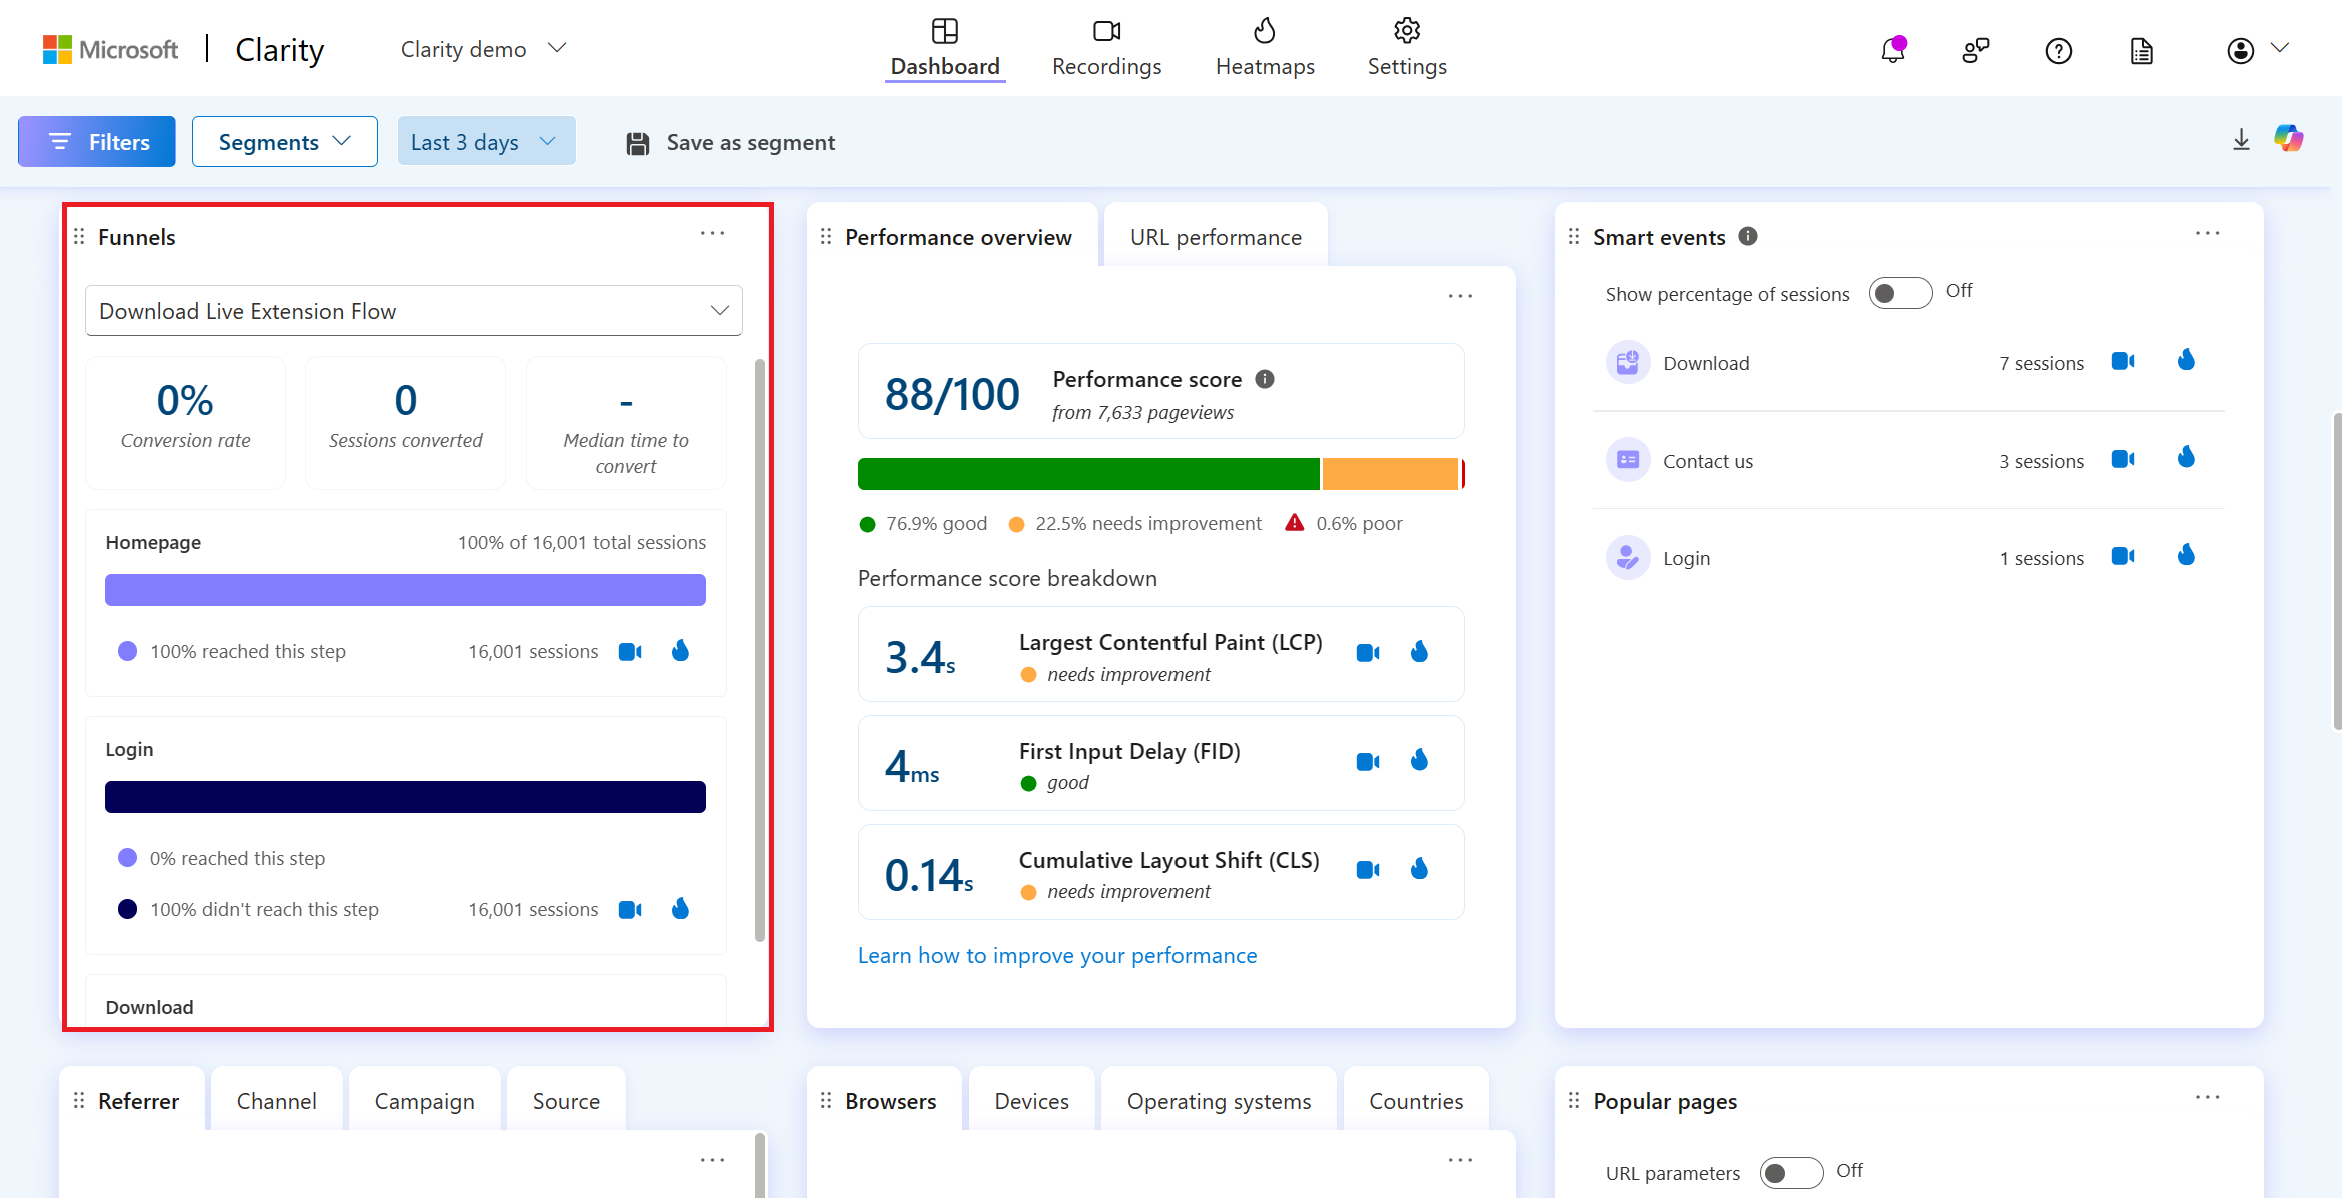
Funnel visualizations are available on the dashboard. For every stage in the funnel, Clarity offers the percentage and count of sessions that successfully progressed and those that didn't. Select the recordings or heatmaps icon to view the filtered data. There are three top level metrics:
Conversion rate: The percentage of sessions that successfully completed the funnel.
Sessions converted: The number of sessions that successfully completed the funnel.
Median time to convert: The median time taken to successfully complete the funnel.
Filters
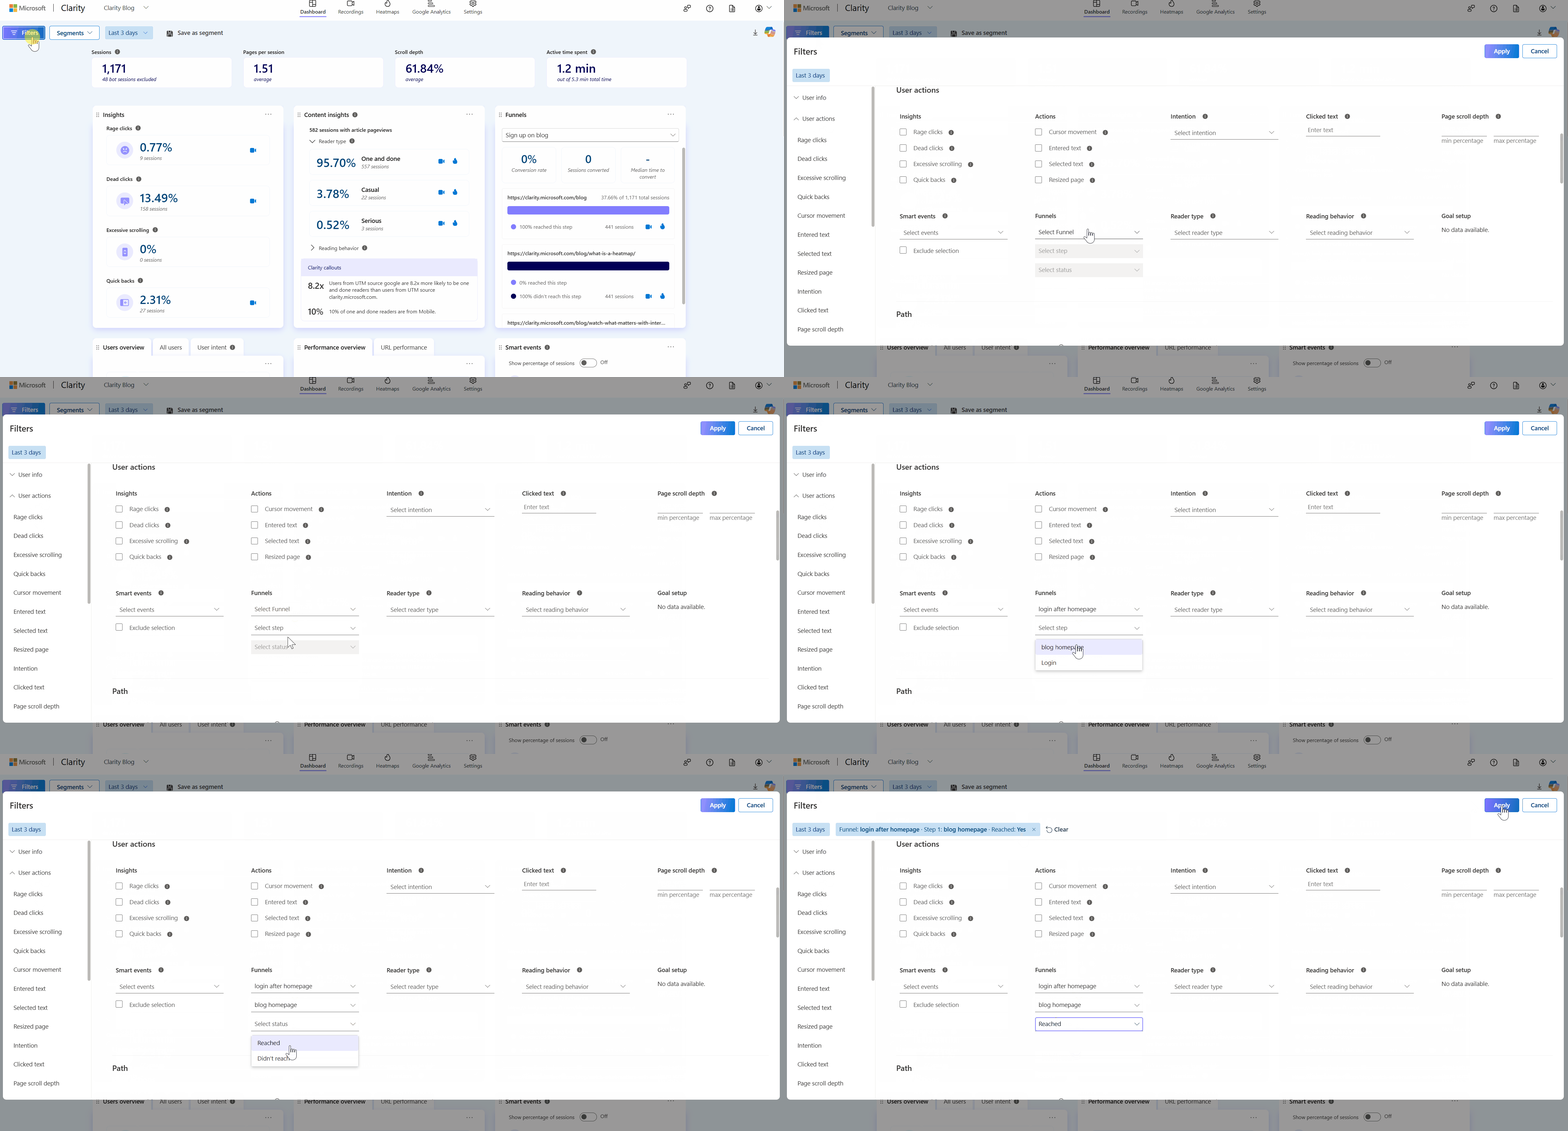
You can also set funnels through Filters.
Edit funnels
Edit in settings
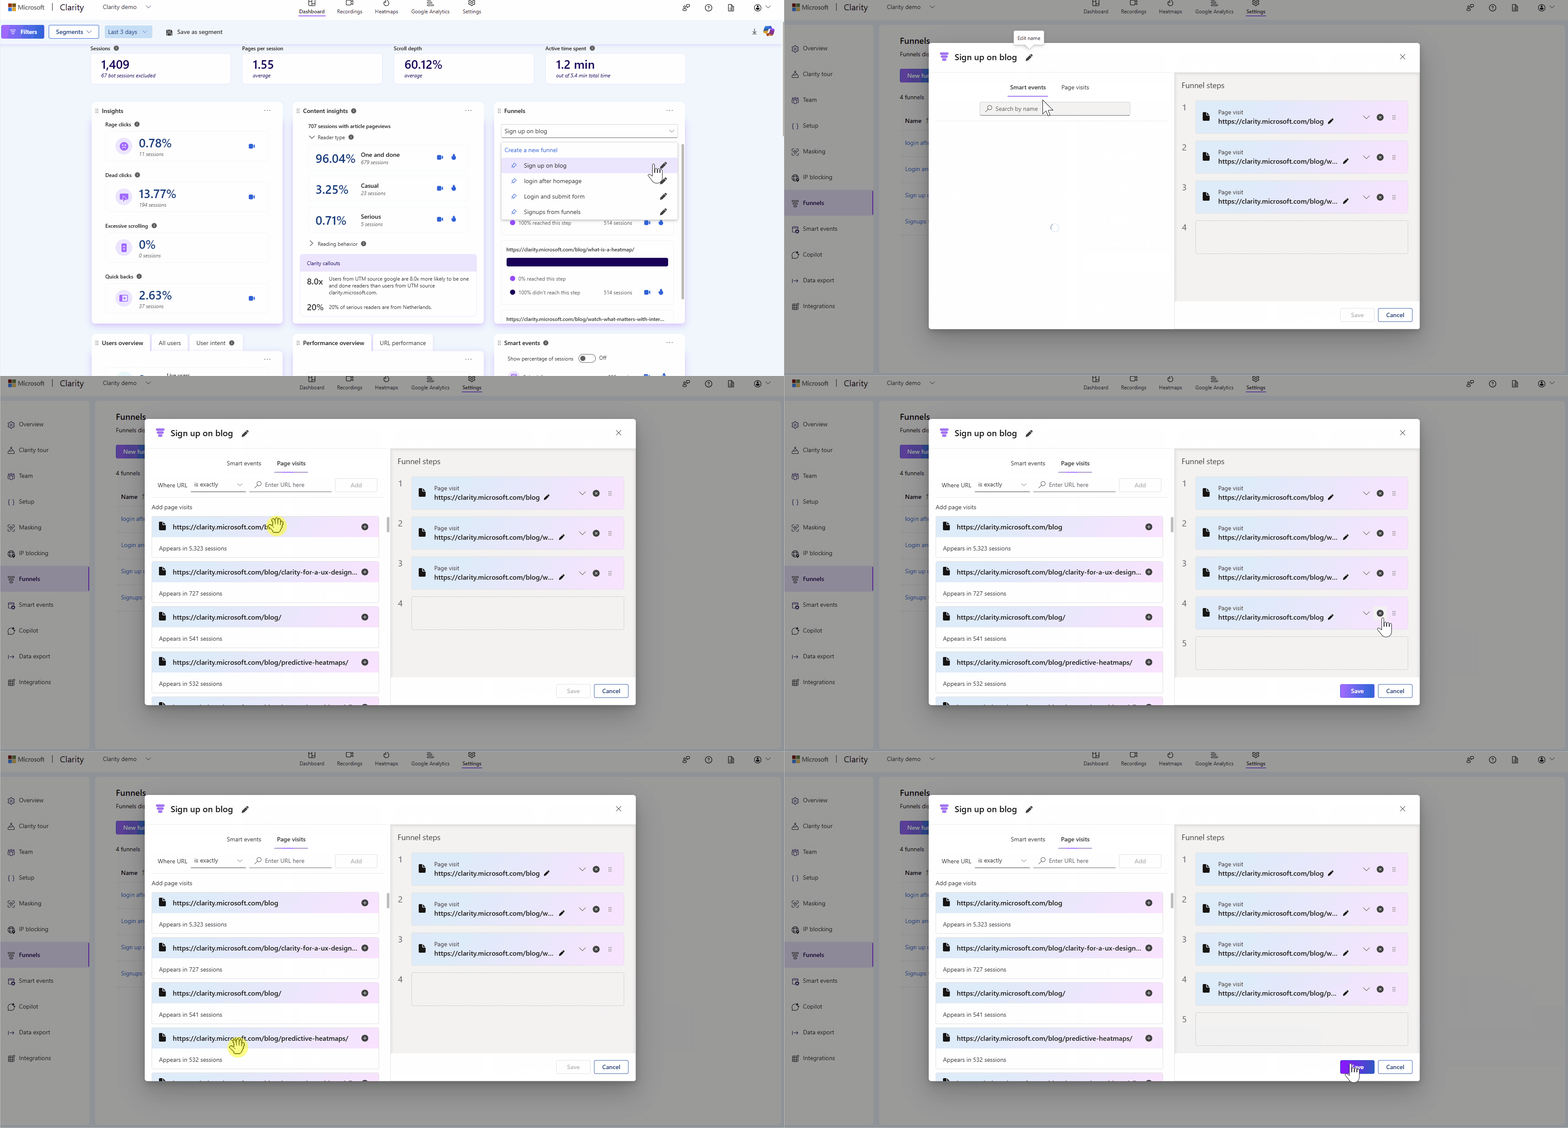
Clarity groups user actions on your website into known events and is listed as steps in the Funnels. You can edit funnels from the Settings vertical.
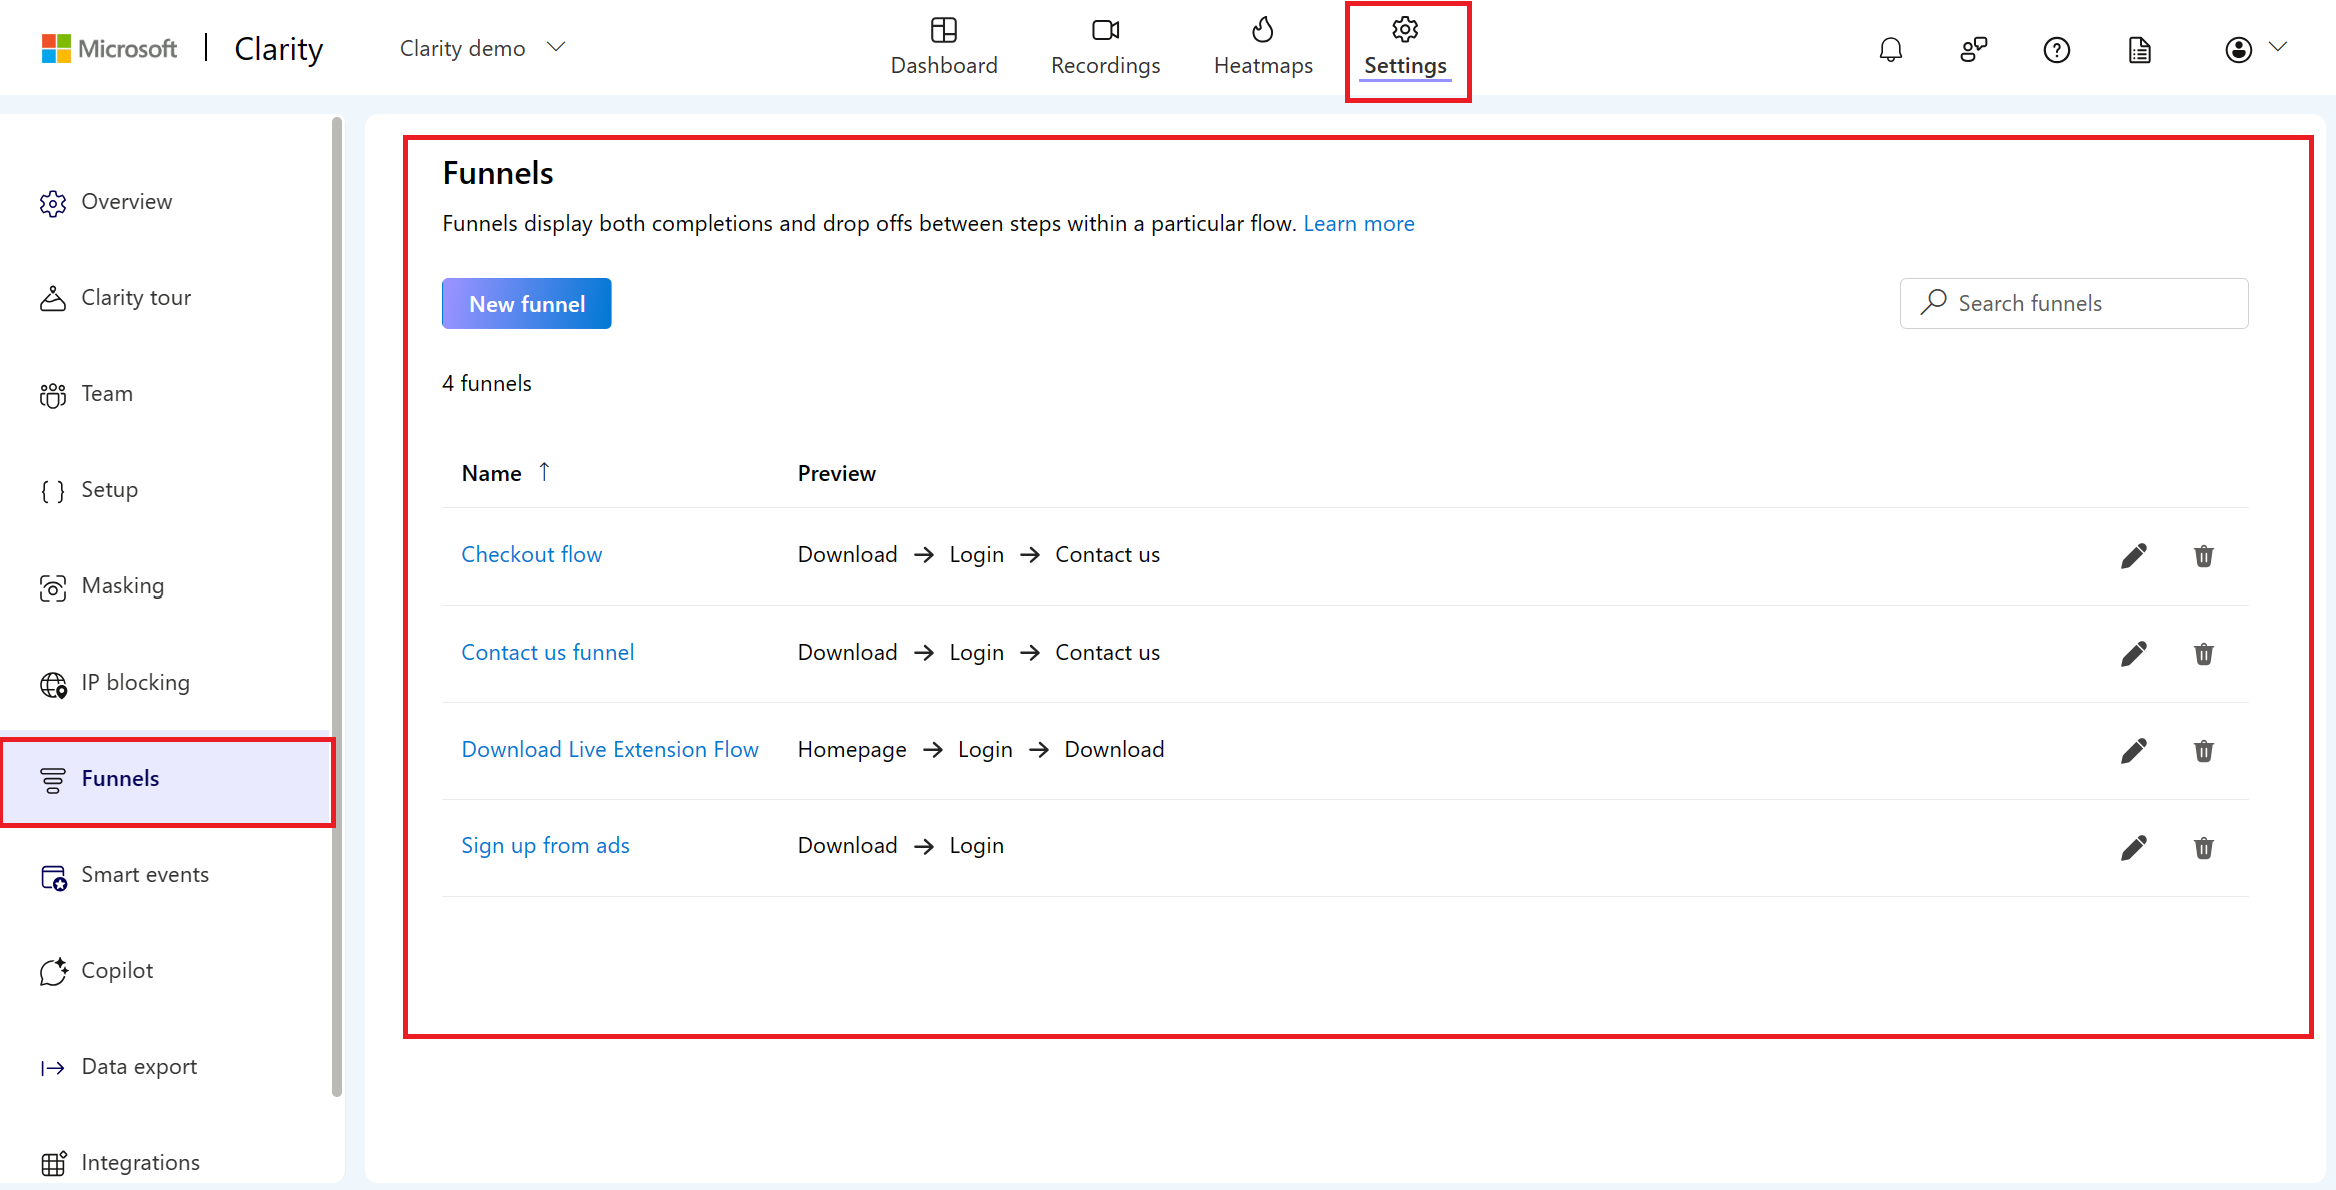
Select Edit icon or the funnel name.
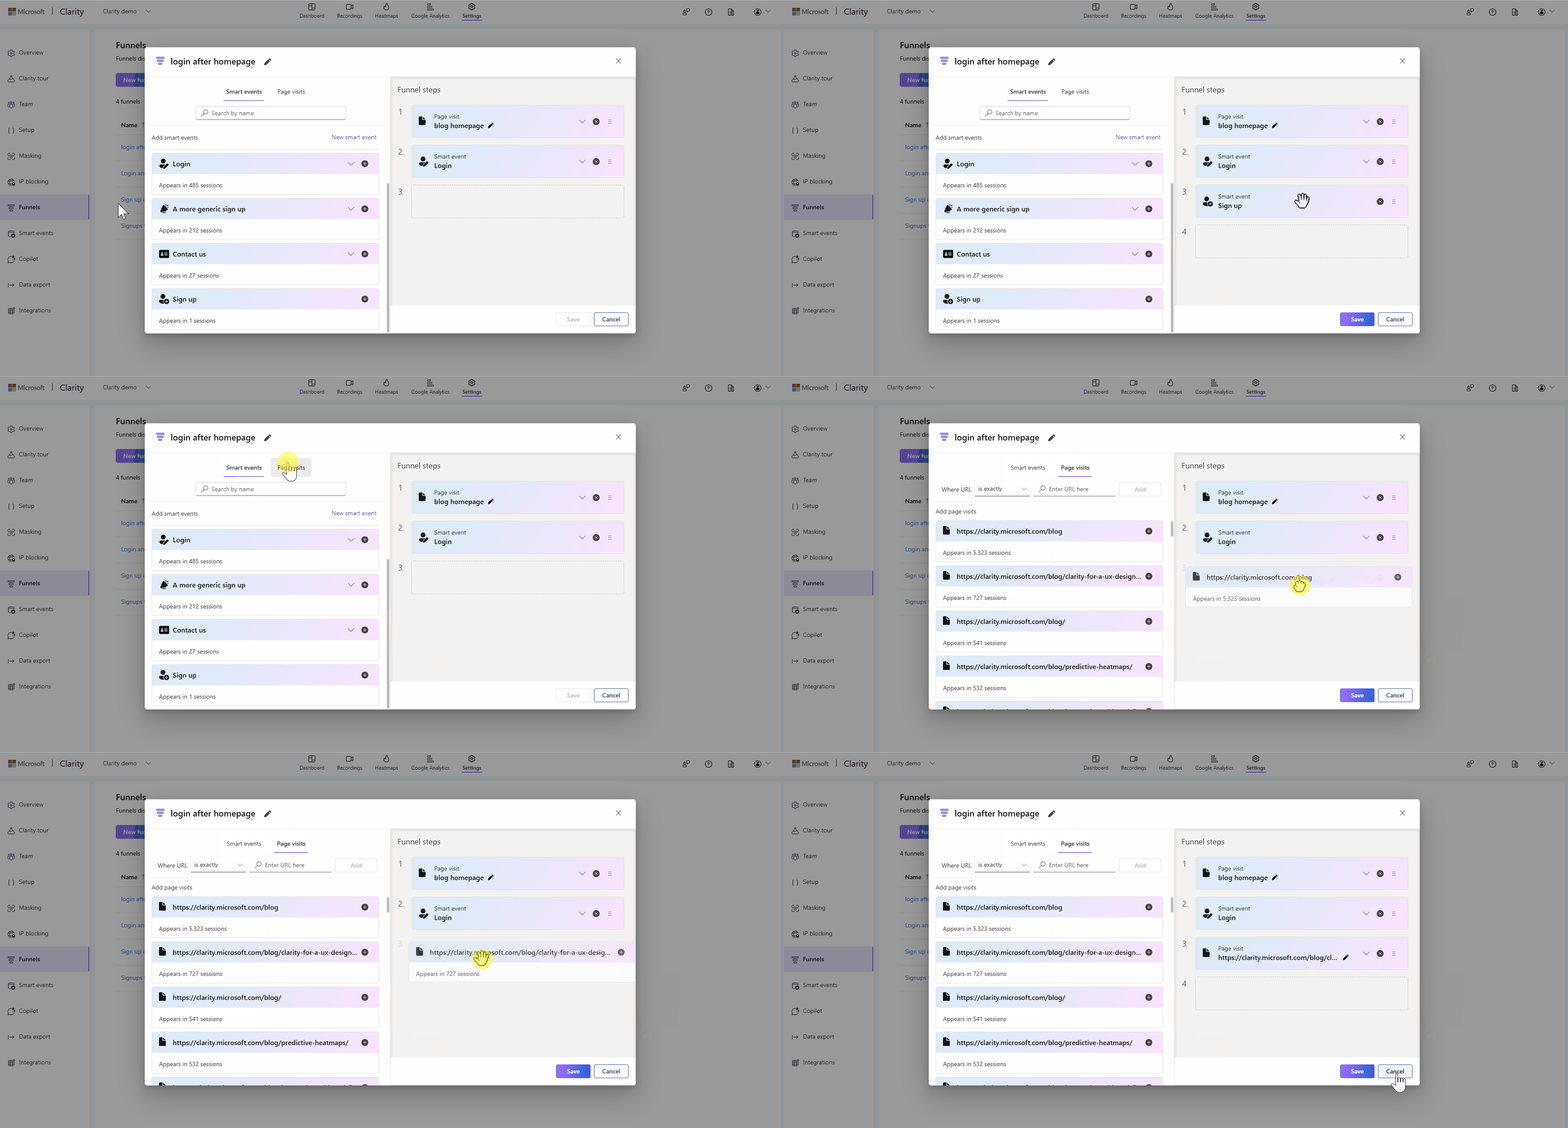
In the right pane, you can view the existing funnel layout. Reorder the steps by dragging and dropping each block or delete a block by selecting x icon.
To add new steps, select or drag a smart event or page visit from the right pane.
Rename the step by selecting on the edit icon next to its current name.
Select Save to finish editing. Once auto events are edited, you can preview the steps in the Funnels page.
Edit in Dashboard
You can also edit a funnel from the dropdown in the dashboard card.
In the dropdown, select Edit icon.
In the right pane, you can view the existing funnel layout. Reorder the steps by dragging and dropping each block or delete a block by selecting x icon.
To add new steps, select or drag a smart event or page visit from the right pane.
Rename the step by selecting on the edit icon next to its current name.
Select Save to finish editing. Once auto events are edited, you can preview the steps in the Funnels page.
Create new funnel
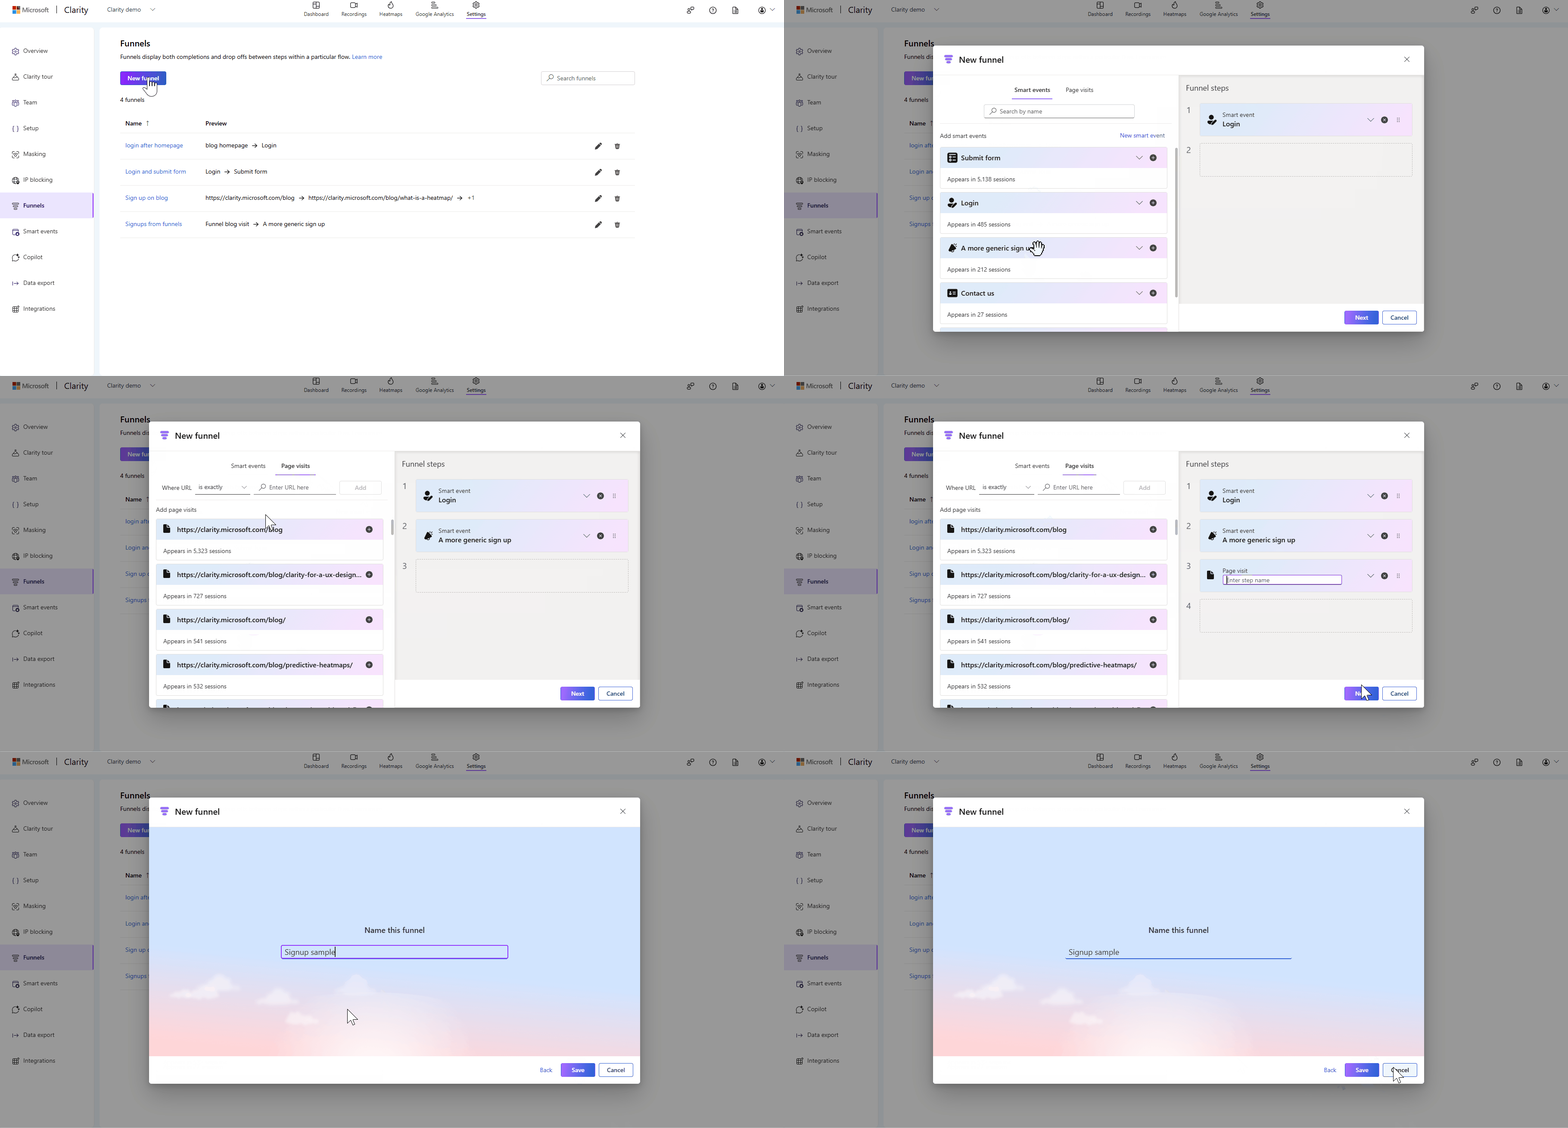
You can create new funnels completely code-free via Settings -> Funnels -> New funnel.
In the right panel, drag and drop smart events or page visits from the left panel into the funnel to add them as steps.
You can rearrange the order of events by dragging and dropping them within the funnel as needed. To remove a step, select the x icon next to the event.
Name your funnel and select Save to save your newly created funnel. You can view them in Settings -> Funnels page. It appears on the dashboard once a user engages in the defined action.
Delete funnel
Important
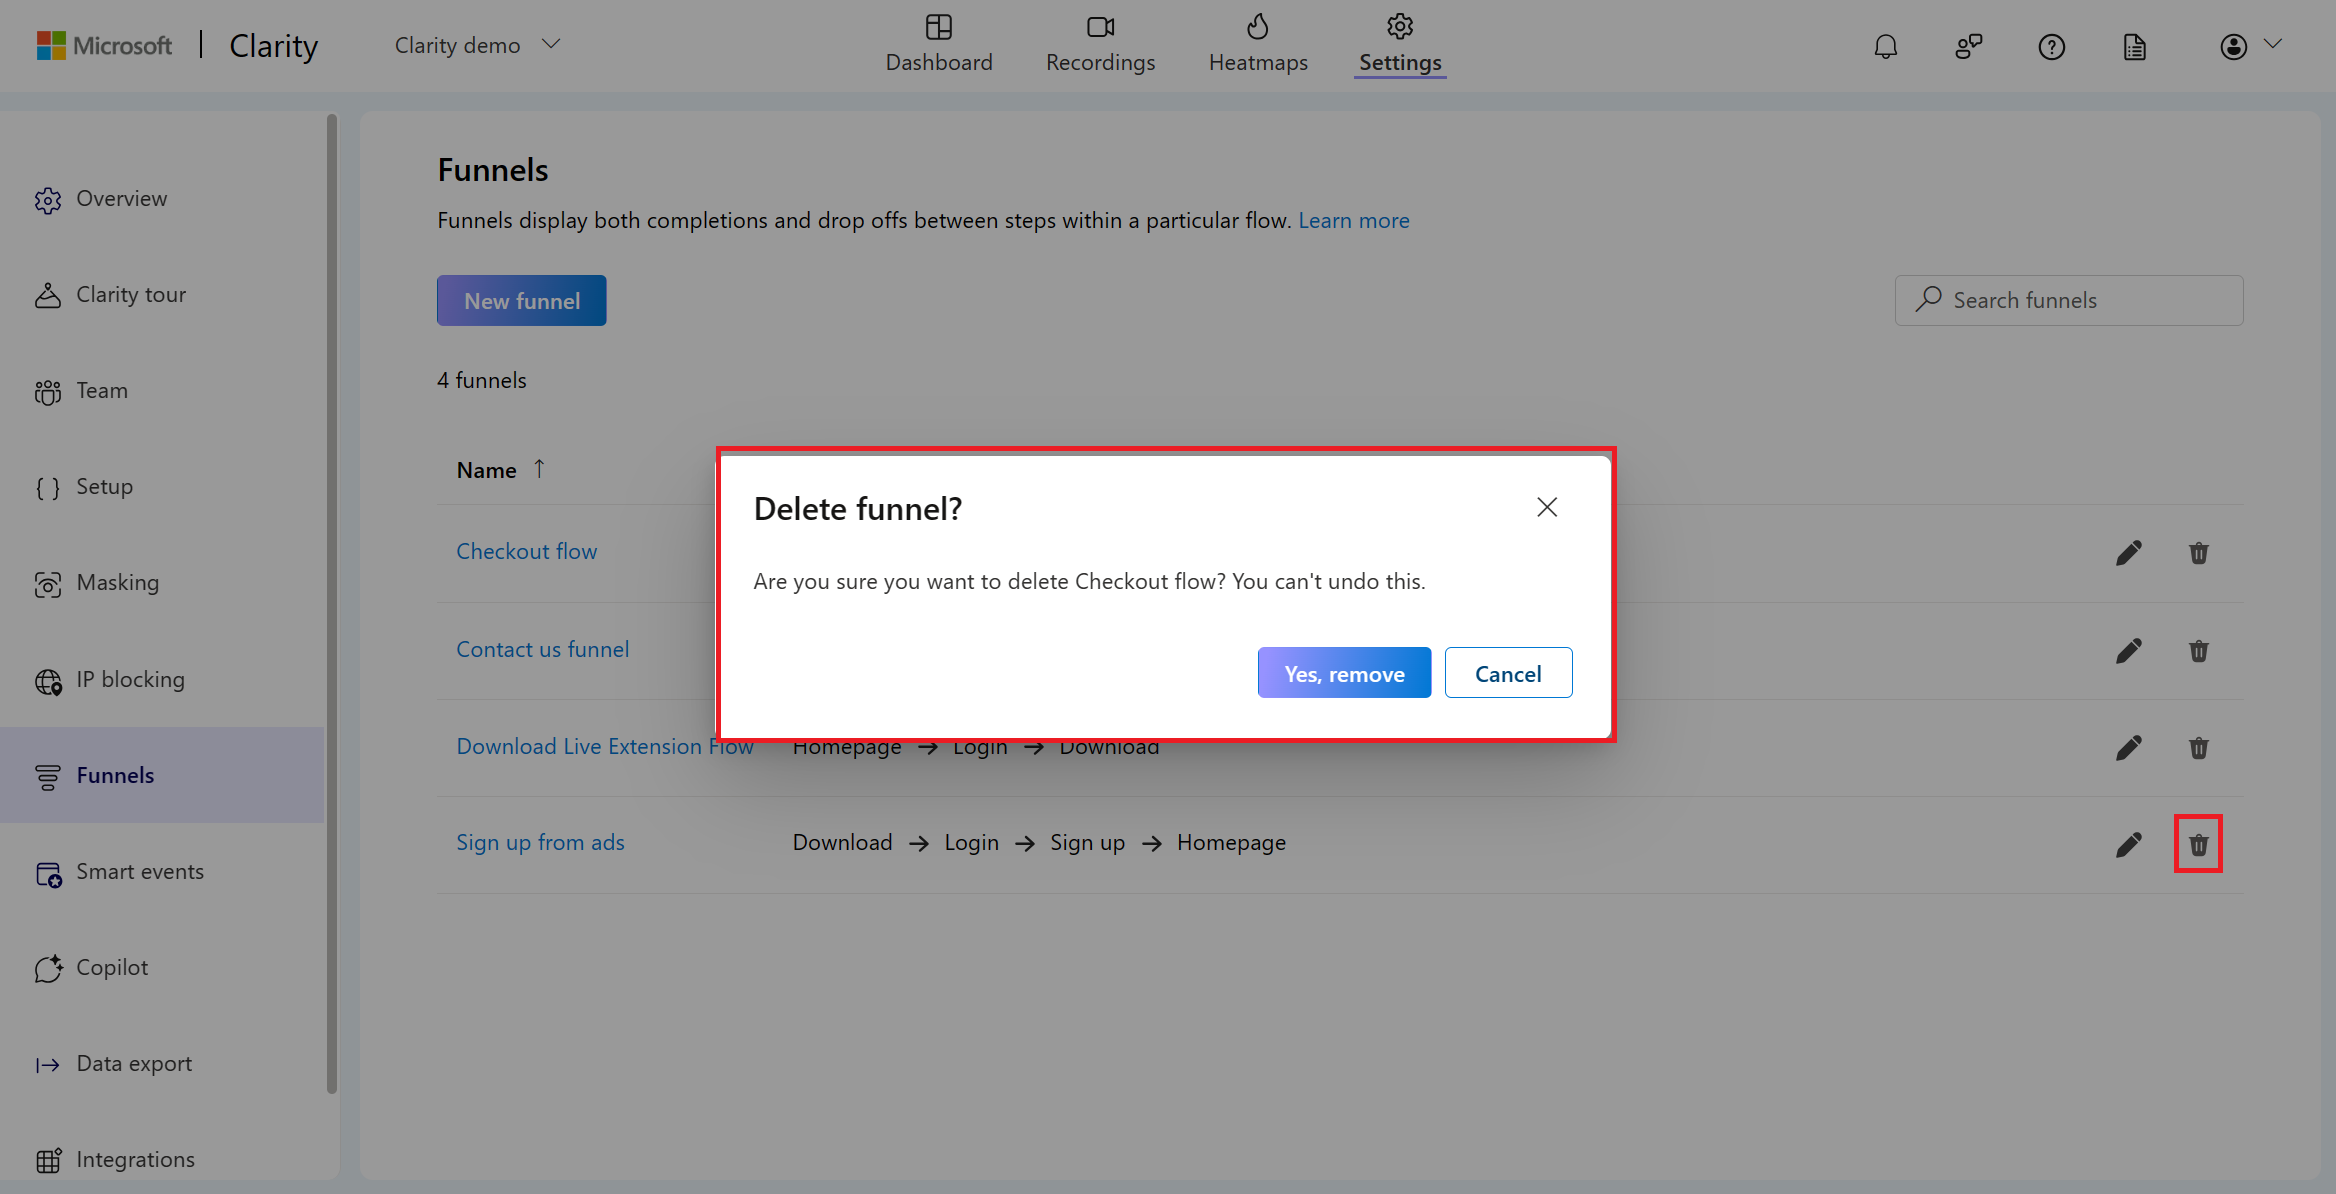
Deleting a funnel permanently removes it. This action is irreversible, and the deleted funnel is unrecoverable.
Select the Delete icon and confirm delete on the pop-up window.
FAQ
For more answers, refer to FAQ.