View and analyze your Azure carbon optimization emission data (Preview)
Azure carbon optimization helps you measure and understand your carbon footprint by providing you with data on your cloud emissions. You can use the Azure carbon optimization blade to view and analyze your carbon emission data and insights, and take actions to optimize your cloud sustainability and efficiency.
View emissions data
Sign into the Azure portal.
In the search box, type Carbon optimization and select Carbon optimization (preview).
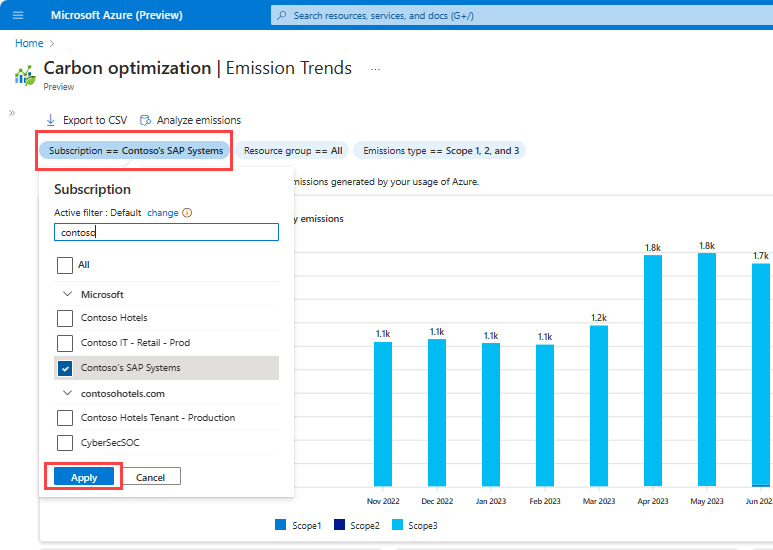
On the Carbon optimization page, select Subscriptions to filter the subscriptions for which you want to see the emissions data. You can choose one or more subscriptions.
Select the subscriptions you want to analyze and select Apply.
Use the Resource group and Emissions type filters to focus the emissions data to a specific resource group or emissions type.
Emissions trends
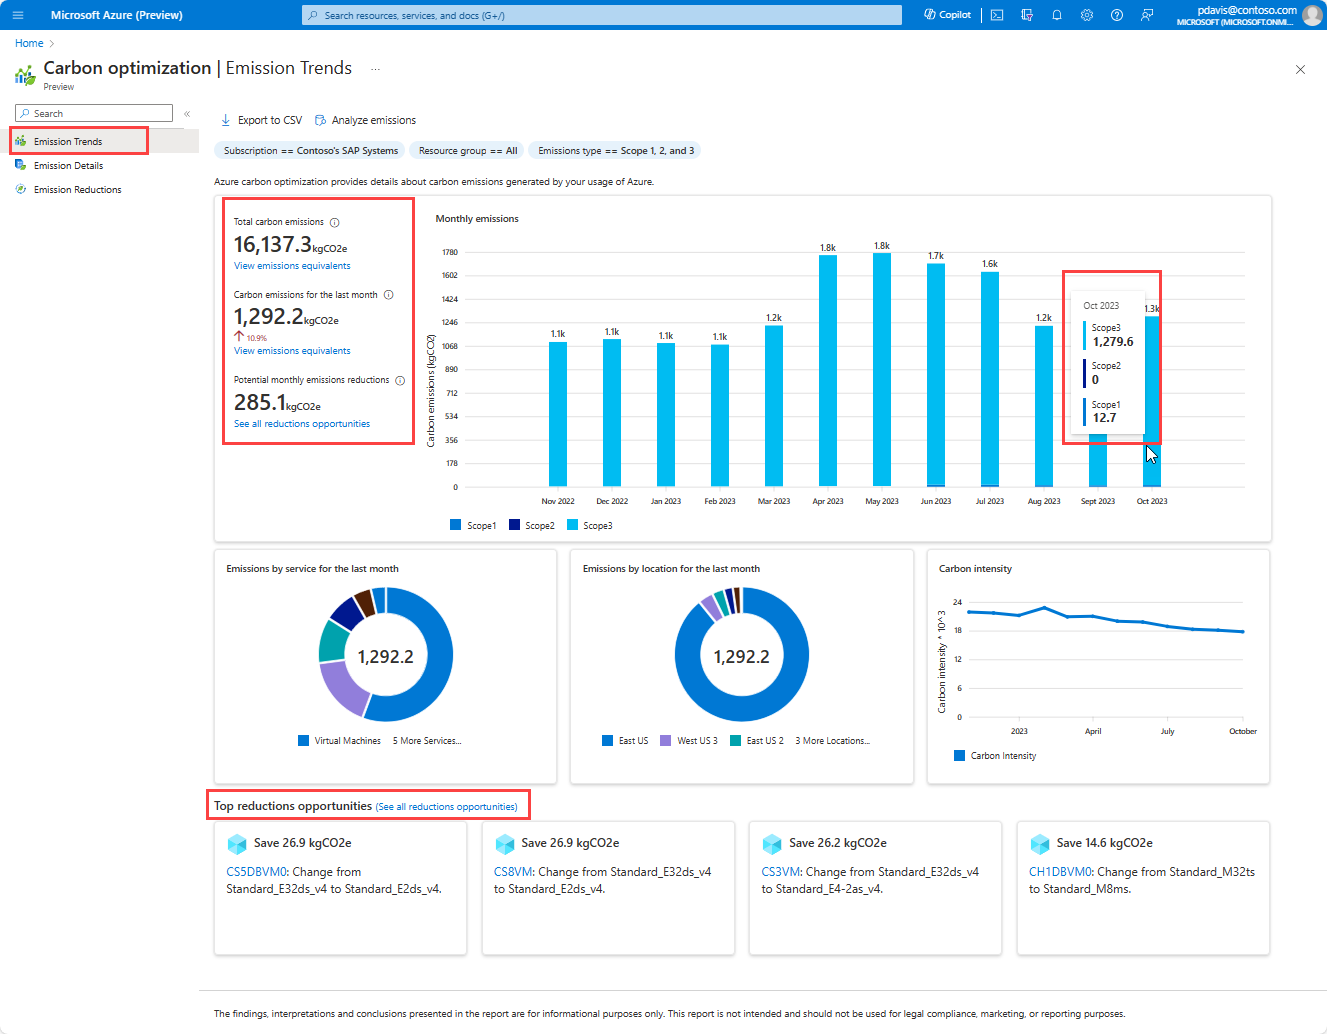
Use the emissions trends page to understand the general patterns in your cloud emissions, and identify the factors and drivers that affect your carbon footprint.
The emissions trends page shows you a trend of your monthly carbon emission data over the last 12 months. Hover over a month's bar to see the breakdown of emission type scopes. The total emissions values are shown with emissions equivalents to make the data more relatable.
Below the monthly trend chart, the previous month's emissions are broken down by service and by location along side the carbon intensity trend for the selected subscriptions. The carbon intensity trend shows your emissions compared to your utilization of Azure.
On the lower section of the page, the top opportunities for emissions reduction are shown. These are the top recommendations that can help you reduce your emissions. Select a recommendation to go to the resource page where you can implement the recommendation. Select See all reductions opportunities to go to the Emissions Reductions page to see all the recommendations for your subscriptions.
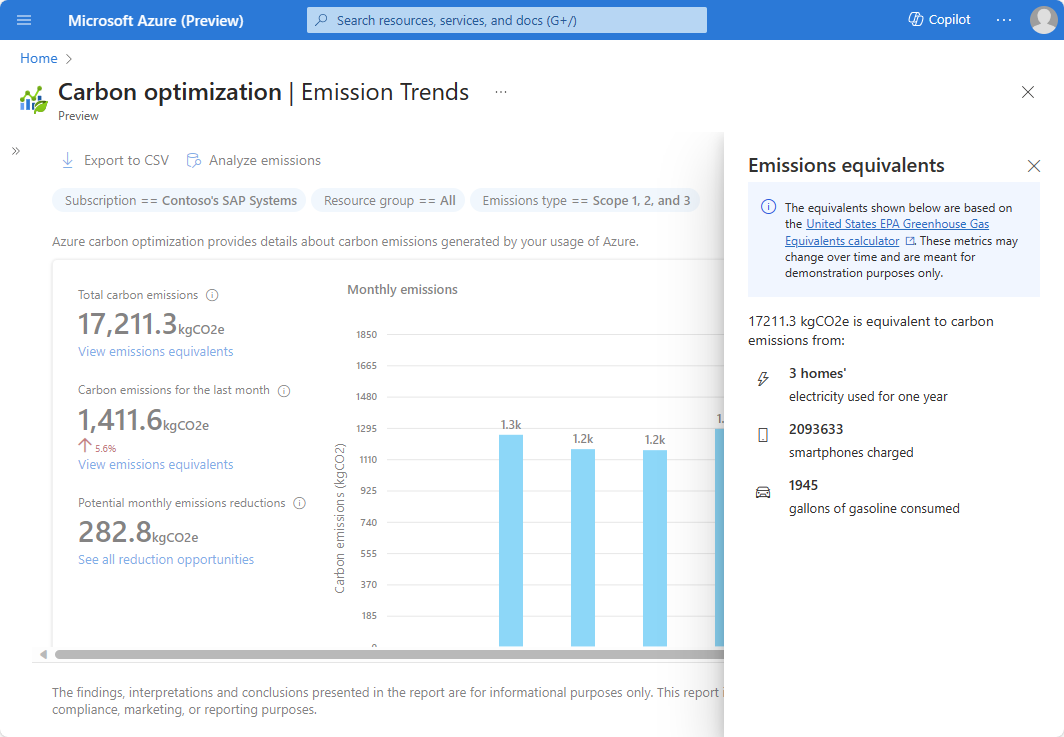
Select View emissions equivalents under Total carbon emissions and Carbon emissions for the last month to see equivalent emissions as calculated by the United States EPA Greenhouse Gas Equivalents calculator.
Emissions details
Gain deeper insights into your resources’ emissions and identify the biggest areas of optimization for your Azure resources.
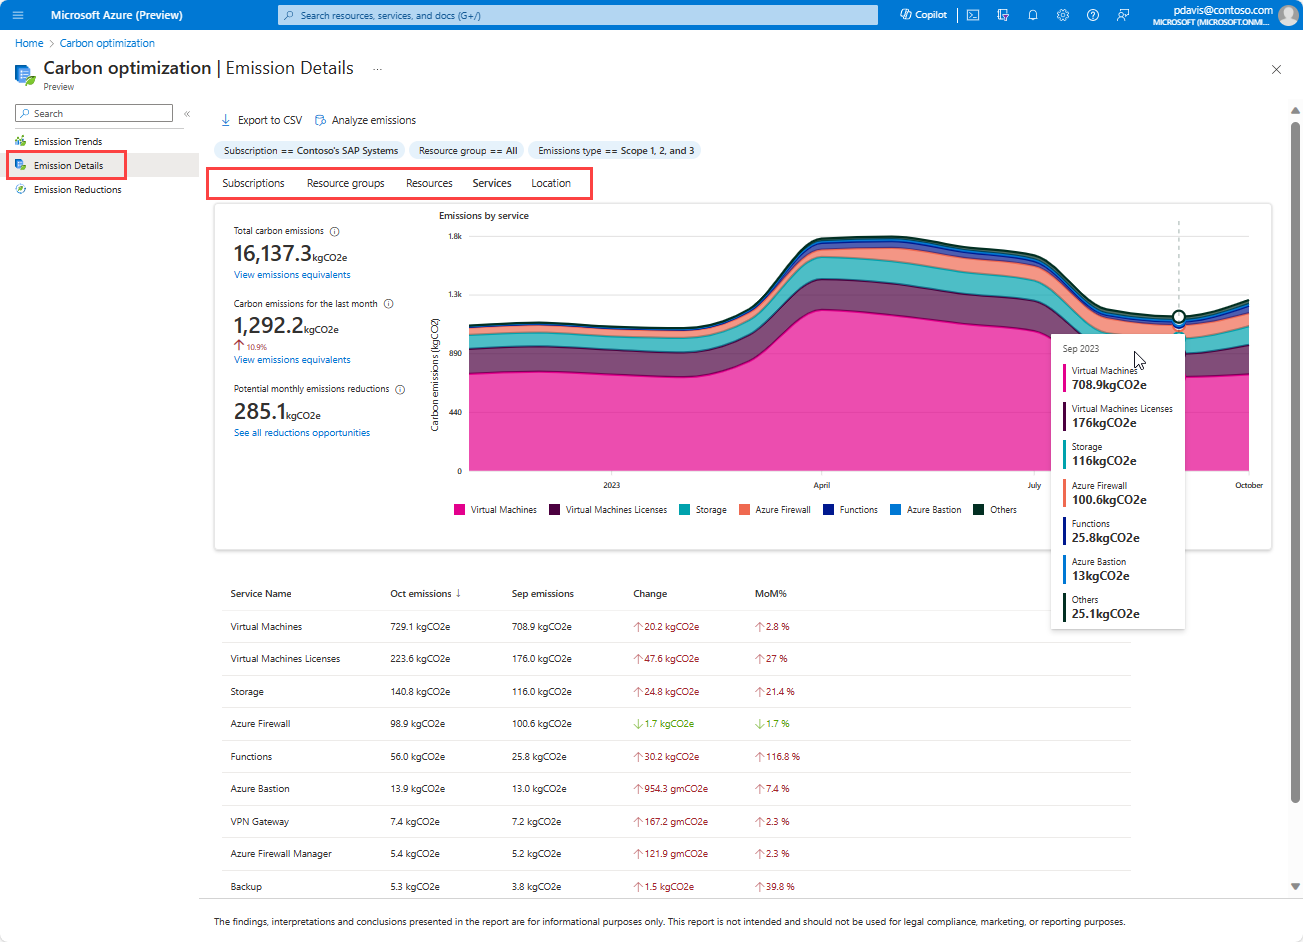
Select the Emissions details page from the left panel. The emissions details page shows you a detailed breakdown of your carbon emission. Select the tabs above the chart to see emissions data by Subscription, Resource groups, Resources, Services, and Location.
The detailed breakdown table below the chart shows the last month's emissions and the previous month emissions for the selected filters.
Sort the emissions data by selecting the column headings. For example, sort the table by the Change column to identify the biggest month over month changes in emissions.
Export the emissions data as a CSV file by selecting Export to CSV at the top of the page. For more information on exporting emissions data, see Export emissions data.
Use the emission details page view to:
- Identify top emissions contributors
- Identify significant month over month changes in emissions
- Audit resources and shut down or delete resources that shouldn’t be running
- Compare emissions of different subscriptions, resource groups, and resources
- Track the impact of changes on emissions
- Narrow down emissions hotspots based on emissions data


