Get Started with AKS CI / CD in Azure DevOps
The easiest way to build Azure kubernetes service CI / CD pipeline is to use Azure DevOps project which has provided rich templates for various of programming language. On the other hand, I also got some questions regarding to how to setup the pipelines from empty template. In this article, I am going to use a very simple nodejs web application as example to demonstrate how to perform AKS CI / CD in Azure DevOps.
Prerequisite
An Azure Kubernetes Service cluster
An Azure Container Registry account
An Azure DevOps account
Sample Project
The sample project is a simple nodejs application based on express, it will return pod name per request. Below is the code structure.

Below is the code for index.js
'use strict';

const express = require('express');

// Constants
const PORT = 80;
const HOST = '0.0.0.0';

// App
const app = express();
app.get('/', (req, res) => {
  res.send('Hello from ' + process.env.PODNAME);
});

app.listen(PORT, HOST);
console.log(`Running on https://${HOST}:${PORT}`);
Below is the code for Dockfile
FROM node:carbon
WORKDIR /app
COPY package*.json ./
RUN npm install
COPY src /app
EXPOSE 80
CMD [ "node", "index.js" ]
Below is the code for nodejsapp.yaml. It will deploy nodejs-front as pod and expose it by an external load balancer. Notice that the predefined variable Build.BuildId is used to define the image tag and we will update it in build pipeline.
apiVersion: apps/v1
kind: Deployment
metadata:
  name: nodejs-front
spec:
  replicas: 2
  selector:
    matchLabels:
      app: nodejs-front
  template:
    metadata:
      labels:
        app: nodejs-front
    spec:
      containers:
      - name: nodejs-front
        image: jacregistry1.azurecr.io/aksdevops-nodejs:#{Build.BuildId}#
        ports:
        - containerPort: 80
        env:
          - name: PODNAME
            valueFrom:
              fieldRef:
                fieldPath: metadata.name
      imagePullSecrets:
      - name: registrysecret
---
apiVersion: v1
kind: Service
metadata:
  name: nodejs-front
spec:
  type: LoadBalancer
  ports:
  - port: 80
  selector:
    app: nodejs-front
Build Pipeline
In the build pipeline, we will build and publish the image to an existing azure container registry, then publish nodejsapp.yaml into artifact which will be used in release pipeline later. Before moving forward, please make sure "Hosted Ubuntu 1604" is selected as the build agent.
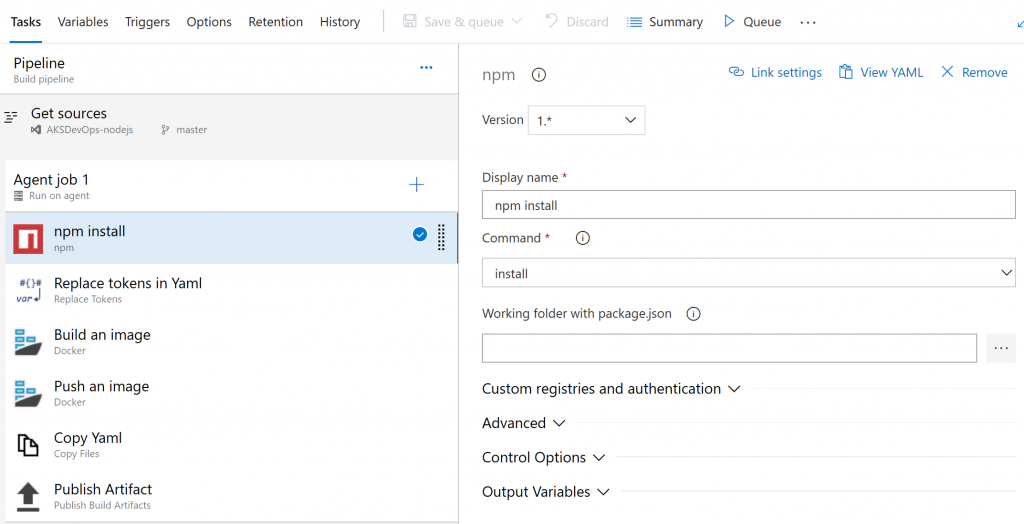
npm install
I have added "npm install" as the first task in the pipeline, though it is not really needed in this demo project, it can be followed by other npm tasks such as unit test in production project.

Replace tokens in Yaml
As mentioned previously, the predefined variable Build.BuildId is used as placeholder in nodejsapp.yaml, we will update it by current build id in the below "Replace Token" task.

Build an image
In order to build an image, we will use "Docker" task here, alternatively, Docker Compose task is available as well. Make sure the azure subscription can be selected successfully, if the expected subscription doesn't appear, please follow the "Manage" link to create the service principle manually. Make sure build is selected as command and also fill in the Dockfile path shown below.

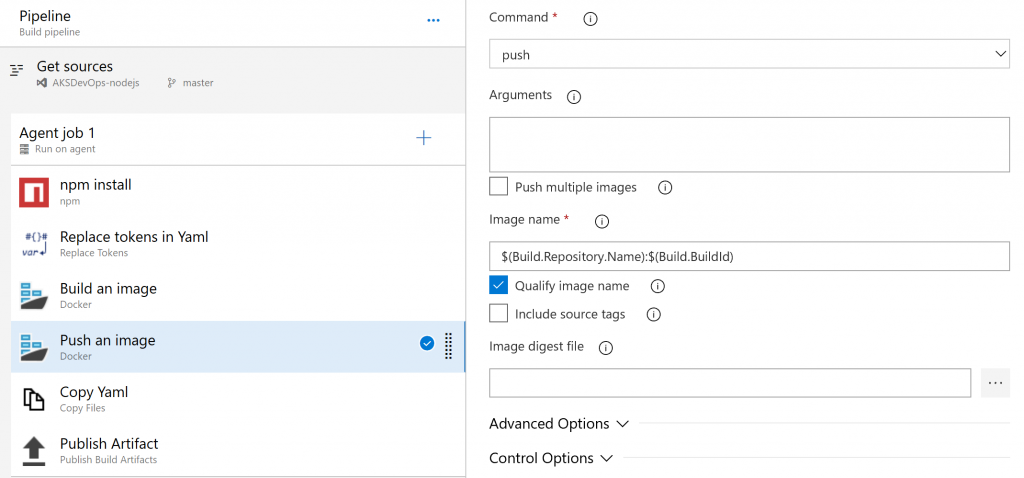
Push an image
Similar to the build an image task, just make sure correct azure container registry is filled in, and push is selected as the command.

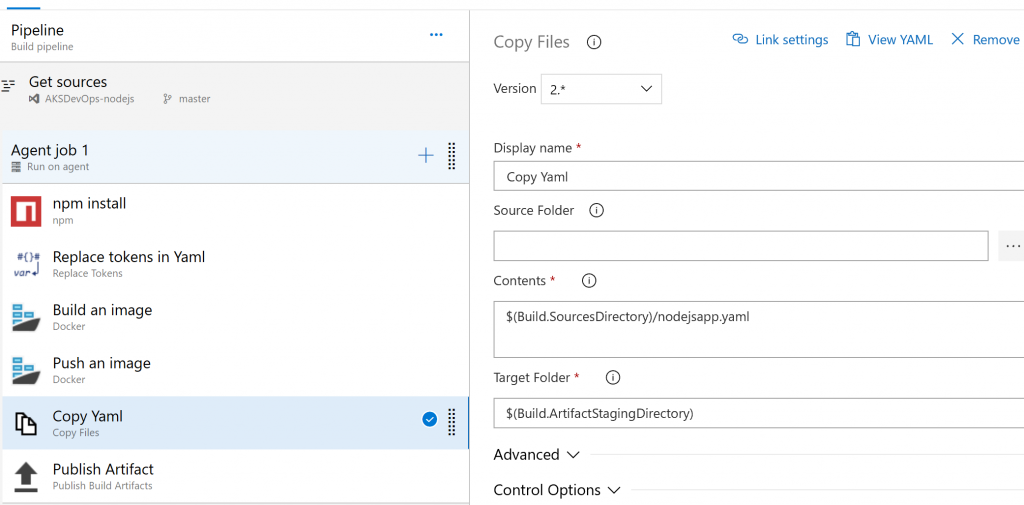
Copy Yaml
Create a "Copy Files" task to copy the nodejsapp.yaml to staging directory shown below.

Publish Artifact
Lastly, a "Publish Artifact" task is created to publish the staging directory, the yaml file is packaged into artifact and will be used in release pipeline to perform the deployment.

Release Pipeline
Make sure the above build pipeline is selected as the source of this release pipeline and then create an empty stage environment, Hosted Ubuntu 1604 should be used as agent as well. Create a "Deploy to Kubernetes" task and select apply as the command, that means the task will perform kubectl apply command in the background. In this task, we also need fill in the secret section, it will execute kubectl create docker-registry secret in the background for the kubernetes cluster to fetch the image from container registry via the secret.
