Debug R with R Tools for Visual Studio
Guest blog by Christo Lolov, Microsoft Student Partner at Imperial College London
What is R
R is a statistical computer language which allows you to achieve your analytical goals by writing scripts. It is a scripting language because it is evaluated while it is being read by the computer rather than first being translated into machine code.
What is a Debugger
A debugger is a tool commonly used by software engineers to find the cause of problems in programs. It allows you to pause your code at breakpoints while executing it. At these breakpoints you are able to observe the state of your program and figure out what is going wrong.
Visual Studio & R
Visual Studio, as an Integrated Development Environment, is a place where code can be written, analyzed for mistakes and ran. It also supports an environment in which development in R is made easier via the R tools for Visual Studio extension.
Introduction
The purpose of this blog is to explore the debugger from R tools for Visual Studio.
Installing Visual Studio and R Tools for Visual Studio
Ways to install Visual Studio and R tools can be found in the official documentation (/en-us/visualstudio/rtvs/). I have written this blog using Visual Studio 2015.
- Install the R Tools.
- Follow the Getting Started guide, as well as the Samples and Getting Help topics.
Navigating Visual Studio Environment
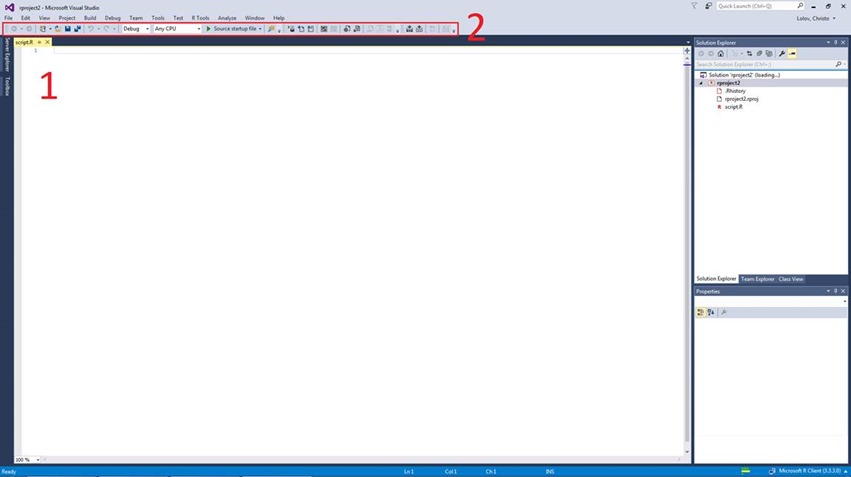
Once you start Visual Studio with a new project, as described in the documentation, you should be able to see a viewport containing a few windows. I have labelled all panels on the images below that I will be referring to with numbers. Panel 1 is the window used to edit files.
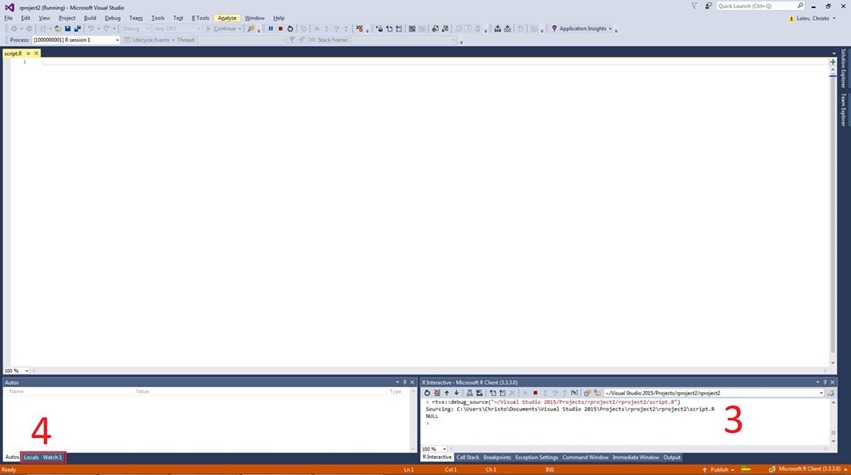
When you press  , located in Panel 2, your viewport should change again.
I will refer to Panel 3 as the R Interactive and to the two tabs in Panel 4 as Locals and Watch.
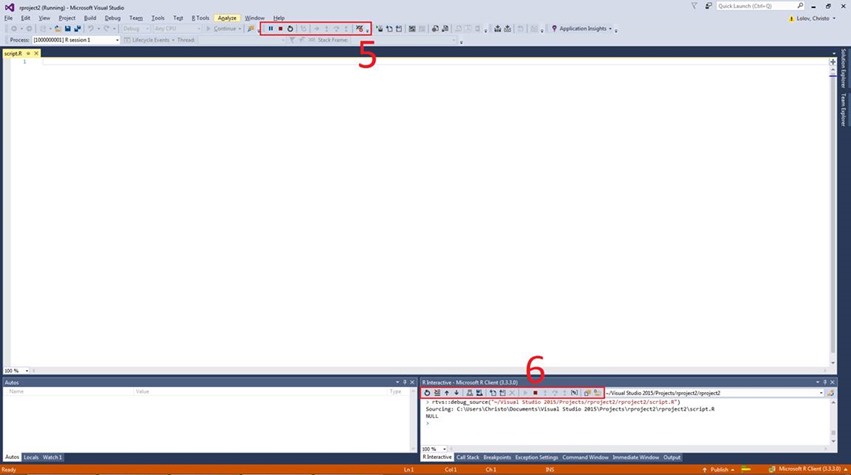
Panels 5 and 6 contain the buttons I will be using.
Scenario
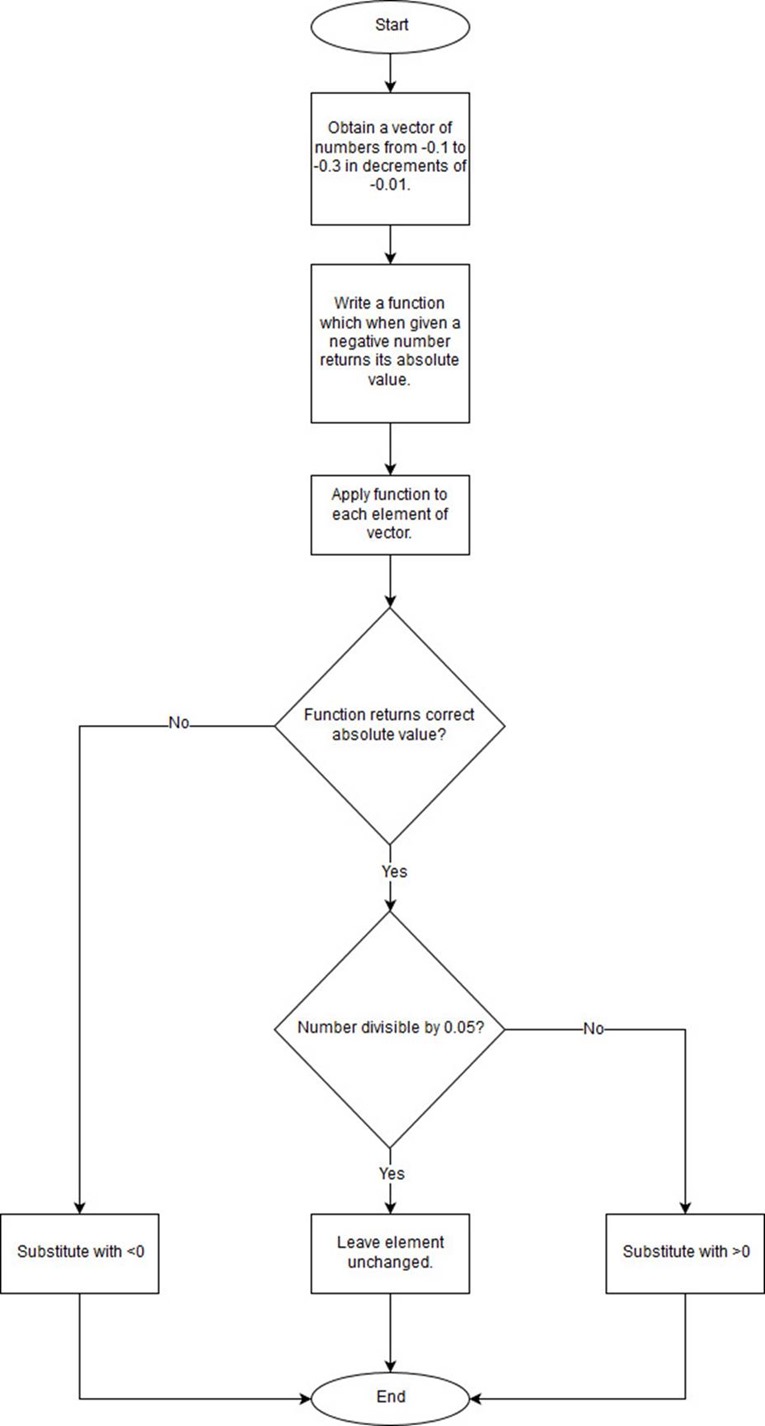
I set about to write a program containing problems in order to demonstrate the features of the debugger.
Developing the Scenario
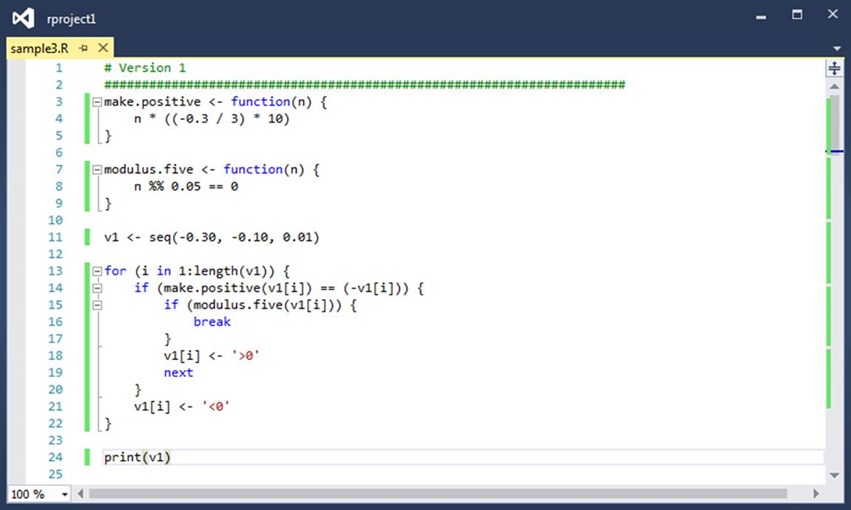
As a first try, I come up with the following code:
Source code
 # Version 1
 ######################################################################
 make.positive <;- function(n) {
     n * ((-0.3 / 3) * 10)
 }

 modulus.five <;- function(n) {
     n %% 0.05 == 0
 }

 v1 <;- seq(-0.30, -0.10, 0.01)

 for (i in 1:length(v1)) {
     if (make.positive(v1[i]) == (-v1[i])) {
         if (modulus.five(v1[i])) {
             break
         }
         v1[i] <;- '>0'
         next
     }
     v1[i] <;- '<0'
 }

 print(v1)

 # Version 2
 ######################################################################
 #make.positive <;- function(n) {
     #n * ((-0.3 / 3) * 10)
 #}

 #modulus.five <;- function(n) {
     #n %% 0.05 == 0
 #}

 #v1 <;- seq(-0.30, -0.10, 0.01)

 #v2 <;- v1

 #for (i in 1:length(v1)) {
     #if (make.positive(v1[i]) == (-v1[i])) {
         #if (modulus.five(v1[i])) {
             #break
         #}
         #v2[i] <;- '>0'
         #next
     #}
     #v2[i] <;- '<0'
 #}

 #print(v2)

 # Version 3
 ######################################################################
 #make.positive <;- function(n) {
     #abs(n)
 #}

 #modulus.five <;- function(n) {
     #n %% 0.05 == 0
 #}

 #v1 <;- seq(-0.30, -0.10, 0.01)

 #v2 <;- v1

 #for (i in 1:length(v1)) {
     #if (make.positive(v1[i]) == (-v1[i])) {
         #if (modulus.five(v1[i])) {
             #break
         #}
         #v2[i] <;- '>0'
         #next
     #}
     #v2[i] <;- '<0'
 #}

 #print(v2)

 # Version 4
 ######################################################################
 #make.positive <;- function(n) {
     #abs(n)
 #}

 #modulus.five <;- function(n) {
     #n %% 0.05 == 0
 #}

 #v1 <;- seq(-0.30, -0.10, 0.01)

 #v2 <;- v1

 #for (i in 1:length(v1)) {
     #if (make.positive(v1[i]) == (-v1[i])) {
         #if (!modulus.five(v1[i])) {
             #v2[i] <;- '>0'
         #}
         #next
     #}
     #v2[i] <;- '<0'
 #}

 #print(v2)

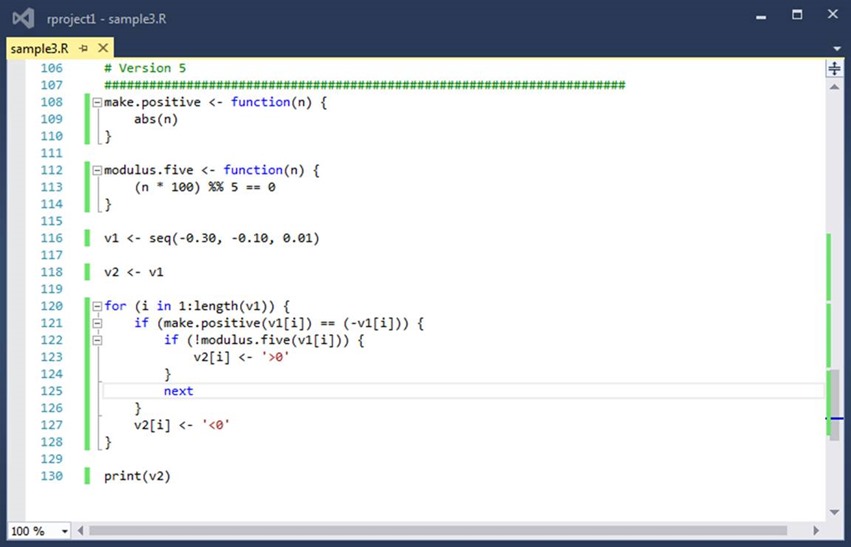
 # Version 5
 ######################################################################
 #make.positive <;- function(n) {
     #abs(n)
 #}

 #modulus.five <;- function(n) {
     #(n * 100) %% 5 == 0
 #}

 #v1 <;- seq(-0.30, -0.10, 0.01)

 #v2 <;- v1

 #for (i in 1:length(v1)) {
     #if (make.positive(v1[i]) == (-v1[i])) {
         #if (!modulus.five(v1[i])) {
             #v2[i] <;- '>0'
         #}
         #next
     #}
     #v2[i] <;- '<0'
 #}

 #print(v2)
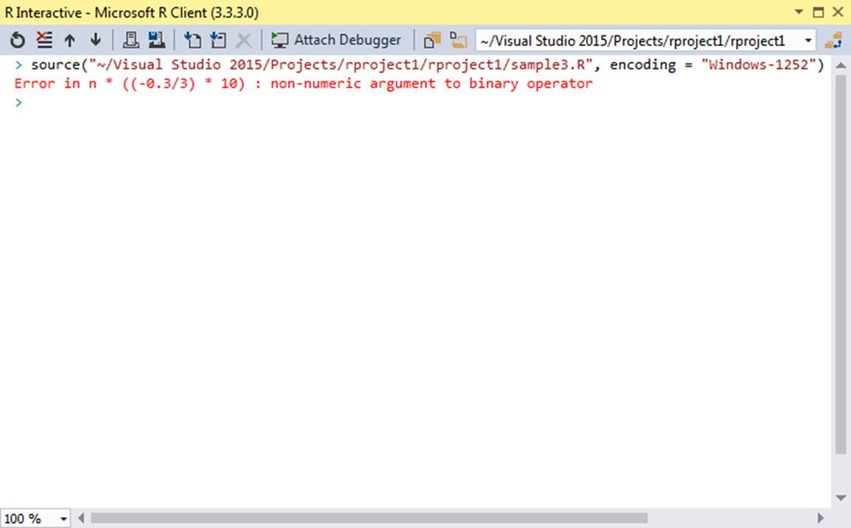
Upon running the script with ![clip_image004[1] clip_image004[1]](https://msdntnarchive.z22.web.core.windows.net/media/2017/09/clip_image0041_thumb.jpg) in Panel 2, however, I get an error.
in Panel 2, however, I get an error.
From the error message, I am able to tell that the error occurred on line 4.
Debugging
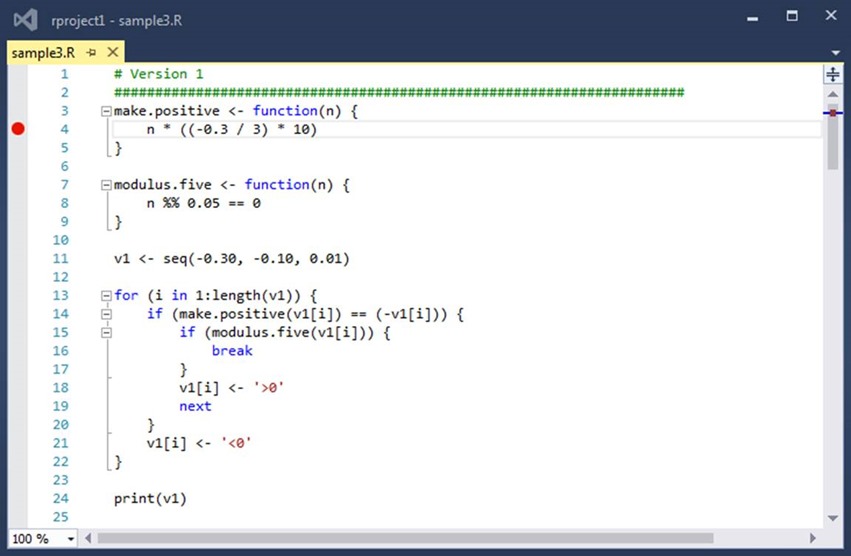
I introduce a breakpoint by clicking at the location of the red dot in the image.
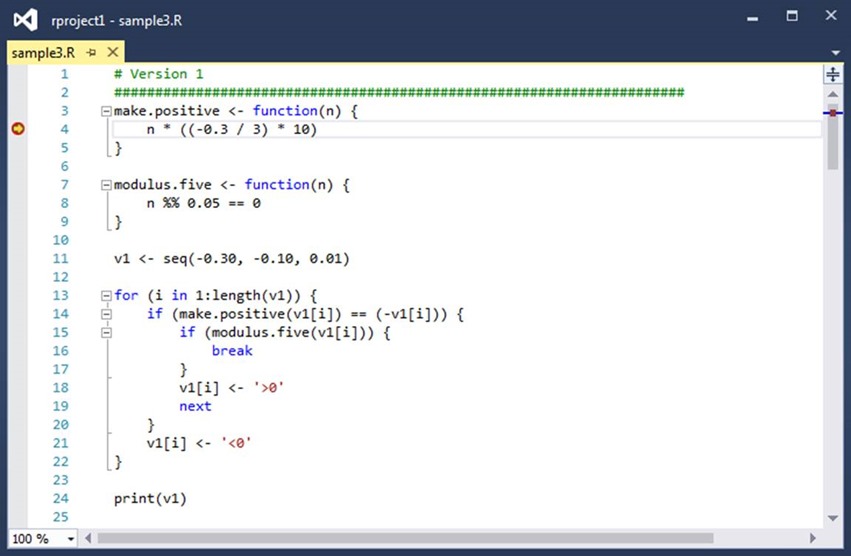
I then click on the restart button  , located in Panel 5, which fires up the process again. The red dot changes to one containing a yellow arrow, which indicates the next line to be executed.
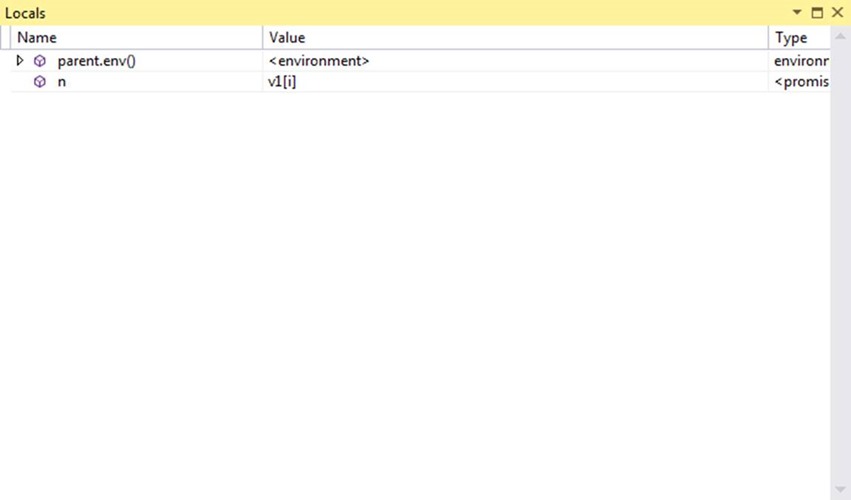
At this point I am able to explore the variables in my program in the Locals window.
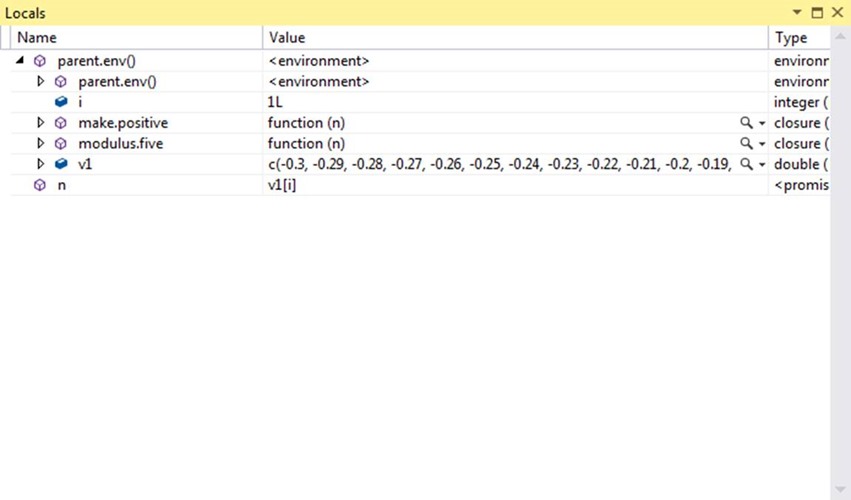
N has a value of v1[i], but if I double-click on it the actual value will be revealed (in this case -0.3). By expanding the arrow next to the parent.env(), I am also able to inspect variables in the parent scope.
Everything appears to be in order. So, I press the button, located in Panel 6, which continues the execution of the code until the next breakpoint or the end of the program is encountered. In the Locals window I am able to see some of the values change.
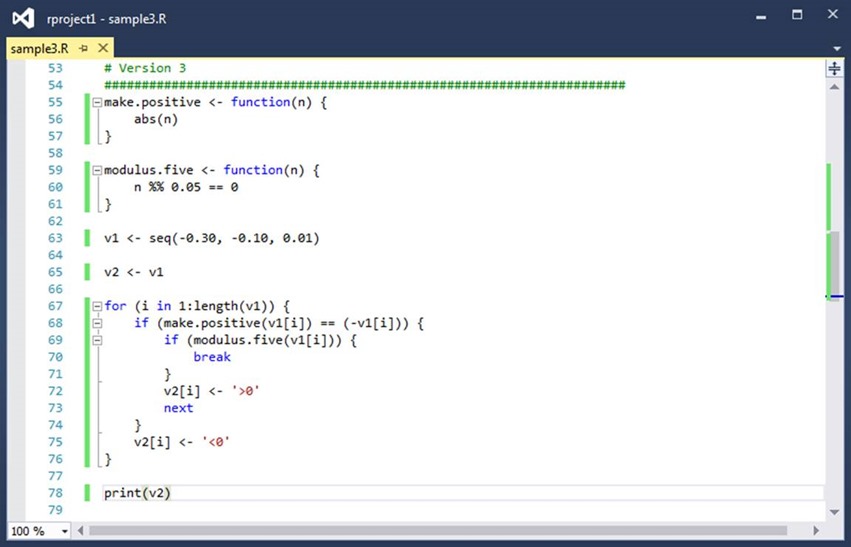
The value of n is now “-0.29”. This is the first problem, n was a number and now it is a string. Vectors in R can only store elements of one type. The moment I assigned the string “<0” on line 21, the type of the vector changed from a number to a string. This means that arithmetic operations can no longer be performed on its elements, hence the error. An easy way to fix the problem is to clone v1 and read the numbers from it, while writing the output into the clone.
Before running the code again, I remove the breakpoint by clicking on it. The result obtained is different to the one expected. 
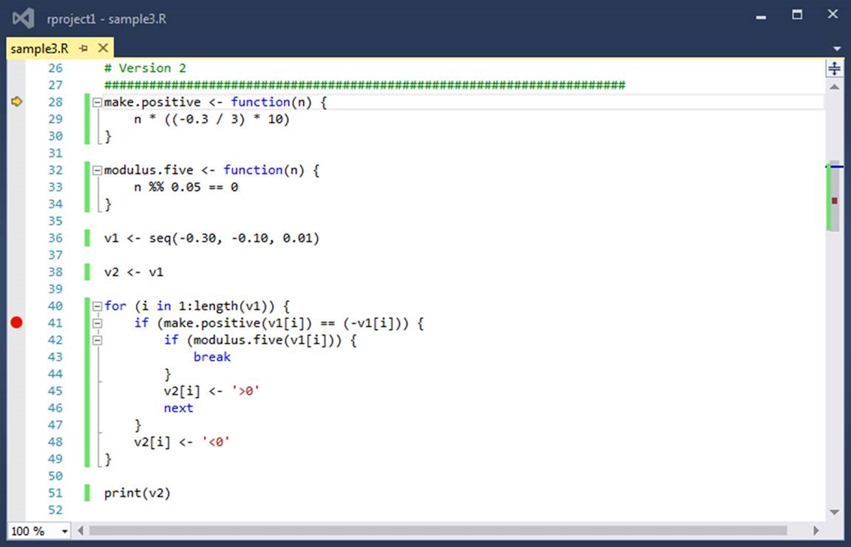
This output leads to the conclusion that line 48 is always reached, meaning that the if-statement on line 41 is not functioning correctly. So, I put a breakpoint on line 41 and run the program.
At this point I would like to go into the function which is about to be executed, so I press the button in Panel 6.
As previously mentioned, the yellow arrow indicates the next line to be executed. However, I would like to go to line 29 in order to explore the state of the variables and I press the  button in Panel 6.
At this point, I would like to know the value of n and it turns out to be -0.3, as expected.
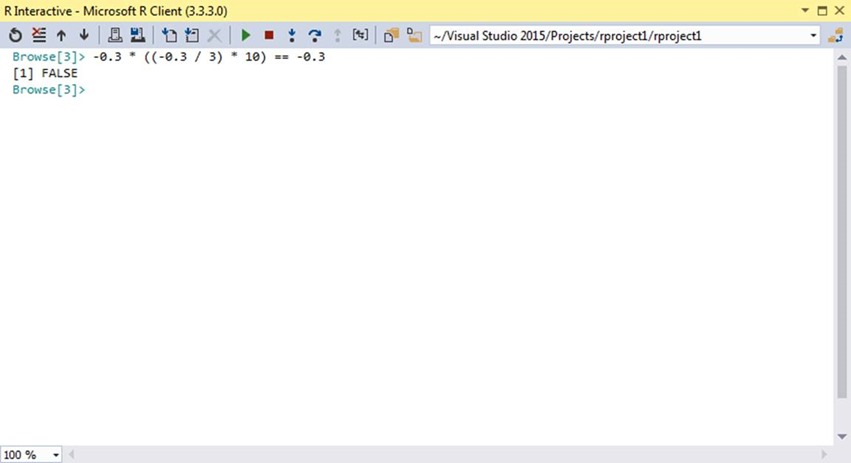
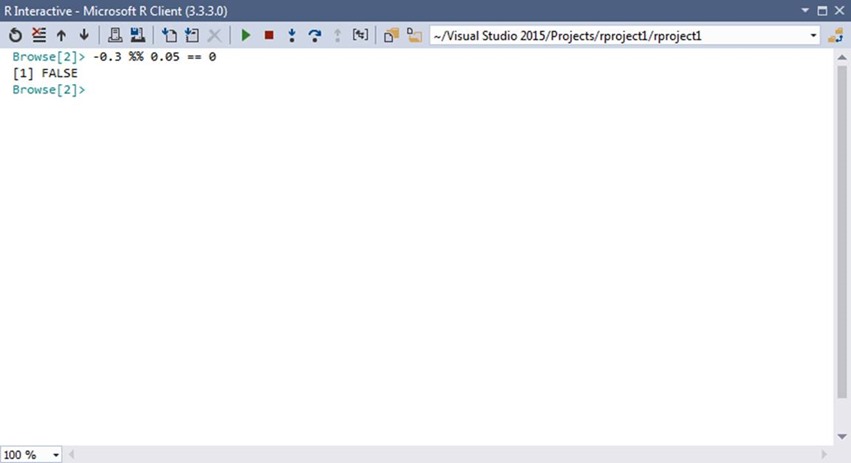
My reasoning is that there is something wrong with the evaluation of line 29 and the resulting comparison on line 41. However, I will not be able to see the result until after it is evaluated…unless I evaluate it in R Interactive
You might be wondering how my console is always clean. The  button in Panel 6 does the job.
This is the second problem. Floating point arithmetic is not as accurate as we would like. This is due to their binary representation and comparisons between them rarely gives the expected result. An easy way to fix the make.positive function is to use the inbuilt absolute value function.
When I run the code, however, another problem appears.
Something goes wrong when n is equal to -0.26 somewhere after line 72. So, I put a breakpoint on line 72 and start the program. At this point, I know that I will have to click ![clip_image026[1] clip_image026[1]](https://msdntnarchive.z22.web.core.windows.net/media/2017/09/clip_image0261_thumb.gif) a number of times until I get to n equalling -0.26. Furthermore, I need to double-click every time on n’s value in order to find out what it is. Fortunately, there is an easier way to track variables.
a number of times until I get to n equalling -0.26. Furthermore, I need to double-click every time on n’s value in order to find out what it is. Fortunately, there is an easier way to track variables.
Upon opening the Watch window it should be empty. If you double-click on the Name column and write v1[i] you should see the output above. Clicking on ![clip_image026[2] clip_image026[2]](https://msdntnarchive.z22.web.core.windows.net/media/2017/09/clip_image0262_thumb.gif) should cause the value in the Watch window to update.
should cause the value in the Watch window to update.
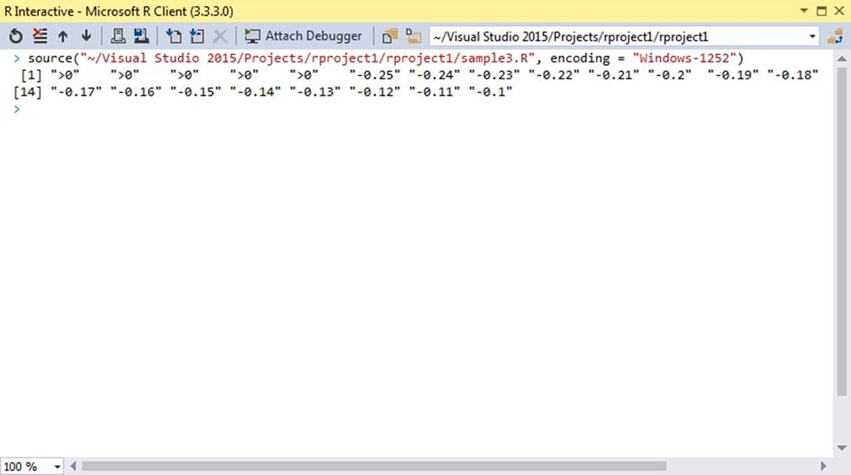
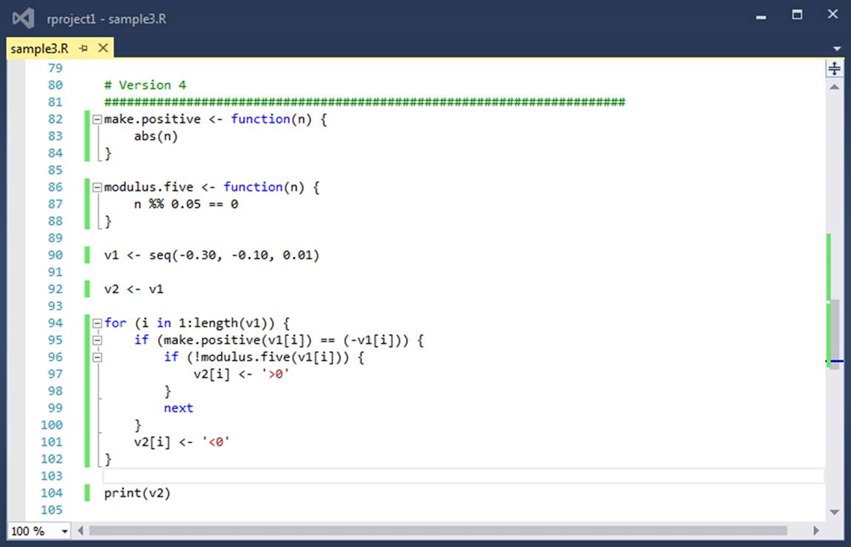
When I reach n equal to -0.26, I ![clip_image040[1] clip_image040[1]](https://msdntnarchive.z22.web.core.windows.net/media/2017/09/clip_image0401_thumb.gif) to line 73. I repeat this 4 more times…and the program terminates. It turns out that break statements in R do not exit from if-statements, but break out of the nearest loop containing them. A solution to this problem is to invert the if-statement.
to line 73. I repeat this 4 more times…and the program terminates. It turns out that break statements in R do not exit from if-statements, but break out of the nearest loop containing them. A solution to this problem is to invert the if-statement.
I run the script again.
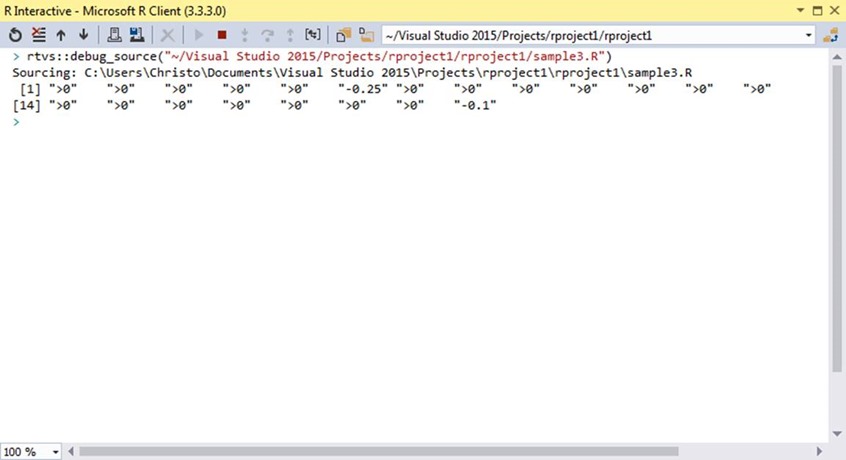
The output is closer to the expected one. Out of all numbers divisible by 0.05 only -0.25 and -0.1 were preserved. This means that my modulus.five function does not work properly. I put a breakpoint on line 87 and run the program. I inspect n in the Locals window and it is -0.3. From the output, I know that -0.3 is not divisible by 0.05 even though it should, so I decide to evaluate the expression in R Interactive.
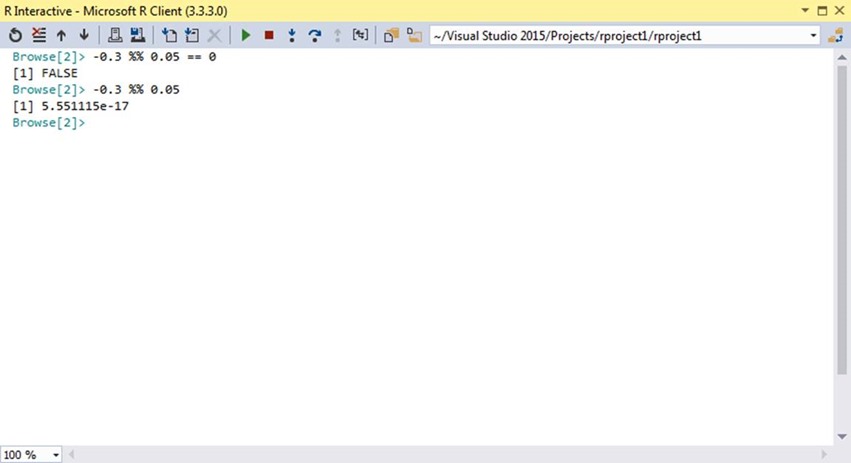
Strange, so let me evaluate only the modulus.
It turns out that modulus on floating point numbers is not as accurate as I would like. If I want reliable results then I should stick to using it only on integers. A way to bypass this problem is to multiply the number passed into my function by 100.
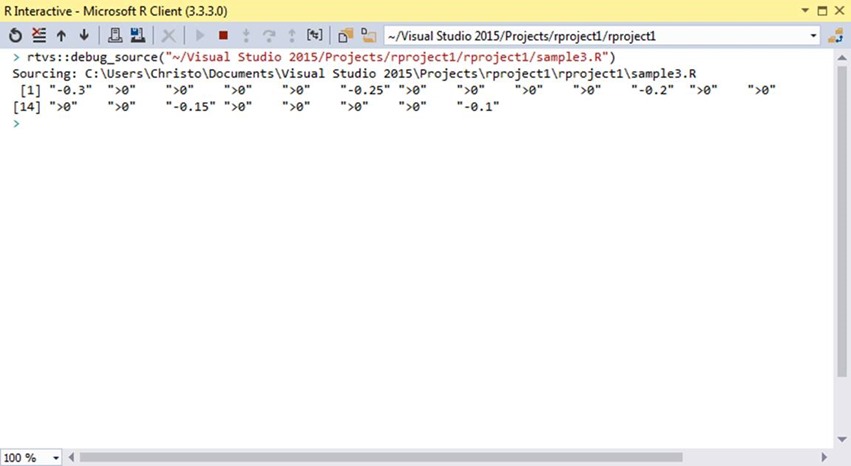
This gives the long awaited result.
Epilogue
This is the end of the blog. I hope you have managed to see how useful a debugger is and how intuitive the one in R Tools for Visual Studio is to use.

