What is REST ? Representational state transfer (REST) is an architectural style of application programming interfaces . Its purpose is to induce performance, scalability, simplicity, modifiability, visibility, portability, and reliability. REST is the software architectural style of the World Wide Web.What is REST API? A REST API defines a set of functions which developers can use to perform requests and receive responses via HTTP protocol such as GET and POST.REST API's works very similar to website in a browser. A resource is exposed to a program/software via a URL. The program can access that URL and receive data about the resource. This is very similar to you typing in a URL to your browser and getting a web page back.REST API's use HTTP. They can be used by any programming language and easy to test. What is REST API?Azure provides REST API's for performing requests/responses so that programmers can benefit from using them and can programmatically access the resources in Azure. A few examples that comes to my mind are – Import/Export, Performing Geo-replication failovers and Performing Point-in time restore. How to Test REST APIs? Programmers often want to test whether the REST API calls are working fine before implementing in the code changes. A simple of testing whether the REST API calls are working is by using POSTMAN client which is an add-on to Google chrome browser. It is an intuitive user interface that would make testing APIs effortless.It can be downloaded from the URL :- https://chrome.google.com/webstore/detail/postman/fhbjgbiflinjbdggehcddcbncdddomopor https://www.getpostman.com/ Testing Azure REST API using POSTMAN Client : We can test REST API call for Azure using POSTMAN client. The scenario chosen in this context is - Initiating an unplanned failover from the primary database to the secondary database for an Azure SQL database configured for Geo-replication. We are going to use OAuth 2.0 as authentication mechanism for this demo. In short, we are going to use OAuth 2.0 to generate access token by passing Auth URL, Token URL, client id and client secret.If you are interested in learning more about OAuth 2.0, the following article can help you. https://azure.microsoft.com/en-us/documentation/articles/active-directory-protocols-oauth-codeBelow are the detailed steps that needs to be followed to achieve this : 1. Create a new active directory if you don't have one. If you already have one, you can use the existing active directory.2. Add an application to the active directory.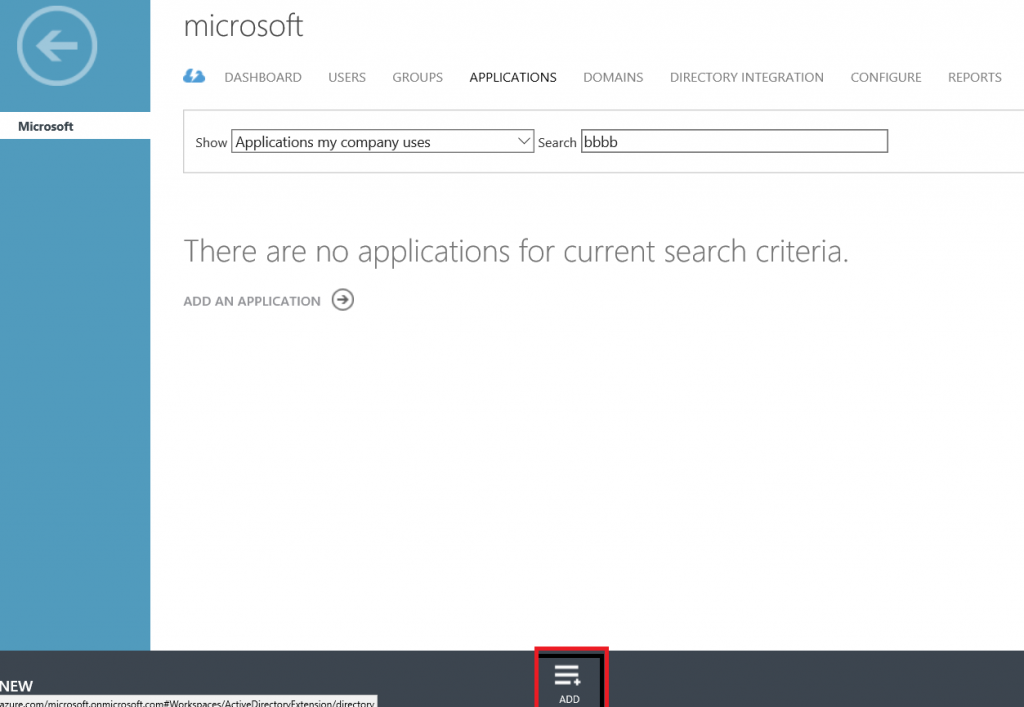 3. Feed in the application name of your choice and ensure that the WEB APPLICATION AND/OR WEB API is selected. 3. Feed in the application name of your choice and ensure that the WEB APPLICATION AND/OR WEB API is selected. 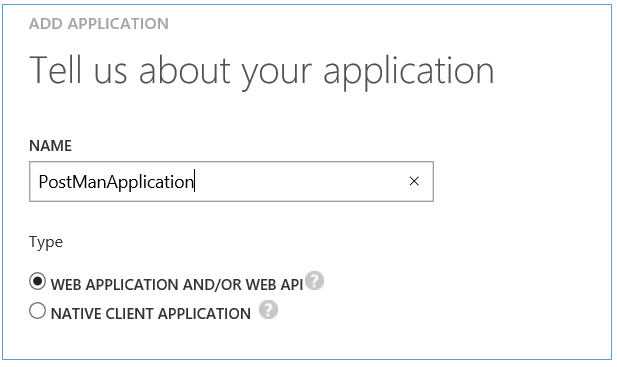 4. Enter the sign in URL and APP ID URL of your choice. 4. Enter the sign in URL and APP ID URL of your choice. 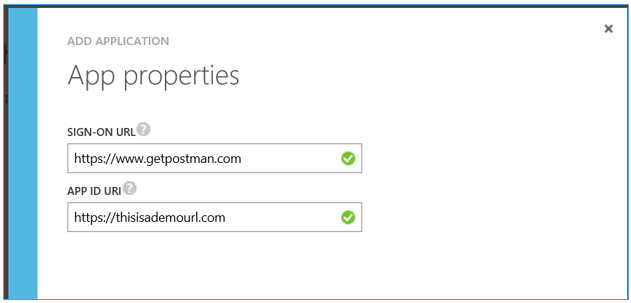 5. Wait for the application to get created until you see the success message.6. Click on the configure tab. 5. Wait for the application to get created until you see the success message.6. Click on the configure tab.  7. Copy the client id and save it somewhere. 7. Copy the client id and save it somewhere.  8. Change the reply URL to https://getpostman.com/oauth2/callbackwhich you see in post man as callback URL. 8. Change the reply URL to https://getpostman.com/oauth2/callbackwhich you see in post man as callback URL.  9. Generate keys and save it somewhere safely. Note : The keys will be generated after selecting the duration and clicking on save button and it needs to be saved as you won't be able to retrieve the key value after you leave the page. The keys will be used as client secret while generating the token. 9. Generate keys and save it somewhere safely. Note : The keys will be generated after selecting the duration and clicking on save button and it needs to be saved as you won't be able to retrieve the key value after you leave the page. The keys will be used as client secret while generating the token.  10. Add the necessary permission by clicking on Add application -> Add Windows Azure Service Management API and specify the Access Azure service management as Organization permission as explained in steps below and save the changes. 10. Add the necessary permission by clicking on Add application -> Add Windows Azure Service Management API and specify the Access Azure service management as Organization permission as explained in steps below and save the changes. 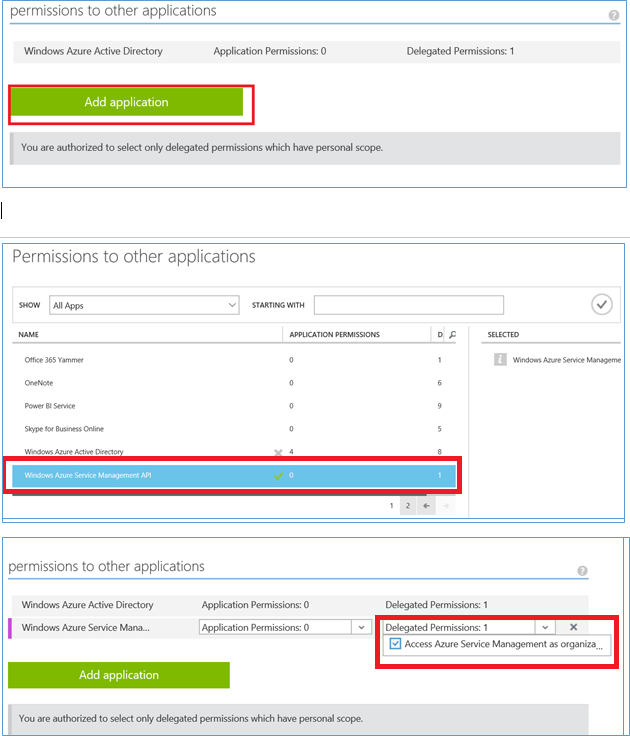 11. This completes the configuration changes required. Now click on view end points and copy the Auth and token URL's 11. This completes the configuration changes required. Now click on view end points and copy the Auth and token URL's
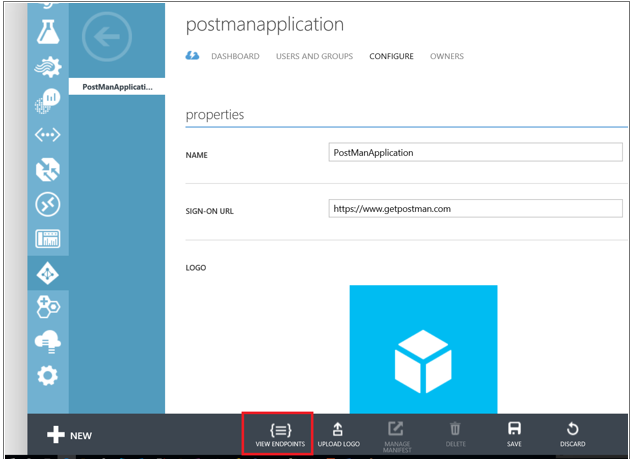 12. Please have the following information handy before we generate the Access token from post man.
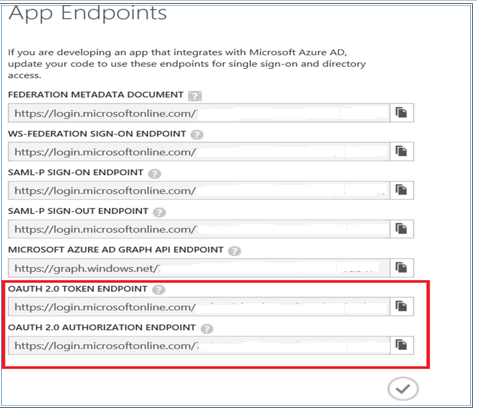 13. Authorization Endpoint URL (Example= https://login.microsoftonline.com/aaaaaaaa-bbbb-cccc-dddd- eeeeeeeeeeee/oauth2/authorize ?resource=https://management.azure.com/ )
- Token End point URL-(Example - https://login.microsoftonline.com/ aaaaaaaa-bbbb-cccc-dddd-eeeeeeeeeeee /oauth2/token)
- Client key
- Client secret
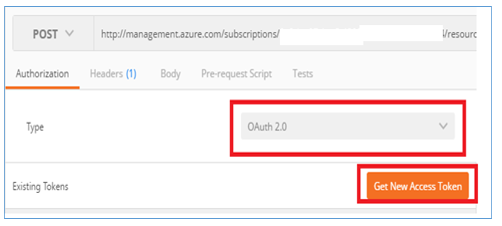
Note: Only in the Auth URL, we need to append this string?resource=https://management.azure.com/ as highlighted above.14. Launch chrome and post man client, Select Authorization type and OAuth 2.0 and click on get new access token.
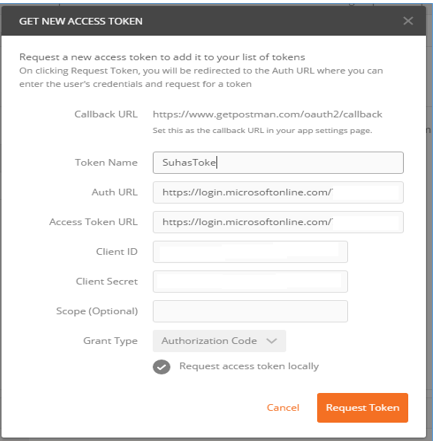
 15. Feed in the necessary information shown in image and click request token button, While doing so, ensure that Request authorization locally check box is checked.
  16. You may be taken into a login window where you have to enter your Azure portal credentials. Post that you will be able to see the generated token name. 16. You may be taken into a login window where you have to enter your Azure portal credentials. Post that you will be able to see the generated token name. 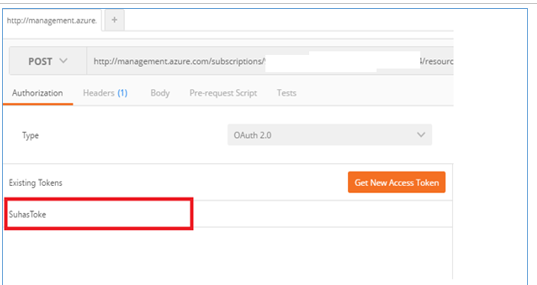 17. Now that you have generated the access/bearer token and you need to use this in the post request. In order to use the token, click on use token and ensure that in the Add token to dropdown, header is selected. 17. Now that you have generated the access/bearer token and you need to use this in the post request. In order to use the token, click on use token and ensure that in the Add token to dropdown, header is selected. 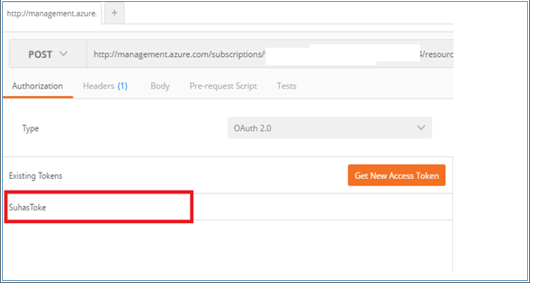 18. Once, you select use token, note that the count of header changes to 1 indicating that the bearer token generated is getting used 18. Once, you select use token, note that the count of header changes to 1 indicating that the bearer token generated is getting used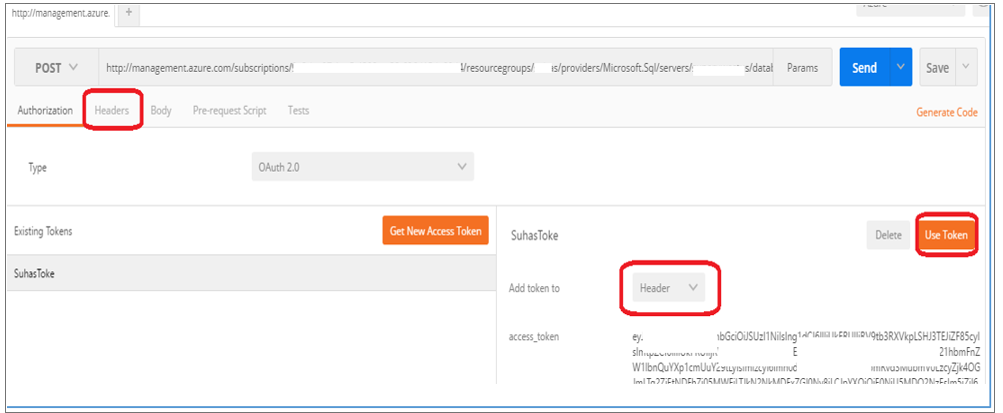 19. Type in the API url into the text box next to post and ensure that POST is selected as we are posting the request here. 20. Click on the send button to post the request , Once, post is successful, you will be seeing a message - {"operation":"ForceFailoverContinuousCopy","startTime":"\/Date(1465905072327)\/"} 19. Type in the API url into the text box next to post and ensure that POST is selected as we are posting the request here. 20. Click on the send button to post the request , Once, post is successful, you will be seeing a message - {"operation":"ForceFailoverContinuousCopy","startTime":"\/Date(1465905072327)\/"} |
 3. Feed in the application name of your choice and ensure that the WEB APPLICATION AND/OR WEB API is selected.
  4. Enter the sign in URL and APP ID URL of your choice.
  5. Wait for the application to get created until you see the success message.6. Click on the configure tab.
  7. Copy the client id and save it somewhere.
  8. Change the reply URL to https://getpostman.com/oauth2/callbackwhich you see in post man as callback URL.
  9. Generate keys and save it somewhere safely. Note : The keys will be generated after selecting the duration and clicking on save button and it needs to be saved as you won't be able to retrieve the key value after you leave the page. The keys will be used as client secret while generating the token.
  10. Add the necessary permission by clicking on Add application -> Add Windows Azure Service Management API and specify the Access Azure service management as Organization permission as explained in steps below and save the changes.
  11. This completes the configuration changes required. Now click on view end points and copy the Auth and token URL's
 12. Please have the following information handy before we generate the Access token from post man.
 13. Authorization Endpoint URL (Example= https://login.microsoftonline.com/aaaaaaaa-bbbb-cccc-dddd- eeeeeeeeeeee/oauth2/authorize ?resource=https://management.azure.com/ )
 15. Feed in the necessary information shown in image and click request token button, While doing so, ensure that Request authorization locally check box is checked.
  16. You may be taken into a login window where you have to enter your Azure portal credentials. Post that you will be able to see the generated token name.
  17. Now that you have generated the access/bearer token and you need to use this in the post request. In order to use the token, click on use token and ensure that in the Add token to dropdown, header is selected.
  18. Once, you select use token, note that the count of header changes to 1 indicating that the bearer token generated is getting used
 19. Type in the API url into the text box next to post and ensure that POST is selected as we are posting the request here. 20. Click on the send button to post the request , Once, post is successful, you will be seeing a message - {"operation":"ForceFailoverContinuousCopy","startTime":"\/Date(1465905072327)\/"}