Using ACS to provide authentication for a WP7 application and a WCF Data Service
The Windows Azure Toolkit for Windows Phone is helping a lot to integrate all kind of Azure features in the device. Recently, Azure Toolkit for Windows Phone has been split in separate parts (storage, ACS, Push notification, …), so that each can be used separately in a project (via NuGet), which is a VERY good thing.
Though, it makes it easy to deal with ACS authentication and external identity providers which is what we need in our WP7 application. We want to get an authenticated user to use our app since the OData service will associate data to this user. The service will also ensure that each user will have access to his own data only.
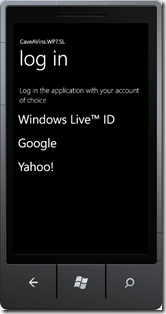
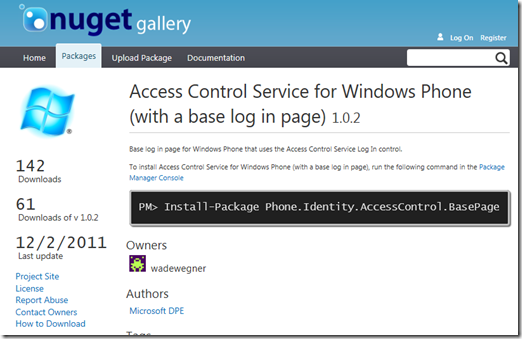
Back to the Azure Toolkit : we are interested in the ACS part so that our WP7 application provides a log in page and an authenticated user. The NuGet package for this is here:
The How To is very explicit, though, it is very easy to handle an OAuth 2 authentication in a windows phone app.

But the procedure doesn’t explain how to set up your remote service so that it can handle the token you just received, and also doesn’t detail how to send it to the server. Actually the answer is a mix of the tutorial dedicated to the inital toolkit, and the new “How To” procedure.
Here is how to do it in a few steps…
Where we will go
Our WP7 application needs to access data from the OData service, but only an authenticated user will be allowed to. We also want to filter resulting information according to the user identity.

In your Windows Phone application
Add the NuGet package to your WP7 project

This package will install all your project needs to use ACS and store the token that will be later reinjected in the OData Http request.
The “HowTo” ([Your WP7 Project]/App_Readme/Phone.Identity.Controls.BasePage.Readme.htm) is very explicit and you just need to follow the steps to make it work. by the way, you need to have set up an ACS like explained here in Task 2.
Add the Web Browser Capability in the application manifest
The log in page will be provided from a web browser control, so you should make it available in the manifest file WMAppManifest.xml
<Capability Name="ID_CAP_WEBBROWSERCOMPONENT"/>
Handling Navigation
Add the log in page as the welcome page in your application, as explained in the How To.
If your token is valid when you start the app, you will skip the log in page and navigate directly to your application home page. So you will have to handle the Back button from there so that you exit the application. You can do it by clearing the navigation history when you navigate to your home page:
 protected override void OnNavigatedTo(System.Windows.Navigation.NavigationEventArgs e)
{
    base.OnNavigatedTo(e);

    while (this.NavigationService.BackStack.Any())
    {
        NavigationService.RemoveBackEntry();
    }
}
Try it !
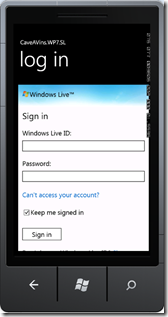
At this point, you should be able to log into your app with any of your identity provider credentials, for example with a Live ID:


Where is my token ?
Once the log in procedure succeeds, your token is stored as a SimpleWebTokenStore in
Application.Current.Resources["swtStore"]
How do I use the token in my OData request ?
The token will be placed in the header of the http request.You should register to the SendingRequest event of your WCF Data Service context and update the header with the authorization.
 _dc = new YourDataServiceContext(new Uri("https://YourDataService.svc/"));

_dc.SendingRequest += new EventHandler<SendingRequestEventArgs>(SendingRequest);


void SendingRequest(object sender, SendingRequestEventArgs e)
{
   var simpleWebTokenStore = Application.Current.Resources["swtStore"] as SimpleWebTokenStore;
   if (simpleWebTokenStore != null)
   {
      e.RequestHeaders["Authorization"] = "OAuth " + simpleWebTokenStore.SimpleWebToken.RawToken;
   }
}
![]() The access to the Resources is not allowed from a thread different from the IU thread, so if that may happen in your case, you should save the token in some place from a BeginInvoke so that you can reuse it safely in the SendingRequest event.
The access to the Resources is not allowed from a thread different from the IU thread, so if that may happen in your case, you should save the token in some place from a BeginInvoke so that you can reuse it safely in the SendingRequest event.
In your WCF Data Service
How do I get it back in my WCF Data Service ?
If your WCF Data Service has not been setup to handle OAuth 2, you should follow the step Task 3 – Securing an OData Service with OAuth2 and Windows Identity Foundation of the great tutorial mentioned earlier.
You will use an assembly developped by Microsoft DPE guys, that extends the WIF mechanism to handle OAuth.
At this point you should have:
- Added a reference to DPE.OAuth2.dll (you should download the lab to get this one)
- Added a reference to Microsoft.Identity.Model.dll
- Added entries to the web.config
Checking the identity
You would probably check the identity on some actions made on your data.
 [System.ServiceModel.ServiceBehavior(IncludeExceptionDetailInFaults = true)]
public class YourDataService : DataService<[YourContext]>
{
    // This method is called only once to initialize service-wide policies.
    public static void InitializeService(DataServiceConfiguration config)
    {
        config.SetEntitySetAccessRule("[YourEntity]", EntitySetRights.All);
        config.DataServiceBehavior.MaxProtocolVersion = DataServiceProtocolVersion.V3;
    }

    string GetUserIdentity()
    {
        string userIdName = null;
        var claim = HttpContext.Current.User.Identity as IClaimsIdentity;
        if (HttpContext.Current.Request.IsAuthenticated)
        {
            userIdName = HttpContext.Current.User.Identity.Name;
        }
        return userIdName;
    }
You can use interceptors (QueryInterceptor or ChangeInterceptor) to do some identity validation and relative tasks, according to your business rules. In my case, I store the user identity name in each new record.
 [ChangeInterceptor("[YourEntity]")]
public void OnChange([YourEntityType] updatedRecord, UpdateOperations operations)
{
    if (operations == UpdateOperations.Add)
    {
        var userIdName = GetUserIdentity();
        if (userIdName == null)
        {
            throw new DataServiceException(401, "Permission Denied you must be an authenticated user");
        }
        updatedRecord.UserId = userIdName;
    }
}
On queries, I return only records that are associated to the identity of the request initiator.
 [QueryInterceptor("[YourEntity]")]
public Expression<Func<[YourEntityType], bool>> OnQuery()
{
    var userIdName = GetUserIdentity();
    if (userIdName == null)
    {
        throw new DataServiceException(401, "Permission Denied you must be an authenticated user");
    }
    return (b => b.UserId == userIdName);
}
Let’s give it a try
You can put a breakpoint on the ChangeInterceptor and QueryInterceptor to check if everything is going fine and if your identity is retrieved properly on the service side. If not, try to use IIS instead of Visual Studio Development Server (thanks to Benjamin Guinebertière for that tip !)

What do I finally have ?
Each OData request made from your WP application is now including an identity token, allowed by the identity provider through ACS. You can use this identity for business rules purpose in your service, and this will be efficient wherever the request comes from. Though, you can protect your data from being accessed and updated from a simple web browser which will return a security exception.

You can still use these data from any application running on any platform that is able to send an OAuth http authorization header.
