Creating SharePoint VM Templates for Azure SharePoint Deployments
Running “on-premises” SharePoint farms in Azure is becoming a fairly common configuration now, given how much flexibility Azure gives in terms of scaling for the price. However, deploying new SharePoint servers in Azure can be a confusing if you’re new to this “run SharePoint in Azure” game – for experienced Azure engineers there’ll be nothing new or interesting here but hopefully SharePoint admins looking at moving into the cloud to run their SharePoint farms will find this helpful.
In short, this post is about how to roll your own Azure SharePoint Server templates if you don’t like or want what comes with the standard templates, which in my experience is quite often the case for more serious SharePoint installations.
The default SharePoint templates in Azure provide more a shortcut to getting a SharePoint farm up & running quickly if you want to play around with the idea of running SharePoint on Azure in my opinion, so having our own templates is just the better option for people from a SharePoint background.
Once you have a template in Azure, spawning new virtual machines based on the template is unbelievably trivial, for VM sizes both large & small. This is why our own templates + Azure is awesome.
A Quick Look at the Default Azure SharePoint Templates
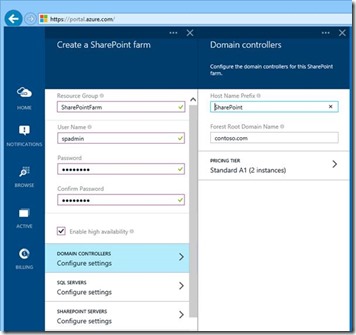
Before we start let’s look at the SharePoint farm template in the Azure portal. It is indeed possible to create a new farm in just a few clicks and in fact it works very well if you’re ok with creating AD, SQL, and everything else from zero.
It’s not bad if you just want a quick farm to play with and aren’t bothered about the finer control of how things are setup.
You get an AD installation, a SQL Server, and a SharePoint Server by default and there’s a high-availability option two which basically doubles-up everything. Not bad.
Us seasoned SharePoint admins however will probably want more control over what’s created & how than this wizard offers, so the idea of templating our own servers suddenly becomes interesting.
Guide Prerequisites
For this exercise I’m going to assume that you have your virtual network(s) with a subnet or two, and storage already setup in Azure. If you don’t know what these are then you probably want to go to a quick Azure Bootcamp.
Define Your Own SharePoint Virtual Machine Template
The goal here is to build a generic virtual machine which will be copied X times in Azure for real machines. So 1st you’ll need a Windows Server VHD. Create a new VM, install Windows 2012 R2 (the wizard only uses 2012 vanilla – another reason ours will be nicer) and setup SharePoint as you already know how – binaries only. This procedure works for local virtual machine images and Azure VMs, with one or two differences.
Either way, put on all the utilities you’ll want every SharePoint machine to have; UlsViewer, Network Monitor, all the things that help you run SharePoint on a daily basis.
Finally, patch Windows & SharePoint (and anything else you need to) so it’s not RTM code. Or don’t, it’s entirely up to you, albeit highly recommended you do patch.
The point is, once we’re done building the perfect SPServer now prepare the machine to be turned into a SP template. This just involves running “sysprep” to generalise the installation and selecting “shutdown” instead of “restart” afterwards so Windows doesn’t undo the generalisation.
Once the VM is shutdown we’re ready to send the template image to Azure if it’s local, or capture the VM image if the template was built in Azure.
Prepare Virtual Machine Template for Azure
There are two ways of doing this, depending if the template image is local or already in Azure.
Upload Local SharePoint VM Template
If you created the image locally, taken from an on-premises production machine for example then follow this section. If not, see “Create Template from Existing SharePoint VM”.
On a machine that has the Azure PowerShell cmdlets installed, once your sys-prepped VM has shutdown, run this command to send the VHD file to your storage account:
Add-AzureVhd -Destination "https://myazurestorageaccount.blob.core.windows.net/vhds/SP15-Dec2014.vhd" -LocalFilePath "C:\VHDs\SP15 Template.vhd" –Verbose
It’s not particularly quick, as you can imagine but it should work (if you change the parameters correctly). Here’s my example:
40 mins for a VHD file isn’t too shabby. Remember to run Add-AzureAccount to authenticate and also Select-AzureSubscription if you have more than one subscription.
Create Template from Existing SharePoint VM in Azure
If your template machine was made in Azure, it’s a bit easier. Follow this guide - https://azure.microsoft.com/en-gb/documentation/articles/virtual-machines-capture-image-windows-server/
Create New VM Image in Azure from Template
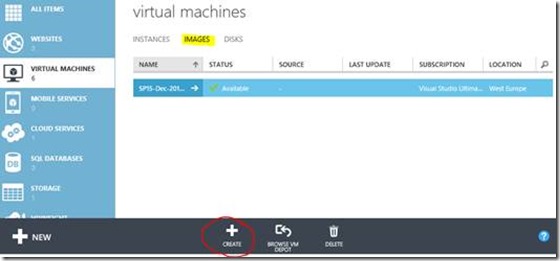
Next, we need to register the VHD file with Azure as a template. Navigate to “virtual machines” & then
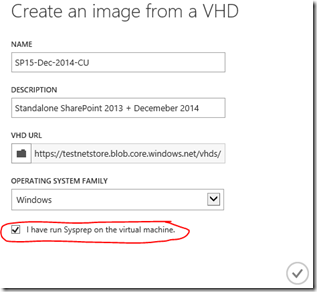
Then you’ll get this window popup:
Fill out something meaningful as the name, etc and confirm that you’ve sysprepped it ok. Then you have your new SharePoint template to create virtual machines for!
Creating New SharePoint VMs from your Template
Once the template has been registered, you can now create virtual machines from it. If you’re going the way of the Azure GUI, click “New”, “Virtual Machine”, “From Gallery”. You should see it in the list of your images.
This being Azure we can make it a huge monster, or something smaller – the image used is the same. More on machine sizes @ https://azure.microsoft.com/en-us/pricing/details/virtual-machines/
Naturally this is all possible (and frankly easier) in PowerShell too with New-AzureVM.
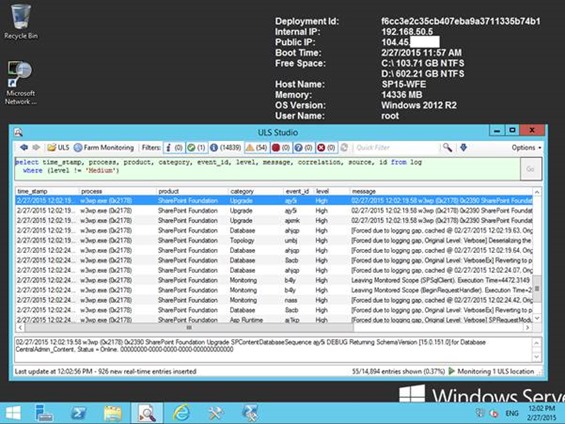
Either way, once created, we finally get our new virtual machine:
The Azure VM agent will set this nice helpful background, but all the rest is how I set it up – tools & everything.
SharePoint Version/Virtual-Machine Template Updates
It’s worth pointing out that you can of course keep uploading templates, each time a new SharePoint cumulative update comes out for example.
Because we’re running in Azure and machine capacity limits just isn’t a thing anymore, upgrading farms becomes a lot easier:
- Update template with new SharePoint binaries.
- Upload new template to azure.
- Create 2nd farm with cloned machine-roles, configuration etc (PowerShell helps here).
- Set 1st farm in read-only mode.
- Move over content-databases.
- Mount (and therefore upgrade too) content databases.
- Switch over network load-balancer to 2nd farm once happy it’s worked.
- Destroy/de-allocate 1st farm.
In Azure you only pay for hardware usage like a rental agreement, the cost of doing this is minimal. It lets you upgrade much more smoothly than normal too so it’s definitely worth the miniscule price, IMO. Doing the same thing would be very expensive on-premises with our own hardware; prohibitively so.
Thus is the awesomeness of Azure!
That’s it for now – I’ll be making more SharePoint “on-prem on Azure” posts; this one’s just to get the ball rolling!
Cheers,
// Sam Betts
Comments
Anonymous
March 02, 2015
How does this work with the SharePoint licence key entered during install. Can you just use a trial key and then change it later?Anonymous
March 08, 2015
Hi Jon, The idea here is you use your own key as you would've previously installed the SharePoint binaries. The default Azure-SP template uses a trial key I believe which I'm pretty sure this still works in 2013 - technet.microsoft.com/.../cc263204(v=office.14).aspx // Sam


