Checklist for creating your first .NET Azure WebJob
Overview
I thought it would be beneficial to add a checklist of things you may have to do when creating a .NET Azure WebJob. Some of this applies to any Azure WebJob, but I will focus on a .NET Visual Basic WebJob (since I have not done that type before). I chose not to include many screenshots because the portal UI changes frequently. This article accomplishes the same thing but has a lot of overhead: https://docs.microsoft.com/en-us/azure/app-service-web/websites-dotnet-webjobs-sdk-get-started It also shows how to do some things differently from how I will show you. PLEASE read that as well.
Checklist
I will create a new Resource Group to logically group the resources I am using for this project. In that resource group I will have the WebJob and a Storage Account for the logs (this is optional).
Create an Azure Web App (or any Azure App Service) to host the Azure WebJob
Yes, you can do this when you publish the Azure WebJob, but I like to get everything configured and ready, so here it goes!
Go to https://portal.azure.com and hit the ‘+ New’ menu item on the top left of the page, scroll down and select ‘Web+Mobile’ and then ‘Web App’, then select the Create button.
Give it a unique name, select the subscription (if you have more than one), for the Resource choose ‘Create new’ and enter a Resource group name, create or choose an App Service plan in the Location you want to host this WebJob and hit the Create button. (there are enough tutorials on this part).
Create a Storage Account for logs and save the connection string – required for .NET projects
If you want to store your logs permanently, add them to Azure Storage. This is also required if you want to use the ‘logs’ view in the Azure Portal. If you are using the WebJobs SDK or creating a WebJobs Project from the Visual Studio Project wizard or if you are using any of the Queue, or storage functionality you must do this. That said, if you are not using Azure Storage for any of the previous reasons, you don’t need to do this.
Go to https://portal.azure.com and hit the + New menu item on the top left of the page
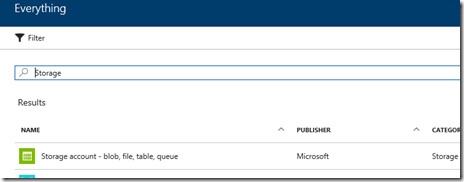
Search for Storage and hit enter:
Pick the Microsoft provided ‘Storage account – blob, file, table, queue’ option and hit create
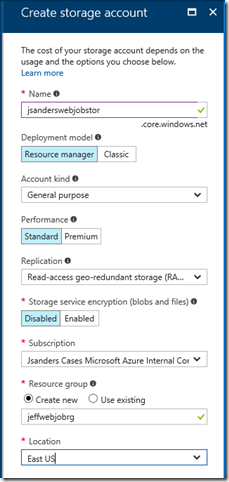
Fill out the required attributes and put it in the same location of your new Azure Web App that will host your WebJob so that data does not have to leave the datacenter (keep it close for efficiency), then hit Create:
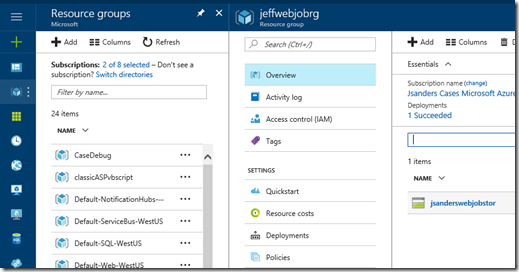
To find your newly created storage, you have a couple of options. I like to view things by resource group so I will show you that one. Click on Resource Groups and choose the Resource Group you just created (or the one you put the storage into), then click on that Storage Account in my case jsanderswebjobstor:
Under SETTINGS click on Access Keys and copy the first key Connection string value into notepad for use in the next step.
Note: You can create Storage in Visual Studio too, but I wanted you to see this in the portal.
NOTE: These next two setting can be tricky if you don’t understand how Azure App Services handles settings.
The default templates for .NET projects can and do utilize App.Config files AND they set these values to empty strings. With that in mind, you make the changes in App.Config or delete the entries (because they override the portal settings) and set these in the dashboard. In other words, if you define this in the Azure Portal, but do not take the settings out in the App.Config, you are overriding these settings with blank values in the App.Config probably without realizing it.
Add Application Setting, Connection string AzureWebJobsDashboard (might be optional)
Note: If you do not add this setting and this is a a project you created in Visual Studio using the WebJobs SDK, your WebJob will fail to run. If your project is NOT created and deployed as a WebJob, your WebJob may still run however you will get a 404 error page when you try to visit the WebJob logs page: https://portal.azure.com/Error/UE\_404?aspxerrorpath=/null\&shown=true. You can STILL get to the portal however if you navigate to the WebJobs Log in Kudu: https://WEBAPPNAMECONTAINGWEBJOBHERE.scm.azurewebsites.net/azurejobs/\#/jobs
Navigate to Application Settings and scroll down to Connection strings. Add a new connection string called AzureWebJobsDashboard, paste the saved Storage Connection string from the above step, set the type to Custom and save. If this is a WebJob project created in VisualStudio, you can set this in the App.Config instead. If you want to use the dashboard, delete these settings from App.Config (see big note above)
Note: If you view the blob created in the container after visiting the WebJobs Dashboard, it simply contains this (at time of this blog post):
 {
  "Version": 0,
  "UpgradeState": 2
}
Add Application Setting, Connection string AzureWebJobsStorage
Like the above setting, this is optional but if you are using the Azure Web Jobs SDK, this is required. This is how the SDK does the magic of wiring up Queues, Tables and Blobs for use in your WebJob.
Like before: Navigate to Application Settings and scroll down to Connection strings. Add a new connection string called AzureWebJobsStorage, paste the saved Storage Connection string from the above step, set the type to Custom and save. Like before, If this is a WebJob project created in VisualStudio, you can set this in the App.Config instead. If you want to use the dashboard, delete these settings from App.Config (see big note above)
Create and build your application
There are lots of resources on how to do this so I will not include them all here. Here is a super simple do not much of anything WebJob in Visual Basic .NET
You do need to install the latest Azure SDK for Visual Studio: https://azure.microsoft.com/en-us/downloads/
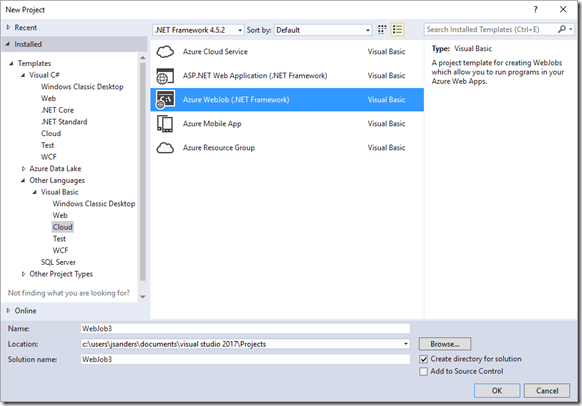
First I create a new Azure WebJob from the templates:
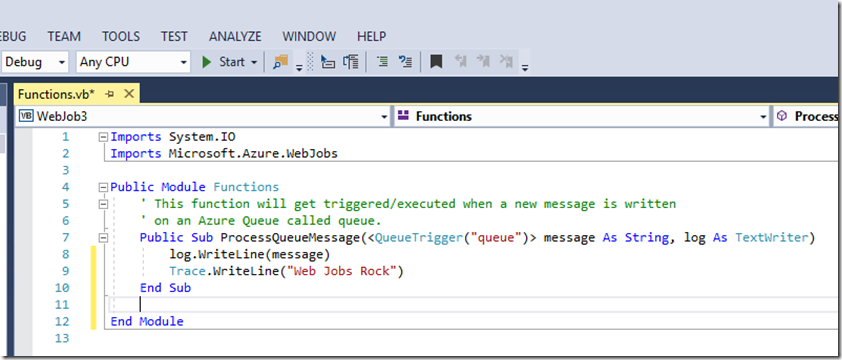
Next I am modifying the the provided function to Trace out a message:
In this case I have not added any additional resources other than what has been provided by the template. One thing to note is that just because a resource had the Azure namespace in it, that does not mean that resource is installed on the Azure Web Apps server. Take note of any dependencies that you are using to ensure they are part of your project and when you deploy, they will be included in the deployment package. For instance, the contents of the \bin folder is what you will be deploying (if you deploy manually).
Finally if you choose to put the Connection strings in App.Config (from above) do that now. If you are not going to use App.Config, then delete them from App.Config. In my case I may run several WebJobs in one Azure Web App so I want to ensure each WebJob has a unique storage behind it. I will add these to App.Config:
Deploy your application
Now that you have successfully built, you need to ensure you deploy your application and all the dependent resources with it. If you are using Git, FTP etc… to manually transfer the files ensure you also get all of the dependencies (see above note in the create section).
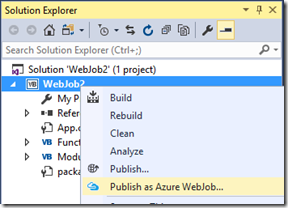
If you are using Visual Studio, the simple way to deploy the job is to right click on the project file and choose ‘Publish as Azure WebJob:
Follow the prompts and pick the Azure Web App you created above.
Verify it is running
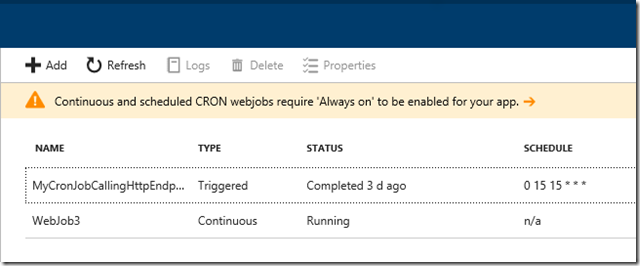
Go to your app service hosting the webjob and open the WebJobs view:
WebJob3 is the Job I created for this blog (I already had one running).
NOTE: ENSURE ‘Always on’ is enabled in the App Settings since this is a Continuous WebJob (per the warning above).
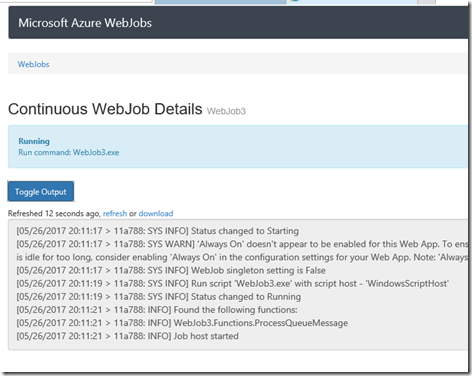
Click on the Logs icon after you highlight the WebJob and Toggle the Output to monitor this job:
and you will see that the Job host is started and waiting for action! Note: you can also get there through the Kudu console by clicking on the Tools, WebJobs Dashboard link in Kudu.
Test your app
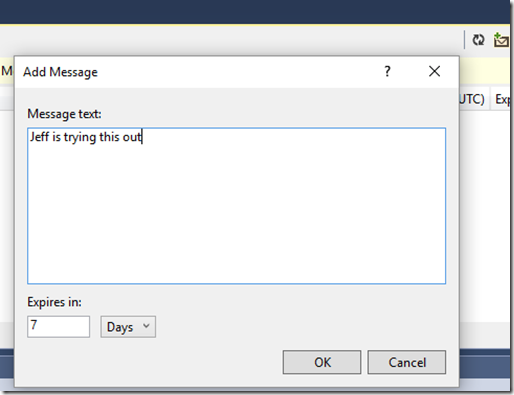
In this case the app is triggered from adding messages in a queue and the name of the queue is “queue” (see code above). You can navigate to the storage you created by using the Visual Studio Cloud Explorer (installed when you installed the Azure SDK above), finding the storage (in my case jsanderswebjobstor), expanding that storage and clicking on queue icon and right click on queues to choose ‘Create Queue’ (in this case named ‘queue’):
Now you can click on the + icon that looks like an mail message icon on the top right and add a message to test that out:
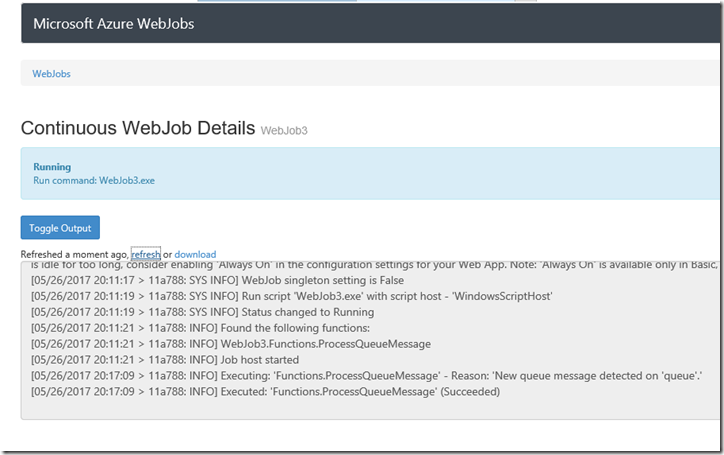
Going back to the WebJob Details you can see that adding the message the queue triggered the processing:
Looks great! But where is the logged message I added in the code above: “Web Jobs Rock”? They are only shown in the log
Optional - Enable Logging
You may find it useful to see the messages you are logging in your app. After you are confident your app is running smoothly you will want to turn off logging for all but error messages however to reduce overhead.
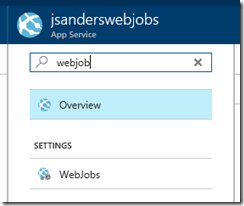
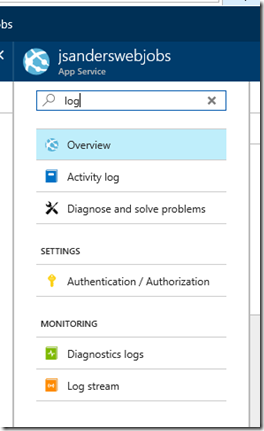
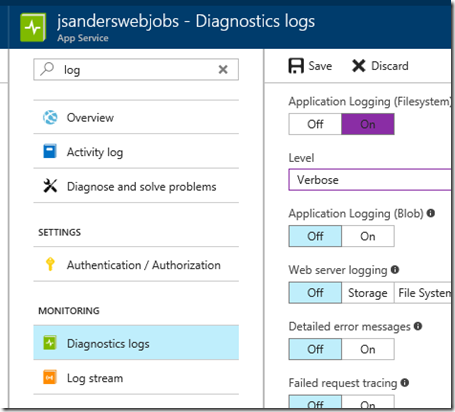
Search on Log in your Web app:
Choose Diagnostics logs and change the Application Logging (Filesystem) to On and Verbose Level. Hit Save:
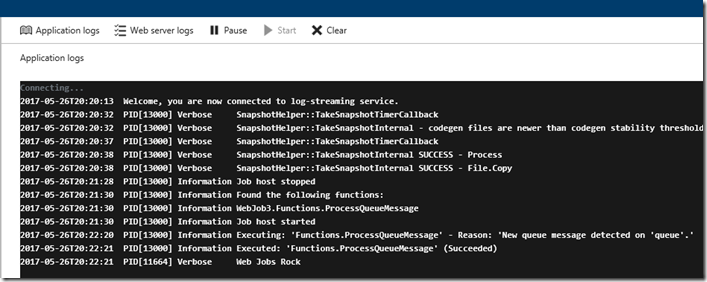
Once you do this you can test again and see the trace message in either the Log Stream:
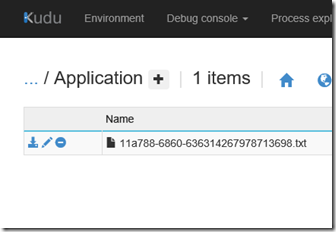
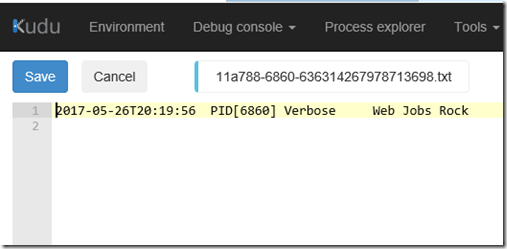
Or navigate in Kudu to the Log Files, Application directory and open the TXT file there by clicking on the pencil icon:
Conclusion
This was just a quick Azure WebJob walkthrough to give you a feel of how to work with a .NET WebJob. There are other ways to do this but having a reference is pretty handy the first few times you mess with Azure WebJobs.
Checklist Again:
Create an Azure Web App (or any Azure App Service) to host the Azure WebJob
Create a Storage Account for logs and save the connection string – required for .NET projects
Add Application Setting, Connection string AzureWebJobsDashboard (might be optional)
Add Application Setting, Connection string AzureWebJobsStorage
Create and build your application
Deploy your application
Verify it is running
Test your app
Optional - Enable Logging
If you found this useful please drop me a note!
Resources
https://blog.amitapple.com/post/74215124623/deploy-azure-webjobs/#.WSc3YMLruUk
https://docs.microsoft.com/en-us/azure/app-service-web/web-sites-create-web-jobs
https://docs.microsoft.com/en-us/azure/app-service-web/websites-dotnet-webjobs-sdk-get-started
