Widget Factory Walkthrough for the LINQ to SQL to Entity Framework Metadata Conversion Template
Introduction
This walkthrough is designed to show you how the new dbml to edmx conversion template can help you to start the conversion process. The conversion template is not yet complete, but can be used to convert basic projects like the one in this walkthrough.
Background
There are several differences between LINQ to SQL and the Entity Framework. One of them is the format in which the metadata is stored. In LINQ to SQL projects, the metadata is stored in a dbml file, from which the designer content is generated. In an Entity Framework project, the edmx file is generally used at design-time instead. The basic information stored in these two files is the same, but there are significant structural differences. The conversion template is a T4 template which will convert valid dbml to the corresponding edmx, which in turn can be used for your Entity Framework based project.
Example Project: Widget Factory
The Widget Factory is moving from its existing LINQ to SQL project to a new Entity Framework project. The database for the Widget Factory has three tables, storing customer data, order data and shipping data. Visual Studio 2010 Beta 1 and SQL Server Express are required.
Before Starting
1. Download the Widget Factory walkthrough WidgetFactory.zip.
2. Create the WidgetFactory database by opening the WidgetFactory.sql file (within the walkthrough zip file), in SQL Server Management Studio and executing the script:
i) Open the file WidgetFactory.sql in SQL Server Management Studio (by choosing File->Open->File)
ii) Press F5 to run the script
iii) The console output should read "Query Executed Successfully"
3. Download and install the conversion template. Instructions for installation can be found in the original blog post.
Exploring the Original Project
The original project is a simple console application that uses LINQ to SQL to query against the WidgetFactory database in order to find interesting information, such as orders shipping in a certain time frame, customers with the most orders, etc.
1. Unzip the example directory and open the WidgetFactory.sln solution file.
2. Take a look at WidgetFactory.dbml in the WidgetFactory project by double-clicking on the file in the Solution Explorer. (If a warning about the OutputPath property appears, ignore it).
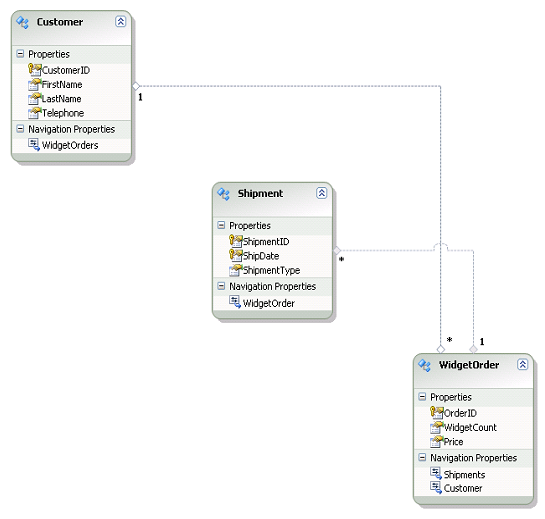
Notice the three entities: Customer, WidgetOrder and Shipment.
2. Open WidgetFactoryTests.cs and look at the unit tests. Try running the tests in TestWidgetFactory.cs by pressing Ctrl + R, A. They all should pass.
Converting the Metadata
1. Create a new project of type Class Library in the solution and name it "WidgetFactoryEFX", by right-clicking on the solution in the solution explorer and choosing Add->New Project.
2. Remove Class1.cs from the new project, by right-clicking on the file in the solution explorer and choosing "Delete".
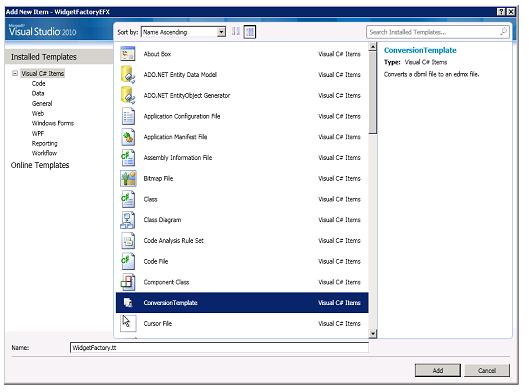
3. Right-click on the new project in the solution explorer and choose Add->New Item. In the dialog box that appears choose ConversionTemplate. Name the template WidgetFactory.tt
4. If a security warning dialog appears, click “Trust” to trust this template. The template and two ttinclude files, EDMXT4.ttinclude and L2ST4.ttinclude should now appear in your solution.
5. Right-click on the template in the solution explorer and choose "Run Custom Tool". An error may appear:
Running transformation: System.Exception: DBML file 'WidgetFactory.dbml' could not be found.
If the error appears, open the template, and modify the filename to match the path for your dbml file. The absolute file-path is required. (Do not copy the dbml file into the new project, as this will cause a conflict between the code generated from the dbml file and the code generated from the edmx file.)
var options = new {
DbmlFileName = @"YourFilePath", // Which DBML file to operate on
...
};
If no error appears, continue to the next step.
7. To run the conversion template on your dbml, right click on the conversion template and select "Run Custom Tool" again. No errors or warnings should appear.
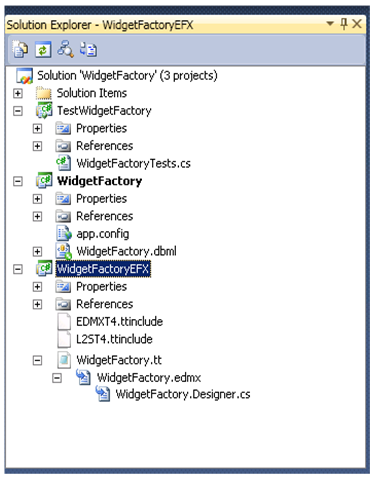
8. Expand the template by clicking on the + sign to see the new sub-files: WidgetFactory.edmx, and WidgetFactory.Designer.cs

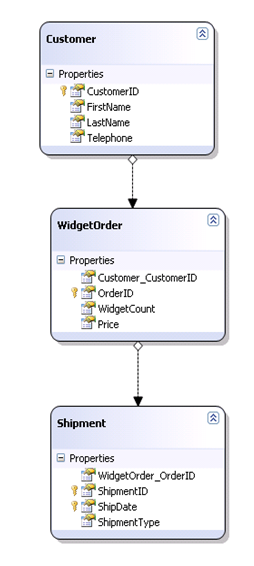
9. Take a look at the edmx file generated by the template by opening it with the designer. Notice that the entities and associations are the same as in the dbml, but that the foreign-key associations have been changed to independent associations. The foreign-keys now appear as navigation properties.
10. Your solution should now look like this
11. Right-click on the WidgetFactoryEFX project in the solution explorer and choose Rebuild.
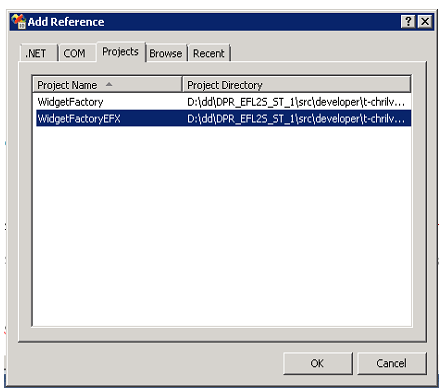
12. Add the new project as a reference to the test project, by right-clicking on References in TestWidgetFactory and choosing "Add Reference".
13. In the Projects tab, choose WidgetFactoryEFX, and click OK.
14. Open WidgetFactoryTests.cs
15. In the test file, uncomment the first line: #define USEEFX
16. Save the file.
17. Take a look at the areas in the test file that have changed by defining USEEFX. Note the differences in the if/else blocks:
I. The use of the WidgetFactoryContainerModel instead of the WidgetFactoryDataContext
II. The "using" statements for WidgetFactory versus WidgetFactoryEFX
III. The connection string
18. Run the tests, all should pass.
19. You should now be able to toggle between running the unit tests against the new Entity Framework metadata and the original LINQ to SQL metadata.
19. Look at the test details, and notice that the output for each test is the same between the LINQ to SQL version and the Entity Frameworks version.
