Building tylerbutler.com, Part 1: Planning and Basic Branding
Part 1 :: Part 2 :: Part 3 :: Part 4 :: Part 5 :: Part 6
Hi everyone, I'm Tyler Butler. You may remember me from such exciting blog posts as Content Deployment or from presentations at the SharePoint Conference about CMS 2002 migration to MOSS 2007 or the MOM management packs for MOSS. I'm a Program Manager working on the Web Content Management features of MOSS 2007. Today I am going to be talking about a pet project I've been working on for a few weeks: tylerbutler.com.
When I started working on the Web Content Management features in SharePoint, I got pretty jealous of the cool author-time experience we provide in the product that I simply wasn't able to leverage on my personal site. Also, I noticed that a lot of people who were looking at the stuff we were building wondered if it was really possible to create a real site that didn't look like SharePoint. So as a bit of a proof-of-concept (and out of personal interest), I decided to work on porting the design and content from my personal site to MOSS.
The task itself wasn't terribly hard, though it did take some time and some tweaking, but as I was going through the process I realized that it would probably be a good idea to try and document what I did and the approach I took so that others who are tackling similar projects could get some ideas and insight. Because I want this to be a highly detailed walk-through of what I did and why I did it, I'm splitting this into multiple posts, each one walking through a specific part of the process in more or less chronological order. So with that (not so) brief introduction, let's get started!
Goals
Well, one more thing before we start. I think it's important to share my overall goals for the site with you so you have some context when reading this. Many of the decisions I made are largely based on what my goals for the site and this project were, and an understanding of them will help you understand my approach much better.
- MOSS site should look more or less like the original tylerbutler.com (if you do check out my site, please be nice – my server's not particularly stout. :-) )
- Essentially, this meant the overall styling should be the same. I think I managed to get pretty close here.
- MOSS features should be leveraged as much as possible without writing custom code
- It was important that I get as far as I could without writing code. I still did in a couple of cases (I can't help it – I like writing code!), but I estimate 90% of my work was code-free (unless you count XSLT as code; I don't)
- Feature-parity is important, but not all features are equal
- Basically, I wanted to maintain as many features from my old site as I could. However, there were some things that my old site could do that simply didn't get a lot of use, or that wouldn't be worth the time to bring over to MOSS. In the end, I got pretty close with feature parity, but I'll point out a few examples where I didn't as I go through everything.
Planning the Site Structure
The first thing I needed to do was decide exactly how I wanted to structure things on the site, and how I wanted to organize stuff. My site is pretty simple; it's just a collection of posts with some rollup pages on the homepage and in the various sections that shows an overview of all the stories.
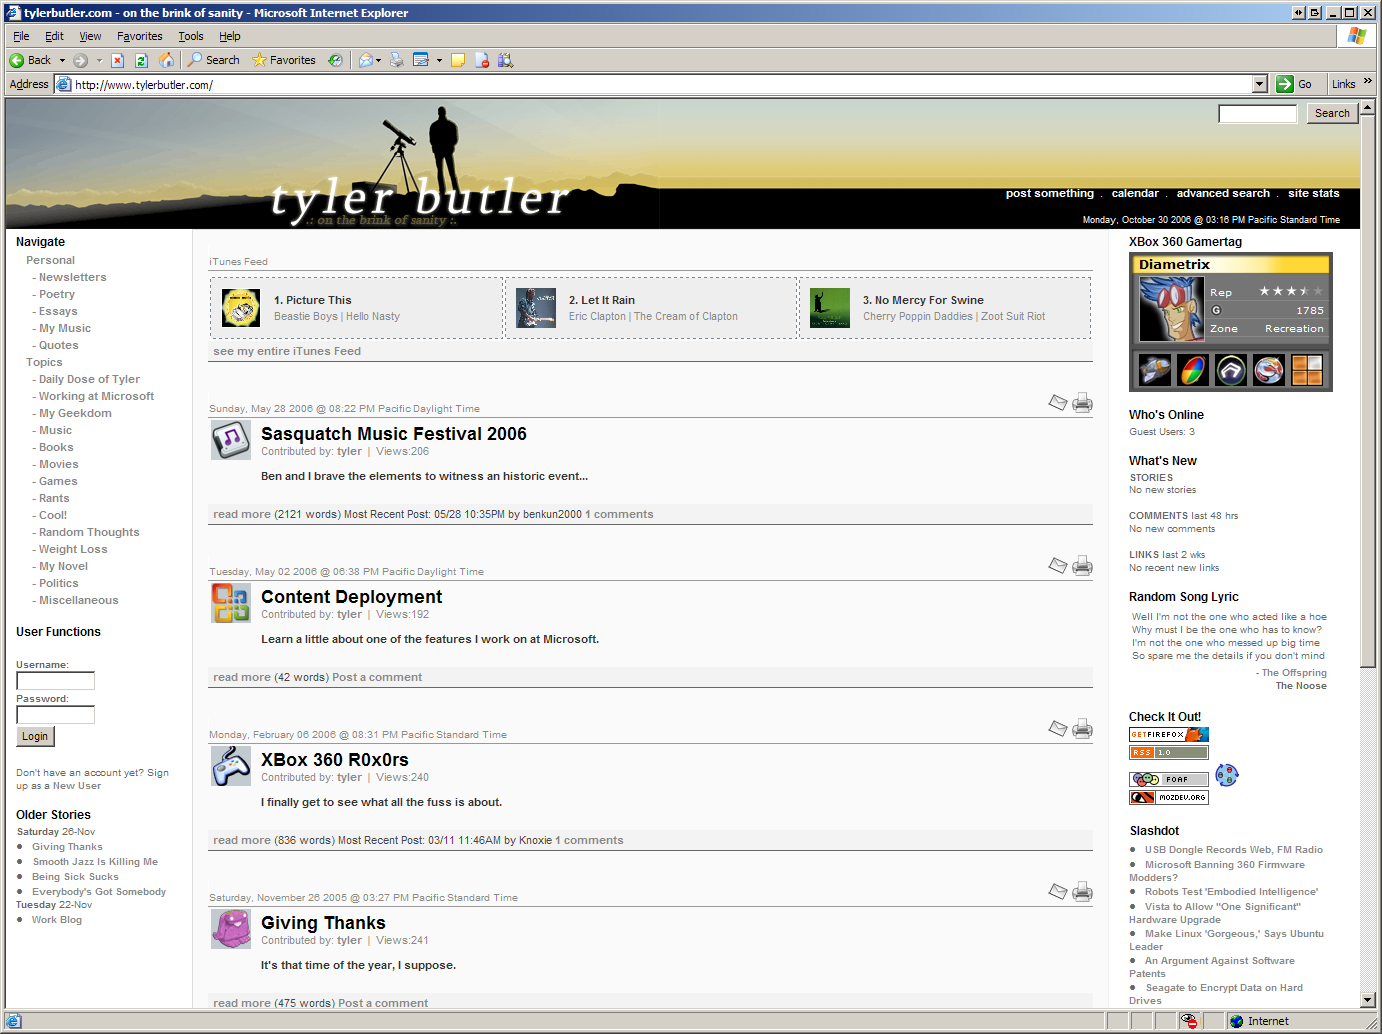
The original tylerbutler.com
It was pretty clear that each post would be a page, and that using Content Query (CQWP) web parts to roll up individual page info into a landing page would suit my needs. Also, posts would be contained within a specific category, which I represent with a subweb. For example, pages about music would be contained in the Music subweb. Makes sense, right?
But I wanted my site structure and navigation to be somewhat categorized. When I had initially built my site, there were two basic top-level categories: stuff I create/write, like my poetry, music, etc. and "everything else." Since I was moving to a new site, I decided some reorganization of the stuff in the "everything else" category was warranted. Rather than having everything bunched together, I divided my topics like "Movies" or "Rants," into four distinct top-level categories: Life, Stuff, Reviews, and Self-Expression.

Original tylerbutler.com left navigation New MOSS-powered tylerbutler.com navigation
Initially I planned to create sites for each of the four top-level categories, and create webs under them to contain the individual posts. However, that seemed kind of heavyweight. I mean, why have a web, with all of the lists, workflows, etc. that a web contains, just to get some navigational structure? Instead, I just created headings in navigation and reordered all of the subwebs so they were displayed under the appropriate heading. (By the way, Ben Schmitlin is working on a great post about navigation which should be ready in a couple of weeks. I'll link to it once it's posted. He's the nav master!)
After deciding exactly what the site structure would look like, I went about creating all of my subwebs. I just used the Site Content and Structure tool, since it provides links to create subwebs pretty easily. Finally, I could move on to the really cool stuff – branding my site using a custom master page and page layouts!
Building the Custom Master Page
The most important element of a branded site is a custom master page. You might be fooled into thinking that the best place to start when building your own custom master page is default.master. Unfortunately, in most cases, you'd be wrong. Lincoln DeMaris has an excellent overview of something we call the Minimal Master Page, which serves as a great starting point for your own master pages. In addition, looking at a publishing master page such as BlueBand.master is a great way to get some ideas or sample markup. Finally, despite what I said earlier about default.master, it is also a good source of sample markup as well, depending on what you're trying to do.
In my case, I opened up my original site's home page in source view, and copied and pasted the markup into a blank master page in SharePoint Designer. Then I went through and cleaned a whole bunch of markup out, especially some custom JavaScript stuff that I didn't want to move forward. I'm using a table layout, and while moving to a completely CSS-based layout is in my long term plan for the site, I didn't want to bite off more than I could chew. So I removed all of the home page content markup in the table cells, and then inserted content place holders into the appropriate cells in the table. I got the custom place holders from BlueBand.master to start out with, then added a couple of custom ones. Lincoln's post has more details on what placeholders you need to have in your master page in order for MOSS to work properly with it. Also, the markup and controls that are necessary for the authoring console (the name of the control is Console) and the Site Actions menu (the name of the control is SiteActionMenu) are in the sample master pages; just copy and paste the markup into the appropriate place in your master page.
Global/Left Navigation
The next thing to do was figure out the appropriate settings for the navigation in the master page. I wanted my navigation along the left to be the same across all the pages in my site, so I put the global navigation there. I just copied the markup from BlueBand.master (specifically the SharePoint:AspMenu and PublishingNavigation:PortalSiteMapDataSource control markup) and changed some of the properties of the ASP.NET menu control in SharePoint Designer. I changed the style properties to point to CSS classes that I wanted to use, and changed the Orientation property to vertical rather than horizontal. I also changed the StaticDisplayLevels property to 2, so that my headings and only the webs under them would show up (in order words, webs under the second level would not be displayed).
Current/Right Navigation
The navigation on the left was going to be global across the entire site, but on the right hand side, I wanted to have links to other pages in the section which you were viewing. Using a custom site map provider and another navigation data source and ASP.NET menu control, I was able to configure navigation to display fifteen of the most recent pages in a given section. Because navigation has the capability to know what site it's rendering in, I only had to add it once to the master page, and every page in my site started showing the fifteen most recent pages in that section.
This was slightly more involved, since I had to open the web.config file for the web app and add the following markup in the <sitemap...><providers> section:
  <add name="PagesOnly" description="Only pages for the right-hand nav" type="Microsoft.SharePoint.Publishing.Navigation.PortalSiteMapProvider,
Microsoft.SharePoint.Publishing, Version=12.0.0.0, Culture=neutral, PublicKeyToken=71e9bce111e9429c" <br>NavigationType="Current" EncodeOutput="true" IncludePages="Always" DynamicChildLimit="15" />
The two most important changes here are the IncludePages property, which ensures pages are always shown, and the DynamicChildLimit property, which ensures I only get fifteen of the pages, instead of all of them. (NOTE: The DynamicChildLimit property does not work as I thought. More details about this here. Therefore this sample is misleading.) I added a new data source pointing to this provider in SharePoint Designer, then added another ASP.NET menu control tied to that data source, and right navigation was pretty much done. In order to display the "Other Posts in <Site Title>" text, I used a control used in default.master, the ProjectProperty control:
<SharePoint:ProjectProperty Property="Title" runat="server" />
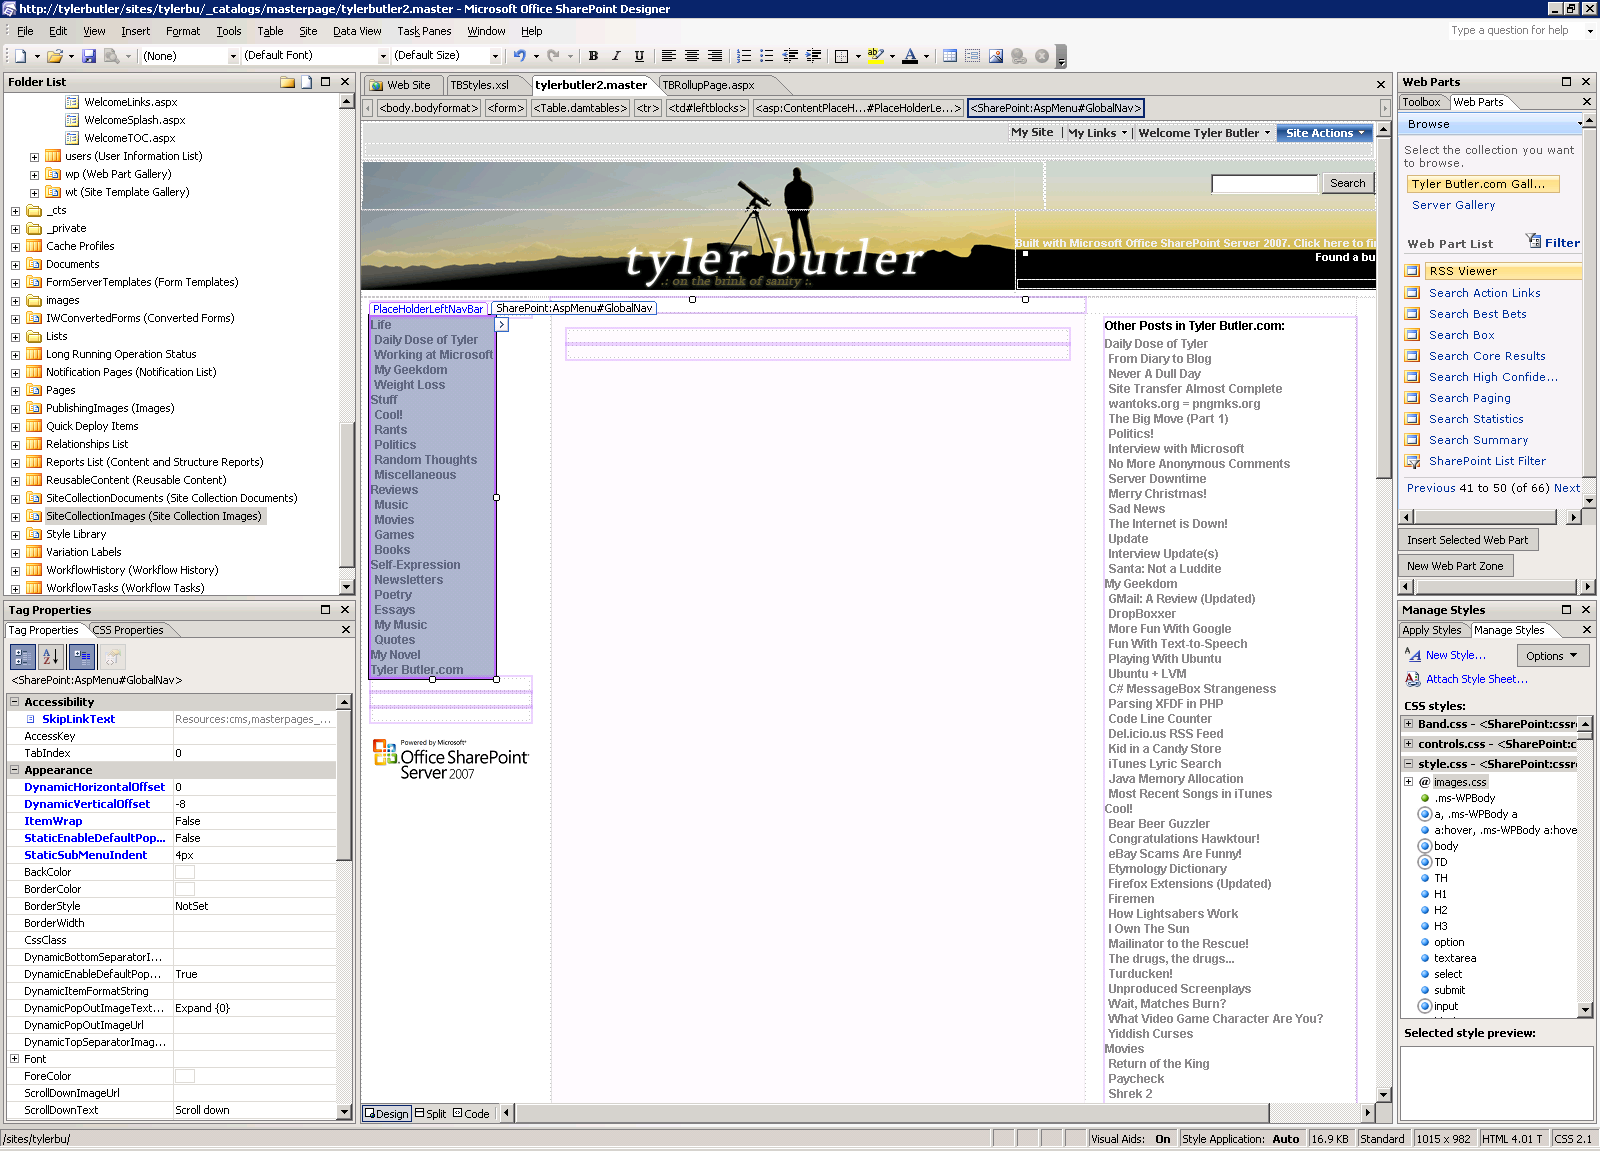
Here's what the master page looks like in SharePoint Designer:
Styles and Images
After I tweaked the master page for a bit, got all the content placeholders in place, and added my navigation controls, I realized that I didn't have the CSS files and images I needed on the SharePoint site yet. Using SharePoint Designer, I moved those files into the appropriate places on the site (Style Library for the CSS, Site Collection Images for the banner images), approved them, and I was almost good to go. The last thing to do was add a link to my style sheet in the header of my master page. To do that, I copied some sample markup into the header and modified it to point to my CSS, using the CssRegistration control:
<SharePoint:CssRegistration name="<% $SPUrl:~SiteCollection/Style Library/style.css%>" runat="server"/>
You'll notice that in the CssRegistration control, I am making use of a token inside the ASP tags, $SPUrl:~SiteCollection. SharePoint understands this token and fills in the appropriate Site Collection URL at runtime. This allows my markup to be portable to non-root site collections (such as /sites/sc1, etc). After I added the reference to my CSS, I was set.
Taking it for a Spin
The final step was to check that the master page actually worked in the site. I checked in the copy I was working on and changed the master page setting of the root site in Site Settings, and… it didn't work. The site didn't render. Of course, it was a mistake on my part. I had missed a content place holder that the system expected in the master page, and it was complaining that it was missing. After adding that place holder, I tried again, and... It worked!
(This is a good place to point out that if you are developing master pages for SharePoint, and you get non-descript errors like "An unexpected error has occurred" when viewing your site with your custom master page applied, then enabling stack traces and disabling custom error pages in web.config is a great way to help you diagnose the specific problems. You can do this by setting <customErrors mode="Off" /> in web.config and the CallStack="true" property in the <SharePoint><SafeMode> tag in web.config.)
So with my new custom master page, my MOSS site was beginning to look a lot like my old site, but it still didn't have any of my old content. While seeing the default MOSS images wrapped in my snazzy master page was nice, I really wanted to get my content into the site. My next post will cover creating page content types, custom page layouts, and using the CQWP to create the rollup pages. Until next time…


