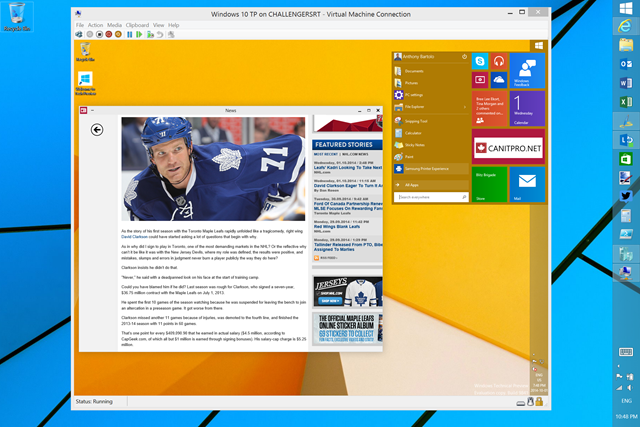
Step-By-Step: Creating and Running A Windows 10 VM on Windows 8.1
With the Windows 10 Technical Preview now available, many IT Professionals and those who are technically incline are facing a decision to update an existing primary machine or to update a possible secondary machine with the newly released client software. There is however another option one could pursue to conduct testing and provide feedback. This Step-By-Step will detail the ability create and run Windows 10 Technical Preview from within a virtual machine. Even more specifically, a virtual machine hosted on a Windows 8.1 Hyper-V enabled device.
Step 1: Download the Windows 10 Technical Preview ISO
- Visit the Windows Insiders webpage.
- Register to be a Windows Insider
- Download the 32 or 64 bit version of the Windows 10 Technical Preview ISO file.
Step 2: Enabling Hyper-V for use on Windows 8.1
Follow the steps provided in the Step-By-Step: Enabling Hyper-V for use on Windows 8.1 post.
Note: Prerequisites to enable Hyper-V on Windows 8.1 are as follows:
- Windows 8 Pro or Enterprise 64 bit Operating System
- 64 bit processor with Second Level Address Translation (SLAT)
- 4GB system RAM at minimum
- BIOS-level Hardware Virtualization support
Step 3: Creating the Windows 10 VM
Open Hyper-V Manager on the Windows 8 machine
(Charms > Search > type Hyper-V Manager)
To begin creating the VM click Action > New > Virtual Machine

On the Before You Begin screen click Next.
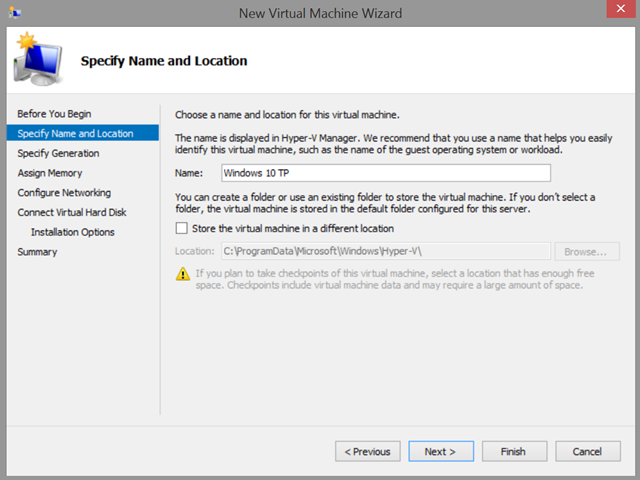
On the Specify Name and Location screen, enter the desired name for the VM and click Next.
On the Specify Generation screen, select Generation 1 and click Next.
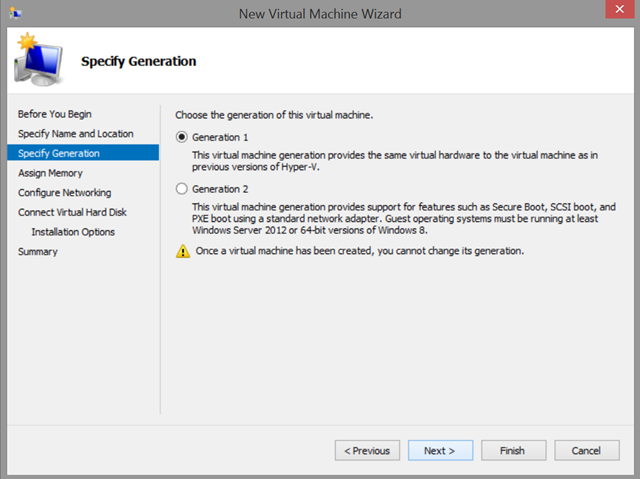
Note: Generation 2 can also be utilize for advanced testing but will require further resources
On the Assign Memory screen, enter a memory size of 2048 MB or higher and click Next.

Note: Only enable the use of Dynamic Memory if multiple VMs are to be enabled simultaneously.
On the Configure Networking screen, select the connection that connects to an external resource for internet connectivity and click Next.
On the Connect Virtual Hard Disk screen, select Create a virtual hard disk, enter 20GB or higher for storage size and click Next.
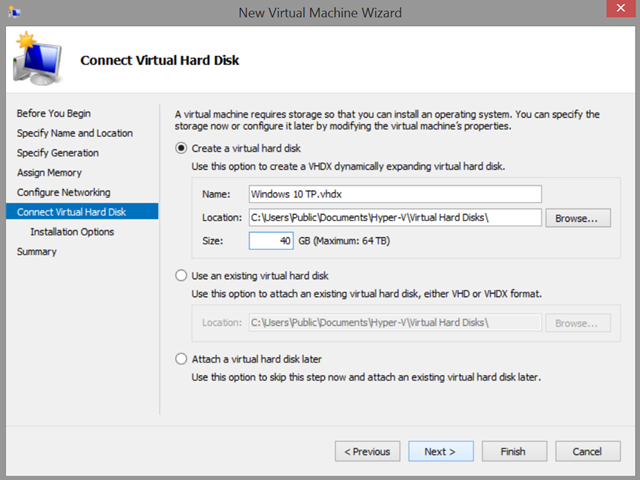
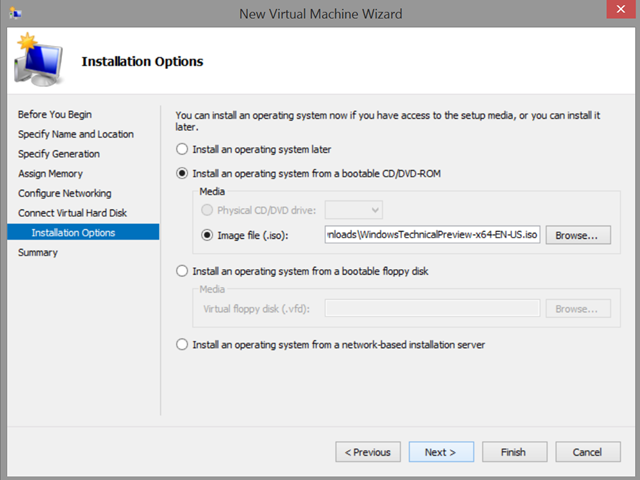
On the Installation Options screen, select Install an operating System from a bootable CD/DVD-Rom
Select Image file (.iso) ,browse your computer to find the Windows 10 Technical Preview .iso file downloaded in Step 1 and click Next.
On the Completing the New Virtual Machine Wizard screen, review the selected options and click Finish.

Back in Hyper-V Manager, right -click on the newly created VM and click Start.

Right -click again on the newly created VM and click Connect.

Once connected, commence the installation of Windows 10 Technical Preview on the newly created virtual instance.

Once the installation is completed, the newly created Windows 10 Technical Preview virtual machine will allow for complete testing of the operating system and can be deleted and recreated as needed.
Comments
- Anonymous
October 09, 2014
Thanks for this guide! I did not want to set up Windows 10 directly to my Surface Pro 3, but I had never set up a VM before. Your guide made it easy and took all the guesswork out.
