Setting up and using GitHub in Visual Studio 2017
I wrote this article here about setting up GitHub in Visual Studio 2015 and felt it necessary to document the same in Visual Studio 2017. Here is how I setup GitHub source code management in Visual Studio 2017 Community.
- Install the GitHub extension for Visual Studio
- Create your GitHub repo and then login
- Create a GitHub repository
- Create a project for the repository
- Add the source code to GitHub
Check out these 2 articles about including 4.6.2 and C# 7 capabilities into Visual Studio 2017, also discussed later on.
NOTE: After completing this configuration, I did not find any difference between the GitHub setup in Visual Studio 2015 and Visual Studio 2017, they work both the same.
Install GitHub for Visual Studio
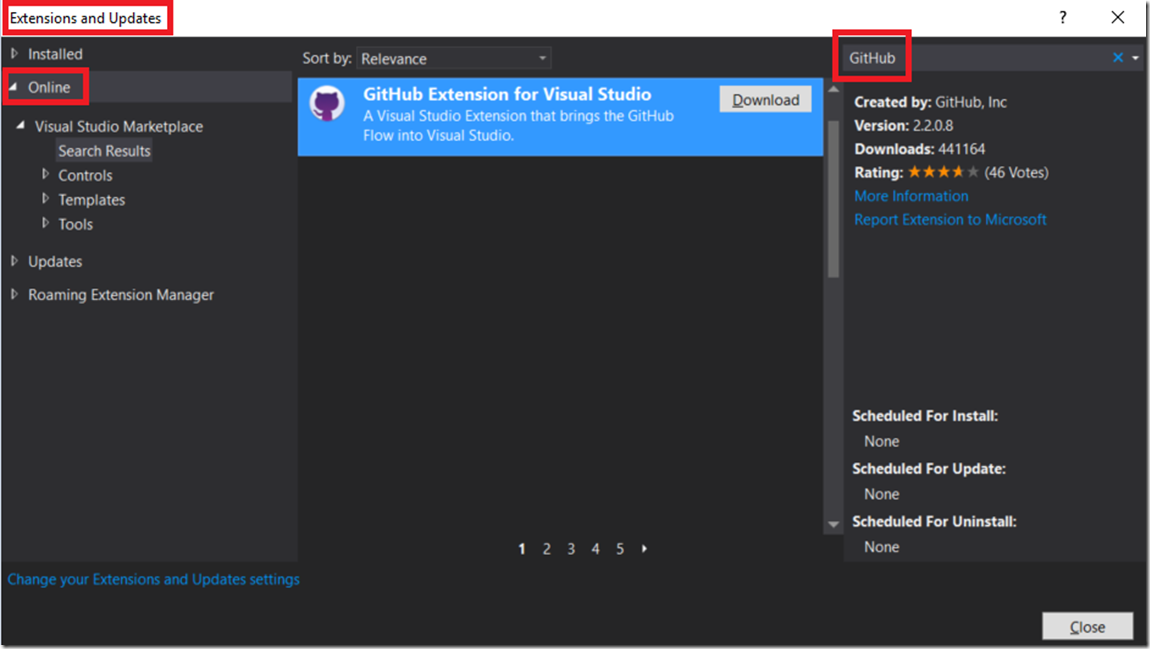
In Visual Studio select Tools -> Extensions and Updates which open the window show in Figure 1. Download and install the extension, a reboot of Visual Studio was required for me.
Figure 1, GitHub for Visual Studio
Create your GitHub repo and login
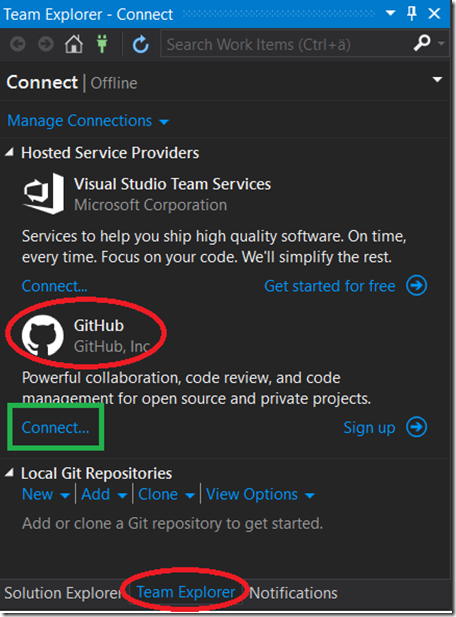
If you do not already have an account on GitHub then you need to create on. Create it and then come back to this point. Once created, use the credentials to login to your GitHub account, as shown in Figure 2.
Figure 2, login to GitHub from Visual Studio
Create a GitHub repository
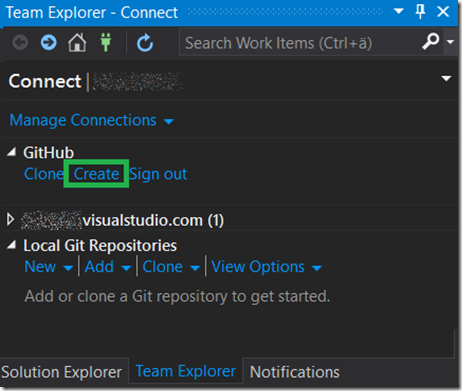
Now create GitHub repository by selecting the Create button on the Team Explorer tab in Visual Studio, as show in Figure 3.
Figure 3, create a GitHub repository from Visual Studio for Visual Studio
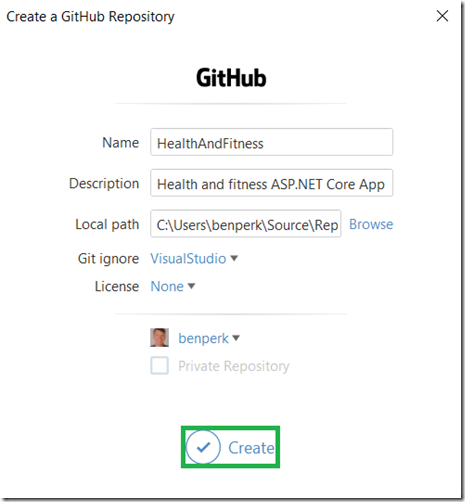
When you click on the Create link, a window similar to that shown in Figure 4 is rendered. Enter the name of the repository, a description and the local location where you would like to store the source code. I use the default.
Figure 4, create a GitHub repo using Visual Studio
Create a project for the repository
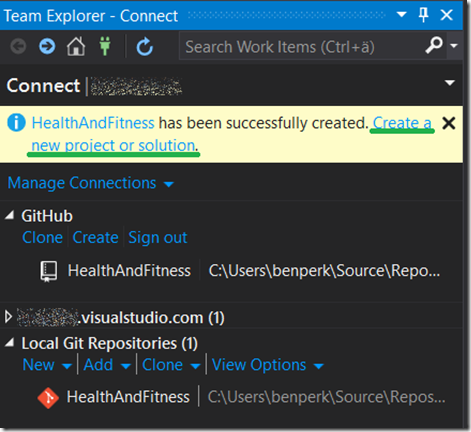
After clicking on the Create button shown in Figure 4 and once the repository is created locally, you are prompted to create a Project to store into it. Similar to that shown in Figure 5.
Figure 5, create a project to store in GitHub from Visual Studio
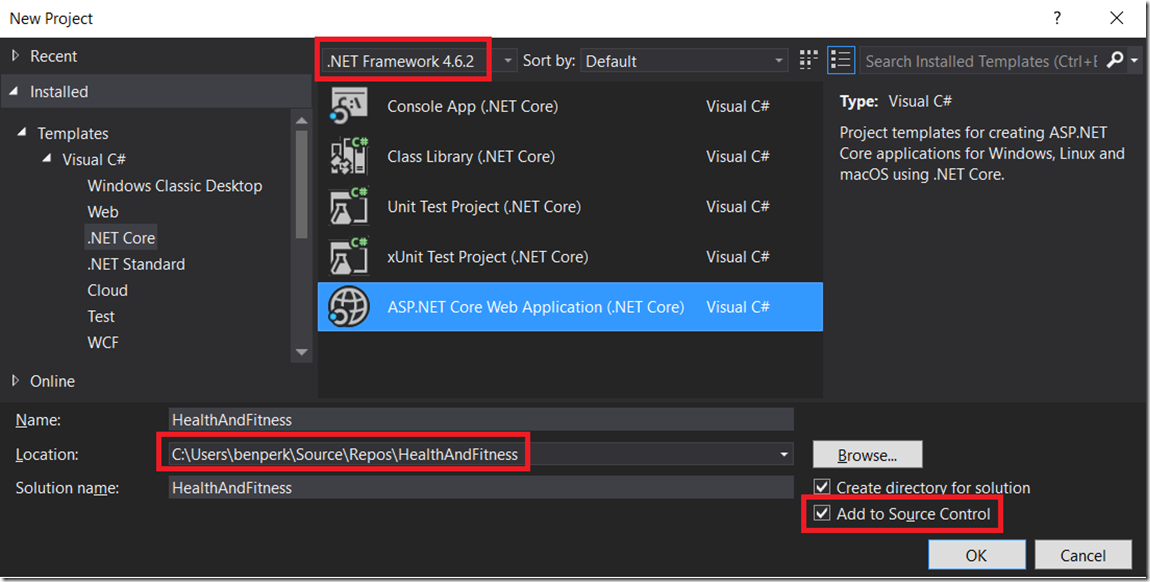
For this example, I am creating an ASP.NET Core Web Application using .NET 4.6.2 (the newest at the time of this blogs creation) which also supports Web API calls, JIC I decide to add some troubleshooting of WEB APIs later. Check out these 2 articles about including 4.6.2 and C# 7 capabilities into Visual Studio 2017.
As seen in Figure 6, I select an ASP.NET Core Web Application and on the next windows I select ASP.NET Core 1.1 and Web Application.
Figure 6, create a project for GitHub from Visual Studio
Add the source code to GitHub
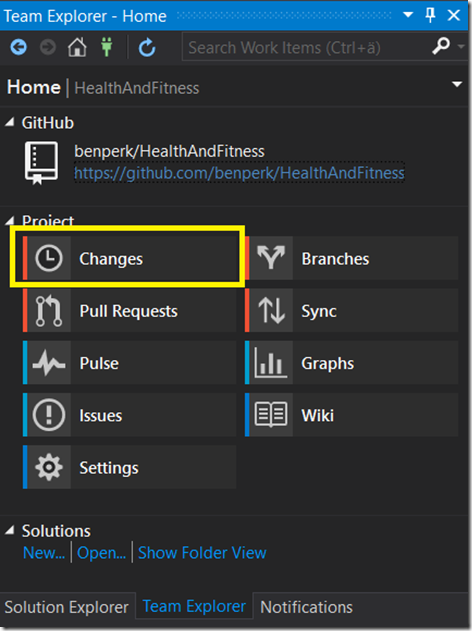
Once the project is created, click on the Team Explorer tab, and expand the Project tree. Click on the Changes button as shown in Figure 7.
Figure 7, commit changes to the GitHub repo using Visual Studio
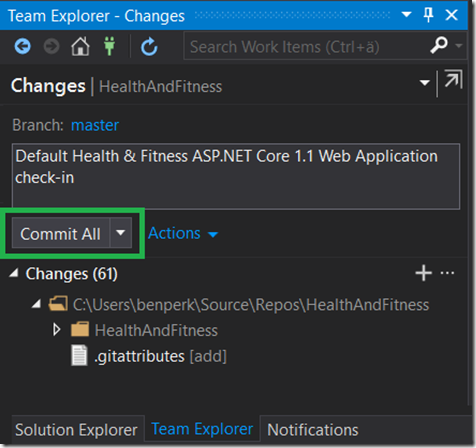
Clicking on the Changes button navigates to the page shown in Figure 8. Enter a description and press the Commit button, as shown in Figure 8.
Figure 8, commit the initial project to GitHub from Visual Studio
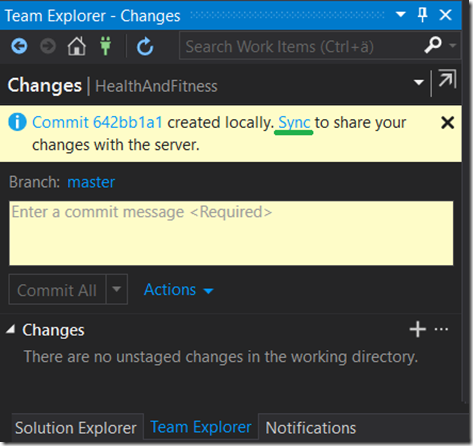
Once committed, synchronize the locally committed source code to the public source hosted on GitHub. As seen in Figure 9, after the commit is complete, you are requested to Sync the changes using the Sync link. You can also Sync them at a later time by clicking the Sync button shown previously in Figure 7.
Figure 9, synchronize code with GitHub from Visual Studio
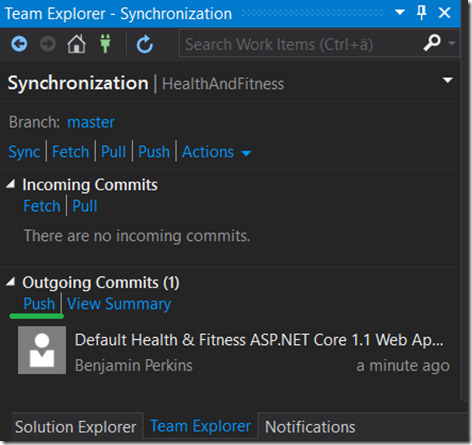
On the Synchronization page, click the Push link to synchronize the changes, as shown in Figure 10
Figure 10, Push the code from a local GitHub to a public GitHub using Visual Studio
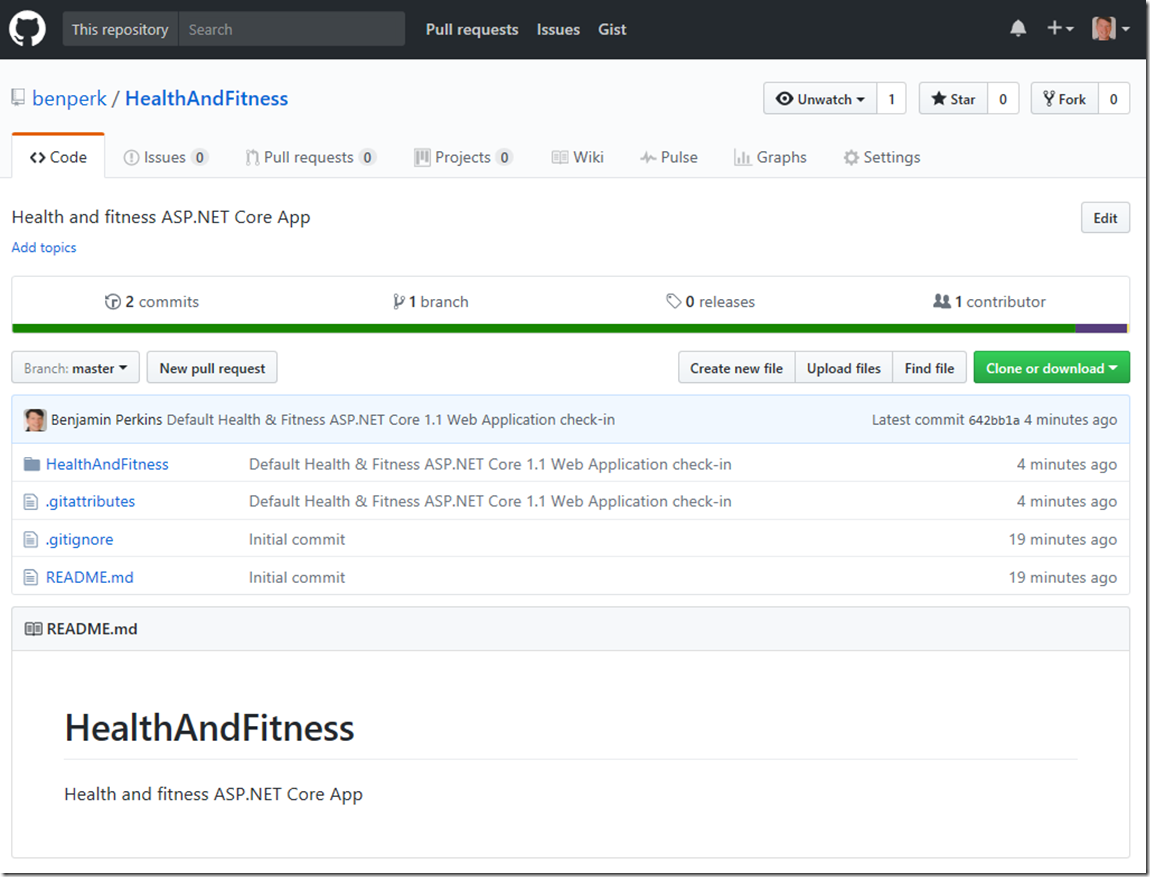
Once complete, you can see the code is public on the GitHub site using a browser, as seen in Figure 11.
Figure 11, viewing the source on GitHub
Comments
- Anonymous
April 14, 2017
+1 post, thank you Benjamin; Rated and shared via different social networks. - Anonymous
May 08, 2017
Great tutorial!! How about if you already have a solution you want to start tracking on GitHub?Can you just open your solution instead of creating a new project and keep following your instructions?- Anonymous
May 16, 2017
http://stackoverflow.com/questions/42217847/how-do-i-add-an-existing-solution-to-github-from-visual-studio-2017- Anonymous
December 17, 2017
You need separate local Repositories. - Anonymous
December 17, 2017
Clarification: You can't use the same local Repository for both TFS and Git - they must be separate. I wasted MANY hours figuring this out. It IS IN this article but it wasn't obvious to me as I was trying to upload an existing VS TFS Solution to Git.In this step:* Create a project for the repository - I just moved the VS 2017 Solution I wanted to upload to the Git Repository I created. It took me about 20 seconds to upload.
- Anonymous
- Anonymous
- Anonymous
August 28, 2017
+1. Brilliant how easy this is now with the VS tooling. - Anonymous
September 15, 2017
Nice post Benjamin ! Rather explanatory for a not only GitHub but Git in general, newbie like myself. In fact, I think that it would be grand, if you could prepare some material on the VS 2017 - Git "interaction" subject probably in the form of series. Being new to the Git world, as I mentioned, I can't (easily) find, up-to-date material in relation to the VS 2017 (Community edition) setup, that I am currently using. Many thanks! - Anonymous
October 05, 2017
Very nice !It looks so simple - Anonymous
October 19, 2017
Very useful tutorial. Thanks very much. - Anonymous
October 26, 2017
This is really helpful and step by step. Thanks a bunch - Anonymous
December 18, 2017
Thanks for sharing! Helped a lot. - Anonymous
January 18, 2018
Very helpful thanks. Can I suggest a followup that deals with tagging for publishing releases? I've still not quite got to grips with that. - Anonymous
February 14, 2018
The comment has been removed - Anonymous
December 16, 2018
Perfect instructions, just what I needed. - Anonymous
April 01, 2019
Thank you for this great tutorial, Visual Studio is a bit misleading in that it seems to have partial GitHub support by default but doesn't fully support it until the extension is added. Made my day! Thanks again!
