Lab 1: Install IIS and create a web site
This article has been moved to its new home here: https://benperk.github.io/msdn/2016/2016-IISLAB-lab-1-install-iis-and-create-a-web-site.html
In this lab you will:
- Install the IIS Management Console
- Configure a web site using the IIS Management Console
Install the IIS Management Console
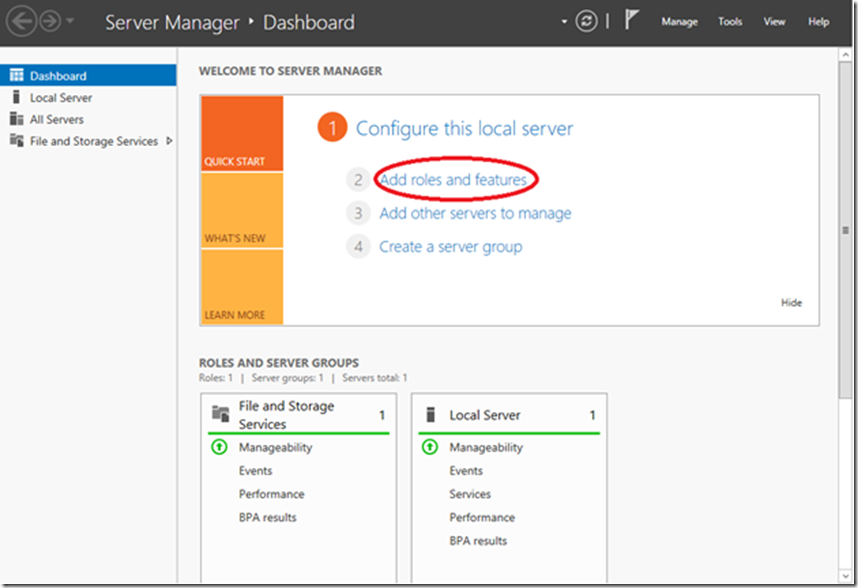
After installing Windows Server and logging in, the Server Manager is opened automatically, as shown in Figure 1.
Figure 1, Windows Server Manager
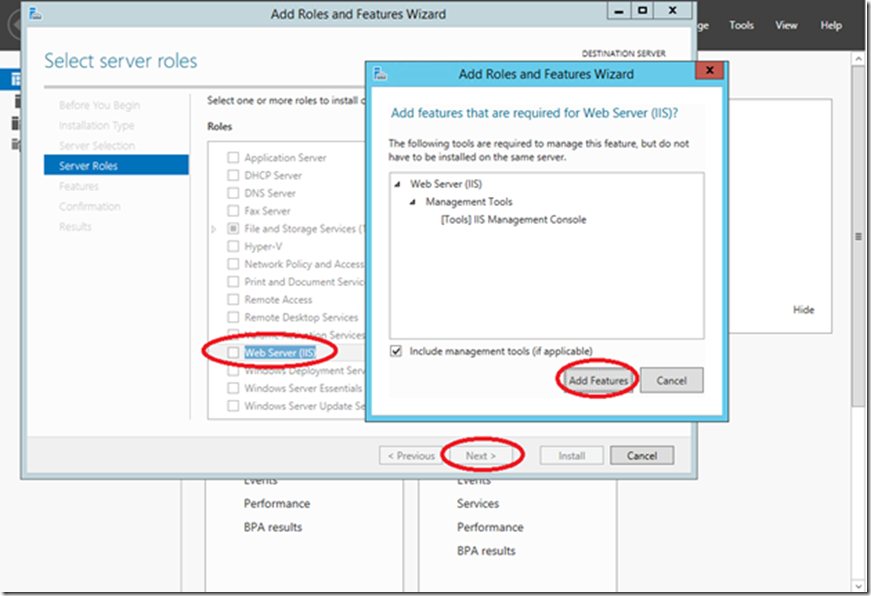
Click on the Add roles and features link, which open an installation wizard. Click the next button, accepting the default settings until you reach the Select server role page, as shown in Figure 2. Select the Web Server (IIS) role and a popup is rendered similar to Figure 2. Click the Add Features button and then the Next button.
Figure 2, installing IIS on a windows server, how to
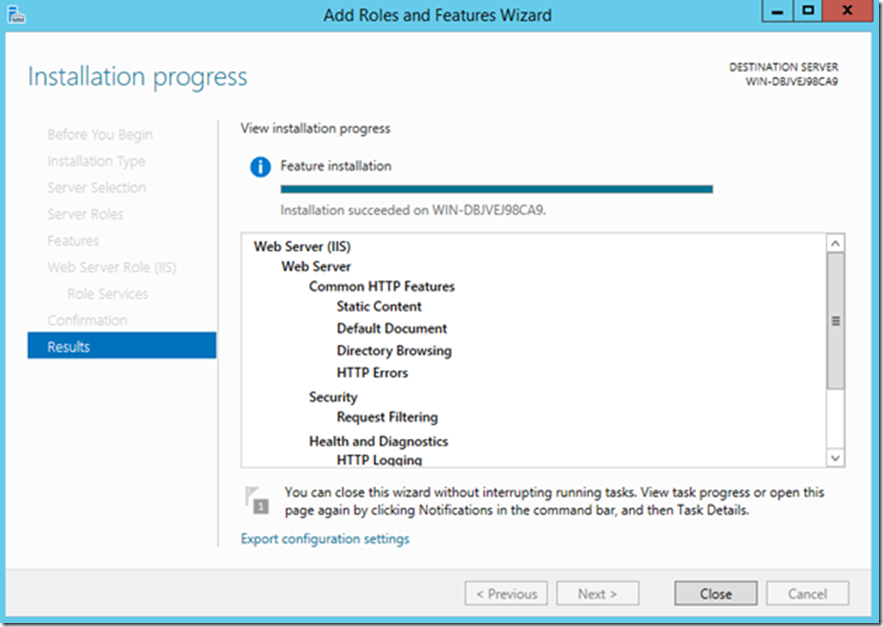
Accept the defaults on each window until the end of the wizard where the Install button becomes enabled. Press the Install button and once installed, press the Close button to complete the installation, as shown in Figure 3.
Figure 3, complete the installation of IIS
Now you can open the IIS management console and add a web site.
Configure a web site using the IIS Management Console
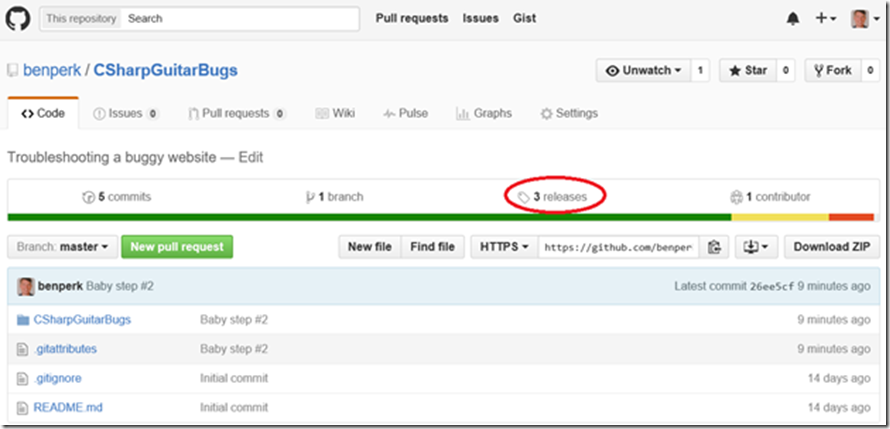
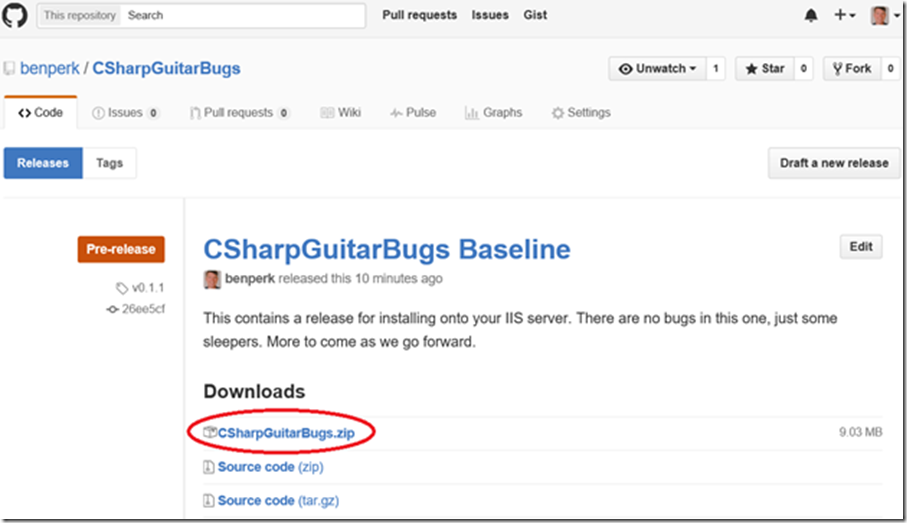
Before you create the web site, download the sample ASP.NET MVC web site from here. Select the releases as shown in Figure 4.
Figure 4, download the sample ASP.NET MVC web site
Download the most recent version of the web site by clicking on the CsharpGuitarBugs.zip file and saving it locally as shown in Figure 5.
Figure 5, download the lab buggy web site
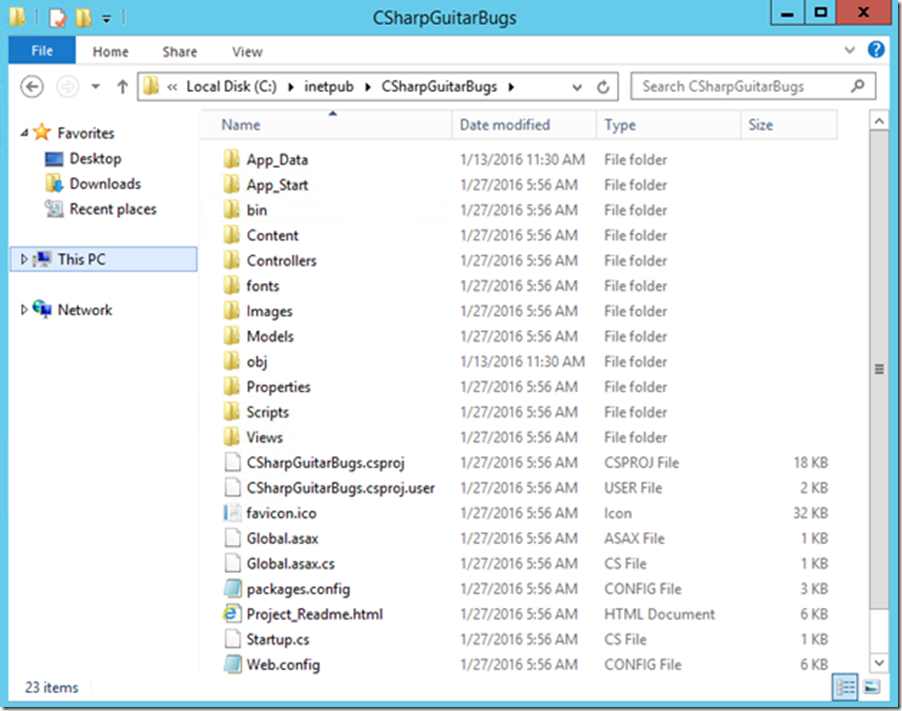
Then, place the contents into the c:\inetpud\CSharpGuitarBugs directory. When completed, you should have a structure similar to that shown in Figure 6.
Figure 6, IIS Lab MVC project structure
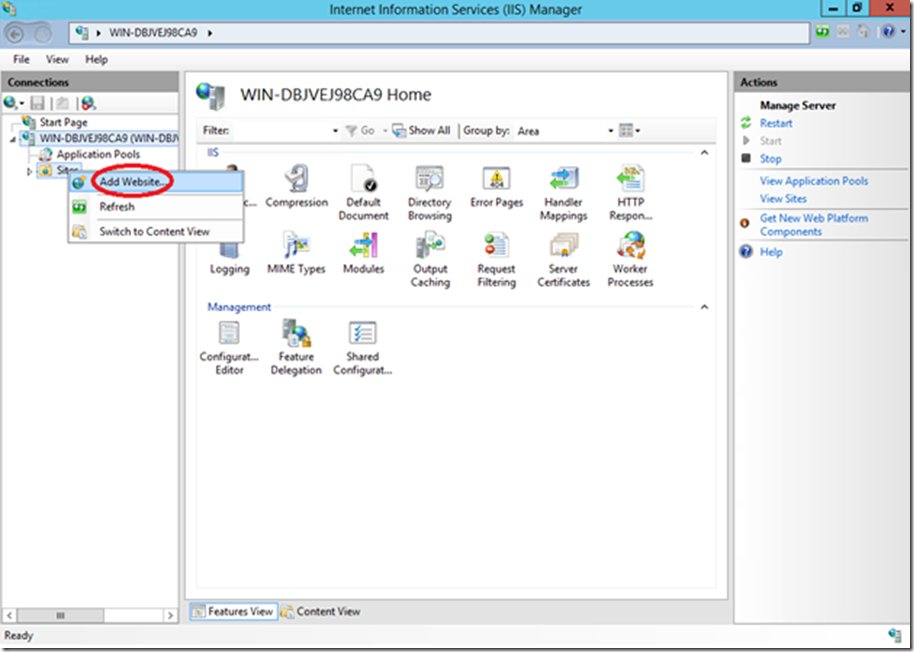
Open the IIS Management console, right-click on the Sites and select the Add Website… menu item, as shown in Figure 7.
Figure 7, add a web site to IIS , how to
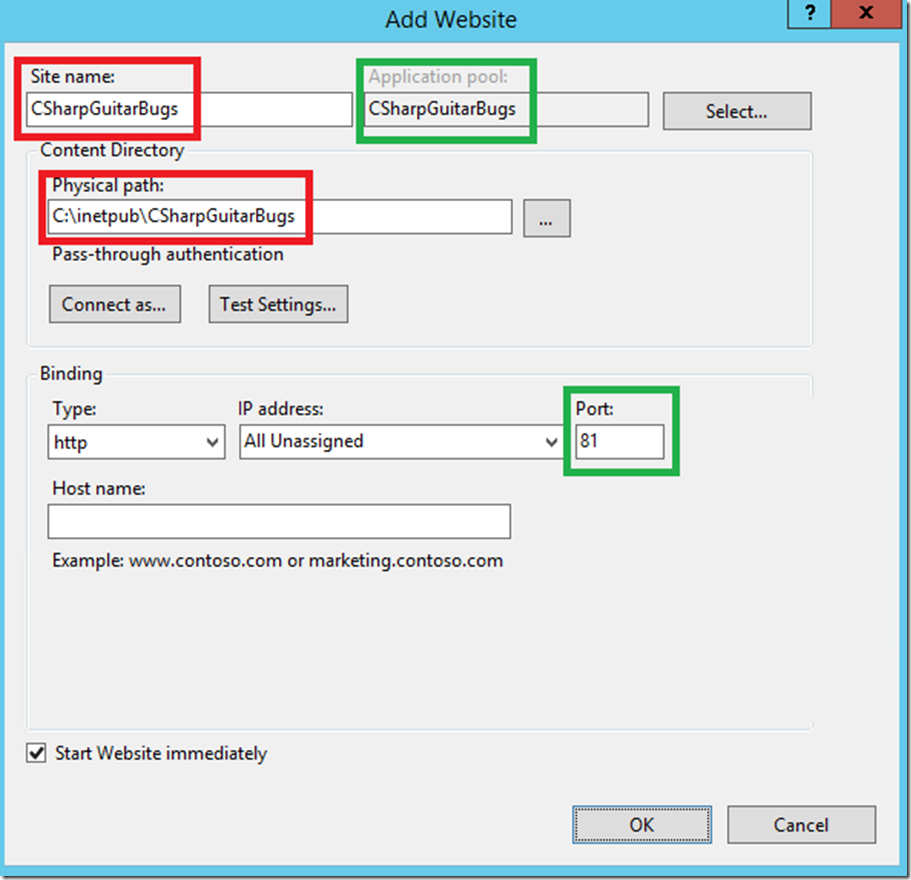
After clicking the Add Website… menu item, a window as shown in Figure 8 is rendered.
Figure 8, adding the required information to create a web site in IIS
The requirements of the web site are:
- Site name - The name of the web site
- Physical path - The location where the actual web site code is located. This can be physically hosted on the server or mapped to a UNC drive, for example.
- Application pool - The name of the process container that runs your web site
- Binding – how a request is bound to a specific site on the web server
- Type - is either HTTP or HTTPS depending on if you have an SSL certificate enabled or not.
- IP Address – is set to All Unassigned by default. If you server has multiple IP addresses bound to it, you can make requests to the different IP addresses route to different web sites on the web server.
- Port – by default all HTTP traffic is routed to port 80 and HTTPS to port 443.
- Hostname – usually the ‚user friendly‘ name of the web server, some like www.contoso.com. If you have multiple domain names bound to the same web server, you can route the requests to the appropriate web site.
Q: Why is the port number changed to 81 in Figure 8? A: Because the Default Web Site is already using port 80. The ‚primary key‘ for a binding is IP:PORT or IP:PORT:Hostname.
Click the OK button and the web site is created.
If you try to open the CSharpGuitarBugs web site now, you will get either a 500.19 error or a Server Error in ‚/‘ Application Configuration Error, this is because the dependent .NET framework and ASP.NET MVC binaries are not yet installed. Please continue to Lab 2 – Install the Web Platform Installer, here, to complete the installation of the web site dependencies.
