How to map a naked domain to an Azure App Service
This article has been moved to its new home here: https://benperk.github.io/msdn/2017/2017-03-how-to-map-a-naked-domain-to-an-azure-app-service.html
A naked domain is one which has no WWW or subdomain before the actual domain name. For example, contoso.com is naked in contrast to www.contoso.com which is a standard internet address. I wrote this article some time ago and thought it was time for an upgrade, so here goes.
Also, check out these articles as well.
- How to redirect a WWW custom domain to a naked domain
- HTTPS only on Azure App Service Web Apps
- Mapping a custom domain name to an Azure App Service
- How to reduce downtime when moving a custom domain between Azure Web Apps
- How to get a static (incoming) IP address for your Azure App Service Web App
As seen in Figure 1, after mapping the www domain, if you try to then access the naked domain, you will get a 404. A question I thought about was, hey, if I want to redirect requests to the naked domain and not allow the www prefix, why enable it at all. The reason is that most people still put the prefix, and if you did not configure or support it, the people would not get to your site and go someplace else.
Figure 1, 404 when access custom domain in Azure
The steps to map the naked custom domain to an Azure App Service include:
- Navigate to the Custom domains blade in the Azure Management Portal
- Validate the custom naked domain
- Create an A Record and a TXT Record
- Confirm, validate and refresh
Let’s get started.
Navigate to the Custom domains blade in the Azure Management Portal
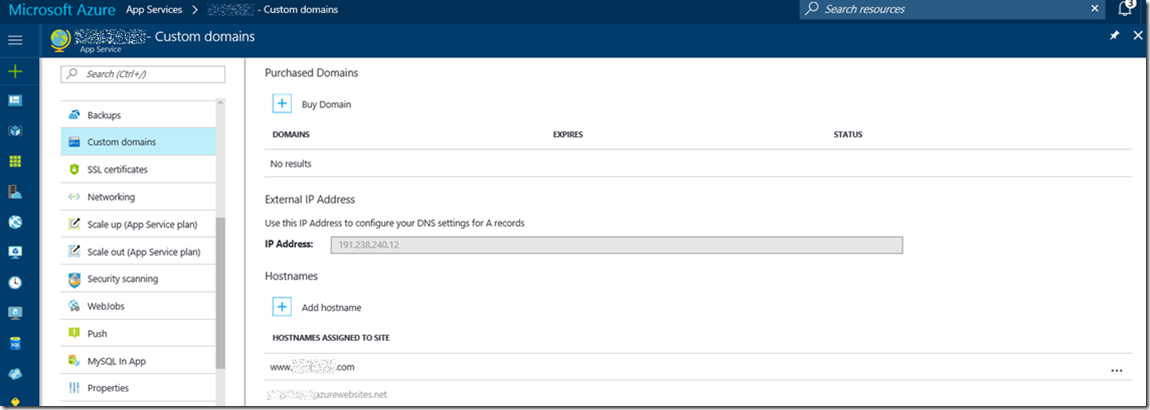
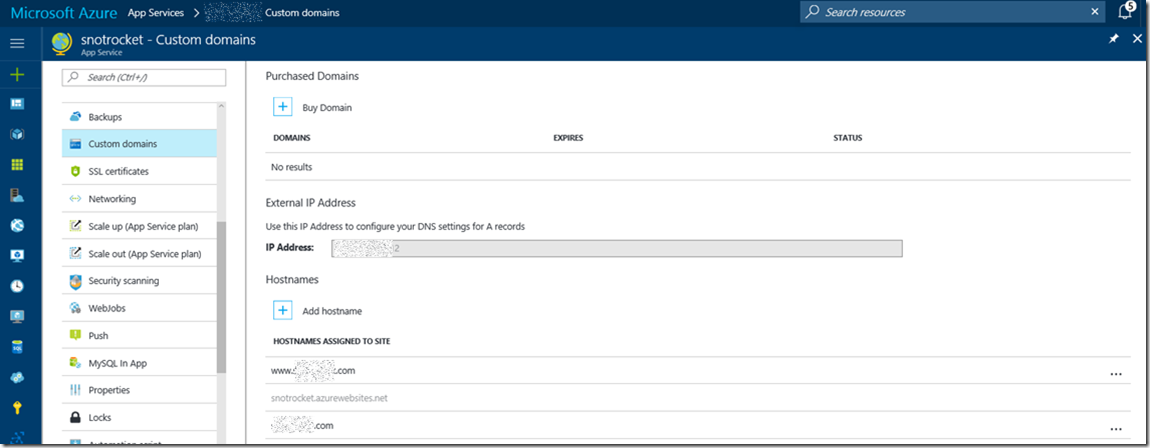
As seen in Figure 2, navigate to the App Service where you want to configure the naked domain, then click the Custom domain link.
Figure 2, configure custom domains in Azure App Service
Click on the Add hostname link, then move to the next section.
Validate the custom naked domain
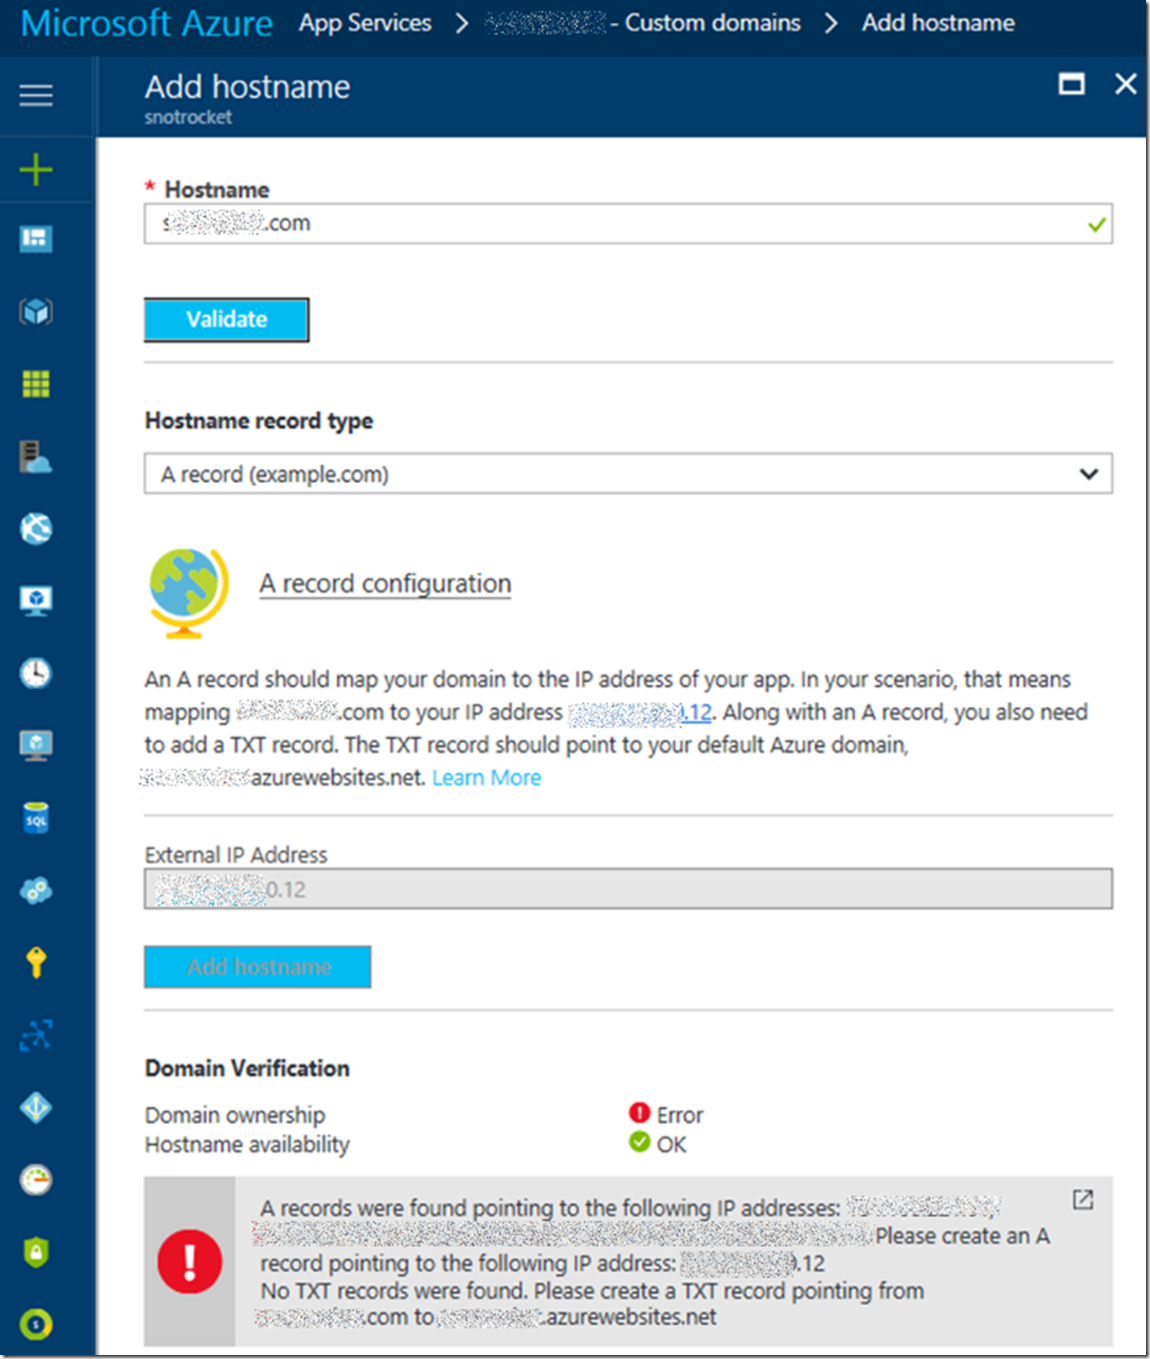
Once the blade opens, enter the naked domain and click the validate button as shown in Figure 3.
Figure 3, configure custom domains in Azure App Service
You will need an A record pointing to the Virtual IP of the scale unit where your Azure App Service exists. You will see this in Figure 3 as well. Open another browser tab or window and access your DNS provider management console and add both the A Record and the TXT Record as described in the message seen in Figure 3.
Create an A Record and a TXT Record
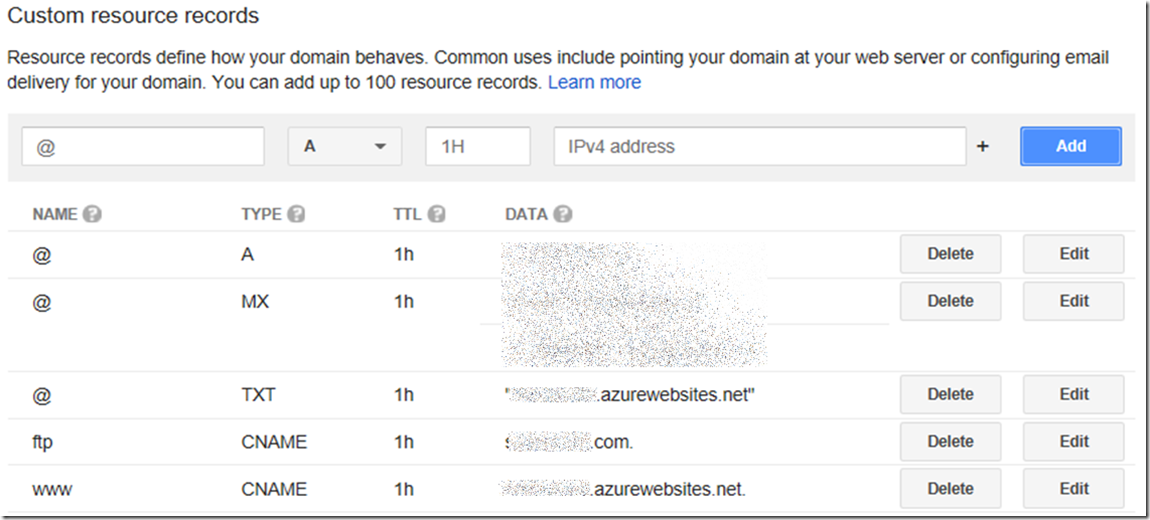
The would look something similar to that shown in Figure 4.
Figure 4, configure custom domains in Azure App Service, A Record and a TXT record
Confirm, validate and refresh
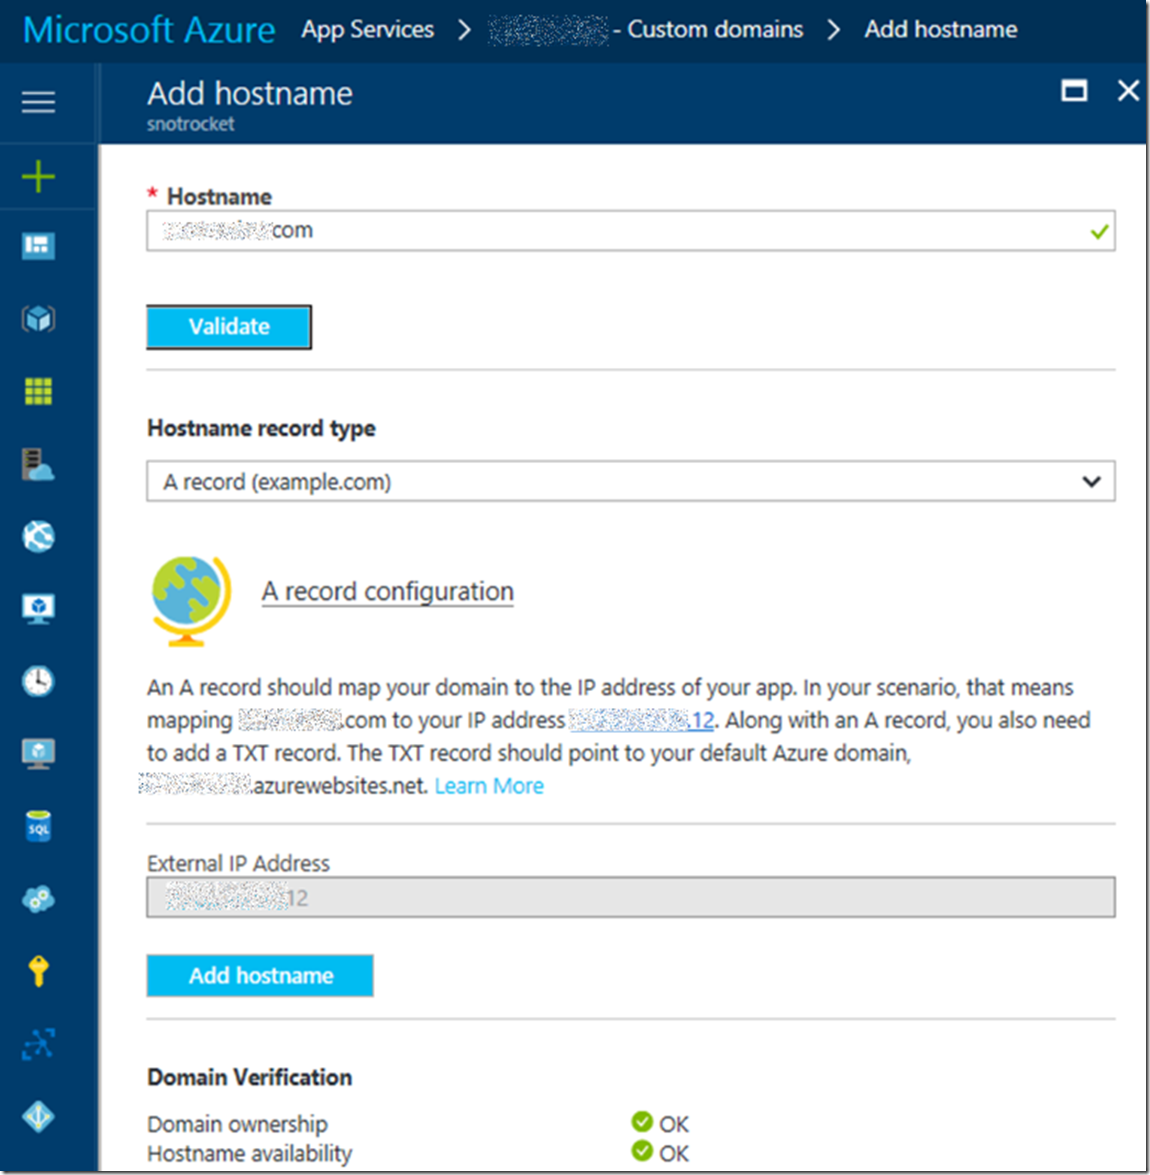
Once the A Record and TXT Record are configured at your DNS provider, go back to the Azure Management Console and click the Validate button again. As seen in Figure 5, once validated the check marks next tot Domain Ownership and Hostname Availability are green, which means success.
Figure 5, configure custom domains in Azure App Service, validate
Lastly, click on the Add hostname button also shown in Figure 5 to add the naked domain to the Azure App Service. Once complete, navigate back to the Custom domain blade and you will see the naked domain in the list of Hostnames Assigned to Site, as seen in Figure 6.
Figure 6, configure custom domains in Azure App Service, validate
Finally, access the naked domain by entering the hostname with www or any other sub-domain and you should access the web site, instead of getting the 404 as shown in Figure 1.
See the list of articles below for information about that and how to map other types of custom domains to your Azure Web App.

