Creating a 3D model for 3D App Launcher
Bored about the classic 2D tile for representing you Windows Mixed Reality app in the Cliff House? Go to the next level:
Use a 3D model that characterizes and differentiates your app!
Here is a summary of the steps to achieve this.
1. Make your model ready for Windows Mixed Reality
From your favorite apps/tools, export a 3D model as glTF 2.0with the .glb extension (As an exemple, I took a model from 3D Remix and exported it by Paint 3D)
⚠ The model must have less than 10k triangles. If you get a red cross instead of the 3D Launcher, this could be the root cause
Download the WindowsMRAssetConverter.exe from the glTF-Toolkit on gitHub - https://github.com/Microsoft/glTF-Toolkit/releases
Simply use the WindowsMRAssetConverter.exe tool with your model (.glb file) as parameter:
2. Add your converted model as content to the App project
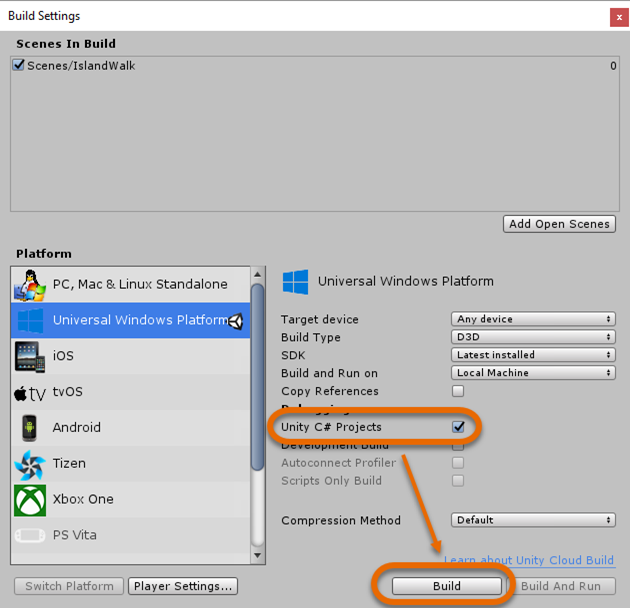
- Build your Windows Mixed Reality project from Unity generating the Visual Studio C# Solution

- Open the built Windows Mixed Reality C# solution in Visual Studio. Right click on the UWP project in the SOLUTION EXPLORER window and choose ADD / EXISTING ITEM…

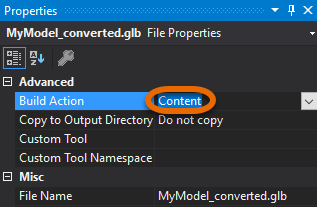
- Make sure that the BUILD ACTION for the added .glb file is set to CONTENT

3. Use your converted model in the App manifest
- Open the Package.appxmanifest with a text editor (or right click on it in Visual Studio and then VIEW CODE)
- Add the uap5 schema in the Package item at the begining of the file:
xmlns:uap5="https://schemas.microsoft.com/appx/manifest/uap/windows10/5"
- Also add uap5 in the IgnorableNamespaces list:
IgnorableNamespaces="uap uap2 uap5 mp"
The Package.appxmanifest file will start like the following:

- Modify the DefaultTile element to integrate a uap5:MixedRealityModel element like:
<uap5:MixedRealityModel Path="MyModel_converted.glb"/>
The entire uap:DefaultTile element will look like this

4. Build and deploy the app for testing
- Build your UWP project either in x86 or x64
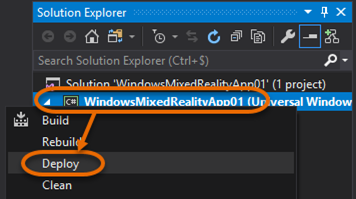
- Lastly, deploy the app to the local machine (Right click on the project in SOLUTION EXPLORER and then DEPLOY;

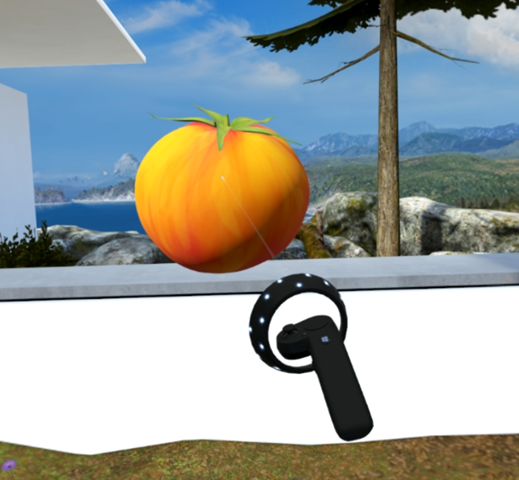
Here is the result when we place the App tile in the Cliff House 🎊🎉 (Tomato model from Remix 3D )

Happy 3D App Launcher modeling 😉
@sbovo for the 💻 🎮 Windows AppConsult team.
References
- 3D Model testing for using in Windows Mixed Reality Home - https://medium.com/\@sbovo/3d-model-testing-for-using-in-windows-mixed-reality-home-768d38867aed
- Implementing 3D app launchers - https://developer.microsoft.com/en-us/windows/mixed-reality/implementing_3d_app_launchers
- 3D app launcher design guidance - https://developer.microsoft.com/en-us/windows/mixed-reality/3d_app_launcher_design_guidance
- Windows Mixed Reality | Creating 3D App Launchers for Windows Mixed Reality - https://www.youtube.com/watch?v=TxIslHsEXno
- #ifdef 3D_LAUNCHERS | glTF TOOLKIT - https://www.youtube.com/watch?v=DYcrBo9S83k
- glTF - https://github.com/KhronosGroup/glTF/blob/master/README.md#converters-and-exporters