Scenario: Web API calling Web API (On Behalf Of Scenario)
Learn how to build a Web API calling another Web API On Behalf Of the user.
Before reading this article, you should be familiar with the AD FS concepts and On-Behalf_Of flow
Overview
A client (Web App) - not represented on the diagram below - calls a protected Web API and provides a JWT bearer token in its "Authorization" Http header.
The protected Web API validates the token and uses the MSAL AcquireTokenOnBehalfOf method to request (from AD FS) another token so that it can, itself, call a second web API (named the downstream web API) on behalf of the user.
The protected web API uses this token to call a downstream API. It can also call AcquireTokenSilentlater to request tokens for other downstream APIs (but still on behalf of the same user). AcquireTokenSilent refreshes the token when needed.

To better understand how to configure on behalf of auth scenario in AD FS, let's use a sample available here and walkthrough the app registration and code configuration steps.
Pre-requisites
- GitHub client tools
- AD FS 2019 or later configured and running
- Visual Studio 2013 or later
App Registration in AD FS
This section shows how to register the Native App as a public client and Web APIs as Relying Parties (RP) in AD FS
In AD FS Management, right-click on Application Groups and select Add Application Group.
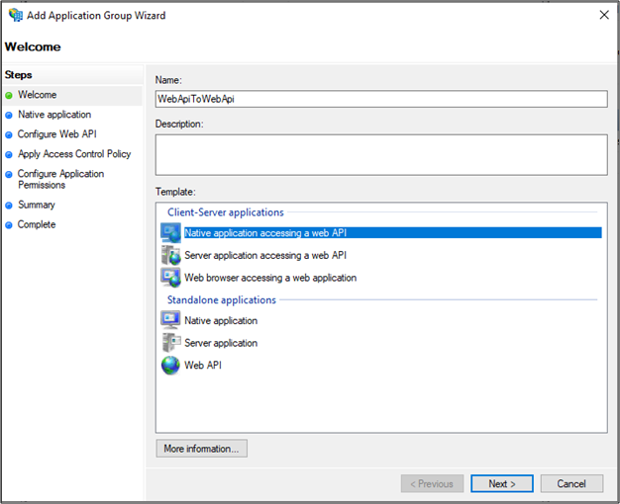
On the Application Group Wizard, for the Name enter WebApiToWebApi and under Client-Server applications select the Native application accessing a Web API template. Click Next.
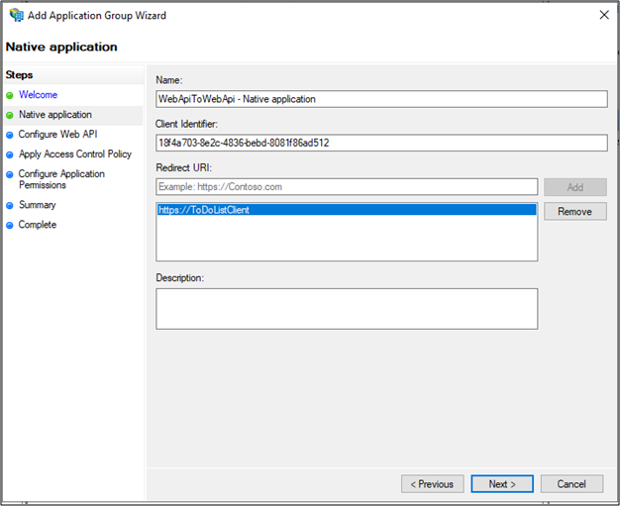
Copy the Client Identifier value. It will be used later as the value for ClientId in the application's App.config file. Enter the following for Redirect URI: - https://ToDoListClient. Click Add. Click Next.
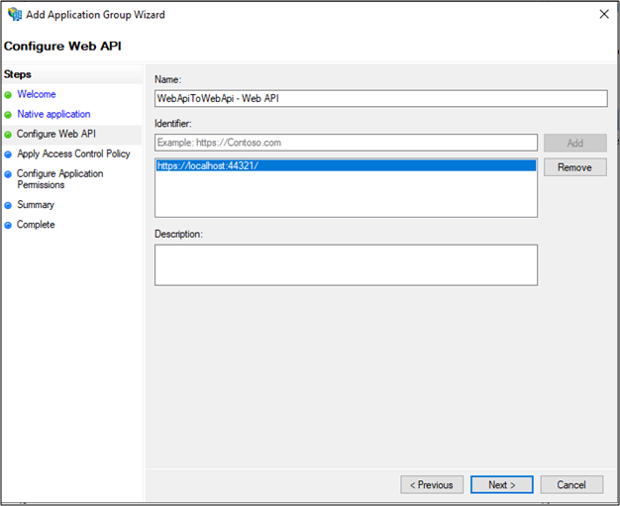
On the Configure Web API screen, enter the Identifier: https://localhost:44321/. Click Add. Click Next. This value will be used later in the application's App.config and Web.Config files.
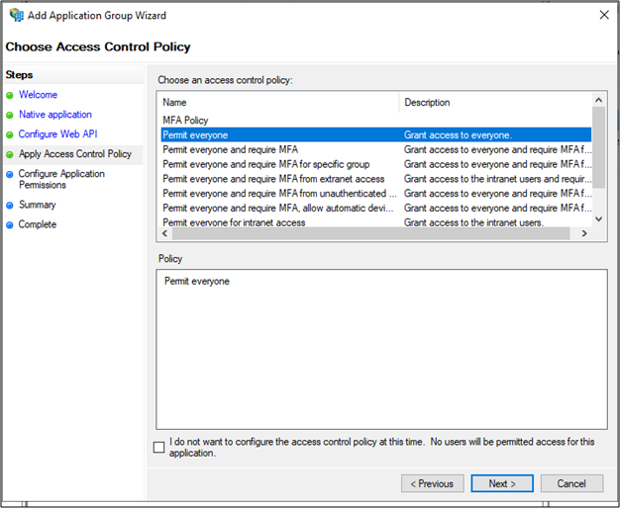
On the Apply Access Control Policy screen, select Permit everyone and click Next.
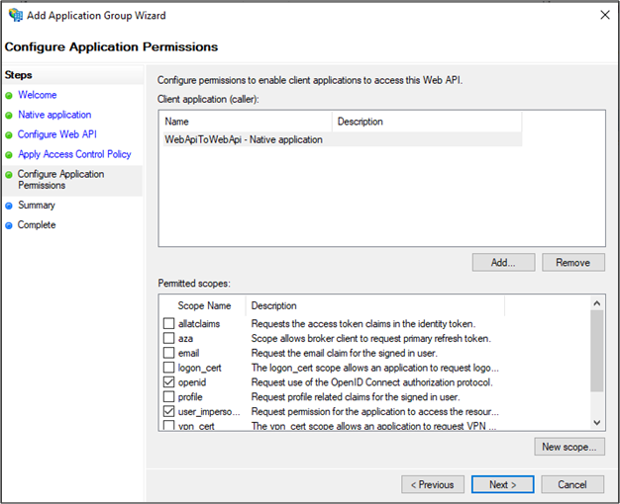
On the Configure Application Permissions screen, select openid and user_impersonation. Click Next.
On the Summary screen, click Next.
On the Complete screen, click Close.
In AD FS Management, click on Application Groups and select WebApiToWebApi application group. Right-click and select Properties.
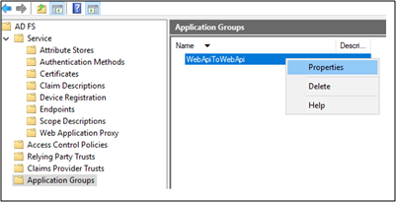
On WebApiToWebApi properties screen, click Add application….
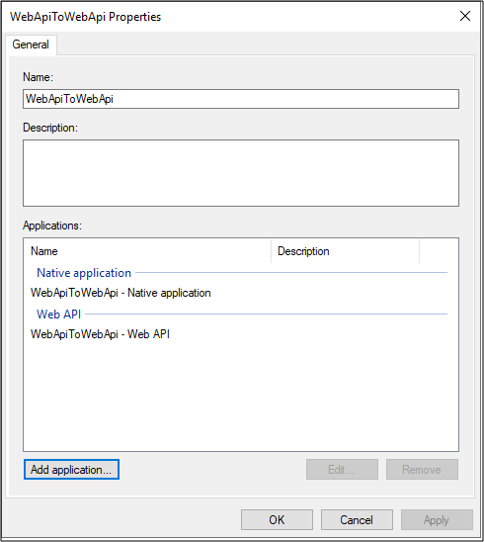
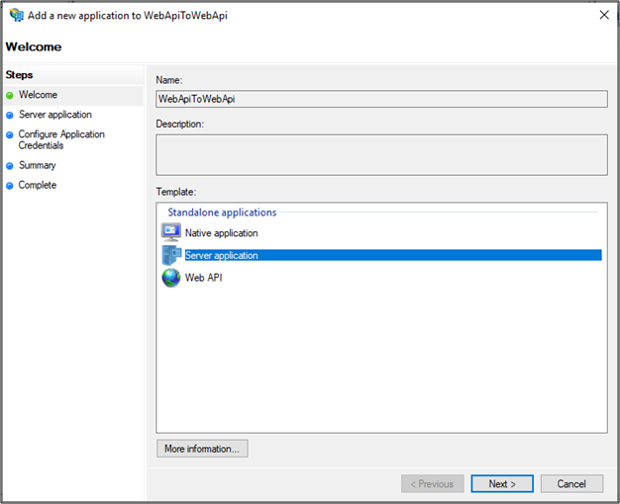
Under Standalone applications, select Server application.
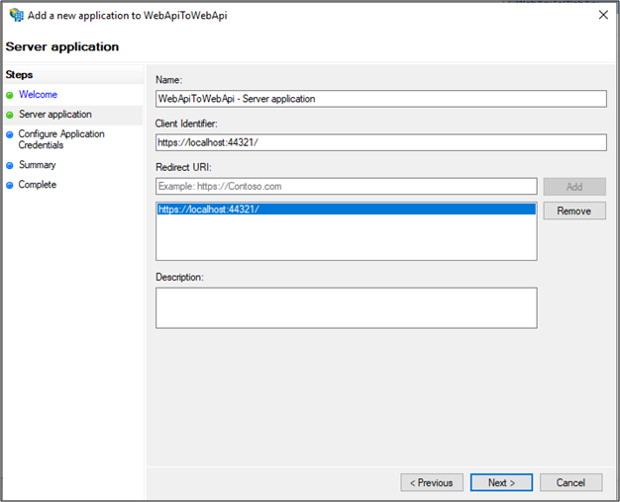
On Server Application screen, add https://localhost:44321/ as the Client Identifier and Redirect URI.
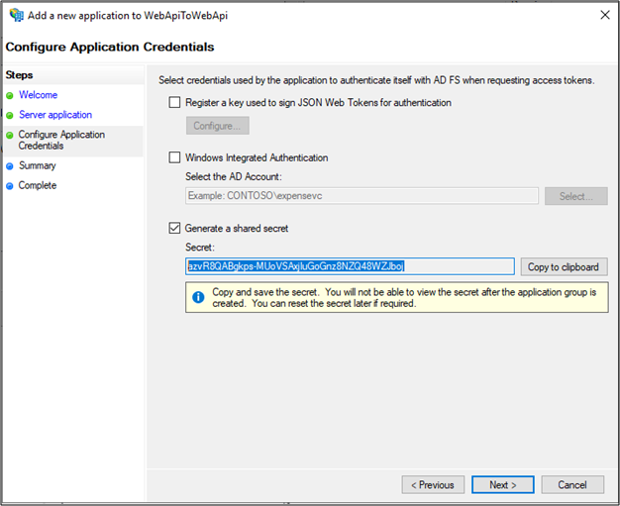
On Configure Application Credentials screen, select Generate a shared secret. Copy the secret for later use.
On the Summary screen, click Next.
On the Complete screen, click Close.
In AD FS Management, click on Application Groups and select WebApiToWebApi application group. Right-click and select Properties.
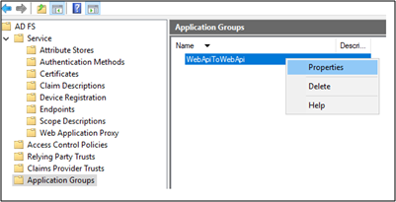
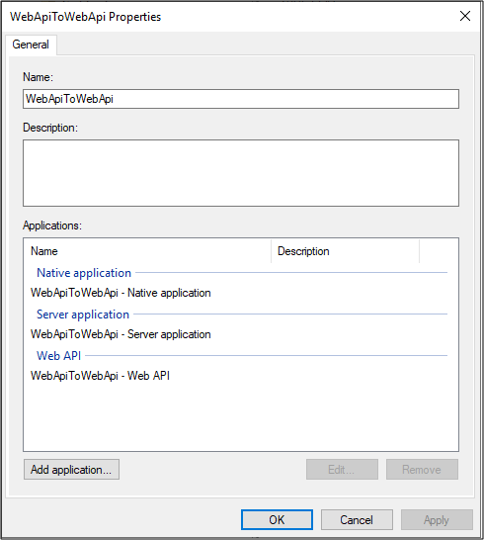
On WebApiToWebApi properties screen, click Add application….
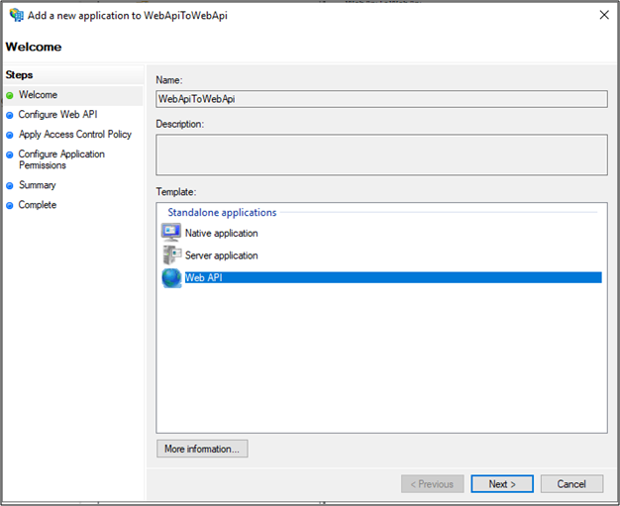
Under Standalone applications, select Web API.
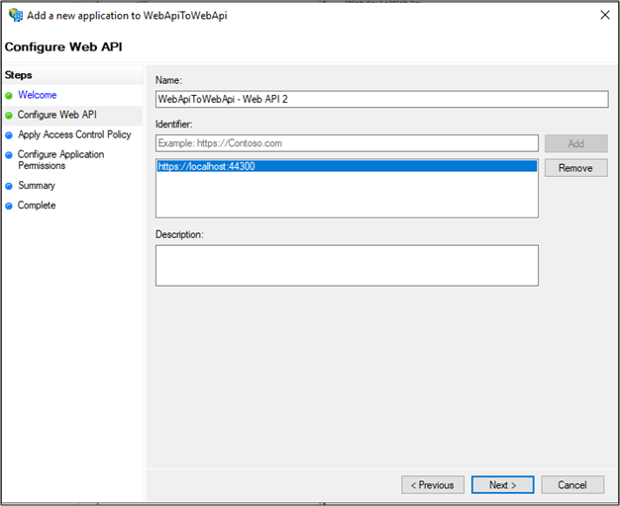
On Configure Web API, add https://localhost:44300 as the Identifier.
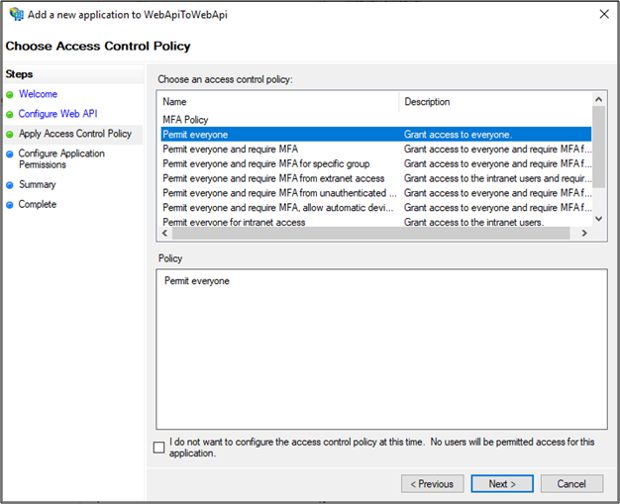
On the Apply Access Control Policy screen, select Permit everyone and click Next.
On the Configure Application Permissions screen, click Next.
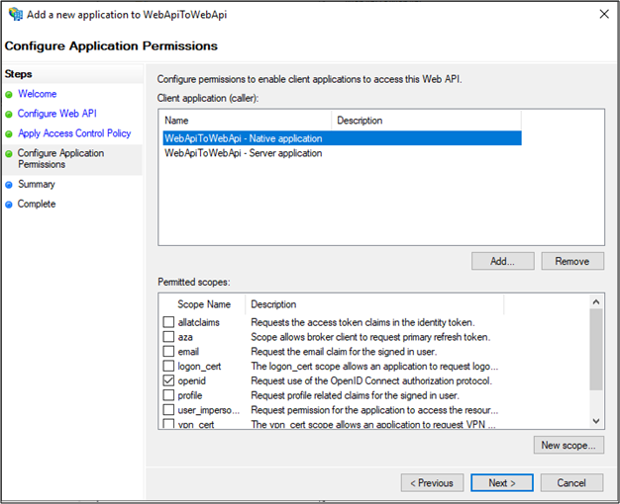
On the Summary screen, click Next.
On the Complete screen, click Close.
Click OK on WebApiToWebApi – Web API 2 Properties screen
On WebApiToWebApi Properties screen, select WebApiToWebApi – Web API and click Edit….
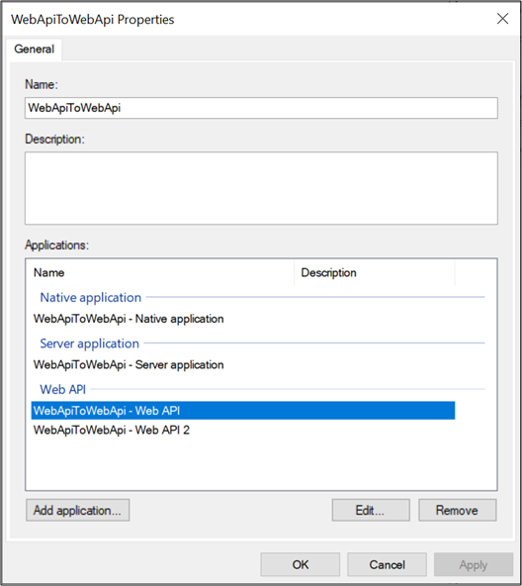
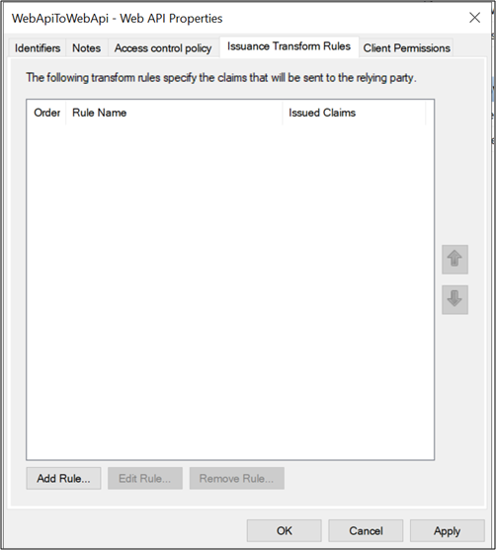
On WebApiToWebApi – Web API Properties screen, select Issuance Transform Rules tab and click Add Rule….
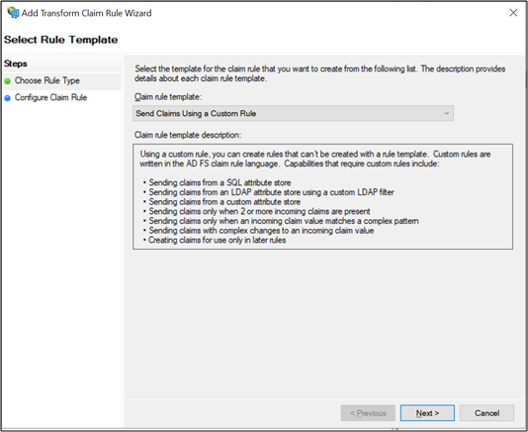
On Add Transform Claim Rule Wizard, select Send Claims Using a Custom Rule from dropdown and click Next.
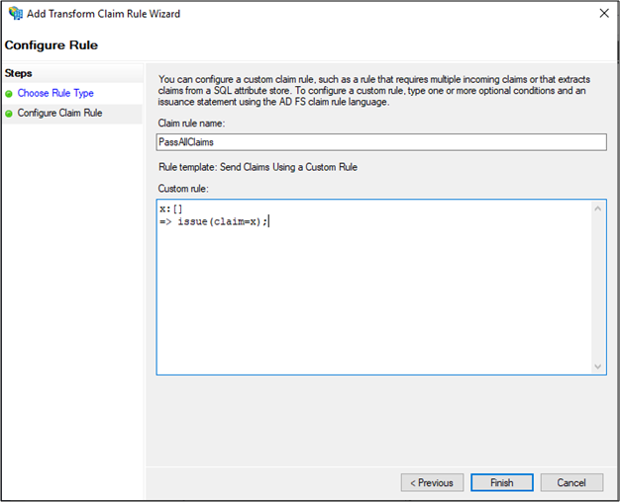
Enter PassAllClaims in Claim rule name: field and x:[] => issue(claim=x); claim rule in Custom rule: field and click Finish.
Click OK on WebApiToWebApi – Web API Properties screen
On WebApiToWebApi Properties screen, select select WebApiToWebApi – Web API 2 and click Edit…
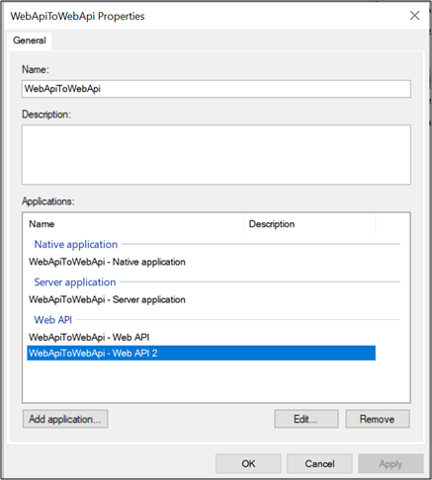
On WebApiToWebApi – Web API 2 Properties screen, select Issuance Transform Rules tab and click Add Rule…
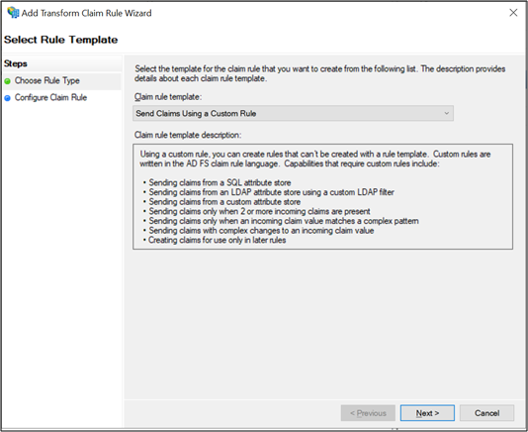
On Add Transform Claim Rule Wizard, select Send Claims Using a Custom Rule from dropdown and click Next
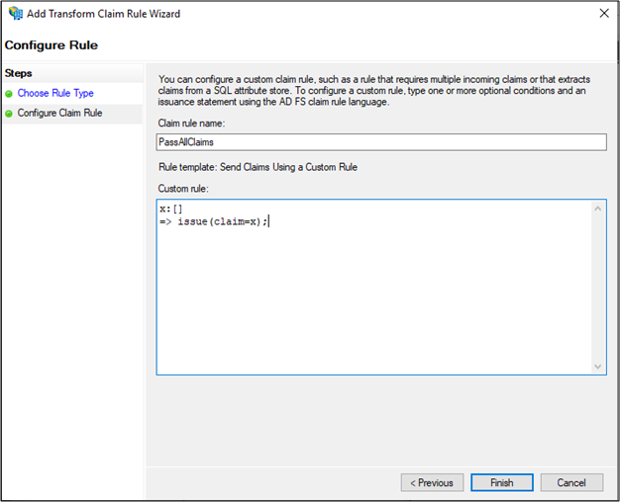
Enter PassAllClaims in Claim rule name: field and x:[] => issue(claim=x); claim rule in Custom rule: field and click Finish.
Click OK on WebApiToWebApi – Web API 2 Properties screen and then on WebApiToWebApi Properties screen.
Code Configuration
This section shows how to configure a Web API to call another Web API
Download the sample from here
Open the sample using Visual Studio
Open the App.config file. Modify the following:
ida:Authority - enter https://[your AD FS hostname]/adfs/
ida:ClientId - enter the value from #3 in App Registration in AD FS section above.
ida:RedirectUri - enter the value from #3 in App Registration in AD FS section above.
todo:TodoListResourceId – enter the Identifier value from #4 in App Registration in AD FS section above
ida: todo:TodoListBaseAddress - enter the Identifier value from #4 in App Registration in AD FS section above.
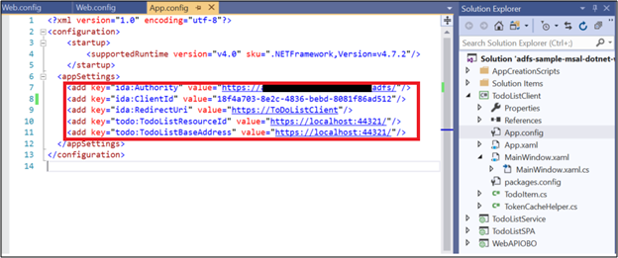
Open the Web.config file under ToDoListService. Modify the following:
ida:Audience - enter the Client Identifier value from #12 in App Registration in AD FS section above
ida:ClientId - enter the Client Identifier value from #12 in App Registration in AD FS section above.
Ida: ClientSecret - enter the shared secret copied from #13 in App Registration in AD FS section above.
ida:RedirectUri - enter the RedirectUri value from #12 in App Registration in AD FS section above.
ida: AdfsMetadataEndpoint - enter https://[your AD FS hostname]/federationmetadata/2007-06/federationmetadata.xml
ida:OBOWebAPIBase - enter the Identifier value from #19 in App Registration in AD FS section above.
ida:Authority - enter https://[your AD FS hostname]/adfs
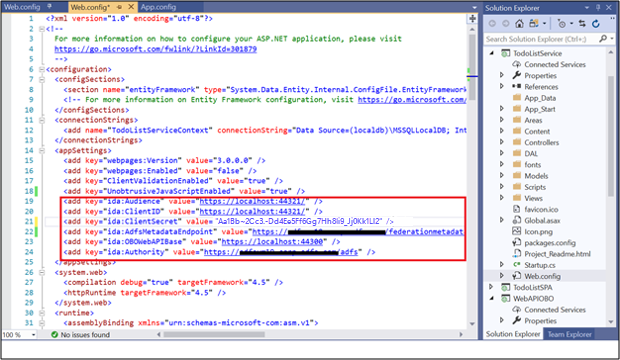
Open the Web.config file under WebAPIOBO. Modify the following:
ida: AdfsMetadataEndpoint - enter https://[your AD FS hostname]/federationmetadata/2007-06/federationmetadata.xml
ida:Audience - enter the Client Identifier value from #12 in App Registration in AD FS section above
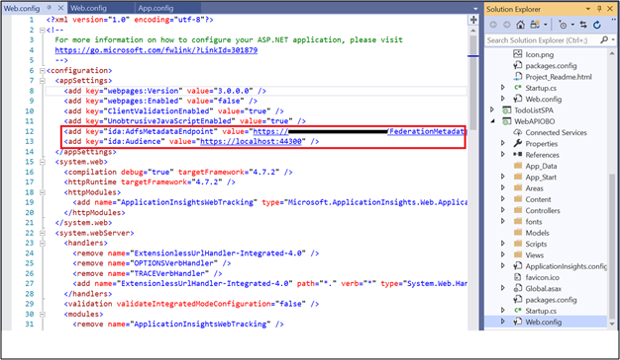
Test the sample
This section shows how to test the sample configured above.
Once the code changes are made rebuild the solution
On Visual Studio, right click on solution and select Set StartUp Projects…
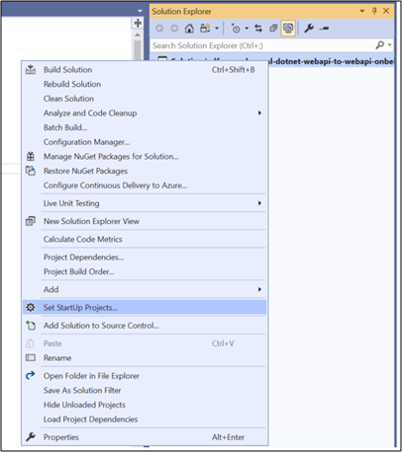
On the Properties pages make sure Action is set to Start for each of the Projects, except TodoListSPA.
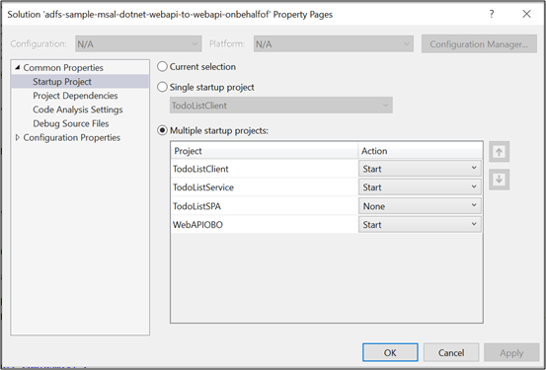
At the top of Visual Studio, click the green arrow.

On the Native App's Main Screen, click on Sign In.
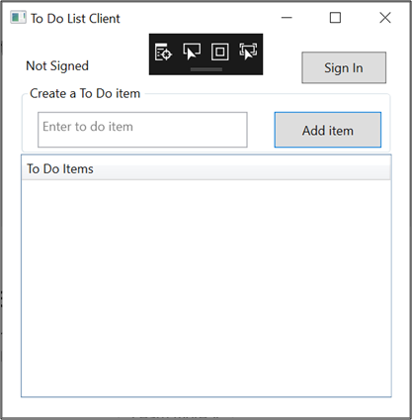
If you don't see the native app screen, search and remove *msalcache.bin files from the folder where project repo is saved on your system.
You will be re-directed to the AD FS sign-in page. Go ahead and sign in.
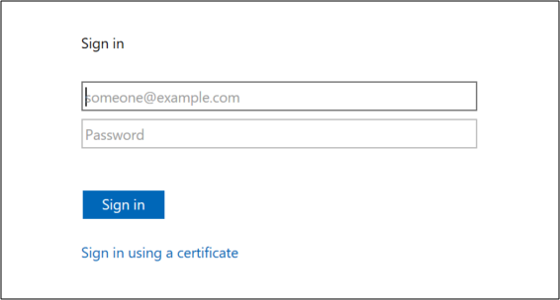
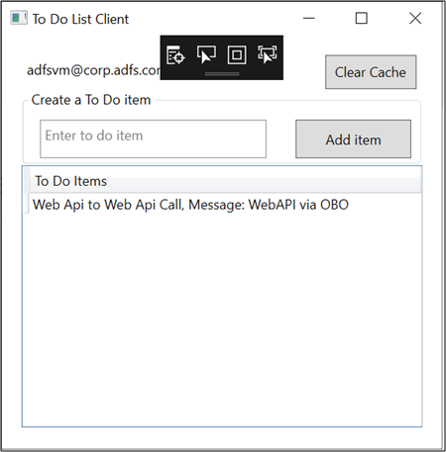
Once signed-in, enter text Web Api to Web Api Call in the Create a To Do item. Click Add item. This will call the Web API (To Do List Service) which then calls Web API 2 (WebAPIOBO) and adds the item in the cache.
