Import your organizational data
You can import employee information from non-Microsoft systems into Microsoft 365 for use in user profiles and in different Microsoft 365 apps, like Viva Insights. This information, called organizational data, is used together with information from Microsoft Entra ID (formerly Azure Active Directory). (For specifics on how the two sets of information work together, including which data takes precedence, see Data usage.)
To import your data, you populate a .csv template with the attributes (or information) about your users that you want to include and then upload the file through the Microsoft 365 admin center. Here are the steps to get started:
- Download a .csv template
- Structure the organizational data
- Import your organizational data for the first time
- Update or make other changes to your data
Step 1 - Download a .csv template
- Sign in to the Microsoft 365 admin center as a user with Global Admin permissions.
- On Organizational Data in Microsoft 365 page (under Setup > Migration and imports), select Get started (if this is the first time you're importing data) or New import.
- Select Download CSV template.
Note
You can also use organizational data exported from another system, such as your HR software, as your starting point, as described in Get an export of organizational data.
Step 2 - Structure the organizational data
Now that you have your .csv file starting point, add the organizational data that you want to use in Microsoft 365, and then save the file.
There are two types of attributes you can add in your organizational data file: required and reserved optional. Attributes can be in any order in the file.
- Required - The only attribute required by default is email address.
- Reserved - Attributes are reserved column headers for attributes that are currently used to calculate, filter, and group data.
Sample data file
Here's an example snippet of a valid .csv file:
Microsoft_PersonEmail,Microsoft_ManagerEmail,Microsoft_LevelDesignation,Microsoft_Organization,Microsoft_Layer,Microsoft_CompanyOfficeCity
Emp1@contoso.com,Mgr1@contoso.com,Junior IC,Sales,8,Seattle
Emp2@contoso.com,Mgr1@contoso.com,Junior IC,Sales,8,Seattle
Emp3@contoso.com,Mgr2@contoso.com,Manager,Sales,7,Seattle
Emp4@contoso.com,Mgr3@contoso.com,Support,Sales,9,New York
Emp5@contoso.com,Mgr3@contoso.com,Support,Sales,9,New York
Emp6@contoso.com,Mgr3@contoso.com,Support,Sales,9,New York
For more information about attributes, see the Attribute reference.
Step 3 - Import your organizational data for the first time
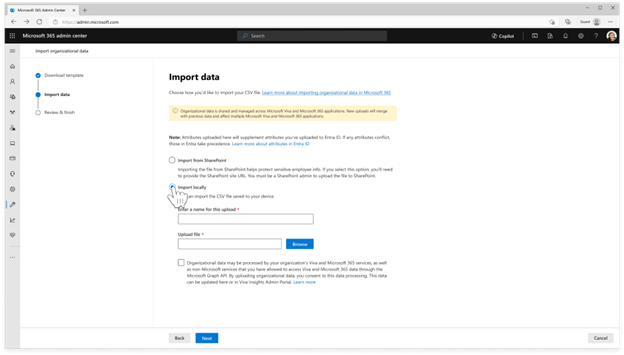
After you create a .csv file with your data, the next step is to import the data, either from your local files on your computer or from a SharePoint site.
Upload the .csv file from your local files on your computer
After you create the .csv file with your data, you can upload it directly from your local files on your computer.
Note
There's a 25 MB limit on files uploaded directly from your local files. If your .csv file is larger, upload it first to SharePoint and then import it from there.

Upload the .csv file from SharePoint
First you need to upload the file from your local computer to a secure SharePoint location; then you import the data.
Upload the file to SharePoint
Use the following steps to upload your data to SharePoint. Make sure that your SharePoint site has the right permissions and that only those that should be able to access the data can access the site. You can upload a file up to 5 Gb in size.
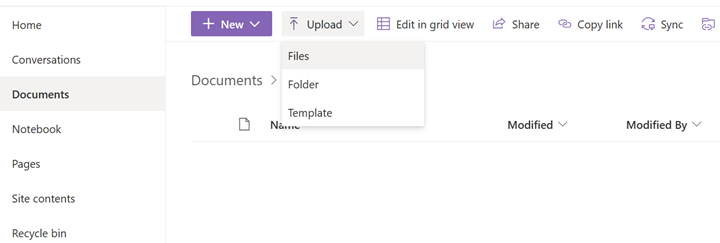
Open the SharePoint site library.
Select Upload, and then select Files.

Navigate to the location where you saved the .csv file, and then select Open.
You can also use drag and drop to upload the file.
Before you import the data into Viva, you need the path to the file on SharePoint, in this format: https://domain.sharepoint.com/sites/sitename/Documents/foldername/filename.csv. Use the following steps to get the path to your file - the path isn't the same as the URL that you see in your browser when you view the file.
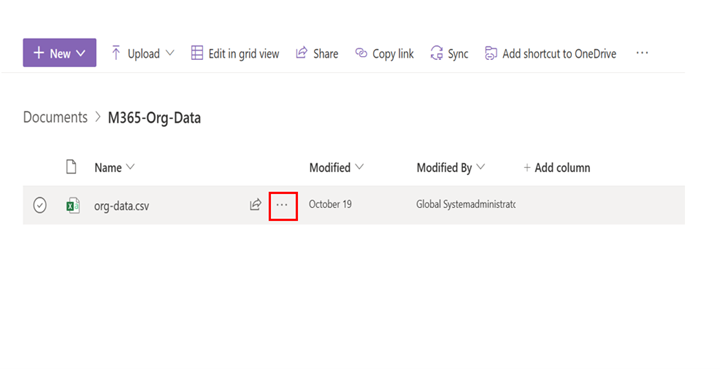
Select the ellipses (...) next to the file and then select Details.

Find the Path value, and then select the copy icon.
Note
Be sure to follow these steps to get the path to the file. This is a different path than what's visible in the URL field of a browser when you view the .csv file in SharePoint.
Import the data into Microsoft 365
Now you're ready to import the data.
- On the Organizational Data in Microsoft 365 page (under Setup > Migration and imports), select Get started (if this is the first time you're importing data) or New import.
- On the Import data from SharePoint page, enter the SharePoint location where you saved your .csv file. (If you copied the location at the end of the upload step, paste it here.)
- Confirm that you understand that the data you upload here may be processed by Viva and Microsoft 365, as well as non-Microsoft services that you've granted access to the data through Microsoft Graph. Select Next.
- Review the details for your upload, and then select Begin validation.
Your organizational data is validated against the requirements for use with Viva and Microsoft 365 services. Validation takes a few hours; however it can take up to three days for your complete data upload to be available in the profile store. You can check the validation status on the Organizational data page in the admin center. When the validation is complete, you see a message that your data is in use and managed by Viva and Microsoft 365.
Each end user's organizational data is stored in that end user's mailbox and respects the data residency rules for Exchange Online (as described in Data Residency for Exchange Online).
Step 4 - Update or make other changes to your data
Only the global admin can update or delete organizational data stored in the Microsoft 365 User Profile.
To update or delete an end user's organizational data, create and upload a new .csv file containing only the users whose data you want to update or delete.
- To update a value, include all of the attributes that you want to update. Provide a different value for any attribute that you want to change. If you include an attribute but don't provide a value (and don't set it to an empty string), the current value in the Microsoft 365 User Profile is used, and the value isn't updated. New uploads merge with previous data and don't overwrite that data.
- To delete a value, set the value for the attribute to an empty string by using two single quotes (''). (Set the Microsoft_Layer attribute "-1".) To delete all of the data for a user, enter the empty string or integer value for all of their attributes.
Note
If you use Excel to edit the .csv file, use three single quotes (''') instead of two ('')- Excel sees a single quote (') as the escape character.