Organization admin dashboard overview
To sign in to Viva Goals, visit https://goals.microsoft.com/.
You need to be an organization owner in Viva Goals to access the admin dashboard and manage organization settings.
Before configuring your organization, you can review the Get Started with Viva Goals learning path to get familiar with the following:
- The OKR framework
- How to write great OKRs
- Viva Goals software training
How to access and use the admin dashboard
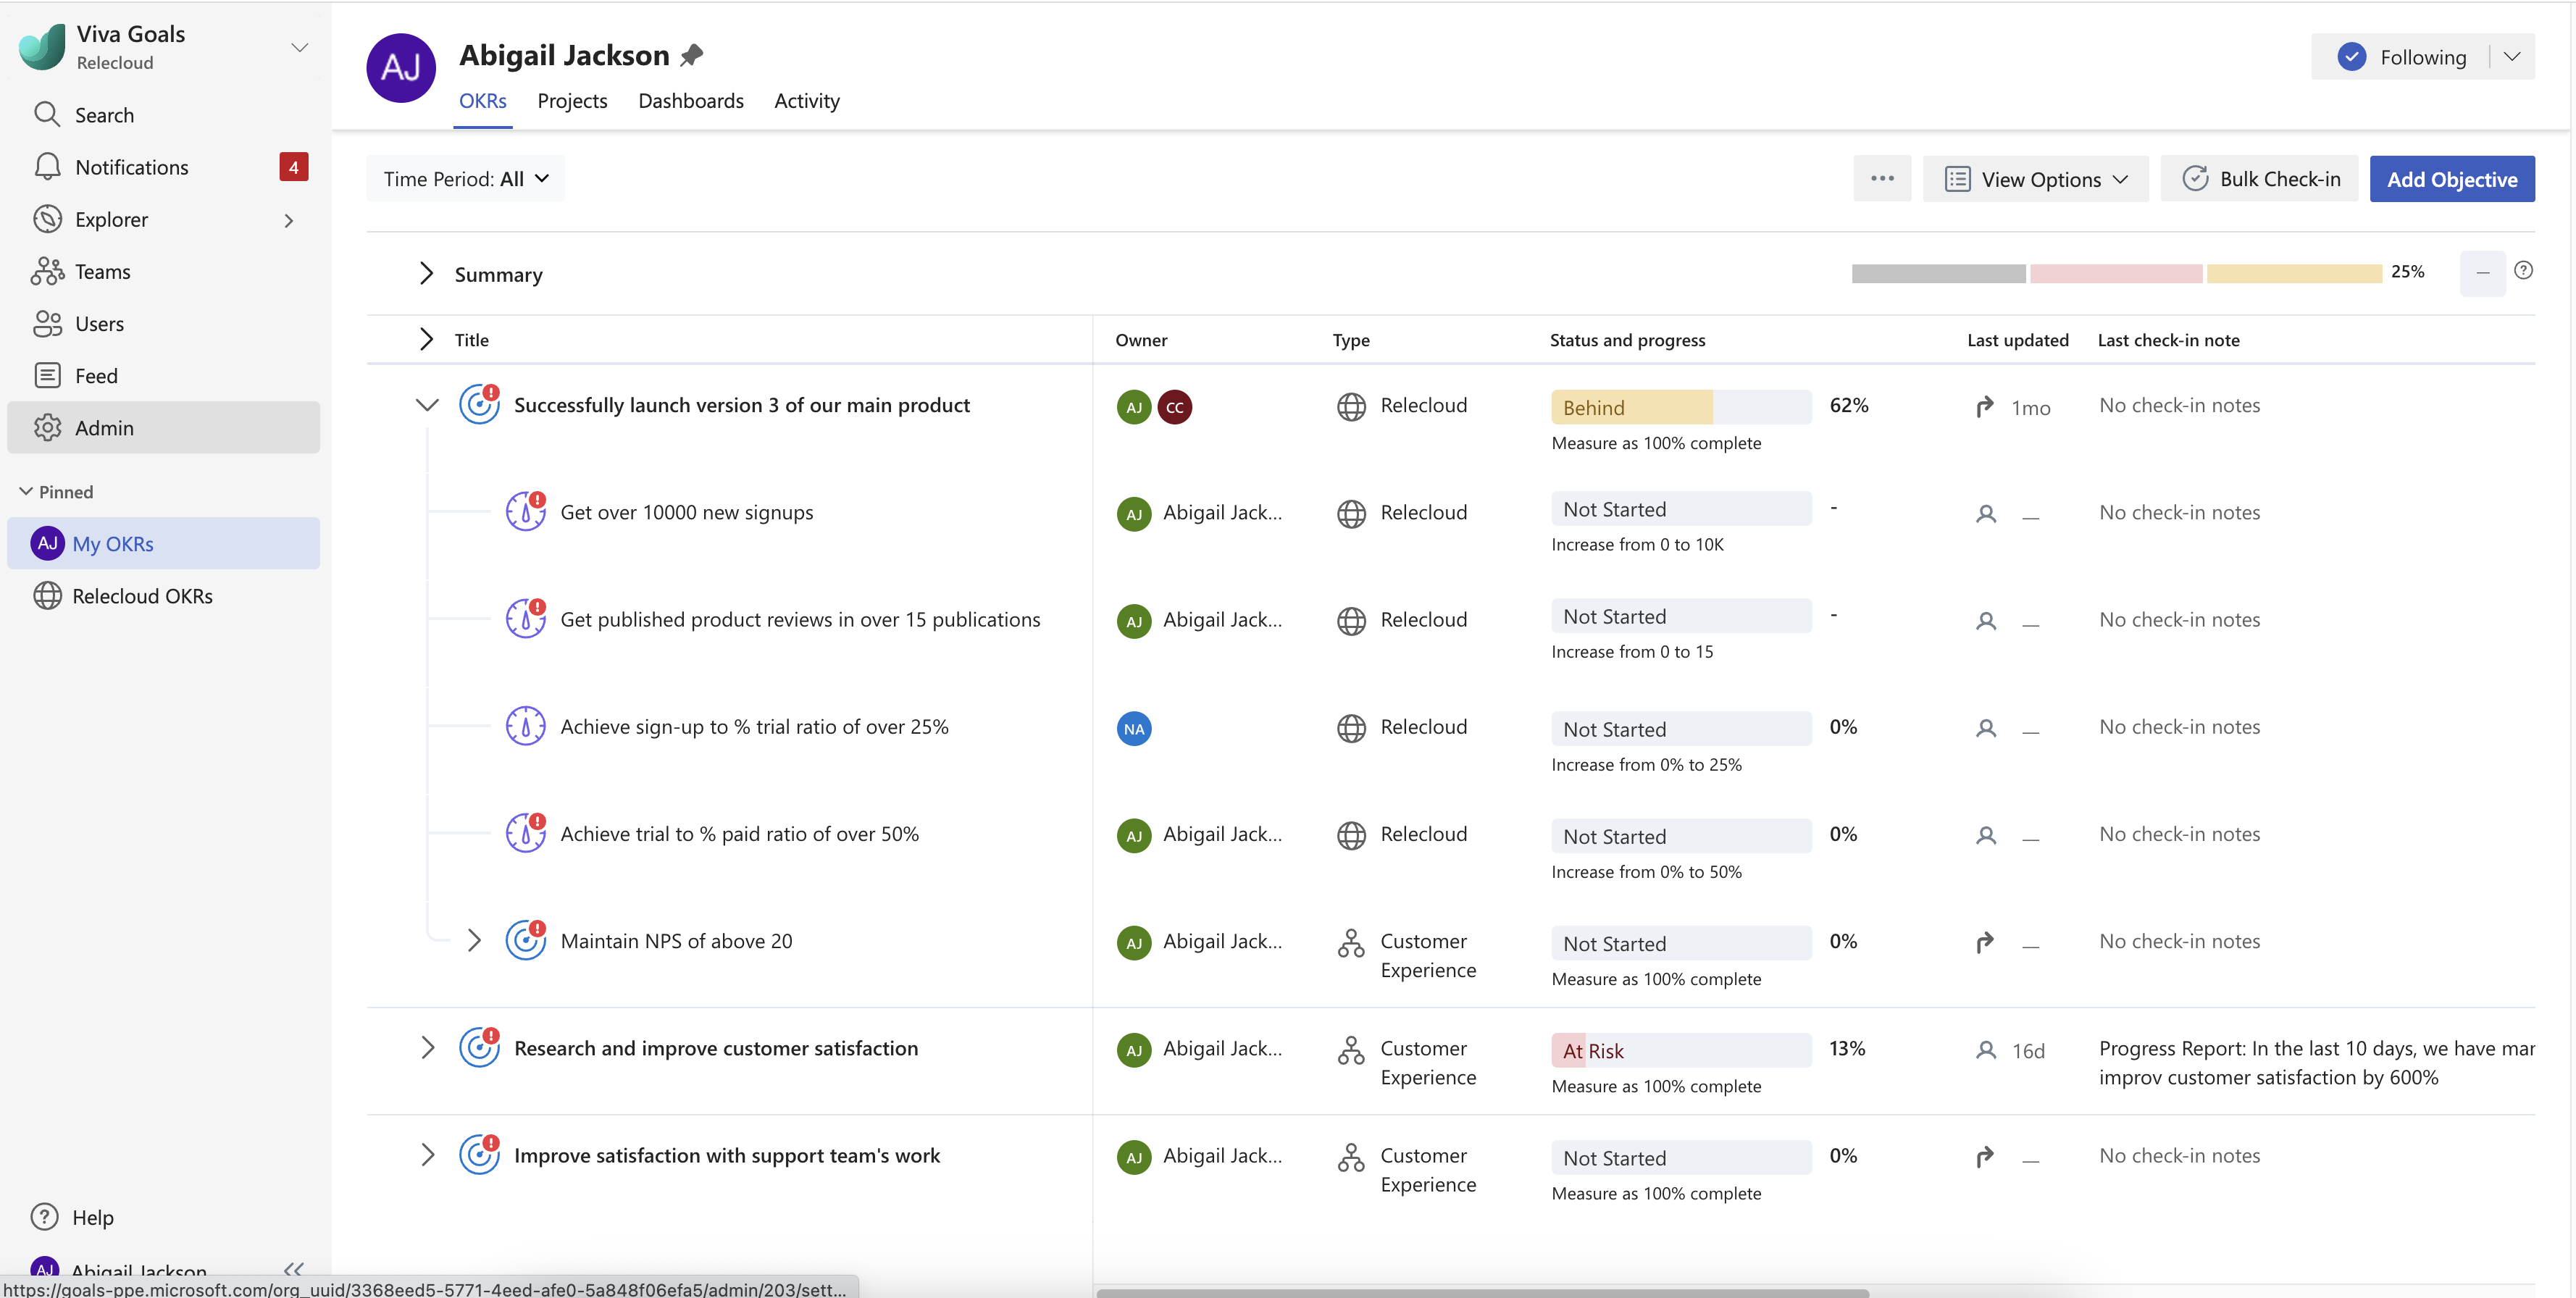
To access the Viva Goals admin dashboard, navigate to the left side panel and select Admin next to the gear icon.
Organization owners have access to settings in the admin dashboard to set up users, teams, time periods, notifications, integrations, OKRs, and initiatives.
Here are recommended first five steps for organization admins:
Navigate your settings in the admin dashboard and configure the instance according to your business rhythms.
Overview of the tabs in the admin dashboard
Settings
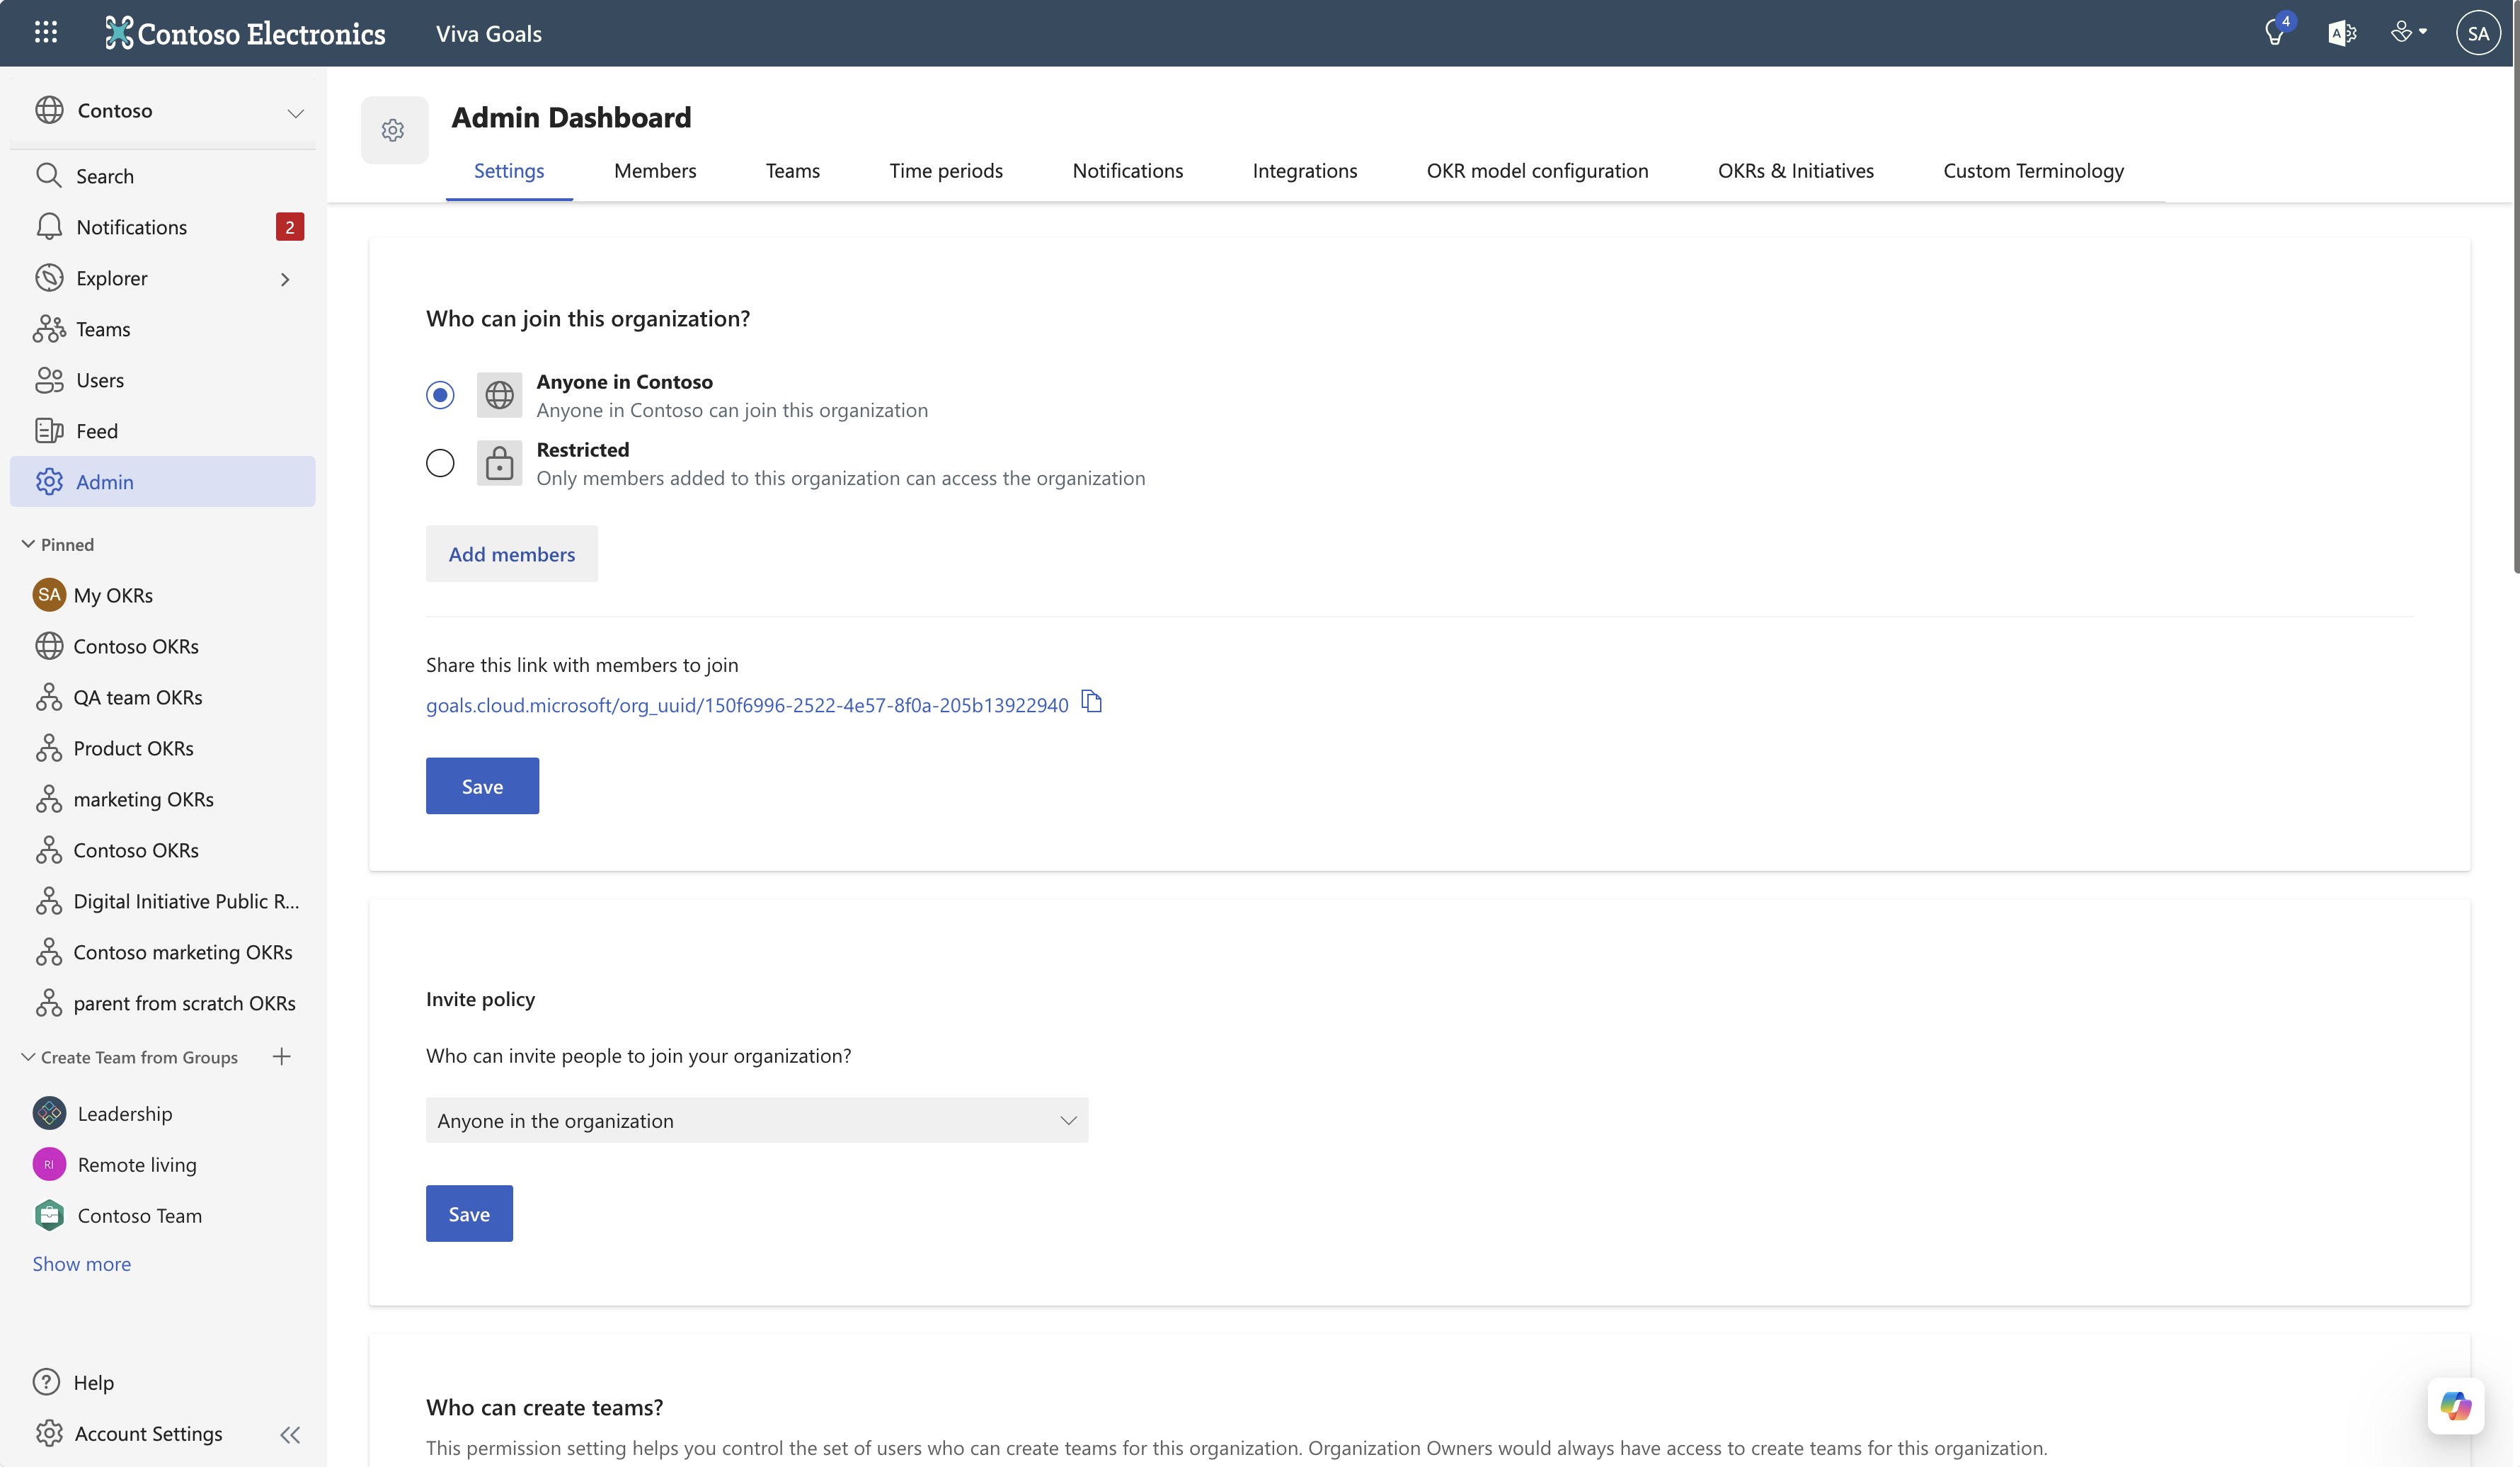
The Settings tab lets you control general settings related to the people and teams in your organization.
Who can join this organization? controls who is allowed to join your instance of Viva Goals and view your organization.
Invite policy controls who can add users to your Viva Goals instance.
Who can create teams? is a feature that allows you to segment your organization into different workgroups and then add employees to those groups in Viva Goals. These groups will own team-level OKRs, and this setting controls who can create teams. Using this permission setting, admins can control the users who can create teams within their organization. There are three options that can be used:
- Any regular user
- Only team owners
- Customized (Choose users and grant them access)
Note
By default for all the newly created organizations, the default permission setting for who can create teams would be set to 'Admins' and 'Team owners'. This option can be changed if needed.
Tag creation is a feature that allows you to categorize OKRs in buckets that you can later filter in a report.
Help and support lets you add custom help links and resources for your organizations.
Members
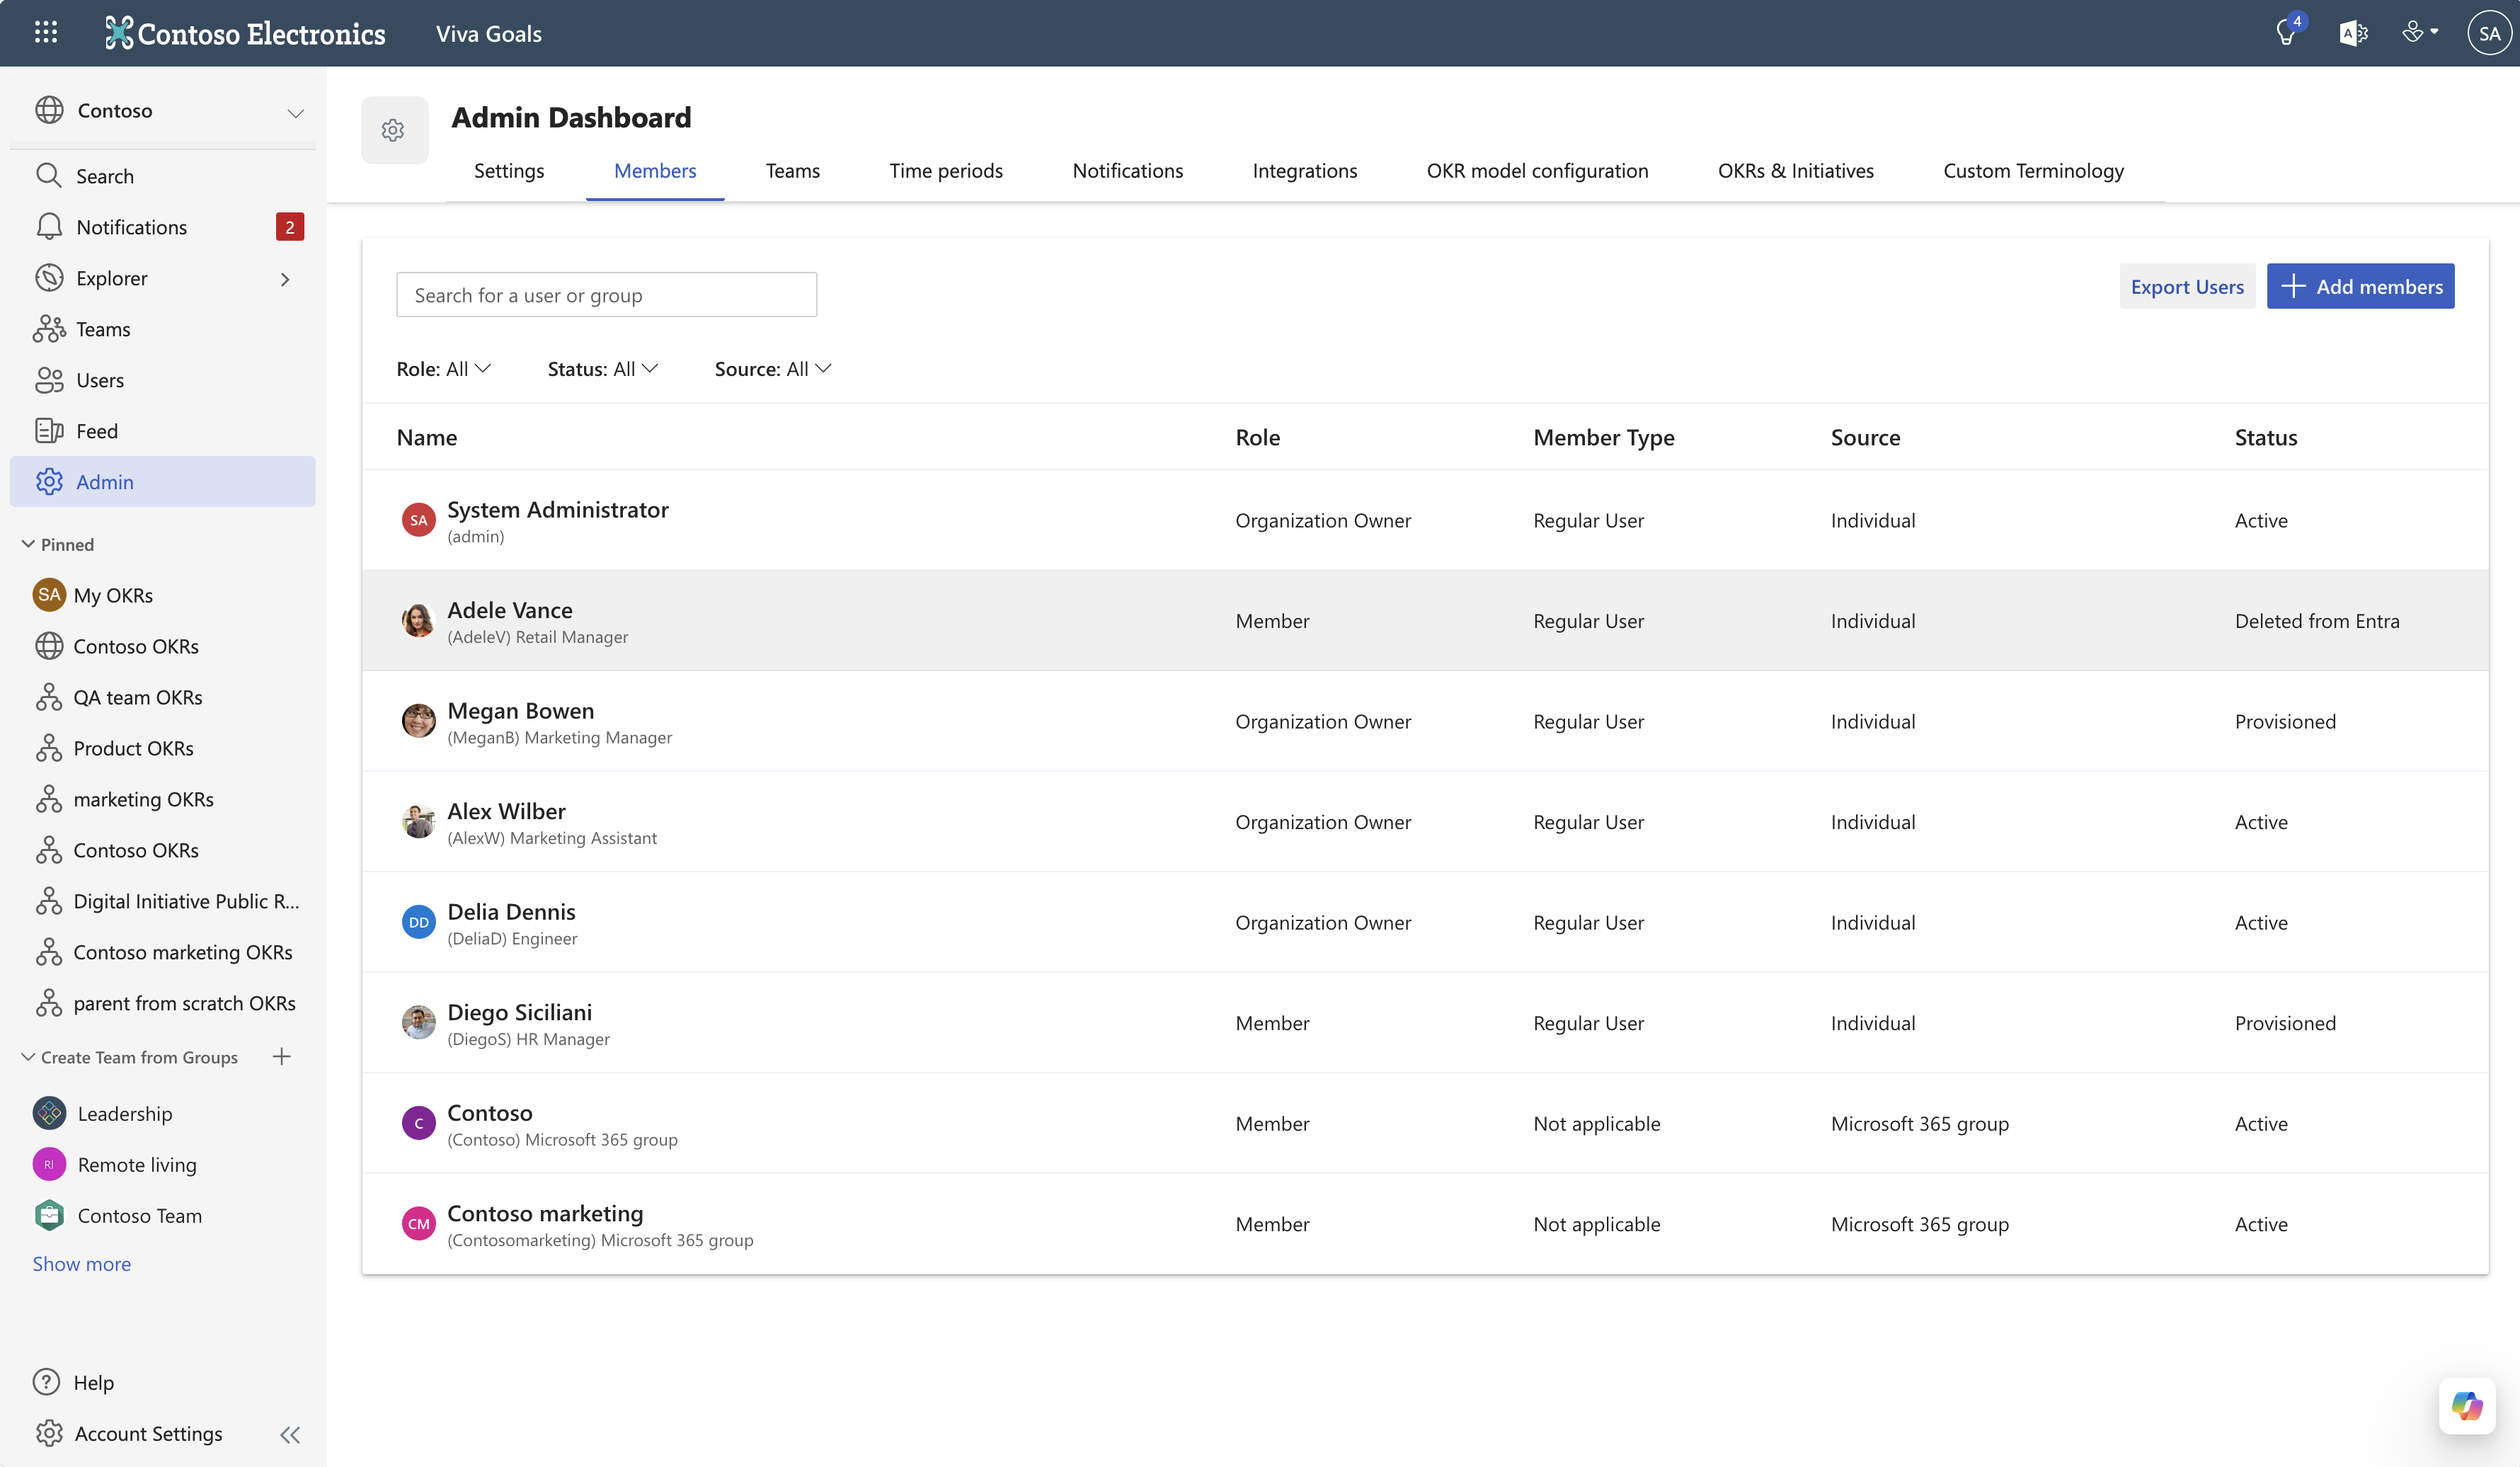
On the Members tab, you'll find a list of all the individuals that have been added to your instance. This page also serves as a report, as you can use the export button to download a CSV file with people information.
All of the information can be filtered using dropdown menus such as role, status, and source.
For example, you can find the active or deactivated users in your organization from the status filter.
As admin, you can use the action menu, marked by three dots, to modify the various settings.
- Deactivate locks a user out of Viva Goals. All their OKRs and historical information will remain, but they won't be able to log on. You might use this option for someone who has left the company. You can reactivate them if needed. You aren't billed for deactivated users.
- View profile lets you view basic information about the employee, such as their name, email, location, and the like.
- Make owner and Remove owner let you add or remove privileges for a user.
- Delete permanently deletes a user from the Viva Goals organization.
Teams
This tab shows all the teams that you've set up, plus the team owner and members. To add a new team, select the Add Team button. To modify team settings, select the ellipses next to a given team. Learn more at Create and edit teams.
Notifications
The Notifications tab lets you customize the notifications that are sent to employees. Notifications are a critical feature that helps drive the rhythm of the business. In a perfect world, every employee consistently checks in their OKRs. But we know from experience that sometimes it takes a little nudge.
Integrations
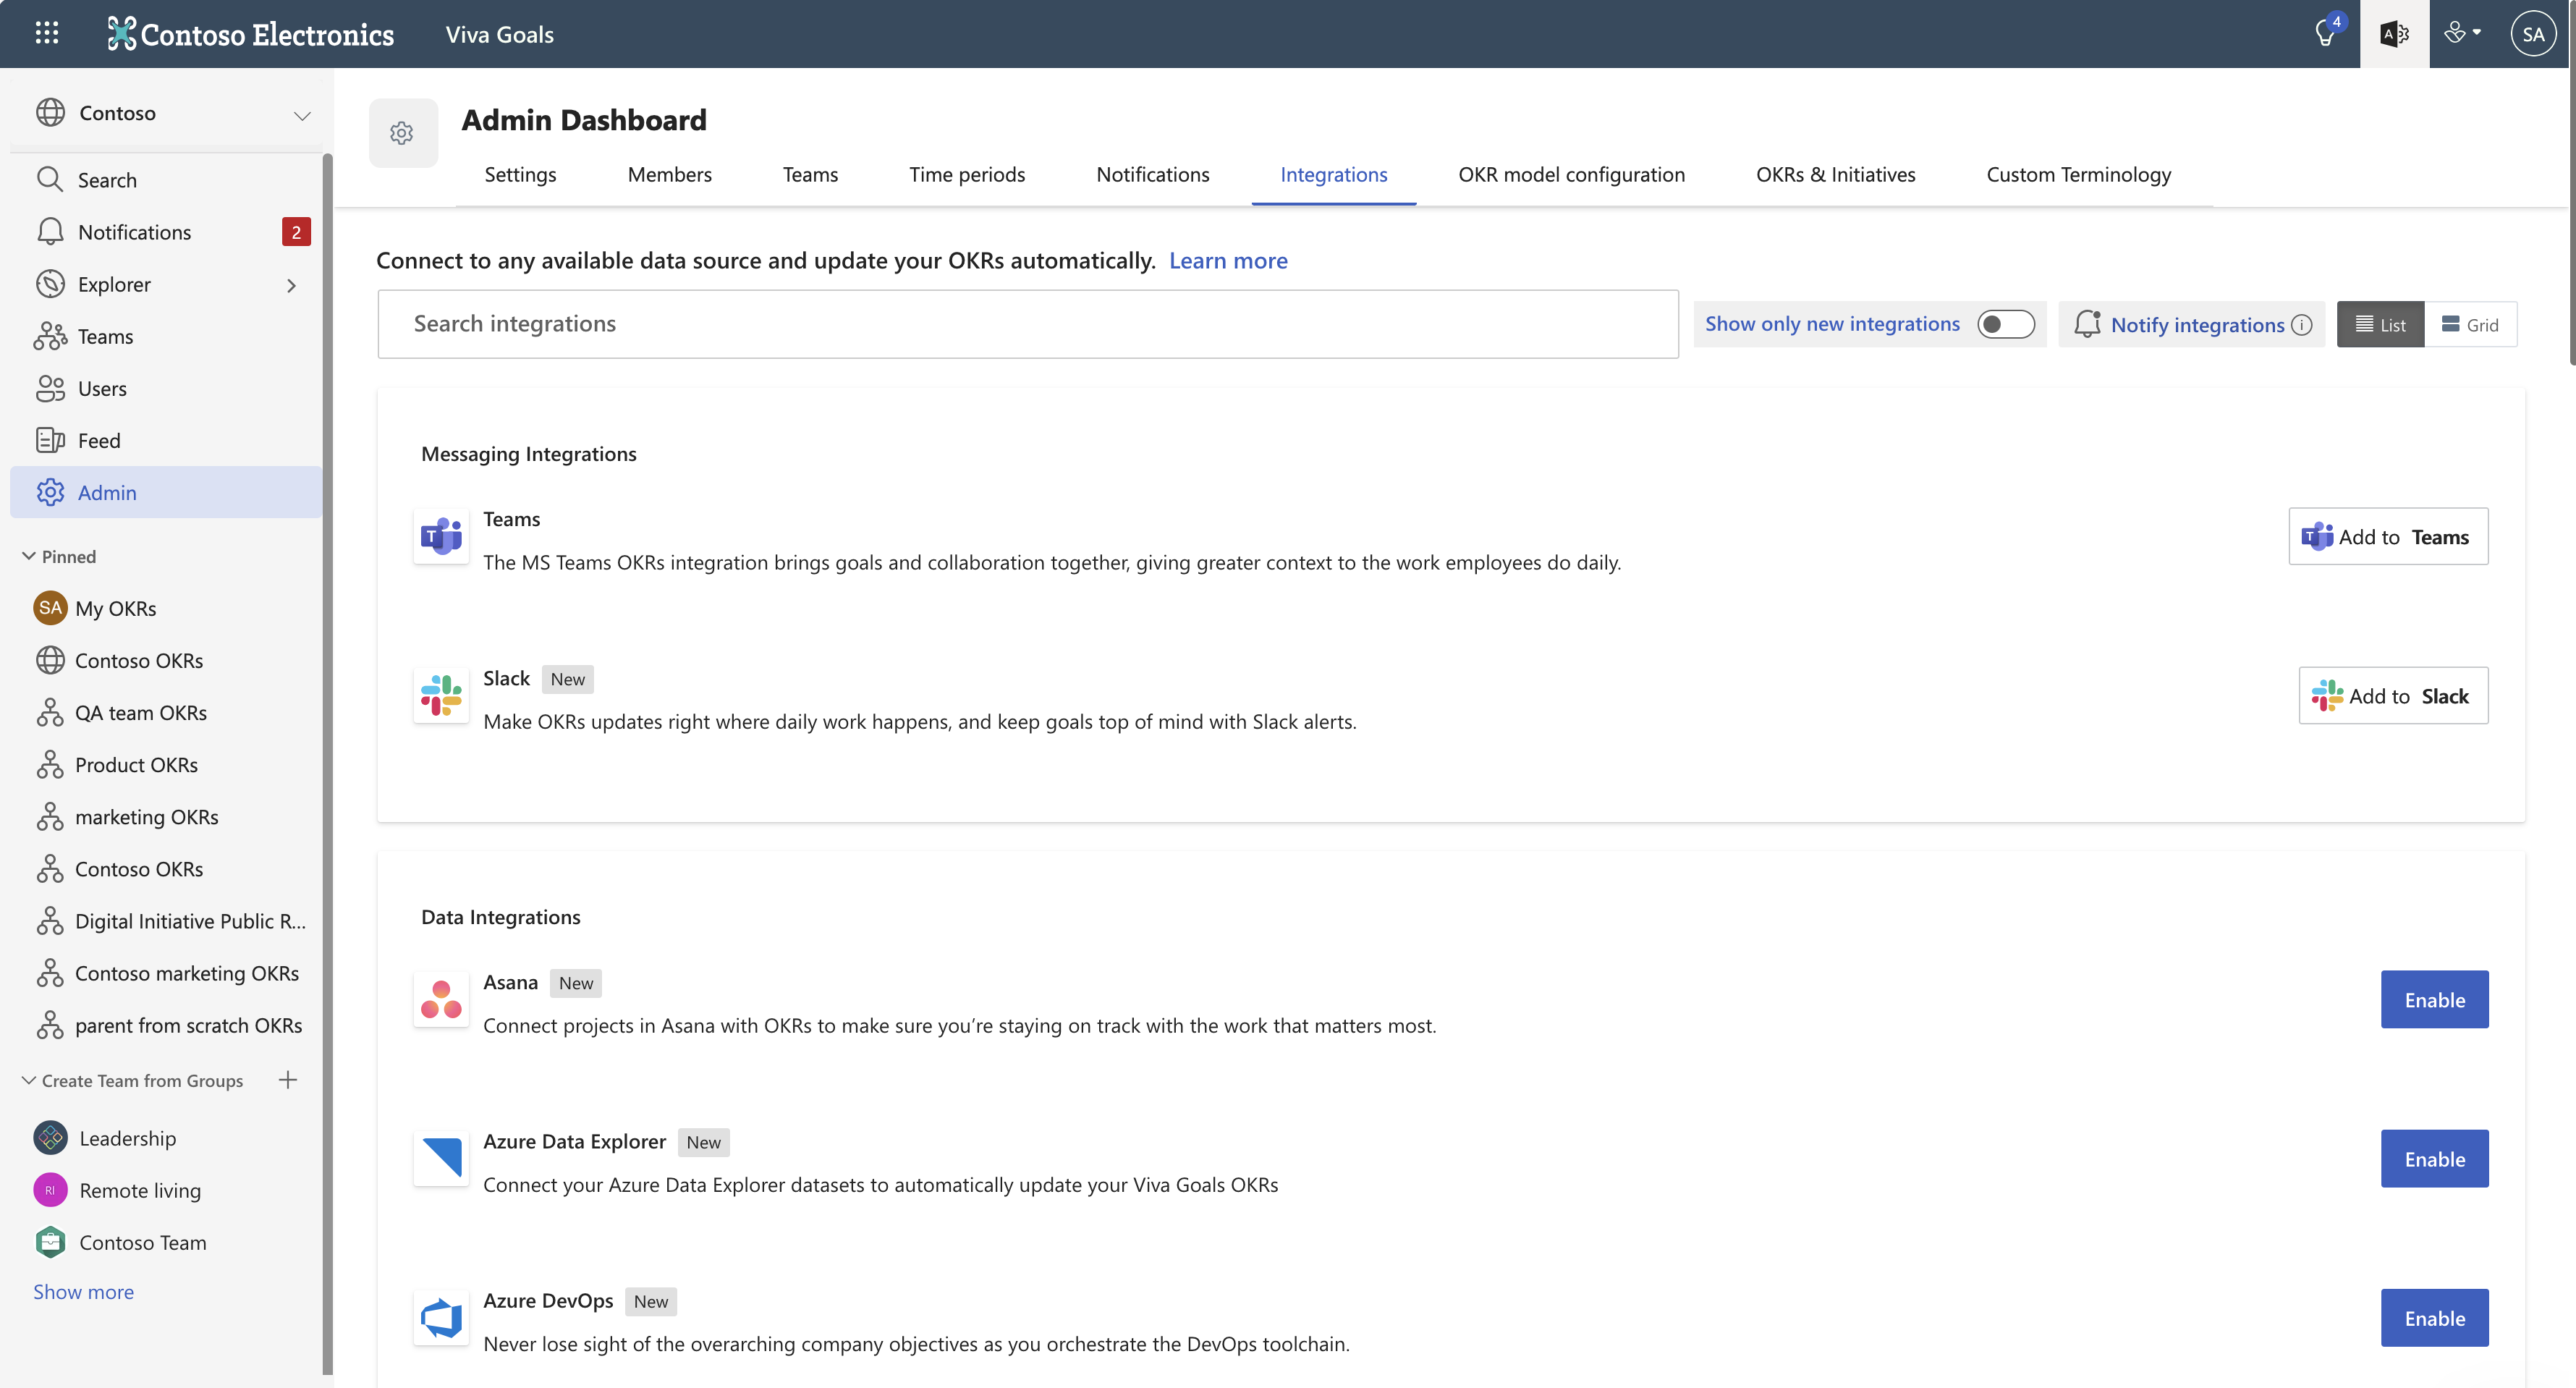
The Integrations tab lets you manage integrations in three categories:
- Messaging integrations: Microsoft Teams
- Data integrations: Asana, Jira, Salesforce, and more
- Authentication integrations: Azure Active Directly only
To learn more, see Viva Goals integrations overview.
Two steps are required to start using most integrations. As an example, let’s say your company wants to integrate with Excel.
Step 1: The Excel integration must be enabled in the admin dashboard. This option is a one-time, organization-level setting that essentially says, "I authorize the company to use Excel as an integration-with ally."
Step 2: The Excel integration can now be used at the individual level. This option is a one-time, user-level setting that essentially says, "I want a certain OKR to pull data from Excel as an integration with Viva Goals."
As an admin, you can oversee and manage these integrations. To continue our Excel example, you could disable the integration for the whole company, add a new connection or view existing connections and reauthenticate, edit, or delete them.
For a messaging integration like Microsoft Teams, you can add, edit, or delete notifications. Let's say you want to ring a virtual bell every time the sales team lands a sale. You can add a notification that does the following:
- For the sales team ...
- Every time there’s a new check-in ...
- Post that message to a specific sales team channel.
You can also enable private group notifications between users and their managers.
As a best practice, it’s a good idea to take a crawl, walk, run approach with integrations. While it may be tempting to see our long list of options and turn several on right away, first make sure your employees are comfortable with writing OKRs and using Viva Goals. From there, it can be useful to start with one group, such as Jira for the product team, before you roll out integrations to a larger audience.
Time periods
Viva Goals includes both annual and quarterly time periods. Typically, organizations operate on an annual planning cadence, and departments/teams operate on a quarterly planning cadence.
Admins can manage OKR time periods and customize them for your organization's requirements. Instead of the default quarterly periods, you could use monthly periods or define a custom time period.
To learn more, see Manage OKR time periods article.
OKR model configuration
Viva Goals understands that every business has its own set of processes and lets you configure and create your own OKR rules to fit your business needs.
To learn more, see Configure your OKR model in Viva Goals.
OKRs and initiatives
Admins can determine whether to allow multiple teams and OKR owners to collaborate on key objectives and initiatives. Admins can also establish OKR approval settings.
To learn more about initiatives, see Initiatives.
Custom terminology
Organization owners can customize OKR terminology to suit their orgs' needs. Currently, the following terms can be customized:
- OKR can be changed to Goal.
- Objective can be changed to Goal, Outcome, Theme, or Big Rock.
- Key Result can be changed to Metric, Outcome, or Result.
- Initiative can be changed to Project, To Do, Deliverable, Milestone, or Action.
You can learn more about customizing terminology here.


