Set up attribute-based survey access in Viva Glint
Microsoft Viva Glint's Attribute-based Survey Access allows users without a corporate email account to complete confidential surveys using attribute-based survey access, which is designed for mobile or public devices including desktops, laptops, tablets, or mobile phones. Users access surveys using key identifiers. These identifiers ensure a user's responses are tied to their survey and allow for full reporting on demographics in survey results.
Understand key identifiers
Viva Glint uses key identifiers to uniquely identify each user. Because these users may not have email addresses, attribute-based survey access requires the use of two attributes - the combination known only to the specific user. The system is flexible enough to support any two attributes that are a part of your employee data file:
- One of these attributes is always a unique identifier
- The other attribute should be something not commonly known, like the employee ID number or birth year.
Set up attribute-based survey access
Configuration in General Settings
From the admin dashboard, select the Configuration symbol, then in Client Settings, choose General Settings.
In the All Settings menu, select Engage Survey Details.
Next to Attribute-based Survey Access, select Set up.
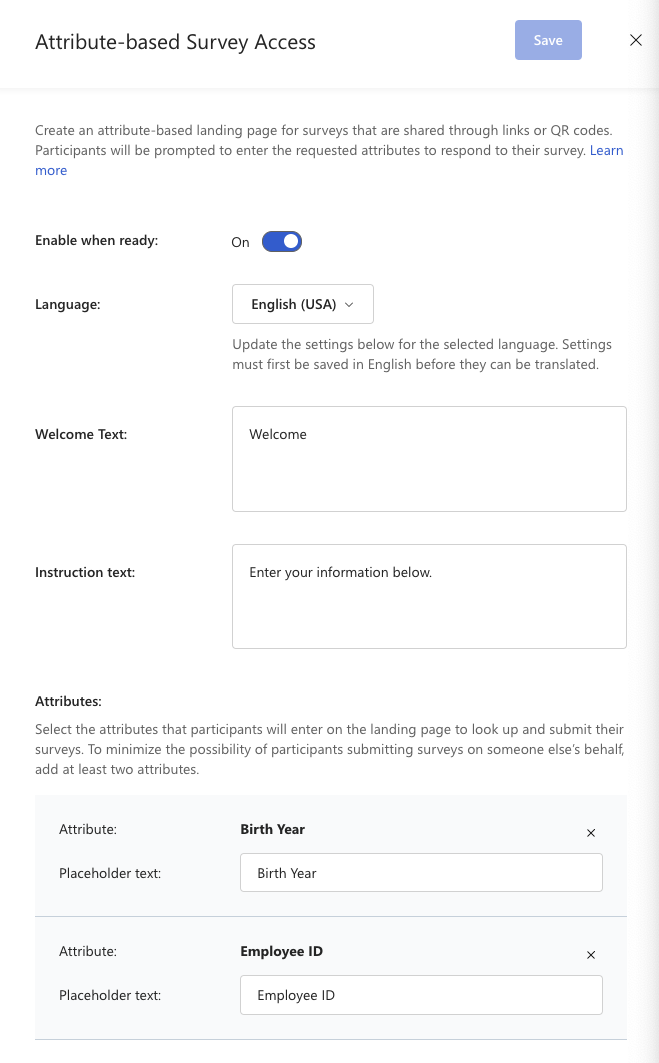
In the Attribute-based Survey Access pane, turn on the Enable when ready toggle.
If desired, edit the Welcome text or Instruction text fields by entering new text.
Select + Add an attribute and select attributes from the dropdown menu.
Note
Complete attribute setup and employee data upload prior to selection for attributes to be available.
Edit the Placeholder text that displays under each selected attribute.

Confirm your edits in the Preview at the bottom of the pane.
At the top of the pane, select Save.
Select the Configuration symbol, then in Service Configuration, choose Advanced Configuration.
In the Details section, confirm that the Enable Kiosk Page checkbox is selected. If not, select this checkbox.
Select Save Changes at the bottom of the Details page.
Manage translations
To add translations for your organization's survey languages, use the dropdown menu in the Attribute-based Survey Access setup section or import translations using the Variables & Product Text feature.
Note
The language selection dropdown menu on the Attribute-based Survey Access survey landing page includes all languages in that your organization selects in General Settings as Supported Survey Languages. The languages available aren't limited by what's selected in the survey program.
Use the language dropdown menu
- In the Attribute-based Survey Access setup pane, select a language from the Language: dropdown menu.
- Add translations to the Welcome Text, Instruction Text, and the Placeholder text fields.
- Select Save and repeat for each language.
Use the Variables & Product Text
Go to Configuration and in the Service Configuration section, select Variables & Product Text.
In the dialog that appears, select Export Product Text and in the next dialog, select languages in the Languages to Include field.
Select Export to download a compressed folder (.zip) to your device.
The exported folder contains a .csv file for each language. To preserve special characters, open each .csv file by importing them to Excel.
Important
To prevent import errors, don't change the file names or column labels in the exported files.
Each file contains three fields. Add translations to the VALUE column for each field.
- PULSE_LOGIN_PAGE_DESCRIPTION
- PULSE_LOGIN_PAGE_FIELD_1
- PULSE_LOGIN_PAGE_FIELD_2
Important
PULSE_LOGIN_PAGE_FIELD_1 corresponds to the first attribute listed in the Attribute-based Survey Access setup pane. PULSE_LOGIN_PAGE_FIELD_2 corresponds to the second attribute listed. Ensure that translations are entered for the correct attribute.
After entering translations, save each file as .csv with the same naming convention as the exported files. For example: textSnippets_202408221_121422_es_US_Spanish (Americas).csv.
After editing and saving all files, compress them into a .zip folder.
Go to Configuration and in the Service Configuration section, select Variables & Product Text.
Select Import Product Text.
In the dialog that appears, drag and drop your .zip file or browse to choose it on your device.
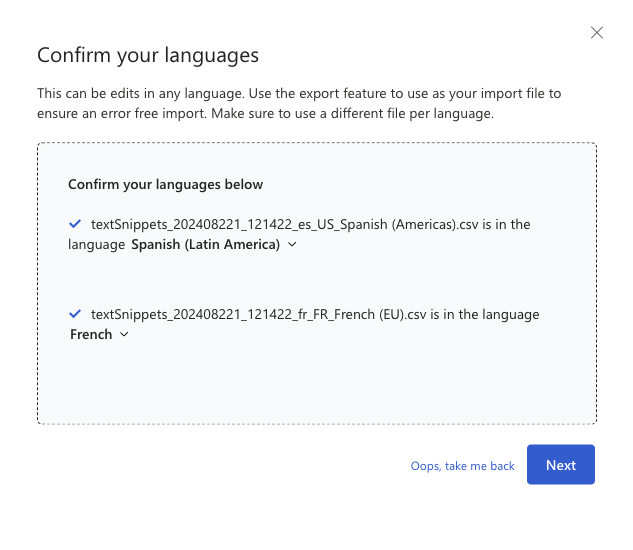
In the Confirm your languages dialog, verify that the listed languages match the files you imported. If something isn't correct, use the language dropdown next to a file to change the language.

Select Next.
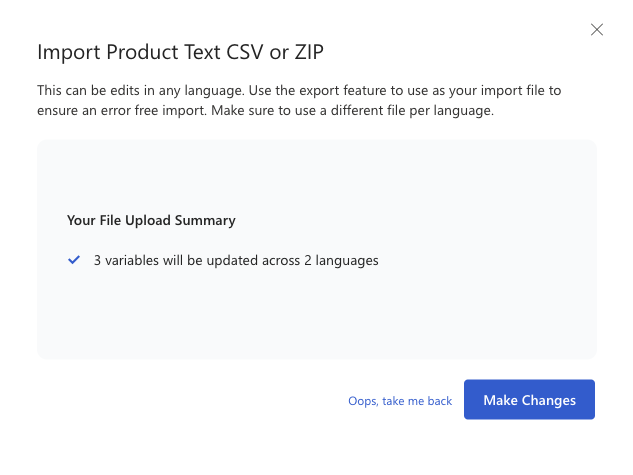
In the Import Product Text CSV or ZIP dialog that appears, verify that the upload summary is correct and select Make Changes.

Return to the Attribute-based Survey Access setup section and select languages from the dropdown menu to confirm that updates applied.
Get the attribute-based survey access URL
- From the admin dashboard, select the Configuration symbol, then in Surveys, choose Survey Programs.
- Select the survey program that should have attribute-based survey access.
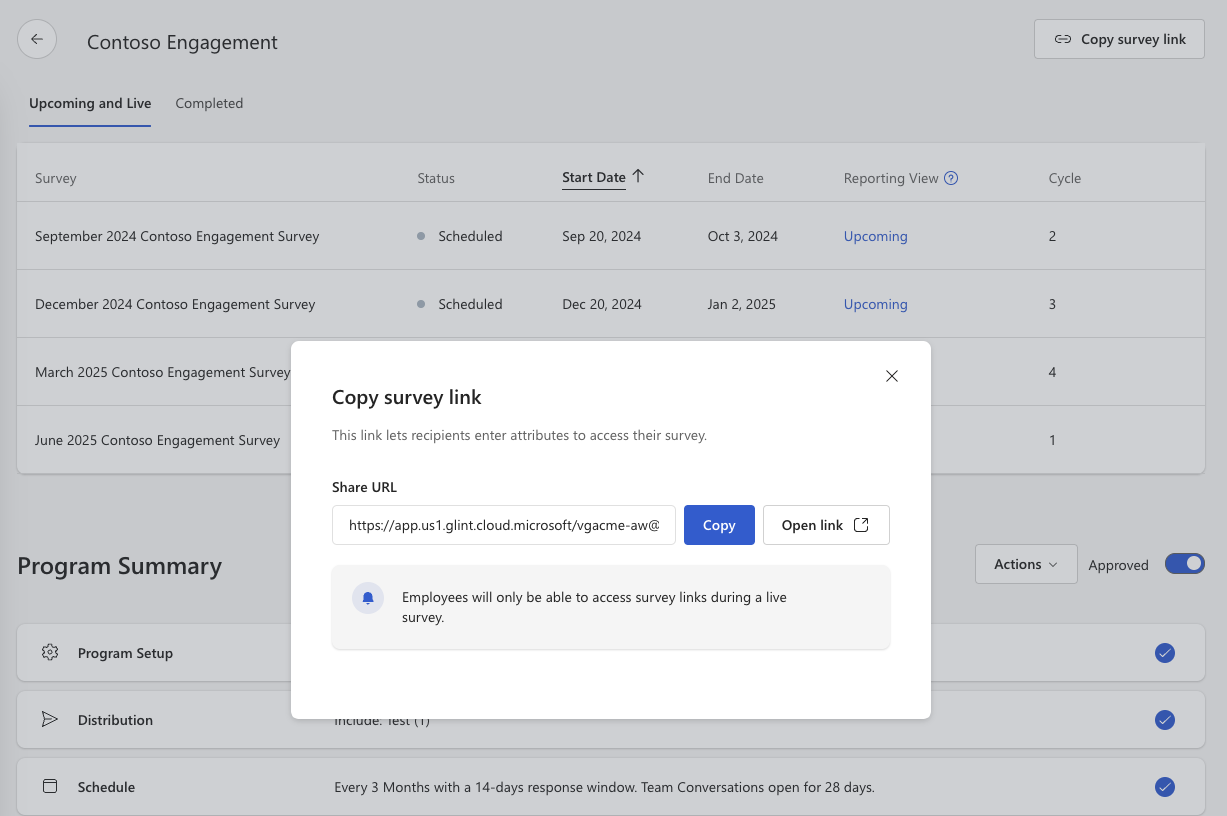
- At the top of the page, select Copy survey link, and then Copy in the dialog.
- Optionally, use online tools to convert this link into a QR code or shortened link for easy participation on mobile devices.

Note
If users become INACTIVE during a survey, they're still able to access surveys with attribute-based access.